Breaded Toasted Ravioli

Breaded Toasted Ravioli with Marinara Sauce

Breaded Toasted Ravioli with Marinara Sauce

These raviolis breaded and baked till golden, then served with warm marinara sauce, are perfect little appetizers or munchies for when folks stop by and you need a quick snack, or for yourself while you’re watching a game.  Be sure to make plenty, because once everyone gets a taste of this crunchy, cheesy, yumminess, they’ll be gone in no time.  And the best part is they are baked, not fried.

On your next trip to the supermarket do your self a favor and pick up a package of fresh or frozen ravioli, either cheese or meat filled.  Either works fine, but we particularly like the three-cheese variety.  There is no need to pre-cook them.  When you’re ready to make them, just dip them into the egg wash, then the seasoned bread crumbs.  Place on a baking sheet and bake until puffed and crisp.  Serve them warm with marinara sauce for dipping.  Very easy to do, and they look like you spent a lot of time on their preparation.

BREADED TOASTED RAVIOLI

SERVINGS:  about 4-5

INGREDIENTS

  • 1 egg 
  • 1 teaspoon water
  • 1 cup bread crumbs, plain, pre seasoned , or Panko
  • 1 teaspoon dried oregano
  • 1 teaspoon dried basil
  • 1 teaspoon garlic powder
  • 1/2 teaspoon salt, optional
  • 2 Tablespoons grated Parmesan cheese
  • 1 (25 ounce ) package ravioli, thawed if frozen
  • cooking spray, or olive oil spray
  • sauce for dipping, ie; marinara or alfredo

1.  Preheat oven to 400*F  Place a wire rack on a baking sheet, or simply line with foil.

2.  Beat together the egg and water in a small bowl.  Mix together the bread crumbs, oregano, basil, garlic powder, salt and cheese, in a large bowl or shallow pan.

3.  Dip each ravioli in the egg, and then roll in the bread crumb mixture.  Spray both sides of breaded ravioli with cooking spray;  place on the wire rack, or foil lined sheet.

Dipped, sprayed, and ready for the oven.

Dipped, sprayed, and ready for the oven.

4.  Bake in preheated oven until golden brown, puffed and crispy, 15 – 20 minutes.  My recommendation is to turn them over about half way through the cooking time so both sides get equally brown and crispy.

IMG_3094

See how the edges break open and the cheese starts to ooze out?

Serve warm with marinara or alfredo sauce for dipping.   Oh, Yum!

SOURCE:  All Recipes.com

Cinnamon Chip Scones

Cinnamon Chip Scones

Cinnamon Chip Scones

You know how, when you eat a potato chip, one is never enough?  Like that certain brand of chips that claim ” you can’t eat just one.”   Well, these scones are like that.  Rich with butter, they are studded with sweet, spicy cinnamon chips.  If you would like to enrich them even further you may add chopped nuts.

Spicy, cinnamon chips scattered throughout.

Spicy, cinnamon chips scattered throughout.

We love these scones, and being a cinnamon lover, I like to add some ground cinnamon to the dry ingredients.  Also I keep buttermilk powder in the house, so when a recipe like this one calls for buttermilk, I just measure out the correct amount of dry powder and add water to equal the amount of buttermilk needed.

Scones are always best eaten while they are still warm, and these are no exception.  Of course two people probably are not going to eat eight scones while they are still warm, so to get that same warmth, just zap one quickly on medium heat in the microwave.  That’s what we do for a quick breakfast with coffee.  Frequently I will make scones while I’m making dinner, so we have one for dessert while it is warm, and then the rest are ready to be reheated as needed for breakfast(s).

CINNAMON CHIP SCONES

SERVINGS:   Makes 8 scones

You will find many uses for these packaged cinnamon chips.

You will find many uses for these packaged cinnamon chips.

INGREDIENTS

  • 2 cups all-purpose flour
  • 2 teaspoon baking powder
  • 1/4  teaspoon salt
  • 1/4  cup sugar
  • 1/4  teaspoon ground cinnamon
  • 1/2  cup butter, preferably unsalted
  • 1/2  cup buttermilk  (or 1 Tablespoon vinegar in a measuring cup,. add milk to  1/2  cup mark.  Stir to combine.)
  • 1 large egg
  • 1 teaspoon vanilla extract
  • 1/2  cup cinnamon chips
  • 1/4  cup chopped nuts (optional)

1.  In a medium mixing bowl, whisk together the flour, baking powder, salt, cinnamon and sugar.

2.  Cut in butter with pastry blender until mixture resembles coarse crumbs, with a few chunks of butter still visible.

3.  In a separate bowl, whisk together buttermilk, egg and vanilla.  Pour the wet ingredients over the dry ingredients, and stir to combine.  Stir in cinnamon chips and nuts, if using.  Do not over mix the dough.

4.  Scrape the dough out onto a lightly floured work surface and knead it gently just until it holds together..  At this point you may pat it into a circle about 8 inches in diameter,  cut  into 8 triangles, and transfer to baking sheet;  or you can scoop up about 1/3 cup dough, and place on parchment lined baking sheet for a “drop-style” scone.  That is how I made the ones pictured here.

Crispy edges, soft and tender inside.

Crispy edges, soft and tender inside.

5.  Bake in a preheated 400*F oven for 12 – 14 minutes, until they’re golden brown.  Remove from the oven and serve warm.

IMG_3073

These deliver on their promise. What’s better than cinnamon when it’s warm!

SOURCE:  King Arthur Flour,  The Baking Sheet

Quesadilla Casserole

Quesadilla Casserole

Quesadilla Casserole

We really like quesadillas, but for me they don’t hold enough food or variety of food to feel like I’ve eaten a whole meal, To remedy that situation I combined some typical foods found in TexMex dishes with south-western seasonings and flour tortillas into a casserole and baked it. That provided us with a satisfying, filling meal with all the flavor and cheesiness you would expect. I got the idea for this from a recipe on the back of a package of McCormick seasonings. This is what we had for dinner on Super Bowl Sunday. My husband commented that he hoped I would make it often because it contained every thing he likes into one casserole dish.

IMG_2980

The product I used for the seasoning is one put out by McCormick Spices. It is a little card with small amounts of different spices needed for a recipe. The recipe is printed on the back so that you can pick up any other ingredients you made need while you are at the grocery store. The spices used here are pretty commonly found in most kitchens so you may already have them. I know I did but I wanted to try the recipe so I bought the card.

The casserole turned out to be quick to make and really good!

You just need a few cans of vegetables; black beans, corn and green chilies, and a large can of tomato sauce.

Add a pound of ground beef, flour tortillas and some cheddar cheese and you will be all set to make an ooey, gooey, cheesy dish of yumminess.

QUESADILLA CASSEROLE

Ingredients probably already in your pantry

Ingredients probably already in your pantry

YIELD: Serves 6

  • 1 pound lean ground beef
  • 1/2 cup chopped onion
  • 2 tsp. chili powder
  • 1 tsp. ground cumin
  • 1 tsp. dried minced onion
  • 1/2 tsp. oregano
  • 1/2 tsp. crushed pepper (optional)
  • 16 oz tomato sauce
  • 1 can ( 15 oz. ) black beans, drained and rinsed
  • 1 can ( 8 3/4 oz. ) whole kernel corn, undrained
  • 1 can ( 4 1/2 oz. ) green chilies, undrained
  • 6 flour tortillas ( 8 -inch size)
  • 2 cups shredded cheese; cheddar, Monterey jack, or pepper jack

1. Brown beef and onion in a large skillet on medium high. Add tomato sauce, beans, corn and green chilies. Mix well. Stir in all of the spices except the red pepper. Bring to a boil, reduce heat to low and simmer 5 minutes. Add red pepper if desired.

Combine meat, vegetables, and spices in a large skillet.

Combine meat, vegetables, and spices in a large skillet.

2. Spread 1/2 cup of the beef mixture on the bottom of a 13 x 9″ pan, previously sprayed with non-stick spray. Top with 3 of the tortillas, overlapping as needed. Layer with 1/2 of the remaining beef mixture and 1/2 of the cheese. Repeat with remaining tortillas, beef an cheese.

Layer in baking dish with tortillas and cheese.

Layer in baking dish with tortillas and cheese.

Top with more cheese.

Top with more cheese.

3. Bake at 350*F. for 15 – 20 minutes till heated through and bubbly. Let stand 5 minutes before serving. Top with sour cream and guacamole if desired.

Serve it up, fragrant, cheesy and delicious.

Serve it up, fragrant, cheesy and delicious.

SOURCE: McCormick Seasonings

Alice Springs Chicken

Alice Springs Chicken

Alice Springs Chicken

One time when we were at Outback Steakhouse, I ordered Alice Springs Chicken.  The name of the dish, first of all, made me curious, but the description said it was boneless chicken breast in a honey-mustard marinade with bacon, mushrooms and melted cheese on it.  Well, with all those good things on one piece of chicken how could it not be good?  So, I ordered it;  and I was not disappointed in the least.  It was moist, a complex blend of flavors, crispy around the edges, and gooey with melted cheese.

I’ve thought about that chicken often and wished I could have it again.  And although I kinda remembered all the ingredients and how it tasted I didn’t know the proportions, or exactly how it was prepared.  Then just last week I saw a recipe for it on Zip List.  It claimed to taste just like the version served at Outback Steakhouse.  You know I had to try it!

People, you will love it.  It looks a little messy, but believe me, it is fantastic.  It tastes just like the one I remember having at OBSH.

Bacon, Mushrooms, Melted Cheese.  What's not to love?

Bacon, Mushrooms, Melted Cheese. What’s not to love?

ALICE SPRINGS CHICKEN

SERVES   4

INGREDIENTS

Honey Mustard Marinade:

A simple marinade locks in the flavor.

A simple marinade locks in the flavor.

  • 1 cup Dijon Mustard
  • 1 cup honey
  • 2 tsp. vegetable oil
  • 1 tsp. lemon juice

Chicken:

  • 4  skinless, boneless, chicken breast halves
  • 1 Tablespoon vegetable oil
  • 2 cup sliced mushrooms
  • 2 Tablespoons butter
  • salt and pepper
  • paprika
  • 8 slices bacon, cooked (I used precooked bacon)
  • 1 cup shredded Monterey Jack cheese
  • 1 cup shredded Cheddar cheese
  • 2 tsp. finely chopped fresh parsley

INSTRUCTIONS:

1.  Combine the mustard, honey, 1 1/2 teaspoons oil and lemon juice in a small bowl.  Whisk for about 30 seconds.  Pour half of the mixture into a zip-top bag.  Add the chicken breasts and marinate them in the refrigerator for about 2 hours.  My pieces of chicken were very thick, so I cut them in half lengthwise.

2.  Chill and save the remainder of the marinade for later.

3.  When ready to cook, preheat the oven to 375*F.   Using an ovenproof frying pan large enough to hold all the chicken, heat 1 Tablespoon oil over medium heat.  If you don’t have an ovenproof frying pan, you will transfer the chicken to a baking dish.

4.  Sear the chicken for 3-4 minutes or until golden brown on all sides.  Remove from the heat, but keep in the pan.  (Here’s where you may need to transfer to a baking dish.)

Browned chicken in a baking dish.

Browned chicken in a baking dish.

5.  In another smaller frying pan, melt the butter and saute the mushrooms just till they start to give up some of their liquid.  Remove from the heat.

Sauteing the mushrooms.

Sauteing the mushrooms.

6.  Brush the seared chicken breasts with a little of the reserved honey-mustard marinade.  (Not the portion the chicken soaked in.) Season the chicken with salt, pepper, and paprika.  Lay two strips of bacon crisscross on top of each piece of chicken.  Spoon the mushrooms onto the bacon, being sure to distribute them evenly over all the chicken.

Bacon and mushrooms on top of the chicken.

Bacon and mushrooms on top of the chicken.

Sprinkle the Monterey Jack cheese evenly onto each chicken breast followed by the cheddar cheese.

7.  Bake for 7 – 10 minutes or until cheese is melted and bubbly.  Sprinkle each piece with the chopped parsley before serving.  Put extra honey mustard marinade into a small bowl to serve on the side.

Sprinkle with chopped parsley before serving.

Sprinkle with chopped parsley before serving.

Served with herbed rice pilaf and a salad, this was a great dinner.

Served with herbed rice pilaf and a salad, this was a great dinner.

An idea for leftover chicken .  The next day, I made a sandwich from one of the pieces of chicken:  on a “sub” roll, spread both cut sides of the roll with Honey Mustard Mayonnaise,  lay a chicken piece on the bottom half of the roll, top with sliced tomatoes and lettuce.  This made a “man-sized” sandwich that my husband raved about..

SOURCE:   Family Favorite Recipes

Pecan Sour Cream Sandies

Pecan Sour Cream Sandies for Valentines Day

Pecan Sour Cream Sandies for Valentines Day

When I was young my favorite cookies were Keebler’s Pecan Sandies.  What I loved about them was the thickness of the cookie, and how rich and crunchy they were.  That was my after school snack with a glass of milk.  I don’t know if they even exist anymore.   I no longer look for them because I don’t buy packaged cookies at the grocery store  when I bake so frequently at home.

This recipe came to my attention one year around the holidays  when I was lining up the cookies I planned to bake for Christmas.  It has since become a favorite, and if I don’t make it for the holidays, I usually make it at some other time during the year.  The dough is easy to make and although initially a little sticky, after chilling a while it firms up and becomes a very forgiving and manageable dough for cut-out cookies.  Since there are all sorts of cookie cutters available for just about any occasion, this dough is a good one to have in your recipe box as a dependable go-to when you want to make a cookie that will always come out good.  If you bake for someone who is nut-sensitive, just leave out the nuts, they will still be a delicious butter cookie.

On a side note:  I used to wonder what it was about pecans that makes them so expensive, when they are widely grown in the South, and used lavishly in southern cuisine.  During my vacation in North Carolina last fall, I think I learned the answer.  The folks we visited have a large pecan tree on their property–see photo below–and it was laden with pecans that hung in clusters.  I thought the tree was beautifully shaped and so I took a picture of it.   I did not realize that a pecan tree can grow to such a large size.

A pecan tree.

A pecan tree.

Not quite ripe pecans in their pods.

Not quite ripe pecans in their pods.

When the nuts are ripe the pods which hold them crack open and the pecan in its shell falls to the ground where they are picked up.  The quantity of nuts a tree will produce in any one year varies,  some years are “good’ and other years “not so good”. Weather and rainfall play a big part.  The pecan is one really protected little nut.  It resides inside the tan-brown shell that we recognize, but that shell is covered by another outer green shell or pod.  If you have ever shelled pecans you know how difficult that can be especially if you want perfect halves.  I don’t know how they are harvested commercially, but for folks who have a pecan tree, harvesting and cracking pecans is a lot of work.  Knowing this helps me to understand and appreciate their price.

Here is the recipe for the pecan sandies.  I made these as part of my cookie packages for Valentines Day this year.  I like to give gifts of home-baked treats to close friends and family for V-Day, a day for love, hearts and all things frilly!

PECAN AND SOUR CREAM SANDIES

Decorated treats!

Decorated treats!

YIELD:   Makes about 5 dozen cookies, depending on size of cutter used.

INGREDIENTS:

  • 1/2 cup pecans
  • 2 1/4 cup all-purpose flour
  • 1 1/2 teaspoons baking powder
  • 1/2 cup butter
  • 3/4 cup sugar
  • 1 egg
  • 1/3 cup sour cream
  • 1 teaspoon vanilla
  • 1 recipe Royal Icing (recipe below)

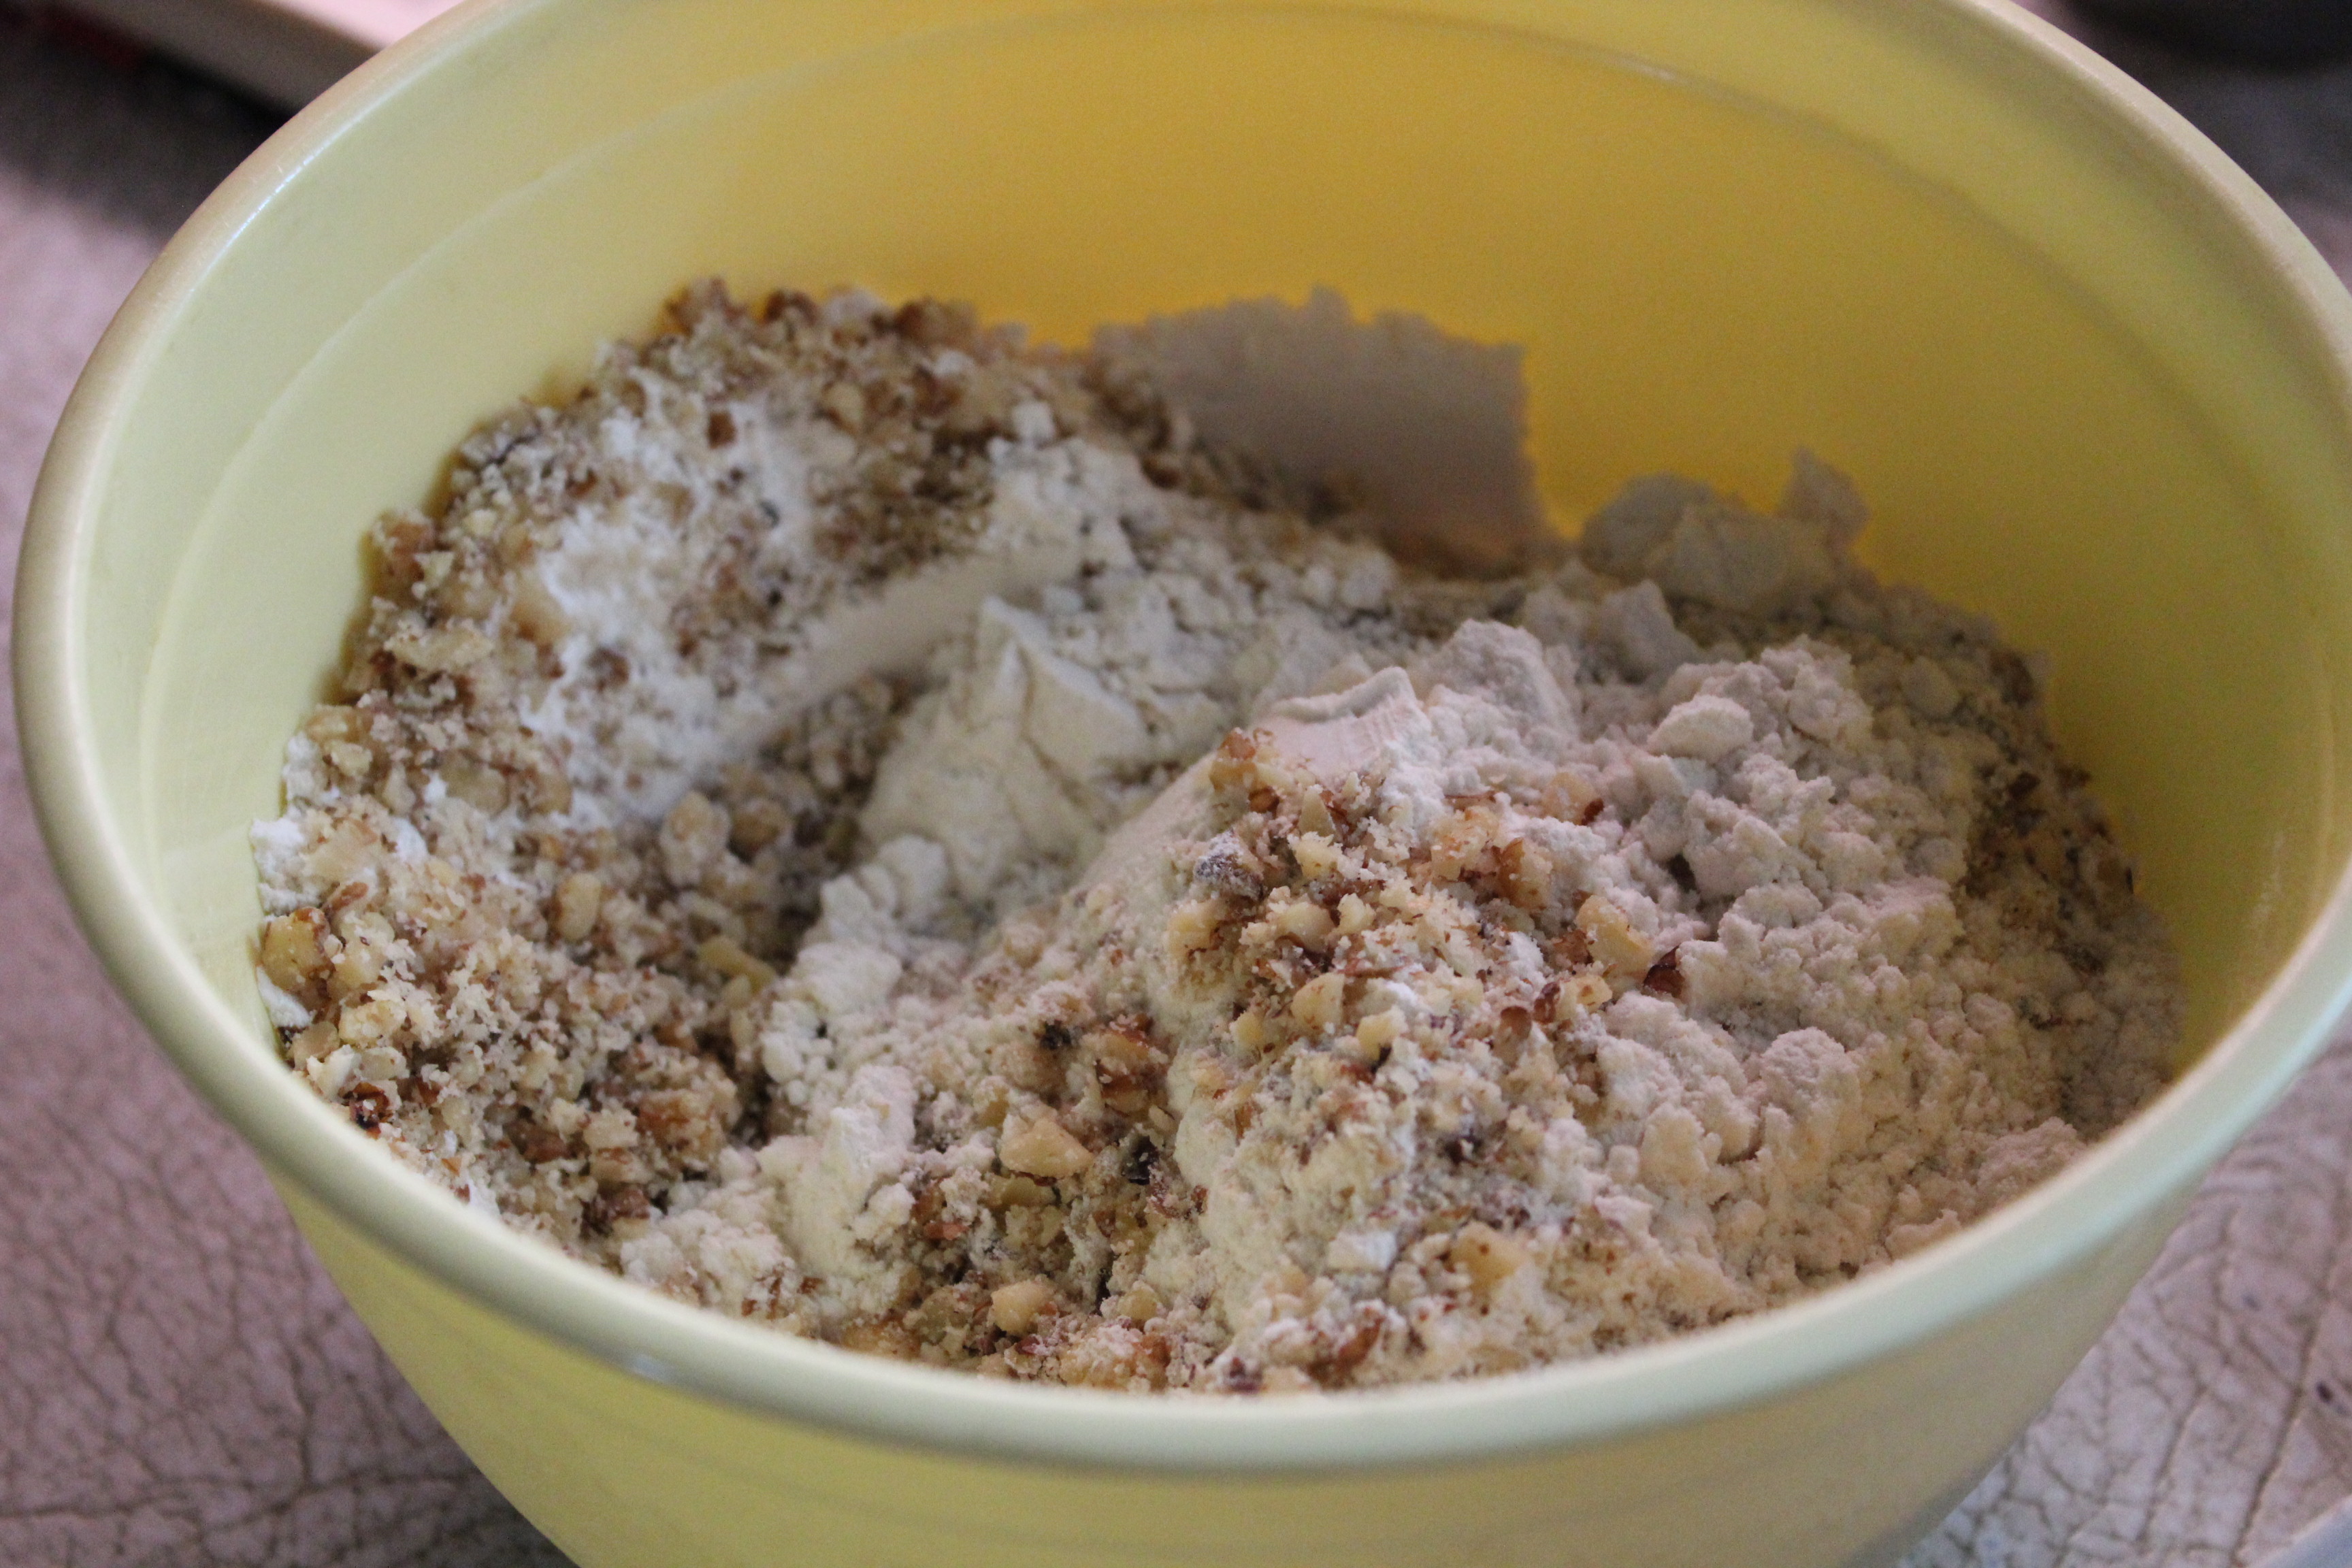
1.  Grind the 1/2 cup pecans in a nut grinder or food processor.  Stir together the nuts, flour and baking powder in a bowl.

Mix finely chopped nuts with flour.

Mix finely chopped nuts with flour.

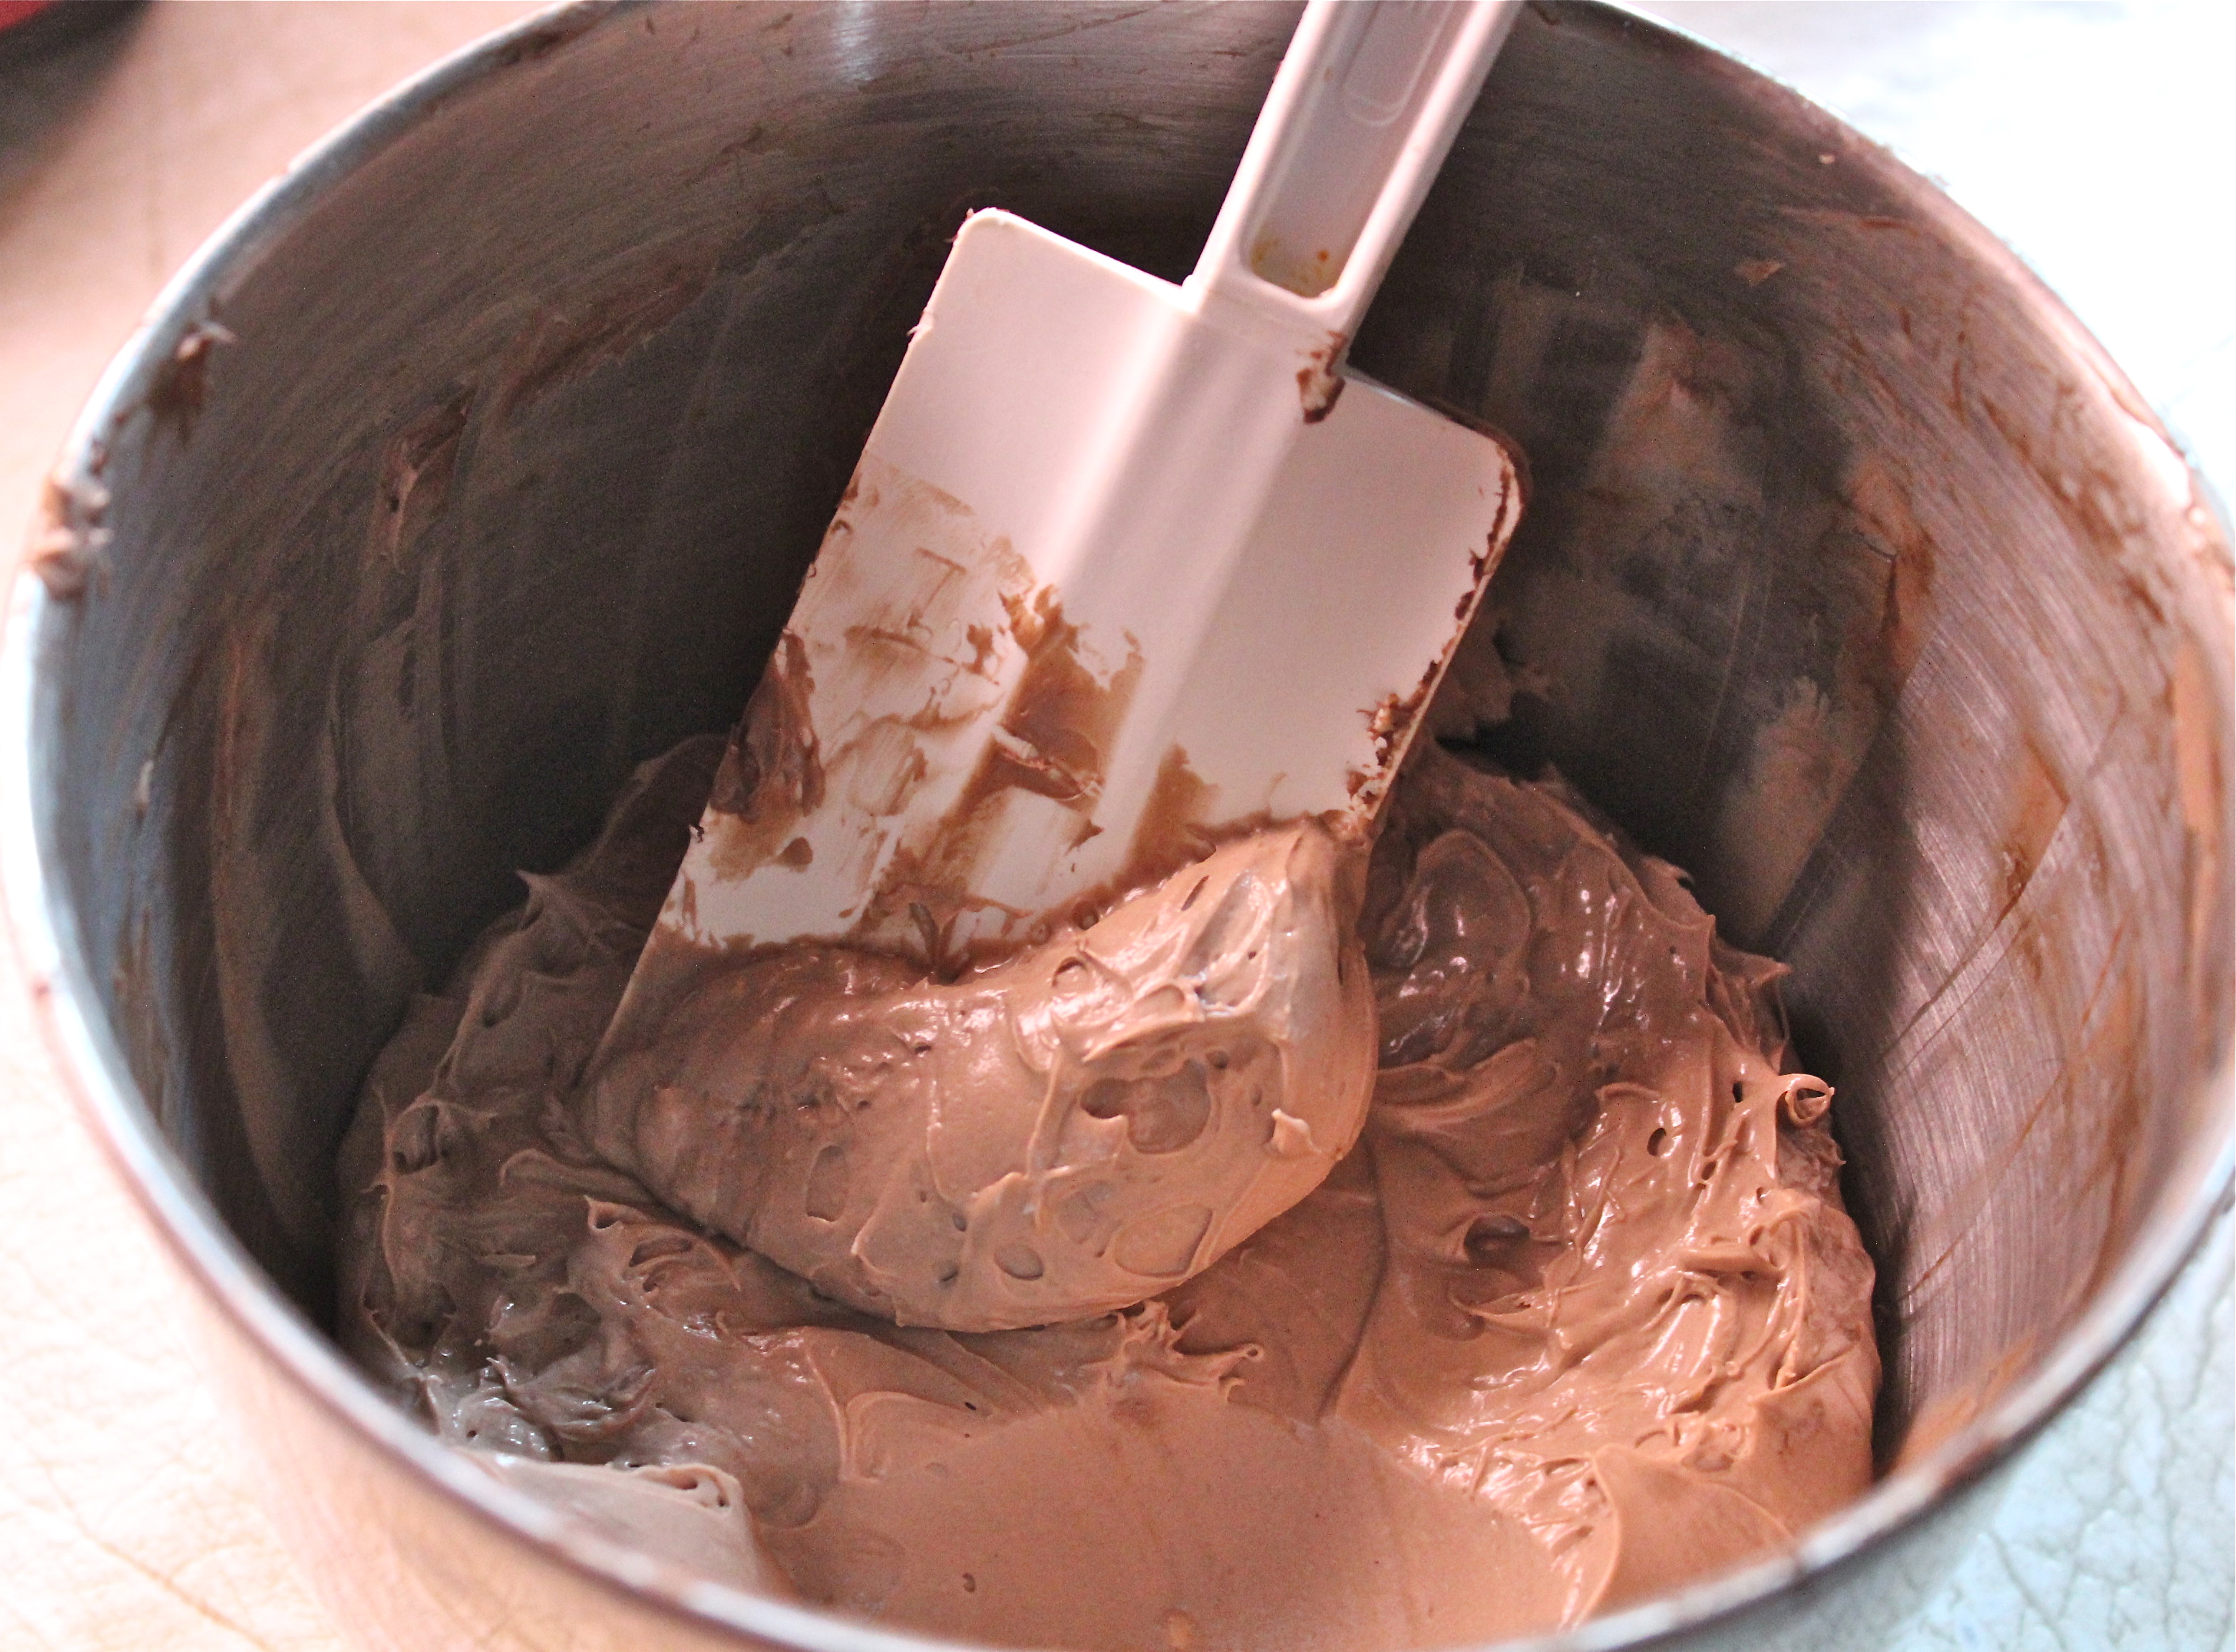
2.  In large mixer bowl beat butter about 30 seconds.  Add sugar;  beat till fluffy.  Add egg, sour cream, and vanilla; beat well.

Creaming butter, sugar, egg, sour cream and vanilla.

Creaming butter, sugar, egg, sour cream and vanilla.

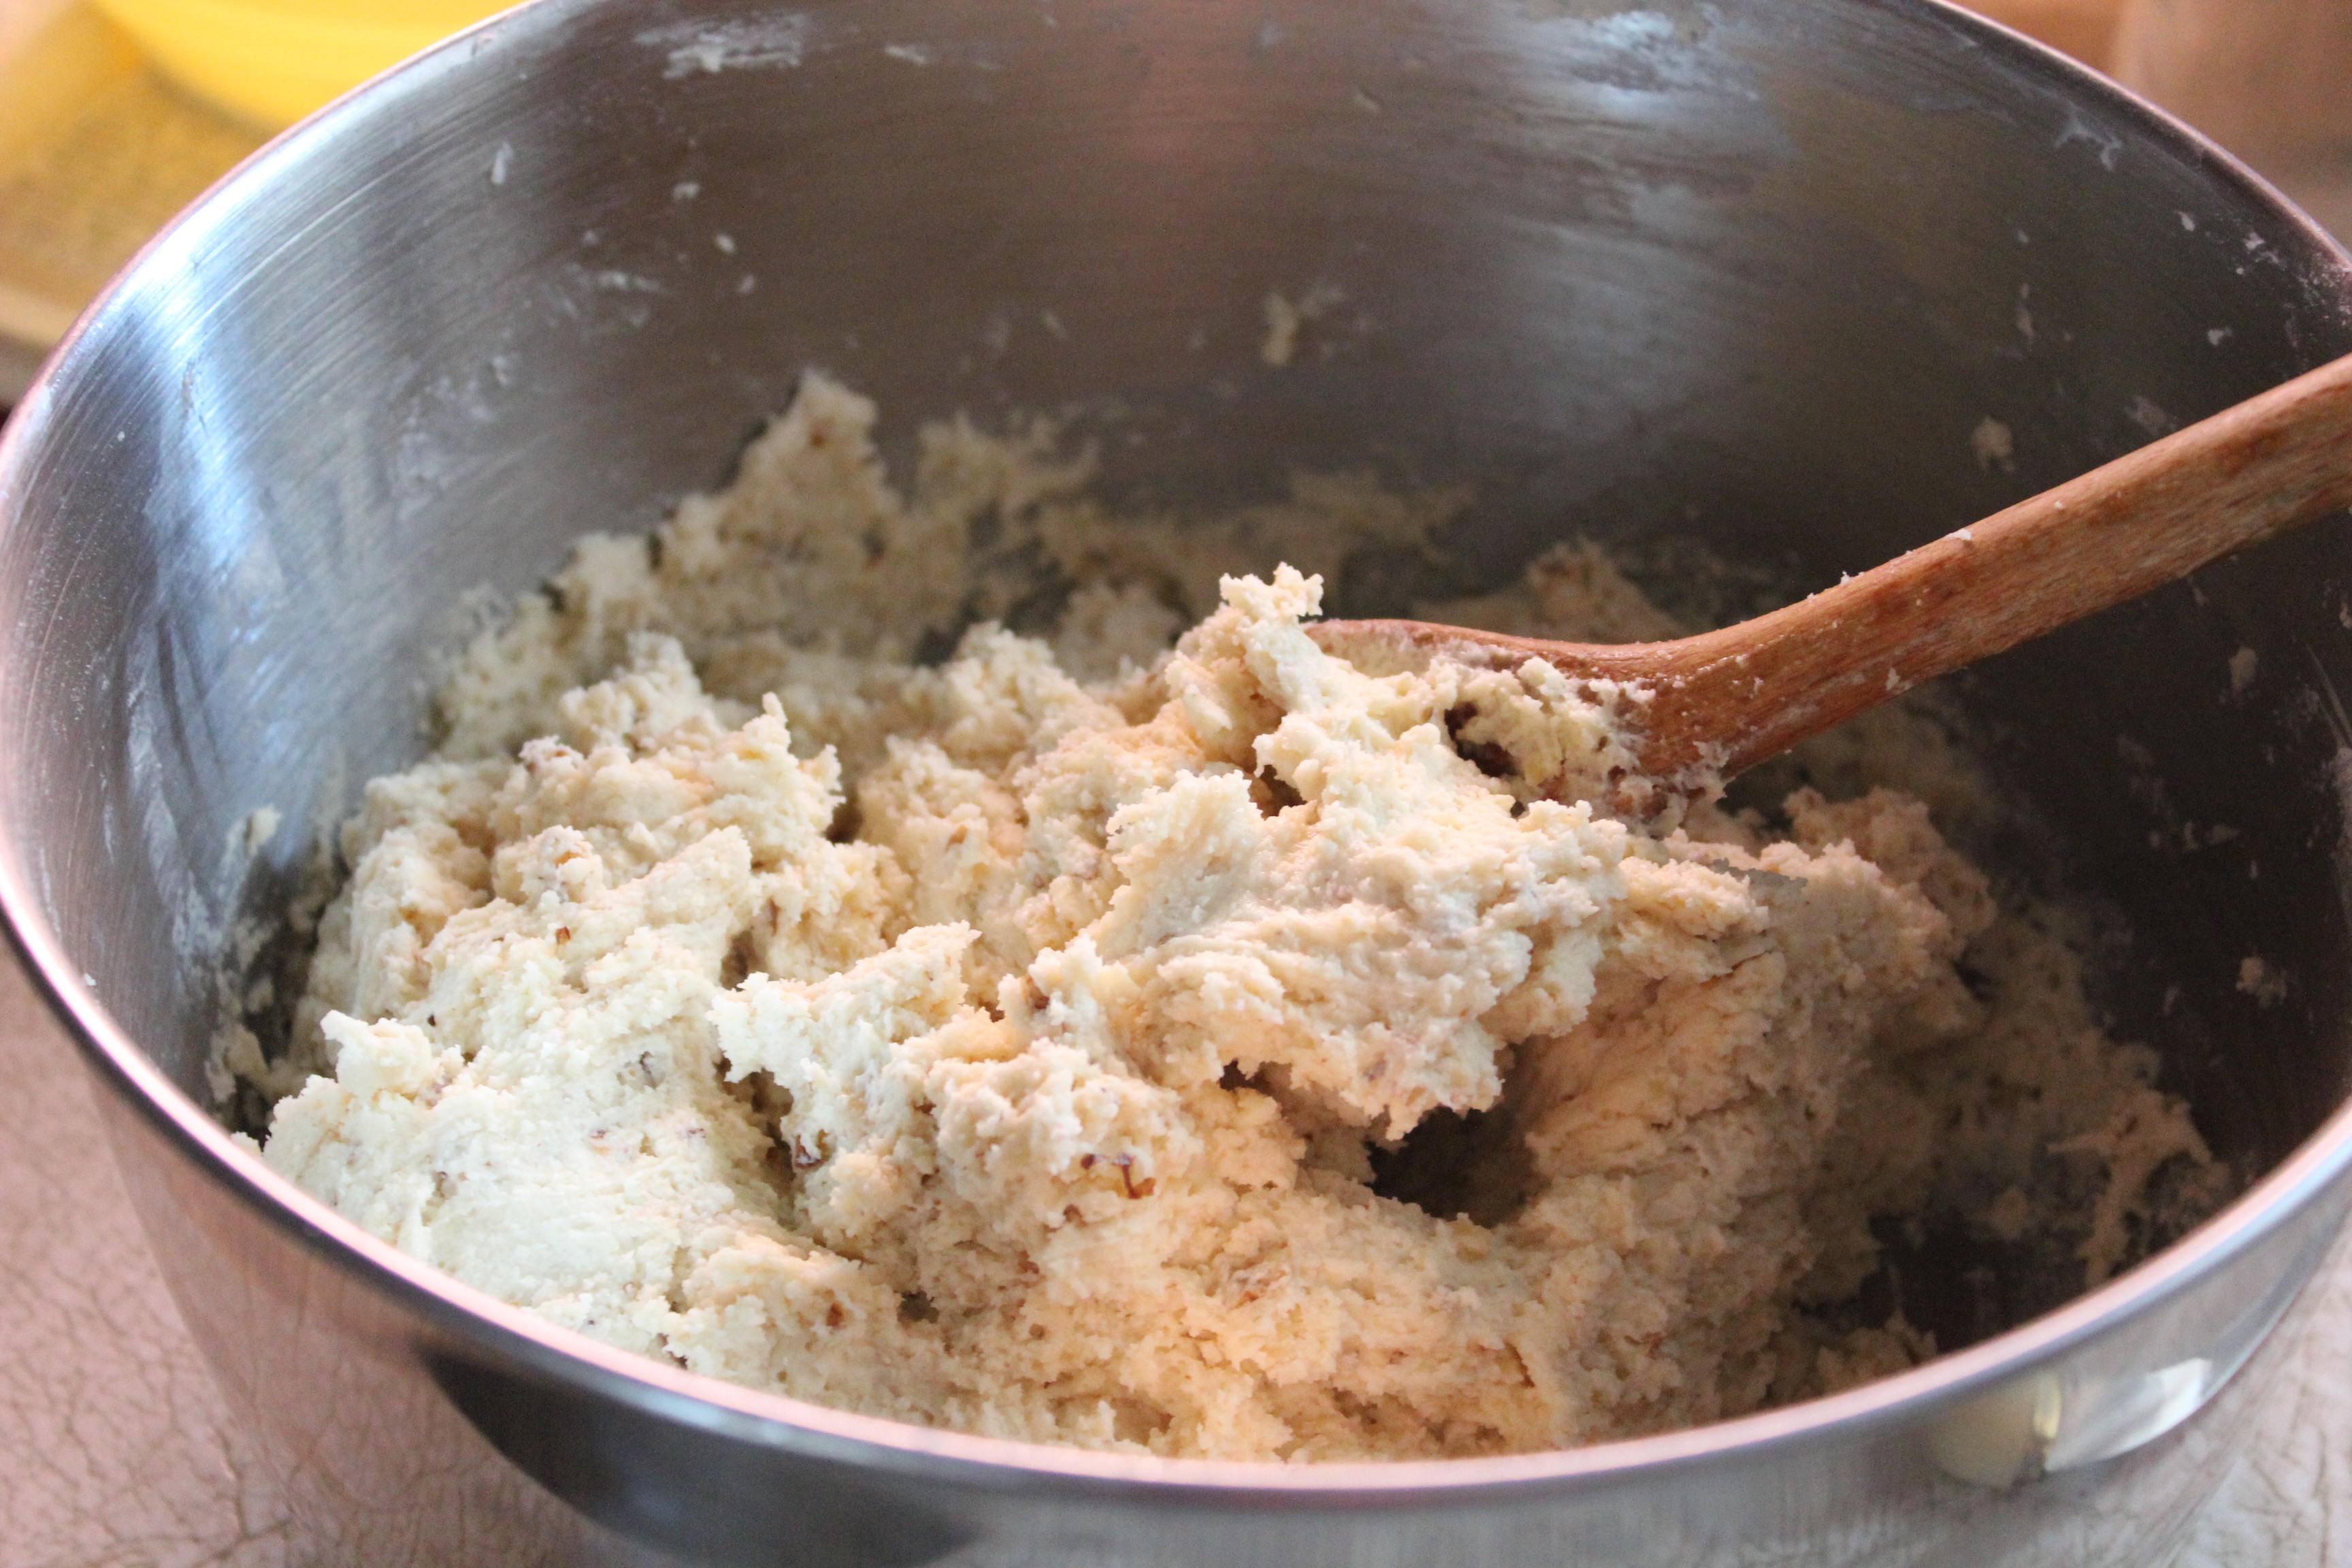
3.  Add dry ingredients, beating till well combined.  Divide dough in half, cover and chill at least 3 hours, or overnight.

An easy to work with dough.

An easy to work with dough.

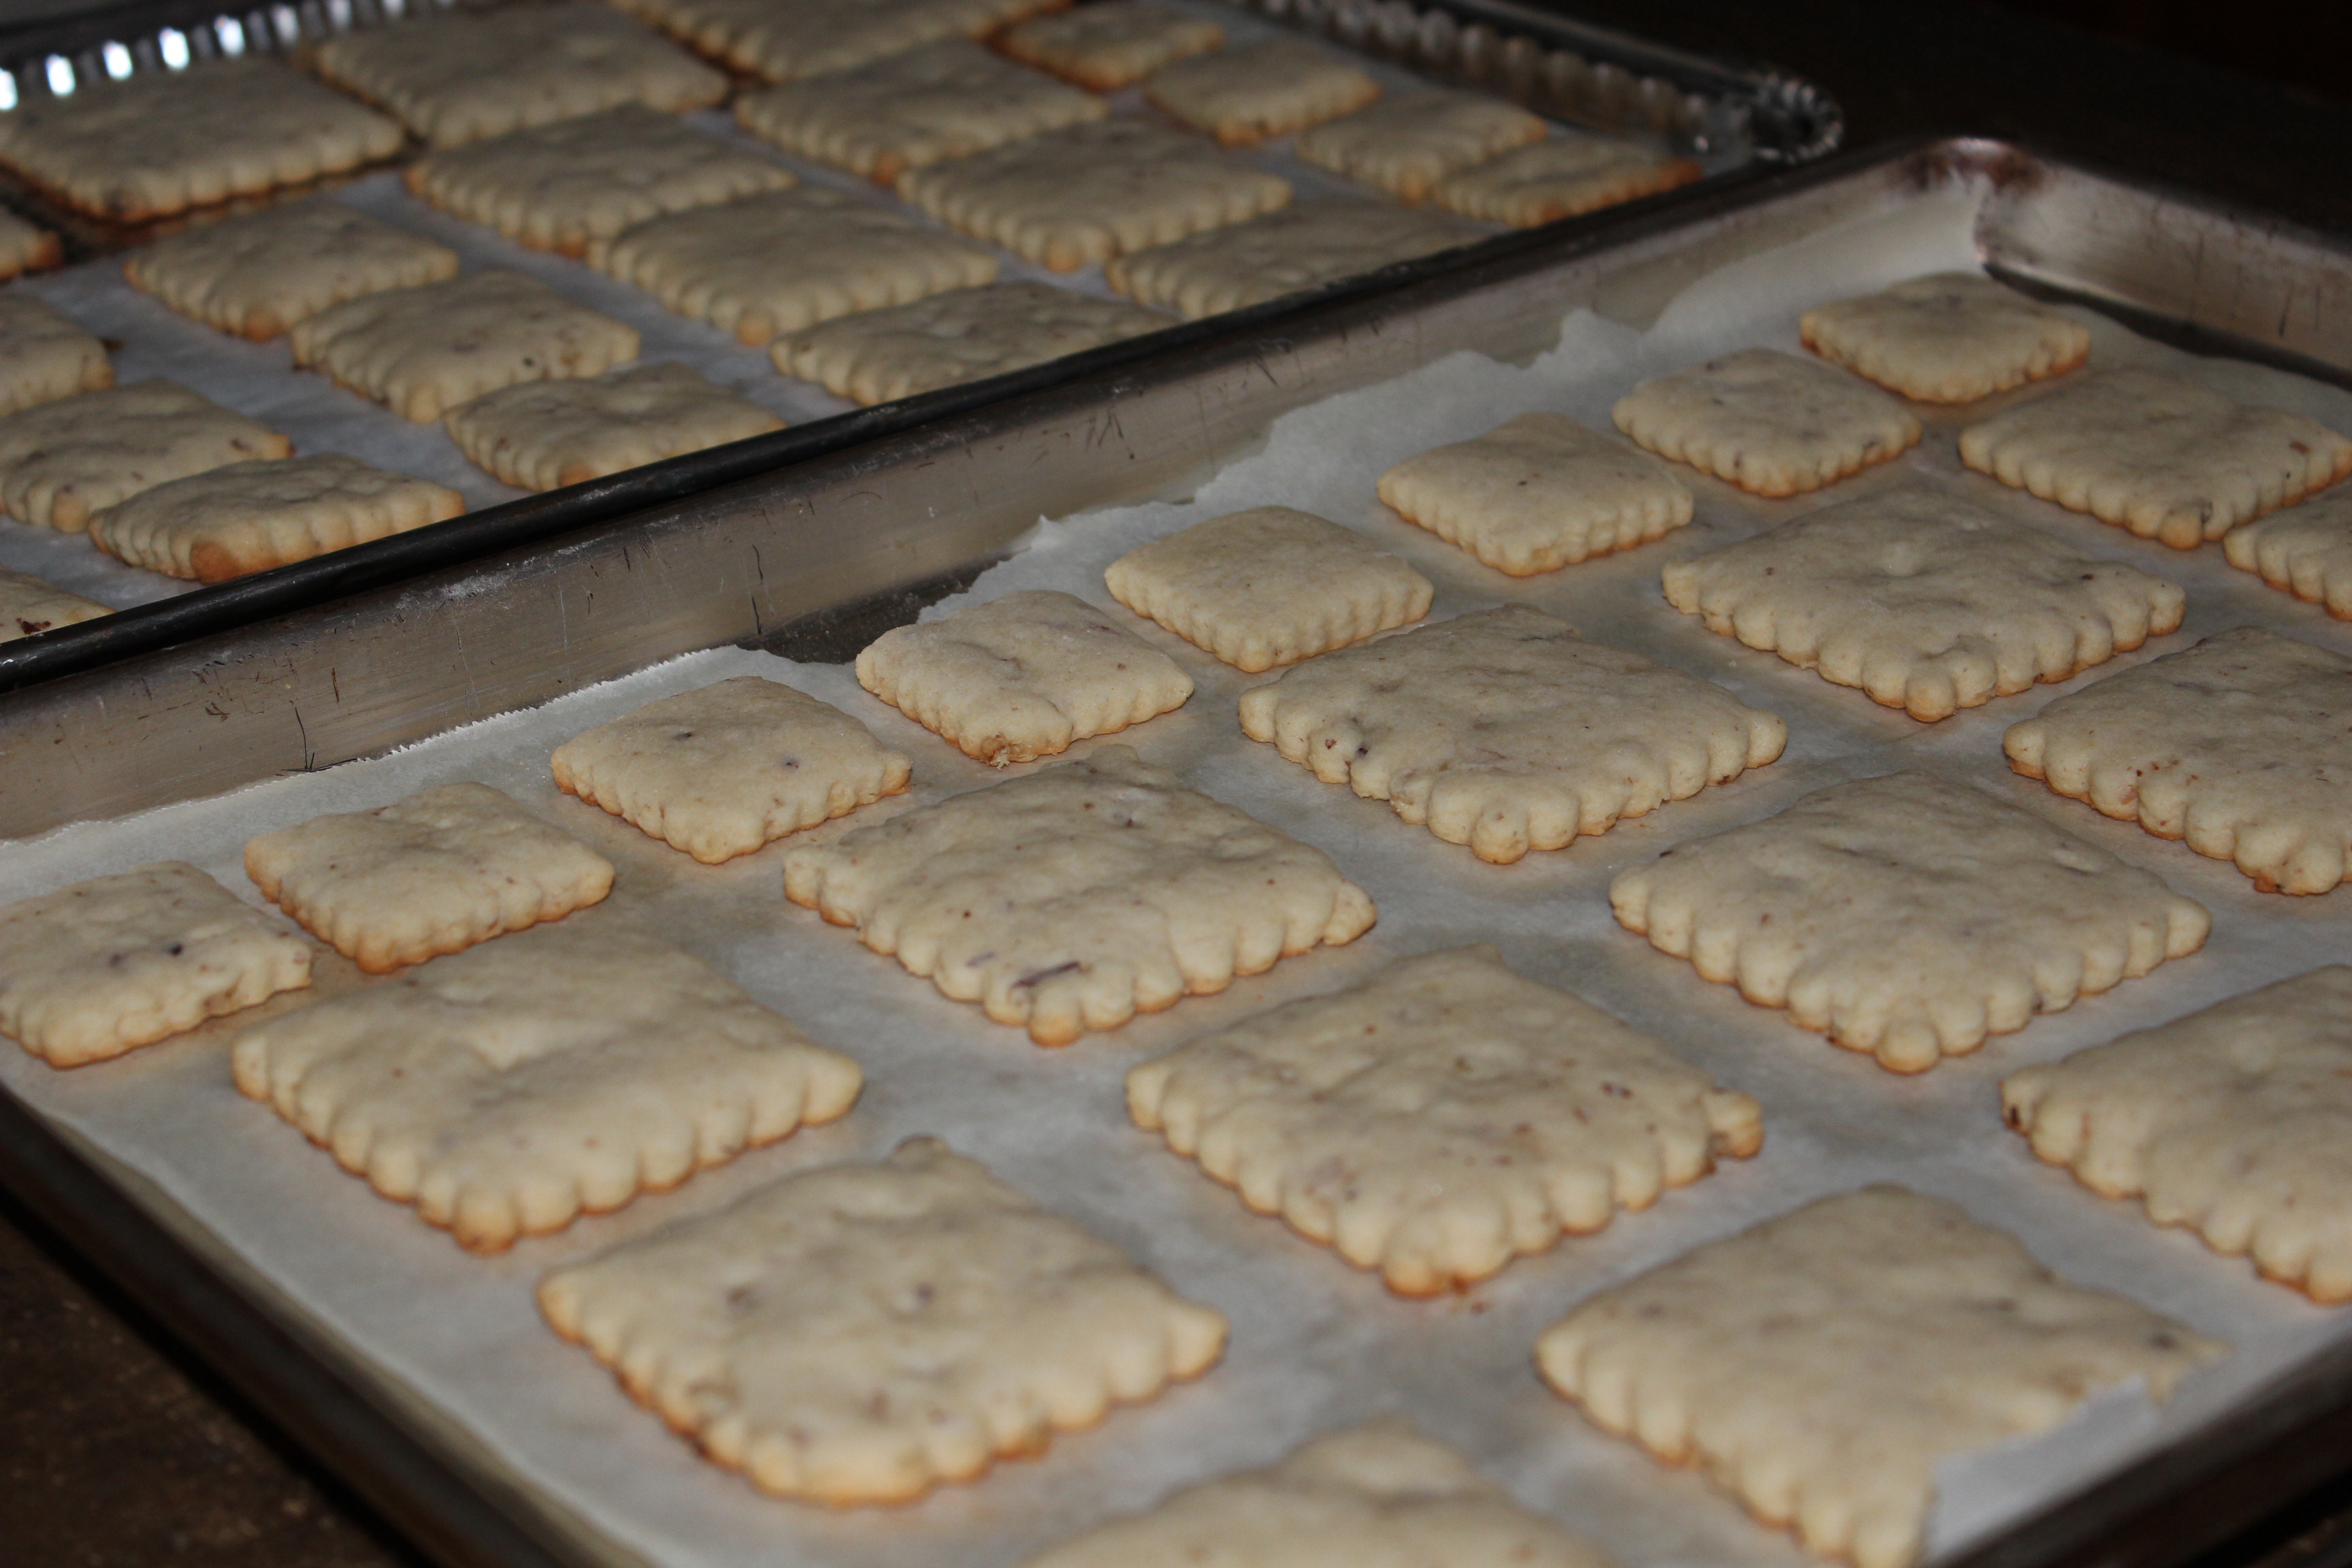
4.  Working with half the dough at a time, on a lightly floured surface, roll to 1/8 inch thickness.  Cut with desired cookie cutters.  (Or dough may be shaped into 1-inch balls).  Place on silpat or parchment-lined baking sheets.  Chill each pan of cookies while you cut the next batch.  Bake cutout cookies in 375*F oven for 7 – 8 minutes,  shaped cookies for about 10 minutes.  Remove to a wire rack to cool.

Cookies cooling before frosting.

Cookies cooling before frosting.

5.  Spread with Royal Icing, sprinkle with nuts, decorative sugars, or other kinds of trims.

Royal Icing, tinted pink

Royal Icing, tinted pink

IMG_3054Royal Icing is a smooth fluid icing that holds its shape well and sets hard.  Once it is set you can carefully write on it with gel-food pens.

ROYAL ICING

In a mixer bowl, beat 1 egg white till frothy.  Add 1 1/2 cups sifted powdered sugar, 1 Tablespoon lemon juice, and a dash of salt.  Beat well.  Add a drop or two of food coloring (optional) to all or part of the glaze.  Decorate as desired.

Various sizes of square cookies.

Various sizes of square cookies.

I cut my cookies with several sizes of square cutters, divided the icing and tinted half of it pink, then stacked some of them, sprinkled some of them, and wrote on others with food-gel pens.  Simply done, but pretty.  Oh, the large cookie with the heart on it (a one of a kind) I will put into Mr. D’s lunch as a surprise!

IMG_3064

SOURCE:  Better Homes and Gardens Special Edition, Baking for the Holidays

Nutella Crackles

Nutella Crackle Cookies

Nutella Crackle Cookies

Does the thought of Nutella make you swoon?  It does me.  I love the stuff, but I tend to forget about it hiding there in the back of the cupboard.  Then when I see the jar it’s like meeting up with an old friend, picking up just where we left off.  You might say we have an “on and off” relationship.

Wouldn't you like to taste one?

Wouldn’t you like to taste one?

I had that same reaction when I saw George Clooney recently in the movie, The Descendants.  He was so good in that role.  I had forgotten how much I like him, until I saw him again.  The same for Rosemary Clooney,  she is one of my all-time favorite singers.  There is nobody who can make you feel a song like she could, and I love to dance to her music.  It’s so romantic, dreamy, jazzy, and cool.  Isn’t it odd that I have such strong feelings for the two of them?  They both make me swoon. You could say that I get swooney for Clooney.  Did you know that Rosemary was George’s aunt?  Yes, his father’s sister.  Such a talented family.

Likewise, just a taste of Nutella is all it takes to make me swoon for it and want to create something sinfully delicious.  I think this recipe for Nutella Crackles has what it takes on all counts:  crispy sugary exterior, crunchy with nuts;  a surprisingly chewy interior, the perfect blend of hazelnuts and chocolate.  Try them, you might get “swooney”, too.

IMG_2886

NUTELLA CRACKLES

YIELD:   about 4 dozen cookies

INGREDIENTS

Beat up the Nutella, butter and sugar.

Beat up the Nutella, butter and sugar.

  • 3 cups all-purpose flour
  • 2 teaspoons baking powder
  • 1/2 teaspoon fine sea salt
  • 1 – 1/4 cup Nutella spread
  • 4 Tablespoons unsalted butter, softened
  • 1 – 1/4 cups granulated sugar
  • 1 teaspoon vanilla extract
  • 1 teaspoon instant expresso powder
  • 2 large eggs,
  • 1/3 cup milk
  • 1 – 1/2 cups hazelnuts, chopped fine
  • 1 cup confectioners’ sugar

1.  Combine flour, baking powder, and salt in a bowl.

2.  With electric mixer on medium speed, beat Nutella, butter and granulated sugar until light and fluffy, about 2 minutes.  Add vanilla, expresso powder, and eggs and mix until incorporated.  Reduce speed to low.  Add flour mixture and milk, and mix until just combined.  Fold in 2/3 cup hazelnuts.   Refrigerate dough until firm, about 1 hour.

3.  Preheat oven to 375*F.  Line baking sheets with silpat or parchment paper.

4.  Place remaining hazelnuts in a shallow bowl. Place confectioners’ sugar in another shallow bowl.   One at a time, roll dough into 1-inch balls, roll in nuts, then in confectioners’ sugar.  Place balls 1 1/2 inches apart on prepared baking sheets.  Refrigerate the first sheet while preparing the next sheet.  Bake the first sheet and all others for approximately 8 minutes.  As each sheet is baking, chill one while you make up the next.

Cooling Cookies.

Cooling Cookies.

5.  Transfer to wire cooling racks to cool completely.  Repeat with all dough.

Crispy, chewy, deliciousness

Crispy, chewy, deliciousness

SOURCE:  Taste of Home Baking

A Blizzard and a Bowl of Soup

Charlotte, not-so-sweet Charlotte!  She’s been here and gone, but not without leaving her mark. I saw a cartoon that was a map of the state of Ct. with these words written across it:  “CLOSED,  come back later.”  Many roads are still not plowed, businesses that are open have only a few people who can get in, the rest are still snowbound.  Thousands of people have no power.  Thankfully we are not one of them.

IMG_3001

We are homebound, snowbound, and almost but not quite bored.  There are tons of things I could do, but somehow nothing I can think of appeals to me. Mr. D. is home because his office is closed, and of course we need to eat.  So in spite of having a “bucket of books” to read and many issues of magazines to catch up on, knitting and other projects to work on, the one thing I can really get in to is to cook something.

IMG_3002

This is a picture of our deck.  The snow is at least 3 feet deep.  We cannot open the back door out onto the deck.

IMG_3003

This is our lower patio.  What looks like a giant marshmallow is a table with that much snow on it.

Storms days usually make me think of soup and today is no exception.  Today’s soup is a beef and barley combination.

Hearty Beef Barley Soup

Hearty Beef Barley Soup

It is only in recent years that I have begun to use barley.  I don’t recall ever having it in my growing up years, and so when I began to cook for my family it is not one of the ingredients I used.  Then one day a soup recipe caught my eye but it contained barley.  I purchased some knowing it is a good source of fiber and low on the glycemic scale, so I gave it a try.  I was pleasantly surprised by its nutty flavor and how much it thickened the soup.  Now I would not make a beef soup without it, and sometimes I include mushrooms with it.  Not today, though, since I didn’t have any on hand, and I couldn’t go out to get some  if I wanted to.

As I assembled all the ingredients and began to prep the vegetables, and brown the meat, it occurred to me that I was following the very same steps you take when you make a braise.  Braising is a technique that is used on tougher cuts of meat to produce great flavor and tenderness.  Its a cook’s secret weapon and one that I use frequently to prepare the basic ingredients for soup, or to slow cook a piece of meat that will become fork tender and falling off the bone.  It is very easy to do if you remember four simple steps that I describe in the recipe below.

If you’re looking for a way to dial up your cooking skills, braising is a secret you need to be in on.  In my opinion there is no other technique that requires so little of you and yet gives so much back.  Just don’t tell everyone, OK?

BEEF and BARLEY SOUP

SERVINGS:    About 8

Assemble and prep the meat and vegetables in advance.

Assemble and prep the meat and vegetables in advance.

  • 1 pound beef stew meat
  • 2 Tablespoons olive or canola oil
  • 1 large onion, chopped
  • 2 stalks celery, sliced
  • 1 teaspoon minced garlic
  • 2 Tablespoons flour
  • 2 cans beef broth
  • 5 cups water
  • 1 teaspoon salt
  • 1/2 teaspoon dried thyme
  • 1/4 teaspoon pepper
  • 2 – 3 carrots
  • 1/2 cup barley
  • 2 cups sliced mushrooms, optional

1. Sear the meat: In a large skillet or Dutch oven, heat the oil. Season the meat  with salt and pepper and brown the beef, in batches if necessary. Don’t crowd the pan, take the time to get good browning all over. Transfer to a large soup kettle.

Sear the meat in small batches.  That's where the good flavor comes from.


Sear the meat in small batches. That’s where the good flavor comes from.

2. Saute the mirepoix.  This is a French term meaning the classic onion, carrots, and celery combo.   Add chopped onions and celery to drippings left in the skillet, and brown them, aiming for a caramel-y brown color.

Add onion and celery and get everything browned.

Add onion and celery and get everything browned.

Add in the minced garlic, and the flour.  Cook for 1 minute, then transfer to the soup kettle. In this recipe the carrots are added later as they are part of the main ingredients of the soup.

3. Deglaze the pan. Pour a small amount of the beef broth into the skillet to deglaze the pan and scrape up all the browned bits. These bits are flavor bombs. When they dissolve in the cooking liquid, they enrich the whole dish.

Deglaze the pan with some of the beef broth.

Deglaze the pan with some of the beef broth.

Add this to the soup kettle with the remaining beef broth, the 5 cups of water, salt, thyme and pepper.

4. Braise it. Bring to a boil.  Meanwhile peel and slice the carrots.  Add them to the soup kettle with the barley.

Add carrots and barley.

Add carrots and barley.

When the mixture comes to a boil, reduce the heat to low, cover with tipped cover and simmer for 1 1/2 hours.

5.  In the last half hour of cooking, I like to add some fresh mushrooms.  They seem to add to the deep beefy flavor of this hearty soup.

A warming bowl of soup.  So Good!

A warming bowl of soup. So Good!

SOURCE:  Cook’s Illustrated

Coeur de Creme au Chocolat

Chocolate cream hearts.  Arn't they pretty?

Chocolate cream hearts. Aren’t they pretty?

Don’t let the French title of this dessert send you into a tizzy.  It means chocolate cream hearts and it’s really easy to make. The oohs and aahs you get when you serve it, will make it all  worthwhile.

This recipe is one that I clipped from a magazine ages ago because it looked so pretty and sounded easy to make.  But then,  I never made it.  Each time I flipped through my recipe notebook looking for something to make I passed this one by.  How could I?   What was the matter with me?  I think I saw it so often that I no longer saw it.   Know what I mean?   But suddenly this year I SAW IT, because I was searching for  things to make for Valentine’s Day, and these hearts jumped out at me and said, “Here we are, make us”.   OK,  all right,  I will!

I am so glad I did.  They are smooth, creamy-dreamy, a little chocolaty, very decadent, and unbelievably good.  And, all it takes to make them is four, count them, four ingredients.

Only four ingredients.

Only four ingredients.

GET THESE:

  • 6   6-inch squares of cheesecloth.  Not an ingredient, but you need this.
  • 1  8-ounce package cream cheese, cut up
  • 2  Tablespoons bottled fudge sauce   I used Dove Dark Chocolate Ice Cream Sauce by Smucker’s.
  • 1/4 cup sifted powdered sugar
  • 1 cup whipping cream

DO THIS:

1.  Moisten the cheesecloth squares.  Line six 1/2 cup molds or custard cups with the cheesecloth, overlapping it so it fits into the mold or cup with an overhang.

Molds lined with cheesecloth.

Molds lined with cheesecloth.

2.  Beat the cheese and the fudge sauce with an electric mixer till well combined.  Add the sugar, beat on high speed till fluffy.

Beat cream cheese with fudge sauce and sugar.

Beat cream cheese with fudge sauce and sugar.

3.  Wash beaters.  In another bowl beat cream till soft peaks form;  fold into the fudge mixture.

Fold in whipped cream.

Fold in whipped cream.

Spoon into molds.  Cover with overhanging cheesecloth.  Quick chill in freezer 30 – 45 minutes or chill in refrigerator 3 – 24 hours.

Fill molds and cover with cheesecloth.

Fill molds and cover with cheesecloth.

4.  To serve:  spoon additional fudge sauce onto serving plates.  Unmold, remove cheesecloth, and drizzle additional fudge sauce over the top.

Unmold heart onto a puddle of chocolate sauce, and drizzle with more chocolate.

Unmold heart onto a puddle of chocolate sauce, and drizzle with more chocolate.

5.  To take this showy dessert one step further,  place a  heart-shaped chocolate on top.

Cap off a special meal with your sweetie by serving this dessert.

Cap off a special meal with your sweetie by serving this dessert.

I never said it was low in calories, but sometimes you just gotta splurge.  If you are feeling really guilty about all this use reduced fat cream cheese like I did.   🙂

The amount you get from this recipe is ample for 6 molds plus more.  I made an additional serving in a custard cup, and I probably could have made another one if I hadn’t licked so much off my fingers, the beaters, the bowl, the spoon, the spatula—–while making it.

Creamy, dreamy, and chocolaty!

Creamy, dreamy, and chocolaty!  Julia would be proud.

Pork Tenderloin with Cheesy Polenta

Pork Tenderloin and Mushroom Sauce

Pork Tenderloin and Mushroom Sauce

With a name like pork tender loin you would expect this cut of meat to be tender, right?   I may be in the minority here, but I’ve had the experience where it wasn’t tender at all;  more like dry, stringy, tough.  Did I do something wrong that ruined it,  or was it the cut of meat?   Most of the recipes I see for pork tenderloin have you cooking it (in the oven) at a very hot temperature, for a short time.  This may be the method of choice, but it doesn’t give me the results I want.

One thing I know about cooking most meats, is that the outside of it needs to be sealed in some way in order to contain its juices within.  This is what makes a cut juicy.  Without this step, cooking it at a high temperature will only dry it out,  and that equals tough!

So, with that in mind, I experimented with a pork tenderloin that weighed about a pound.  The recipe that follows describes what I did, and I’ll tell you right now that I got the results  I wanted:  a juicy, tender piece of meat with the added benefit of deep umami flavor thanks to the browning of the meat and the mushrooms used in the sauce.  Served with a cheesy polenta to spoon the sauce over,  this meal was outstanding.  In the words of my husband, it was “plate-licking good”.

A moist cut of pork with mushroom sauce to spoon over polenta.

A moist cut of pork with mushroom sauce to spoon over polenta.

PORK TENDERLOIN with CHEESY POLENTA

SERVINGS:   about 4

  • 3 Tablespoons EVOO, divided
  • 1 pork tenderloin, about 1 pound weight
  • salt and pepper
  • 2 small – medium shallots, finely chopped
  • 1  8-ounce pkg. mushrooms, sliced
  • 1 cup chicken broth
  • 1/2 cup cream, light cream or half and half
  • 1 cup polenta ( cornmeal that cooks in 3 minutes)
  • 6 ounces shredded semisoft cheese, such as fontina, gouda, or jarlsburg
  • chopped flat-leaf parsley, or dried parsley, for garnish

1.  Preheat the oven to 375*F, and lightly spray a baking dish appropriately sized to the meat.

2.  In a large skillet, heat 1 Tablespoon oil over medium heat.  Season the meat all over with salt and pepper, and cook in the skillet, turning until browned, about 10 minutes.  Do not skimp on this step, it’s what produces the sear to keep the juices inside.

3.Transfer meat to the prepared baking dish.  Insert a meat thermometer into the thickest part of the meat.  Put into the oven and roast until the temperature registers 145*—-about 12 – 15 minutes.  When temperature has been reached, remove from the oven, cover with foil to keep warm and let rest while you continue.

4.  In the skillet, add the remaining 2 Tablespoons oil, and over medium heat cook the shallots and mushrooms until softened, about 5 minutes.  Add the chicken broth and simmer until reduced, about 3 minutes.  Cover and remove from heat.

5.  Meanwhile, in a saucepan, bring 3 1/4 cups water and the cream to a boil.  Whisk in the polenta.  Lower the heat to medium-low and cook, whisking, until thick, about 3 minutes.  Remove from heat and stir in the cheese;  season with salt and pepper.  Cover and keep warm.

6.  Transfer the pork to a cutting board and slice on an angle.  Arrange on a serving dish, top with mushroom sauce and garnish with parsley.  Serve with polenta.

Slice pork, pour mushroom sauce over top.

Slice pork, pour mushroom sauce over top.

Cheesy Polenta

Cheesy Polenta

IMG_2966

This meal can be completed by the addition of a green vegetable, such as green beans or broccoli.  In the event polenta does not appeal to you,  substitute mashed potatoes or rice to spoon the sauce over.  It will be very good however you serve it.

SOURCE:  A Carolyn Original

Bacon Cheddar Pinwheels

Bacon Cheddar Pinwheels.

Bacon Cheddar Pinwheels.

Yes, it was Super Sunday, and no we didn’t watch the game, go to a party, or cheer for any particular team, but I did use game day as an excuse to make some foods associated with game watching.  I guess I’m more interested in food than football!  Anyway, I made these easy little pinwheels that we enjoyed for lunch with some fresh fruit.  Then I went on to make a chicken quesedilla casserole for dinner.  I’ll be telling you about that in a few days. so stay tuned.

These easy to hold little pinwheels make a great appetizer, combining two flavor favorites; bacon and cheddar cheese, wrapped into crescent roll dough.  You can eat them with your fingers, no utensils required, while in the other hand you hold your favorite beverage.  A neat party food, I think.  One that guys will like–at least my husband did.  In fact, he asked me to make them after seeing them in a picture.  Turns out he was on the right track with that suggestion.  I liked them very much too.

BACON CHEDDAR PINWHEELS

Just a few ingredients, you probably have on hand.

Just a few ingredients, you probably have on hand.

Yield:   Makes 12 – 16, depending on how thick you cut them.

  • 1 roll refrigerated crescent dinner rolls
  • 2 Tablespoons ranch dressing
  • 1/4 cup cooked bacon pieces,  4 slices bacon, crisply cooked and crumbled
  • 1/2 cup finely shredded cheddar cheese
  • 1/4 cup thinly sliced green onions

1.  Preheat oven to 350* F.  Spray baking sheet with non-stick spray or line with parchment paper.

2.  Unroll the crescent roll dough;  pressing each section into a 12 x 4 inch rectangle,  firmly pressing the perforations to seal.

3.  Spread 1 Tablespoon dressing over each dough rectangle to the edges.  Sprinkle each with bacon, cheddar cheese, and onions.

Layer on the fillings, then roll up.

Layer on the fillings, then roll up.

4.  Starting at one short side, roll up each rectangle;  press edge to seal.  With serrated knife, cut each roll into 6-8 slices;  place cut side down on prepared baking sheet.

Slice, then bake.

Slice, then bake.

5.  Bake 12 – 17 minutes or until edges are deep golden brown.  Immediately remove from baking sheet.  Serve warm.

Served warm with fruit for a light lunch.

Served warm with fruit for a light lunch.

Bacon Cheddar Pinwheels

Bacon Cheddar Pinwheels, a neat little appetizer.

SOURCE:   Pillsbury Baking