Shrimp-Mango Stir-Fry

Shrimp-Mango Stir-Fry

Shrimp-Mango Stir-Fry

Every time I make an Asian-inspired meal from Cooking Light, I wonder if this will be the one that’s a bit off, the one that doesn’t quite come together.  And without fail we sit down to something fabulous, in a way I hadn’t ever considered before.   By now I should know better, the folks who design recipes at Cooking Light magazine seem to always get it right.

This one was no different.  It looks like a very simple shrimp stir-fry with noodles, and it is really, but mango?  with shrimp?  Yes, yes, and yes!  Add some sliced peppers and onion, plus ginger and I find it hard to describe the complexity and absolute deliciousness of this dish.  I swear it’s the ginger that brings it all together, so please don’t leave it out.

Shrimp-ly Delicious!

Shrimp-ly Delicious!

This recipe is meant to serve four, but two of us ate it all, with no regrets.  It’s that good!!

The other good thing about it is that it can be made quickly like most other stir-frys.  Slice, chop, measure and mix all the ingredients in advance and once you turn on the burner, cooking commences and it’s done in a flash.

SHRIMP-MANGO STIR-FRY

Yield:   serves 4

Ingredients:

  • 5 ounces uncooked rice noodles, or soba noodles

    A diverse mix of ingredients!

    A diverse mix of ingredients!

  • 3 tablespoons water
  • 4 teaspoons fresh lime juice
  • 2 teaspoons brown sugar
  • 2 teaspoons fish sauce
  • 1/2 teaspoon cornstarch
  • 1/4 teaspoon crushed red pepper
  • 1/4 teaspoon ground black pepper
  • 12 ounces large shrimp, peeled and deveined
  • 1 tablespoon canola oil, divided
  • 1 cup sliced yellow onion
  • 1 cup sliced red bell pepper
  • 1 tablespoon minced peeled fresh ginger
  • 1 cup cubed peeled ripe mango
  • 1/2 cup torn fresh basil leaves
Slice, chop, measure and mix before starting to cook.

Slice, chop, measure and mix before starting to cook.

Directions:

1.  Prepare noodles according to package directions.  Drain.

2.  Combine 3 tablespoons water and next 4 ingredients (through cornstarch) in a small bowl, stirring with a whisk.  Set aside.

3.  Combine red pepper, black pepper, and shrimp in a medium bowl; toss to coat.

4.  Heat a wok or a large skillet over high heat.  Add  1 1/2 teaspoons oil to pan; swirl to coat.  Add shrimp mixture; cook 3 minutes or until shrimp are almost done, turning once.  Remove shrimp mixture from pan.IMG_7695

5.  Add remaining 1 1/2 teaspoons oil to pan; swirl to coat.  Add onion, bell  pepper, and ginger; cook 2 minutes, stirring occasionally.  Return shrimp mixture and juice mixture to pan.

IMG_7697

Add mango; cook 1 minute or until liquid thickens slightly and shrimp are done.

Add mango last.

Add mango last.


Sprinkle with basil.  Serve over noodles.  (I mixed mine right in with the shrimp mixture.)

Sprinkle torn basil on top.

Sprinkle torn basil on top.


I can't believe we ate the whole thing!!

I can’t believe we ate the whole thing!!


SOURCE:  Cooking Light Magazine

What Dance Teachers Say


Ballroom dance lessons are a unique and wonderful experience.  They involve growth as a person as you develop a new skill.  They keep you “on you toes” both literally and figuratively.  Dancing is a super form of exercise and it requires you to be mentally sharp.  It is also a “close contact” sport.

Dance instructors and coaches have a unique challenge of giving information in a way that is clear and that you can relate to and remember.   The desire to get the point across can bring out the emotions and creativity of the teacher along with the information.  Sometimes what they say is priceless.

For your amusement, I have included below, some actual quotes from my teacher.  He can be very funny, unintentionally so.  That is just one of the reasons I have continued to dance with him for almost 10 years.  There are some days when it seems like I do more laughing than dancing, but that’s okay.  Laughter is a good tension breaker, and that’s what we need sometimes.

“Always keep your feet under you, and you must decide what leg your head is on”.

“Always keep in a straight line,  let me draw you a straight line, now let me see you walk in a straight line.  Hmmm, okay, now let’s dance in a straight line.”     I don’t drink and dance, honestly.

“Stretch, stretch, stretch.   Yes, that’s good.    Does it hurt?   If it hurts, you’re doing it right.   Keep stretching!!”

“I need to come inside you, then outside you..”

“Feel me, use my body,  wait for me, don’t finish before me”  Then he says,  “You seem distracted.  What are you thinking about.”

“Left, LEFT!  More LEFT!  Stretch your head left.  HEAD LEFT!  Stay to my right side.  Give me your right side.  HEAD left!   More left!   GO!! LEFT!!”

“Your other left”    At times like this, I’m not sure which is my right or my left.

“Where’s your boobs?  I don’t see them.  I need to see your boobs at all times.  You understand why this is important, don’t you?”

“I want you right THERE…. between my legs!”

“I want you to do an arm kick right there!”

“Use your front leg, then your hind leg”

“As you start turning, screw yourself into the floor.”

” You pulled out!   I told you NOT to pull out!”

“If you’re going to fall, do it gracefully.  You must be graceful and feminine at all times, and RELAX.”

“Don’t dance where your feet are, dance where your head is.”

My teacher is awesome, such a talented and graceful dancer, and so much fun to work with.  The operative word here is work!!

Just three more weeks until the competition.  YIKES!


Cream of Zucchini Soup

Cream of Zucchini Soup

Cream of Zucchini Soup

Gad-Zooks!   You planted a few seeds, a harmless enough activity, hoping to get a few zucchini to enjoy over the summer, and suddenly you’re up to your ears in zucchini.  You’ve already been through zucchini bread, zucchini casserole,  zucchini with peppers and onions, zucchini muffins, and stuffed zucchini.  What’s left to make?  zucchini fudge?  zucchini frosting for that chocolate cake?  zucchini ice cream?   Here’s a novel idea, how about zucchini soup?

IMG_7781

I’ll admit it’s weird thinking about soup when its so warm outside.  Hot soup.  I didn’t even have the decency to make cold soup.  It’s just in-your-face hot–smack dab in the middle of a July summer.  That takes some nerve!

But please forgive me because this soup is sooo good!  My family loves it and it is so easy to make. With only 5 ingredients,  it takes only about 30 minutes start to finish, and one large bowl is only 60 calories, or 1 WW point.

I often serve it with a drizzle of olive oil and some fresh grated cheese, but that’s completely up to you.  You can add fresh herbs, yellow squash, or some cauliflower, or whatever you wish.  Served with some crusty bread or a salad and it’s a complete meal, or make it as a starter to any meal.  To make it vegetarian use vegetable broth.  I usually make it with chicken broth.

IMG_7784

Make this soup and stay cool;  maybe eat it sitting in front of the refrigerator with the door open……..enjoy!


CREAM OF ZUCCHINI SOUPIMG_7770

Serving:  4   size, 1 1/2 cups,  calories, 60,  fat 1g,   carb 10 g,

Ingredients:

  • 1 medium onion, quartered
  • 3-4 cloves garlic,
  • 3 medium zucchini, leave skin on, cut into large chunks
  • 32 oz. reduced sodium chicken broth (or vegetable broth)
  • 2 tablespoons reduced fat sour cream
  • kosher salt and black pepper to taste
  • fresh grated cheese (Parmesan or asiago) for topping (optional)

Directions:

1.   In a large pot, over medium heat, combine the chicken broth, zucchini, onion and garlic, and bring to a boil.  Lower heat and simmer until tender, about 20 minutes.  Remove from heat and let cool slightly.

2.  Puree with an immersion blender, add the sour cream and puree again until smooth.

IMG_7771

3.  Taste and add salt and pepper to your liking.  Serve hot.

IMG_7782


SOURCE:   Skinny Taste


Coconut Cream Poke Cake

Coconut Cream Poke Cake

Coconut Cream Poke Cake


For the time being can we just put aside the kale and zucchini?  We don’t need them.  We’re also going to set aside any twinges of guilt.  What we are going to do is make a white coconut cake that’s gooey with Cream of Coconut, fluffy whipped topping and lots of flaked coconut.  There! I said it and I’m not sorry in the least.  In fact I feel really good about it and I hope you do too.

IMG_7803

This is a very easy cake to make as most “poke” cakes are.  It is so moist and has such a great  creamy, coconut flavor that I think even folks who are not coconut lovers will fall in love with this one!  It’s a surprisingly light and fluffy cake in spite of being soaked with the cream of coconut.

IMG_7793

Coconut Cream Poke Cake:

Yield:  20 -24 servings:

Just a few ingredients.

Just a few ingredients.

Ingredients:

  • 1  (18-oz.) box white cake mix
  • ingredients needed to make cake ( eggs, oil and water)
  • 1 (15-oz,) can Cream of Coconut**
  • 1 (8-oz.) container frozen whipped topping, thawed
  • 1 (8-oz.) package sweetened flaked coconut

** Be sure to use Cream of Coconut–not coconut milk.  Cream of Coconut can usually be found where alcohol supplies and mixers are in your grocery store.   It tends to be near the margarita mixes.  You will need to shake the can well or stir well when you open it, because the cream part tends to separate from the liquid.

Directions:

1.  Prepare and bake the white cake as the package directions specify.  Bake in a 9 x 13″ pan that has been well greased.

2.  Remove cake from oven, and while still hot, poke holes all over the top of the cake using a large fork.

Poke hole all over the top with a fork.

Poke hole all over the top with a fork.

3.  Open the can of Cream of Coconut –making sure to stir it well –and pour over warm cake.  Make sure you evenly coat the whole cake and spread it around so it will soak in.

Pour Cream of Coconut all over the top and let it soak in.

Pour Cream of Coconut all over the top and let it soak in.

4,  Let cake cool completely then frost with whipped topping.

Frost with whipped topping.

Frost with whipped topping.

5.  Top with flaked coconut.  If you like you can toast your coconut first but I prefer it un-toasted.

Top with flaked coconut.

Top with flaked coconut.

Keep cake refrigerated.   The cake will taste best after it has cooled for at least a couple of hours.  This gives it time for the coconut flavors to really soak in.

IMG_7798

Poke cakes are so easy to make, but give the impression  that you spent a lot of time on them.  If left in the baking pan and covered securely, they can be transported safely to an outing or picnic.  This one is no exception.  We all loved it!!


IMG_7801

SOURCE:  The Country Cook


Glazed Salmon with Couscous

Glazed Salmon and Couscous

Glazed Salmon and Couscous

Let’s go fishing!   I’ll bring the fishing poles if you’ll bring your boat.  I’ll pack a picnic lunch and some cold drinks,  and enough insect repellent to take care of any bugs within miles.  Oh, yeah, bait!  Would you stop on your way to the river and pick some up? Oh, and be sure to bring your camera.  We have to get some pics of our catch to post on F.B.

That reminds me—Do you know how to bait the hook?    Oh, me neither.   Well, I guess we’ll need to find someone to help us with that.   On second thought,  why don’t we just go shopping instead and stop by the local fish market for a nice piece of salmon on our way home.  Sounds like a plan to me 🙂

When we get home it will only take a few minutes to get dinner ready because the salmon is so easy to prepare with this recipe.

IMG_7459

GLAZED SALMON

Yield:  Serves 4

Ingredients:

  • 1  1/4 cups water
  • 3/8 teaspoon kosher salt, divided
  • 3/8 teaspoon ground black pepper, divided
  • 1 cup uncooked couscous  (In my version, I used the larger size pearl couscous, and followed cooking time on the package.)
  • 2 tablespoons chopped fresh dill

    Whole-grain mustard and chopped shallots.

    Whole-grain mustard and chopped shallots.

  • 1/4 teaspoon grated lemon rind
  • 1 teaspoon fresh lemon juice
  • 2 teaspoons olive oil
  • 1 teaspoon butter
  • 3 tablespoons chopped shallots
  • 1/4 cup dry white wine
  • 2 tablespoons whole-grain mustard
  • 1 tablespoon brown sugar
  • 4 (6-ounce) salmon fillets, about 1 inch thick
  • cooking spray

Directions:

1.  Preheat the broiler.  Line a jelly-roll pan with foil, and coat with cooking spray.

2.  Bring 1 1/4 cups water to a boil in a medium saucepan.  Stir in 1/8 tsp. salt, 1/8 tsp. pepper, and couscous; cover.  Remove from heat; let stand 5 minutes.  Stir in dill, rind, and juice.  (If using Israeli or pearl couscous, following cooking directions on package.)

3.  Heat a small saucepan over medium-high heat.  Add olive oil and butter; swirl until butter melts.  Add shallots; cook 2 minutes, stirring occasionally.  Add wine to pan; bring to a boil.  cook 2 minutes;  stir in mustard and brown sugar.  Remove pan from heat.

Sautéing the shallots.

Sautéing the shallots.

4.  Arrange salmon fillets, skin sides down on the prepared jelly-roll pan.  Sprinkle with remaining 1/4 tsp, salt and remaining 1/4 tsp. pepper.  Spread half of mustard mixture evenly over fillets.  Broil 6 minutes or until desired degree of doneness.  Spread remaining half of mustard mixture over fillets.  Serve salmon with couscous.

You can round out this meal nicely with the addition of a green vegetable such as haricots verts, or asparagus.

IMG_7457


Blueberry Pancake

Oven Baked Blueberry Pancake

Oven Baked Blueberry Pancake

Everyone loves blueberry pancakes, and this is the time of year when blueberries are readily available, so maybe your family is asking for their favorite pancakes right about now.  Which is why you run into a supply and demand problem, standing over a hot griddle flipping one after the other.  Usually the one who is doing the “flipping” is the last one to get to eat, and hopefully there will still be one or two hot ones left for when the cook gets to have theirs.

IMG_7599

I’ve been in that situation, and even though I preheat the oven and put some of the pancakes in there to keep warm,  when I get to sit down to eat they are never quite the same as getting some hot off the griddle.  This recipe for an oven-baked blueberry pancake is meant to take the pressure off since you just mix and pour the batter, then pop it into the oven.  It has all the tender texture of old-fashioned flapjacks, but it slices into wedges so everyone can eat together–and you don’t end up feeling like a short order cook.

In the unlikely event that there is some left over, it does reheat well in the microwave for a special breakfast treat before starting your weekday morning, or have it for lunch with some additional fruit.

IMG_7600


OVEN BAKED BLUEBERRY PANCAKE

Yield:  Serves 4IMG_7593

Ingredients:

  • 1 cup all purpose  or whole wheat flour
  • 3 Tablespoons plus 1 teaspoon granulated sugar
  • 1  1/2 teaspoons baking powder
  • 1/2 teaspoon salt
  • 3/4 cup whole milk
  • 1 large egg
  • 2 Tablespoons butter melted, plus 1 Tablespoon for the pan
  • 1 cup blueberries
  • confectioners’ sugar for serving
  • maple syrup for serving

Directions:

1.  Preheat oven to 375*F with rack in upper third.  Place a 10-inch cast-iron skillet ( or other nonstick ovenproof pan) in oven.

2.  Whisk together flour, 3 tablespoons granulated sugar, baking powder, and salt in a bowl.  Whisk together milk, egg, and melted butter in another bowl.  Whisk milk mixture into flour mixture until just combined.

3.  Remove skillet from oven and add 1 tablespoon butter, swirling to coat.  Pour in batter and smooth top with a spatula.

Pour batter into prepared pan.

Pour batter into prepared pan.

Sprinkle evenly with blueberries and remaining 1 teaspoon granulated sugar.

Sprinkle with blueberries and 1 teaspoon sugar.

Sprinkle with blueberries and 1 teaspoon sugar.


4.  Bake until golden brown and cooked through, about 25 minutes.  Remove from oven, let cool 5 minutes before dusting with confectioners’ sugar and serving with syrup.

IMG_7596


IMG_7597


IMG_7601


SOURCE:   Martha Stewart Living


Perfect Rhubarb Pie


 Perfect Rhubarb Pie

Perfect Rhubarb Pie


This is a recipe that was back in the archives, but is so darn good that I think it’s worth bring it back again.  I made the pie last weekend and took some new photos.  This is the best rhubarb pie I have ever had, for two reasons;  it’s not runny when you cut it, and the flavor is unique.  You must see for yourself.

Rosy, tart, beautiful rhubarb.

Rosy, tart, beautiful rhubarb.

Ah, rhubarb, sweet rhubarb!  (just kidding, of course)  I’ve never tasted anything so tart in my life, and yet I LOVE it.  I can’t let a spring  season go by without baking something with it.  The most  popular item I make is rhubarb pie–Mr. D’s favorite kind of pie; but I’ve also been known to make cobbler, rhubarb muffins and sweet bread.    Last weekend I made the can’t-wait-to taste-it rhubarb pie.  Try it served with a little vanilla ice-cream along side and you will hear angels singing.

I call this “perfect” rhubarb pie, because it just melts in your mouth.  I’ve discovered that adding some orange zest and nutmeg brings out the flavor of rhubarb, without going overboard in the sugar department. In my opinion, too much sugar just makes it taste sweet, and obscures the flavor of the rhubarb, which is what this pie is all about.

IMG_7667

We like it a little tart, so when I make it just for us, I use only 1 cup of sugar.  The recipe given here is for 1 1/2 cups which I feel is quite sweet,  but you can surely adjust the  sugar to suit your taste.   I use quick-cooking tapioca and flour as thickeners; and I also add an egg which helps bind the ingredients and  keep the pie from becoming overly juicy.  When baking, I place the pie on a small baking sheet such as a pizza pan in case it runs over, but really, with this recipe that never seems to happen.

PERFECT RHUBARB PIE

Yield:   Serves 8

Ingredients:

Perfect Rhubarb Pie

Perfect Rhubarb Pie


  • 4 cups fresh or frozen rhubarb, cut into 1/2 – 1 inch pieces
  • 1 1/2 cups sugar
  • 3 tablespoons flour
  • 1 teaspoon quick-cooking tapioca
  • 1 teaspoon grated orange zest
  • 1/4 teaspoon grated nutmeg
  • 1 egg
  • 1 teaspoon water
  • 1 tablespoon butter

Pie pastry for a 2-crust  9 inch pie.   You may want to use a refrigerated  pie crust from the grocery store, or prepare your favorite pastry recipe.

This is a pie pastry recipe that I have success with:

  • 3 cups all-purpose flour
  • 1/2 teaspoon salt
  • 1 cup vegetable shortening
  • 7-8 tablespoons ice water

Directions

  1. In a large mixing bowl, combine sugar, flour, tapioca, orange zest and nutmeg.  Stir in rhubarb; let mixture stand while you make the crust.

Prepare pastry:  In a mixing bowl, stir together the flour and salt.  Using a pastry blender, cut shortening  into flour until pieces are the size of small peas.Sprinkle 2 tablespoons water  over part of the flour mixture and stir gently with a fork.  Push moistened dough to the side of the bowl.  Repeat using 1 tablespoon ice water at a time using the 7-8 tablespoons total, until all the dough is moistened.Gather dough up into a ball and divide in half.  Roll each half into a 11-12 inch circle, for bottom and top crusts.  Place one crust in a 9-inch pie dish.  Cut decorative slits in the top crust to allow steam to escape while baking.

         2.  Combine egg and water, mixing lightly with a fork.  Add to rhubarb mixture, and stir to combine.  Spoon into pastry-lined pie dish.  Dot with butter.

Add egg mixed with a little water to the sugared rhubarb.

Add egg mixed with a little water to the sugared rhubarb.

3.  Cover with top crust.  Trim crust and crimp edges.  Lightly brush top crust with a little milk or light cream, then sprinkle with coarse sugar for a nice browned top.

Brush top crust with a little milk and sprinkle with coarse sugar..

Brush top crust with a little milk and sprinkle with coarse sugar..


4.  Cover edges with foil to prevent over browning.  Bake in a 375 degree oven for 30 minutes.  Remove foil from edges, and bake another 30 minutes, until browned and filling is bubbly.

No runny pie here!

No runny pie here!

IMG_7691

SOURCE:   Originally from a vintage cook book in my collection,  with modifications by yours truly .

Roast Tomato Bruschetta

Roast Tomato Bruschetta

Roast Tomato Bruschetta

It’s a fact that the majority of foods that we love and that I prepare here at home make their way to the pages of this blog.  However, there are some recipes that I make over and over again and somehow never think to share them with you.  Usually that’s because they are so simple, I don’t view them as a “recipe’, but they are non-the-less-good in spite of it.

IMG_7518

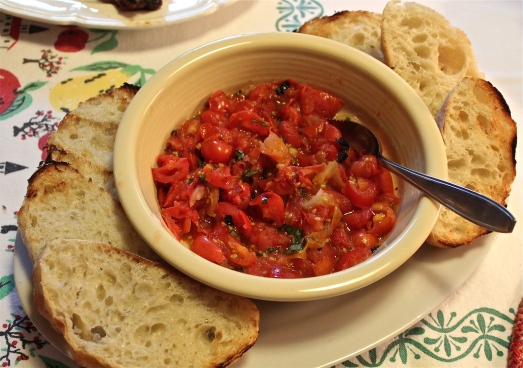
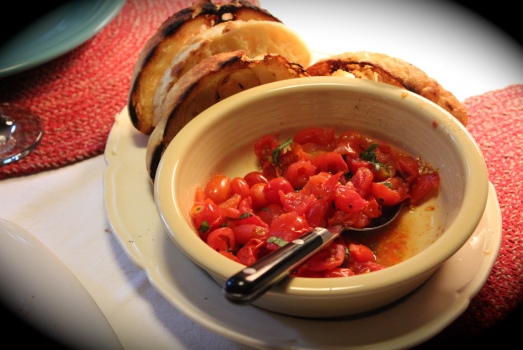
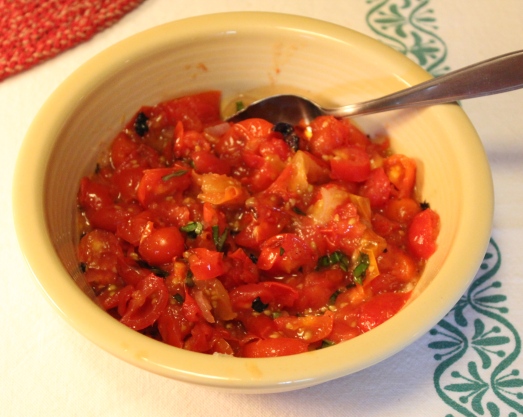
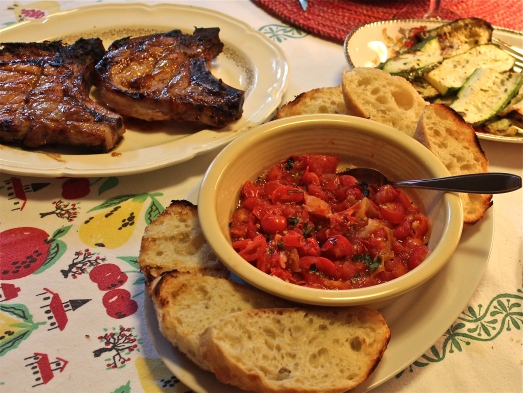
A few weeks ago I shared a picture on Facebook of an appetizer that I was making to bring to a family picnic,  and almost instantly I was getting questions about what it was, and requests for the recipe.   All it consisted of was roast tomatoes, coarsely chopped then mixed with some diced shallots, olive oil, and chopped basil.   Spread this mixture on some  toasted whole-wheat baguette slices, and you have yourself  one delicious appetizer, an accompaniment to a salad, or a little extra something to round out a meal.

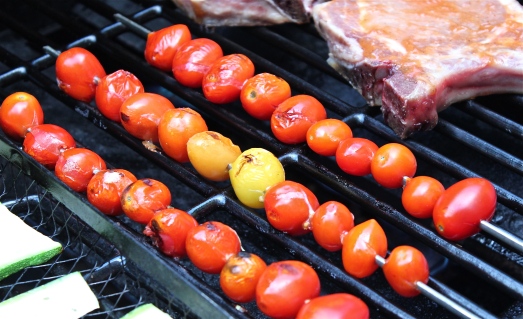
I make this using whatever kind of tomatoes I have in abundance, but my favorite is to use small heirloom varieties.  I like the mixture of colors.  The tomatoes can be roasted in the oven on a cookie sheet, or on the grill if you already have it heated up.  One quick way to do this on the grill is to thread the tomatoes on skewers (6-8/skewer) and lay them on the grill, turning every 2 – 3 minutes until the tomatoes start to crack and begin to look charred.  Then bring them into the kitchen, chop them up, add the remaining ingredients, and its done!

ROAST TOMATO BRUSCHETTA

Yield:   Make about 2 cups

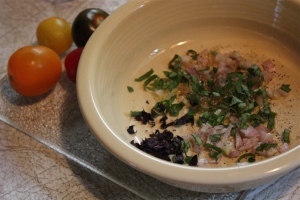
I get the dressing ready before roasting the tomatoes.

I get the dressing ready before roasting the tomatoes.

Ingredients:

  • 2 cups cherry tomatoes, or any variety of tomatoes you desire
  • 4 teaspoons olive oil, divided
  • 2 tablespoons chopped fresh basil
  • 1 small shallot, chopped  (or finely minced red onion)
  • 1 whole wheat French bread baguette, sliced
  • 1 garlic clove, halved

Directions:

1.   Preheat oven to 375*F.   or heat grill to medium-high heat.

2.  Thread tomatoes evenly on 4 skewers;  lay on a cookie sheet and brush all over with 2 teaspoon olive oil.  If using grill, brush tomatoes with oil and lay on grill .   Turn the skewers several times for even roasting, and when the tomatoes start to crack and look charred ( about 5 minutes on the grill) remove from heat.

Roasting the tomatoes on skewers.

Roasting the tomatoes on skewers.

3.  Remove tomatoes from skewers; chop coarsely.  Place tomatoes, 2 teaspoons olive oil, 1/4 teaspoon salt, 1/4 teaspoon pepper, basil, and shallot in a small bowl, stirring to combine.

IMG_7612

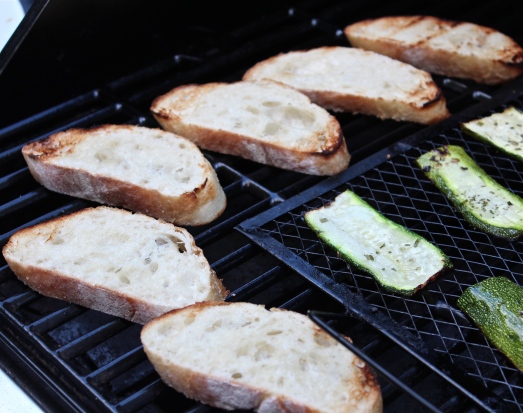
4.  Brush bread slices evenly with some olive oil,  Grill for about 30 seconds on each side or until toasted.

Toasting the bread.

Toasting the bread.

Rub cut sides of garlic over one side of bread slices, top evenly with tomato mixture.

Once you try this, you will want it with every meal. 🙂


IMG_7617


SOURCE:  Carolyn’s Creations

Tortellini and Broccoli Salad

Tortellini and Broccoli Salad with Bacon

Tortellini and Broccoli Salad with Bacon

There’s a certain kind of math that goes on in my head every time I stare into my refrigerator and try to decide what to make for dinner.

It goes something like this:  6 eggs,  1/2 bag of cheese tortellini, part of a head of broccoli, 1 stick of butter, some leftover chicken soup, a block of cream cheese, 4 slices of bacon, and  half a loaf of Italian bread.

IMG_7633

There’s also a strange correlation at work–the less time I have and the hungrier I am, the harder it is to process all this math.  Let’s see, if  I scramble the eggs and mix them with warm garlicy broccoli, and sprinkle toasted bread crumbs over the top, would that work?

Oh, wait–how about if I cook the tortellini, mix it with broccoli, and treat the mixture like macaroni salad with a mayonnaise dressing.   Top if off with a sprinkle of bacon?    Yes, now is there enough mayonnaise?   Do I have a lemon?   And what’s this?—one romaine heart hiding at the back of the crisper drawer!   Perfect, I’ll serve the salad on a bed of romaine.  Whew!  That was a tough one.

IMG_7634

I’m wishing you the same kind of success when this happens to you. 🙂

TORTELLINI AND BROCCOLI SALADIMG_7632

Yield:   Serves 4

Ingredients:

  • 8 0z. refrigerated cheese tortellini
  • 4 cups broccoli florets
  • 1/2 cup mayonnaise
  • 1 tablespoon balsamic vinegar
  • 2 teaspoons lemon juice
  • 3/4 teaspoon dried oregano
  • 1/4 teaspoon salt
  • Romaine lettuce or spring greens mix
  • 4 strips bacon, cooked and crumbled (vegetarians can omit bacon)

Directions:

1.  Cook tortellini according to package directions.  Add broccoli florets in the last 5 minutes of cooking time.   Drain, and rinse with cold water to stop cooking action.  Transfer to a mixing bowl.

2.  In a small bowl, mix together the dressing ingredients, i.e.. mayonnaise through salt.  Pour this over the tortellini and broccoli, and mix well to coat evenly.

3.  On a large platter or serving dish, arrange the salad greens,  Spoon the tortellini salad on top.   Sprinkle with crumbled bacon and serve.

IMG_7631

This salad is good slightly warm or at room temperature, or thoroughly chilled.  Try it on a warm day when you want a quick, cold meal.

IMG_7635


SOURCE:   Another of my own creations!

(Less is More) Blueberry Zucchini Bread

Blueberry Zucchini Bread

Blueberry Zucchini Bread

This is an  experiment in cutting back, using less, leaving out, and just generally leaving things alone.   You know that when I cook I try to cut back on ingredients that are unhealthy or not good for us, but when it comes to the “good” stuff, well…..that’s another story.  My philosophy is usually “more is better”.

IMG_7662

Today’s baking session went something like this.   I made Blueberry Zucchini Bread, without adding bacon, without lemon zest, without ginger, without crumb topping, without coconut, without chocolate chips.   Oh, the more I mention, the more I want to put into this luscious breakfast bread.   I keep telling myself,  “no, just let it be what it is”.  So, Ok, I added blueberries to zucchini bread, but you know, a green veggie is kind of boring, and blueberries are so pretty, and good for us, (antioxidants and all).  You’ll be so glad I did all this for you.   The resulting bread is just right for breakfast, not too sweet, yet moist with tons of flavor.

IMG_7663


Many zucchini bread recipes in my cookbooks seem to call for 1 cup or more of oil, and are also too sweet for my taste, so thinking that the moisture added to this recipe by the zucchini and blueberries would compensate, I reduced the amount of oil to 2/3 cup, and used only 1 cup of sugar instead of two cups as the original recipe called for.  Thus you have less is more.   Less of the unhealthy and unnecessary  ingredients and more of the healthy ingredients that are better for you.

Picky eaters at your house?   I’ll bet they’ll be scarfing down this one!

BLUEBERRY ZUCCHINI BREAD

Yield:   2 loaves,  8″ x 4″  see accompanying conversion list for other size loaves

Ingredients:IMG_7649

  • 3 cups flour  ( I used 1 1/2 cup white whole wheat, and 1 1/2 cups all purpose white flour)
  • 1 teaspoon salt
  • 1 teaspoon baking powder
  • 1/4 teaspoon baking soda
  • 1 tablespoon ground cinnamon
  • 3 eggs
  • 2/3  cup vegetable oil
  • 3 teaspoons vanilla extract
  • 1 cup sugar
  • 2 cups shredded zucchini
  • 1 pint fresh blueberries

Directions:

1.  Preheat oven to 350*F.   Lightly grease loaf pans.  See conversion list for pan sizes.

2.  In a large bowl, combine flour, salt, baking powder, baking soda and cinnamon.

Mix together the dry ingredients.

Mix together the dry ingredients.

In another bowl, beat together the eggs, oil, vanilla, and sugar.

3.  Stir flour mixture into egg mixture and combine until well blended.

Add dry ingredients to egg mixture.

Add dry ingredients to egg mixture.

Stir in zucchini, then gently fold in blueberries.

Stir in zucchini, then blueberries.  Batter will be thick.

Stir in zucchini, then blueberries. Batter will be thick.

Pour batter into prepared loaf pans.   Note:  if using small pans, set them on a baking sheet for stability in and out of the oven.

Pour batter into loaf pans set on a baking sheet.

Pour batter into loaf pans set on a baking sheet.

4.  Bake at 350*F. for 50-55 minutes or until a toothpick inserted into the center comes out clean.

5.  Cool in pans for about 20 minutes, then turn out onto a wire cooling rack to cool completely.  Wrap in foil to freeze if desired.

IMG_7658

These rise nice and high.

These rise nice and high.

Perfect for breakfast.

Perfect for breakfast.


Notes from my kitchen:   Many times quick breads can be baked in different sizes than the recipe calls for.  These are some alternate size pans for when a recipe is based on 2  1/2  – 3 cups of flour.  Keep in mind that baking times will vary, so use a cake tester, and rely on color and your sense of smell.

1  ( 9 x 5) loaf pan

12 muffins

2  ( 8 x 4) loaves

4  (6 x 3 x 2-inch) mini loaf pans

1 tube or decorative mold pan

IMG_7662


SOURCE:   I made some major changes to a basic recipe for zucchini bread that was in my files.