Kale and Caramelized Onion Grilled Cheese

Kale and Caramelized Onion Grilled Cheese.

Kale and Caramelized Onion Grilled Cheese.

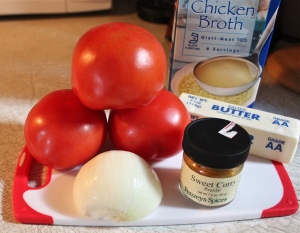
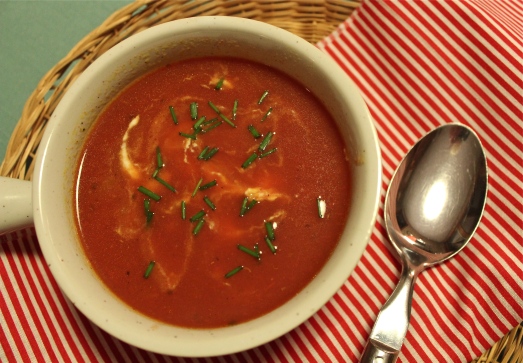
If you’re tired of the same old, same old for Meatless Mondays, this sandwich with its unusual combination of vegetables and cheese might just perk up your menu.  I served it with a hearty tomato soup, (read about it here.) last week when I wanted to have a meatless meal.

I had seen this sandwich recipe and earmarked it as one I wanted to try because of the inclusion of kale, with caramelized onions and two kinds of cheese.  I’ve only recently grown to like kale and I wasn’t sure I would like it in a sandwich, but surprisingly it did not announce itself too strongly.  The most prominent flavors were the onions and cheese, but the kale is quietly in the background, and you know you’re eating something healthy.  We thoroughly enjoyed this sandwich and it was a good compliment to the tomato soup.

IMG_5153

The two cheeses I used were Parmesan and smoked provolone.  The recipe calls for raclette, but it may not be widely available so a good substitute is Gruyère, or any cheese with good melting properties, like provolone.

KALE AND CARAMELIZED ONION GRILLED CHEESE

Yield:   Serves 4  ( 4 sandwiches)IMG_5141

Ingredients:

  • 4 medium sized kale leaves, stems removed
  • 2 teaspoons canola oil
  • 1 large or 2 medium red onions, cut into 1/2-inch thick slices
  • 1/4 teaspoon freshly ground pepper
  • 1/8 teaspoon kosher salt
  • 1 teaspoon red wine vinegar
  • 8 slices multi-grain bread
  • cooking spray
  • 1 ounce finely grated Parmesan cheese, divided ( about 1/4 cup)
  • 3.5 oz. shredded raclette cheese ( about 7/8 cup)  or other shredded or sliced cheese

1.  Bring a small pot of water to a boil;  add kale.  Remove from heat; let stand 4 minutes or until kale is bright green.  Drain;  Pat leaves dry with paper towel.

Dry kale after blanching.

Dry kale after blanching.

2.  Heat a skillet over medium-high heat.  Add oil; swirl to coat.  Add onion, pepper, and salt.  Cool 10 minutes or until onion is tender and browned, stirring frequently.  Remove from heat; stir in vinegar, tossing to coat.

Brown onions in a little oil.

Brown onions in a little oil.

3.  Heat a non-stick skillet or panini pan over medium heat.  Lightly coat 1 side of each bread slice with cooking spray.  Working with 2 slices at a time, arrange bread in pan, sprayed side down.  Sprinkle 1 tablespoon Parmesan on each slice.

First layer of cheese is grated Parmesan.

First layer of cheese is grated Parmesan.

Top with 1 kale leaf, one-fourth of onion mixture,

Layer on the kale and onions.

Layer on the kale and onions.

and about 1/4 cup shredded cheese, (or 1-2 slices of cheese).

Top with second type of cheese.

Top with second type of cheese.

Top with another slice of bread, sprayed side up.

4.  Toast sandwiches until browned and cheeses are melted, turning over once.  Repeat with remaining bread slices and remaining filling ingredients.

Toast till browned and cheeses are melted.

Toast till browned and cheeses are melted.

Melty, gooey cheese, savory onions, and kale on multi-grain bread.  YUM!

Melty, gooey cheese, savory onions, and kale on multi-grain bread. YUM!

SOURCE:  COOKING LIGHT  Magazine

Advertisement

Apple Oat Cinnamon Bread

Apple-Oat Cinnamon Bread

Apple-Oat Cinnamon Bread

Dear readers, I have a confession to make.   I am a bread snob!  I am mildly ashamed to admit it, but it’s true.  I am a person who loves bread, but not white bread, only artisanal or whole grain breads will do. For me, white bread is boring, bland, Blah!  Therefore I either buy my bread at a good bakery, or make my own.  That is what led me to make this wonderful bread that contains apple, oats and cinnamon.

The cloudless blue sky and brisk air this week has made me think of the kids gone back to school, and getting lunches ready. When I was in grade school I always brought my lunch, carefully packed by my mother.  One of my favorites was her homemade raisin bread with peanut butter and jelly or cream cheese and cherries.  I considered myself lucky to be one of the “brown baggers”, not one of those kids who purchased weekly lunch tickets, which entitled them to “hot lunches”.  No sir, the sloppy joes, canned corn, tuna noodle casserole, applesauce , and jello were not for me.  I much preferred Mom’s carefully handcrafted sandwiches, or sometimes hot soup in a thermos bottle.

So now when September rolls around, I remember those days and long for home baked bread.  After a summer of grilled chicken and Caesar salads, it’s time for my comfort food,  the sandwich.

Apples and oats both team up happily with cinnamon, so why not put them all together in a soft, tasty loaf?  A touch of maple syrup sweetens the loaf, while walnuts add crunch.    A slice of this, toasted for breakfast is wonderful, and of course, sandwiched with peanut butter and jelly it can’t be beat.

APPLE OAT CINNAMON BREAD

YIELD:  16 – 18 slices

Ingredients:

  • 2 3/4 cups all-purpose flourIMG_5099
  • 2/3 cup rolled oats
  • 1 1/4 tsp. salt
  • 1  1/2 tsp. ground cinnamon
  • 2  1/2 tsp. instant yeast
  • 1/4 cup butter
  • 1/4 cup nonfat milk powder
  • 2 Tbsp. potato flour, (optional, for softer texture)
  • 3/4 cup lukewarm water
  • 1/4 cup maple syrup
  • 1 cup finely diced peeled apple (about 1 medium apple)
  • 1/2 cup chopped walnuts  (optional)

1.  In a large mixing bowl, or in the bucket of your bread machine, combine all of the ingredients, mixing and kneading to make a fairly smooth (though quite sticky), elastic dough.  I used my bread machine set to the “dough” cycle.  If you’re using a mixer, knead for about 7 minutes at medium speed;  the dough will never completely clear the sides of the bowl.

2.  Transfer the dough into a lightly greased bowl, cover it, and allow it to rise for 1 hour or until it’s quite puffy.

3.  After the first rise, gently deflate the dough, and shape it into a 9-inch log.  If using a bread machine, remove dough, deflate and shape as described.

After first rise form dough into a 9-inch log.

After first rise form dough into a 9-inch log.

Place dough into a lightly greased 9″ x 5″ loaf pan.  Cover the pan with lightly greased plastic wrap.  Allow the loaf to rise until it’s crested about 1 inch over the rim of the pan, about 1 hour.

Cover with greased plastic wrap and put in a warm place to raise again.

Cover with greased plastic wrap and put in a warm place to raise again.

What you see here is my loaf inside the microwave, on a heating pad set to “low”.  Close the door and keep it warm inside.  You’ll get a beautiful rise for all your yeast dough(s).

Mine rose really high!!

Mine rose really high!!

4.  Bake the bread in a preheated 350*F oven for 45 minutes, tenting with aluminum foil after about 20 minutes, to prevent over-browning.**  Remove bread from the oven when its internal temperature registers 190*F on an instant-read thermometer.  After about 5 minutes, turn it out of the pan onto a rack to cool.

**A work of caution here:  When you tent the bread with foil, be sure the top has baked enough to hold itself up, else the weight of the foil may cause the loaf to collapse.  You can see in my pictures that is what happened to mine.  Prior to putting it into the oven it had risen beautifully, but because the dough is “airy”, it had not baked enough to hold itself up before I covered it with the foil.    The excess dough rolled to the sides and down over the edges of the pan, giving the bread a “flat-top”.   A lesson learned!  It still tasted fabulous, though.

Everything about this bread is so good;  color, flavor, texture.

Everything about this bread is so good; color, flavor, texture. (Except the “flat top”.) 😀

SOURCE:   King Arthur Flour

Tomato Curry Soup

Fresh Tomato Curry Soup

Fresh Tomato Curry Soup

Here we are again, Theme Thursday, and the theme is still tomatoes.  Today I have a recipe for Tomato Soup with the added flavor of curry to give it a little zing.

The inspiration for this soup came in a brown paper bag,  a plain brown wrapper you might say, but there was nothing naughty inside.  No, I’m happy to tell you the bag was full of ripe tomatoes.  A friend, going away for a few days, picked all the ripe tomatoes from her garden, and brought them to me, knowing that I would make good use of them.  Such a good friend!  My creative juices started flowing and looking for recipes for tomatoes I found several for soup.  I liked something about this one, and something about that one, but not everything about any one of them.  So how did I choose which one to make?  I didn’t.  I made a merger, taking a little from here and a little from there,  and came up with this idea for a tomato soup.

Using a large onion chopped, I sautéed it in butter then added the curry powder, stirred it around for a minute or so to blend flavors, added the crushed tomatoes and chicken broth and let it simmer a while.  So simple, and yet so good.

I used 2 1/2  pounds of fresh tomatoes with skins removed, and seeds squeezed out, but the really nice thing is that you can use  canned crushed tomatoes ( 28 oz. can), and have this soup anytime you want it.  You don’t need to wait for tomato season to roll around.  I also used chicken broth, but, here too, you can make a substitution and use vegetable broth instead for a vegetarian/vegan soup.  Since I associate curry with Indian cookery, and sour cream is also widely used in Indian cookery, at serving time I swirled a little sour cream into each bowl of soup and sprinkled on chopped chives for garnish.

We enjoyed this soup totally, and along with it I made a pretty spectacular grilled cheese sandwich, using kale, caramelized onions and cheese.  Wow!!  Stop back next week when I’ll have that recipe ready for you.  For now, here’s the soup.

Rich, deep tomato flavor.  The curry is mild, but you can add more if you like.

Rich, deep tomato flavor. The curry is mild, but you can add more if you like.

TOMATO CURRY SOUP

Yield:   serves 6

Ingredients:

2 pounds tomatoes, onion, butter, chicken broth and curry seasoning.

2-3 pounds tomatoes, onion, butter, chicken broth and curry seasoning.

  • 1/2 cup  ( 1 medium) onion, chopped
  • 1/4 cup butter ( 1/2 stick)
  • 2 teaspoons curry powder ( more if you like)
  • 2 – 3  pounds fresh tomatoes, skinned and seeds squeezed out, ( or use 1  28 -oz. can crushed tomatoes)
  • 1 32-oz. container chicken stock or vegetable stock
  • 1/4 cup sour cream
  • chopped chives for garnish

1.  Melt butter in a large sauce pan.  Sauté onion in butter until transparent.  Add in curry powder, stirring over low heat for  1 – 2 minutes to blend flavors.

2.  Add tomatoes and chicken stock. Break up tomatoes with a wooden spoon as much as possible.   Bring to a boil, then reduce heat and simmer about 15 – 20 minutes.  You can smooth out the soup by pureeing in a blender or use an immersion blender.  Otherwise serve as is; it will be a little chunky.

3.  Ladle into serving bowls, swirl in 1 – 2 teaspoons sour cream.  Garnish with chopped chives.

If you like tomato soup, you will like this.

If you like tomato soup, you will like this.

Source:   a Carolyn Original

Gardener’s Ratatouille

Gardner's Ratatouille

Gardner’s Ratatouille

What could be better at this time of year than Ratatouille, a vegetable stew.  Using all the fresh vegetables that are so plentiful now, I made up a large pan of this dish.  We love it when I first make it, and we like it even better the second time around when the  flavor seems to get even better.

Extras can be slowly reheated very successfully, but it is actually quite good served cold.  We particularly enjoy folding the leftovers inside a croissant, for a light lunch.  If you wish you can turn this dish into a hearty meal by adding some protein such as grilled sausages during the final stage of cooking.

The ingredients listed provide a guideline;  you can change up the vegetables to suit your taste, or what’s available when you make it.  For instance I used yellow summer squash instead of zucchini.  A red pepper can take the place of a green pepper.  One thing you must do, if making this dish, is use lots of fresh herbs.  Unfortunately I didn’t have any fresh oregano, so I used dried, ( 1 teaspoon),  but I did use fresh basil and parsley.   Fresh herbs make a hugh difference in the taste.

Also, you know how eggplant can soak up a lot of oil, well this recipe only uses 2 teaspoons olive oil to sauté the onions, the rest of the moisture comes from the vegetables as they are cooked slowly while covered, and the eggplant takes on the flavors of the vegetables and herbs it is cooked with.  Also, be sure to cut all the vegetables the same size to ensure even cooking.

GARDENER’S RATATOUILLE

Yield:  6 servings

Ingredients:

  • 2 teaspoons olive oil

    Beautiful Fresh Vegetables

    Beautiful Fresh Vegetables

  • 1 cup chopped onion
  • 3 cups chopped plum tomato ( about 1 pound, or 3 tomatoes)
  • 2 cups chopped peeled eggplant (aubergine)
  • 1  1/2 cups chopped zucchini
  • 1 cup chopped green pepper
  • 1 garlic clove, minced
  • 1 Tablespoon chopped fresh oregano
  • 1 Tablespoon chopped fresh basil
  • 1 Tablespoon chopped fresh parsley
  • 1/2 teaspoon salt
  • 1/4 teaspoon black pepper

1.   Heat oil in a large skillet over medium heat.  Add onion;  sauté 3 minutes or until tender, stirring frequently.

Saute onions with peppers.

Saute onions, then add tomatoes

Add tomato, eggplant, pepper, squash, and garlic.  Cover, reduce heat, and simmer slowly about 30 minutes, stirring occasionally.

Add in all the remaining vegetables.

Add in all the remaining vegetables.

2.  When vegetables are tender, stir in oregano and remaining ingredients;  cook, uncovered 5 minutes or until most of the liquid evaporates.

Garnish with chopped parsley before serving.

Garnish with chopped parsley before serving.

IMG_4978

Serving size:  3/4 cup.   Calories, 91,  Fat, 3 g,  Protein, 2.8g., Carb 16g.. Fiber  4.6 g.,  Sodium 308 mg.

SOURCE:  Cooking Light

Magic Pumpkin Bars

Magic Pumpkin Bars

Magic Pumpkin Bars

It seems now that Fall weather has set in recipes featuring pumpkin in some form or other are flooding the air-waves, web and periodicals.  Well, not to be left out, I wanted to get in on the fun of baking something with pumpkin.

You know what magic cookie bars are, right?  They’re also known as 7-layer bars.  But I like to call them magic cookie bars because 1) they don’t always have 7 layers, and 2)  the sweetened condensed milk performs the magic by tying all the layers together.

IMG_5071

Let’s start by reviewing all the layers in this version,  OK?

1. Gingersnap Crust.   I think that gingersnap and pumpkin are a match made in heaven.  They were made for each other.

2.  The chips.  White chocolate chips, preferred for color contrast and silky texture.  However, the day I made these bars I plunged into making them without checking and found I was out of white chips, so used chocolate instead.  But then, chocolate also goes well with pumpkin.  So use what ever kind you prefer or have on hand.

3.  Pecans, (or any nuts, really).  You gotta have them, especially in a fall dessert.

4.  Coconut.  This is totally optional, but it’s usually found in magic bars.

5.  Toffee Bits.  In my opinion, you can never have enough of these.  See #3.

6..  Pumpkin.  Come on……they are called pumpkin magic bars.

7.  Sweetened condensed milk.  The top and final layer;  the tie that binds it all together!   In this recipe it gets mixed with the pumpkin and some pumpkin pie spice and poured over the top.

Fudgy, chewy.  I love the way all the layers blend together.

Fudgy, chewy. I love the way all the layers blend together.

MAGIC PUMPKIN BARS

Yield:  12 -16 bars

Ingredients:

Get all the ingredients ready.

Get all the ingredients ready.

  • 25 gingersnaps
  • 2 Tbsp. sugar
  • 5 Tbsp. butter, melted
  • 1 cup white chocolate chips
  • 1/2 cup chopped pecans
  • 1/4 cup coconut
  • 1/4 cup toffee bits
  • 1/2 cup sweetened condensed milk
  • 1/4 cup pumpkin puree
  • 1/2 tsp. pumpkin pie spice

Instructions:

1.  Preheat oven to 350*F.  Line a 9 x 9-inch pan with foil and spray with cooking spray.

2  Grind gingersnaps to a fine crumb in a food processor.  Mix with sugar and melted butter.  Press into prepared pan.

3.  Sprinkle with white chocolate chips, nuts, coconut, and toffee bits over the top of the crust.

4.  Whisk pumpkin, pumpkin pie spice and condensed milk in a small bowl or measuring cup and pour over the top of the bars.

All layered up and ready for the oven.

All layered up and ready for the oven.

5.  Bake for 29 – 31 minutes, until edges have started to brown.  Cool completely before cutting.  Using edges of foil, lift completely from the pan to a cutting surface and using a bench knife or other sharp knife, cut into 12 or 16 squares.

Use the foil "handles" and lift the whole square out of the pan for ease in cutting.

Use the foil “handles” and lift the whole square out of the pan for ease in cutting.

Looking sooo good!

Looking sooo good!

These are surprisingly not too sweet.

These are surprisingly not too sweet.

SOURCE:  Crazy For Crust

Loaded Turkey Chili Baked Potato

Loaded Turkey Chili Baked Potato

Loaded Turkey Chili Baked Potato

This loaded baked potato is stuffed with lean turkey chili, low-fat shredded cheese and topped with sour cream and chopped scallions,  a quick and easy weeknight meal.

I love a dish that can be served several ways.  Using the left-over Slow-Cooker Turkey Chili, that I wrote about last week,  I baked some russet potatoes, (either in the oven or microwave), and spooned the hot chili over the top.  Then capped it all off with shredded Mexican Blend cheese, low fat sour cream,  some chopped scallions.   It was ready in a very short time and my husband loved it.

IMG_5048

Last week in my recipe for au gratin potatoes, I discussed the health values of potatoes.  The same holds true for this meal plus the added value of vegetables in the chili and lean protein in the turkey.  How can you go wrong when there are so many good reasons to eat a meal like this one, and it tastes satisfying and delicious too.

LOADED TURKEY CHILI BAKED POTATOIMG_5049

Yield:   4 servings

Ingredients:

  • 4 russet potatoes, about 5 -6 ounces each
  • 2 cups Slow-cooker Turkey Chili
  • 1 cup reduced fat shredded cheese
  • 2 Tablespoons chopped scallions or chives
  • reduced fat sour cream or Greek yogurt for topping

Directions:

1.  Wash and dry potatoes.  Poke holes in them with a fork, then cook in the microwave using the baked potato setting until potatoes are soft and cooked through (about 8 – 10 minutes on HIGH ), or bake in conventional oven for 45 min.- 1 hour at 400*F.

2.  Split open the potato in half, lengthwise, and press the sides to open the top.  Spoon on 1/4 cup shredded cheese and 1/2 cup hot chili.  Then add sour cream and chopped scallions or chives.   Enjoy!

IMG_5051

Shrimp and Broccoli Stir-Fry

Shrimp and broccoli stir-fry.

Shrimp and broccoli stir-fry.

I really like to make stir-fries for several reasons:  they’re quick to cook, and they can be very nutritious with all the vegetables  you can add in to them.  Also they are a way to use up small amounts of ingredients you may have on hand, and you can vary the protein component every time you make it.

This week I made a stir-fry of predominantly broccoli and shrimp which are a popular duo.  But I also added scallions and carrots, all in a soy sauce base to round out this low-fat recipe.  Served over brown rice, it was quick, colorful, nutritious, and delicious, not to mention economical.   You can’t ask for better than that,  in my opinion.

STIR-FRIED SHRIMP AND BROCCOLI

Yield:  4 servings

Ingredients:

Not many ingredients.

Not many ingredients.

  • 1 pound fresh or frozen medium shrimp, peeled and deveined
  • 1/3 cup water
  • 1/4 cup soy low-sodium soy sauce
  • 2 Tbsp. rice vinegar or 1 Tbsp. cider vinegar
  • 1 Tbsp. cornstarch
  • 1  tsp. sugar, or 1 tsp. honey
  • 1 Tbsp. cooking oil
  • 2 cloves garlic, minced
  • 2 cups broccoli florets
  • 1 cup thinly bias-sliced carrot
  • 1/3 cup sliced scallions
  • 2 cups hot cooked rice, preferably, brown rice
  • 1/4 cup cashews or sliced almonds, optional

Directions:

1.  Thaw shrimp if frozen.  Peel and devein shrimp  Pat dry with paper towels.  Set aside.

2.  In a small bowl combine water, soy sauce, vinegar, cornstarch, and sugar; set aside

3.  Heat oil in a wok or a 12-inch skillet over medium-high heat.  Cook and stir garlic in hot oil for 15 seconds.  Add broccoli, carrot and scallions.  Cook and stir for 3 minutes.  Remove vegetables  from pan with a slotted spoon.

Lightly cook the broccoli and carrots and set aside.

Lightly cook the broccoli and carrots and set aside.

4.  Stir soy sauce mixture.  Add to skillet; cook and stir until slightly thickened and bubbly.  Add shrimp; cook about 3 minutes or until shrimp are opaque.

Precook the shrimp and scallions and set aside.

Precook the shrimp and scallions and set aside.

Return vegetables to skillet; heat through.

Add everything back into the skillet or wok.

Add everything back into the skillet or wok.

Serve with rice and sprinkle with cashews or almonds, if using.

IMG_4791

Serve over brown rice and enjoy!

Serve over brown rice and enjoy!

Fresh Herbed Heirloom Tomatoes with Goat Cheese Crostini

Heirloom Tomato Salad with Goat Cheese Crostini

Heirloom Tomato Salad with Goat Cheese Crostini

Today’s post features tomatoes used as a salad.  Everyone it seems is familiar with Caprese Salad, that includes mozzarella cheese and basil along with the tomatoes, but this one depends on the tomatoes alone to carry the responsibility for the whole salad. Fresh tomatoes are dressed with a flavorful drizzle of lemon and herbs, and served with toasted baguette (crostini) spread with goat cheese.    This is so good, I can’t wait to make it again, and again while fresh tomatoes are still available.

IMG_4999

Please try to use heirloom tomatoes, in varied colors if possible, for the most beautiful presentation.  Of course, any fresh tomatoes will do nicely, but I really like the colors you get in heirlooms.  This recipe certainly illustrates the phrase, “less is more”, because the simple lemon-herb dressing perfectly enhances the sweetness of the tomatoes, and that would be enough.  But don’t stop there;  make the crostini because the crunch of toasted baguette and the smooth tanginess of goat cheese is a perfect companion to the tomatoes.    In my version, seen here, I used herb-seasoned goat cheese.

IMG_5002

I think this would make a light, appetizing and different appetizer, and If I were to serve it in that way, I would dice the tomatoes instead of slicing them, and serve them in a small glass to be eaten with a small spoon, with the crostini on the side.

HERBED HEIRLOOM TOMATOES WITH GOAT CHEESE CROSTINI

Yield:  4 servings

Ingredients:

Heirloom tomatoes in many sizes and colors.

Heirloom tomatoes in many sizes and colors.

  • 1/4 cup chopped fresh basil
  • 1/4 cup chopped fresh parsley
  • 2 Tbsp.  water
  • 2 Tbsp. fresh lemon juice
  • 1 tsp. extra virgin olive oil
  • 8  (1/4-inch-thick) slices diagonally cut French bread baguette
  • 4 tsp. goat cheese, divided ( used goat cheese with herbs if possible)
  • 20  (1/4-inch-thick) slices tomato
  • 1/2 tsp. kosher salt, divided
  • 1/2 tsp. freshly ground black pepper, divided

1.  Preheat oven to 350*F.

2.  Place the first 5 ingredients in a blender; process until smooth.

IMG_4996

3.  Place the baguette slices in a single layer on a baking sheet.  Bake at 350*F for 7 minutes or until crisp.  Spread 1/2 teaspoon goat cheese over each slice.

4.  Divide tomatoes evenly among 4 salad plates.  Drizzle each serving with 1 Tablespoon herbed oil.  Sprinkle each with a little salt and pepper.  Garnish each plate with 2 crostini.

In my rendition of this delightful salad, I served the whole salad on a large platter, so all the colors of the tomatoes would be seen.

IMG_4998

I just love this,  it’s so pretty; almost too pretty to eat!

SOURCE:   Cooking Light

Slow-Cooker Turkey Chili

Slow Cooker Turkey Chili

Slow Cooker Turkey Chili

This morning was very chilly for mid-September,  and the prediction is for a cooler than average day.  So right away I am thinking about making chili in the slow cooker.  I’m always amazed at how quickly I adapt to the next season.  Even though I’m not ready to give up all that summer has to offer,  one cool morning, and I’m looking for a sweater or jacket and thinking about chili.  Go figure!

I do  know that there’s nothing quite so enticing than walking into the kitchen and taking in the tantalizing aroma of onions, garlic, and chili powder from a big pot of chili bubbling on the stove or in the crock pot.  Serving up steaming bowls of chili with all the fixings is fun and warming in the fall especially if you’ve been outdoors at a football game or other event in cool weather.

If you have ever worried that chili isn’t good for you,  stop worrying now.  There are a number of tricks you can do to keep it healthy but still hearty.   First, start with a lean meat, like chicken, turkey or lean beef;  second add at least 3 cups of fresh vegetables to boost fiber;  and third, be selective in your toppings, keeping to low-fat cheese and  sour cream,  good-fat avocado, and plenty of fresh options like scallions, radishes, jalapeños, onion, and cilantro.

IMG_5034

This recipe for turkey chili made in the crock pot incorporates all the “tricks” mentioned above.  It’s a meal we really enjoy and I like the simplicity of starting it in the morning and having a meal ready to put on the table except for cutting up a few garnishes at the last minute.

SLOW-COOKER TURKEY CHILI

Yield:   4 – 6 servings

Ingredients:

  • 1  1/4 pound lean ground turkeyIMG_5029
  • 1 large onion, chopped
  • 1 clove garlic, minced
  • 1 ( 1.25-oz. ) envelope chili seasoning mix
  • 1 cup chicken broth
  • 1 cup fresh corn kernels
  • 1 red or green bell pepper, chopped ( i omitted this)
  • 1 ( 28-oz ) can crushed tomatoes, or fresh tomatoes, in season
  • 1 ( 15-oz. ) can black beans, drained and rinsed
  • 1 ( 4-oz. ) can tomato sauce
  • 1/2 tsp. salt
  • Toppings to include any of: shredded cheddar cheese, sour cream, finely chopped red onion, sliced jalapeños, radishes, or scallions

1.  Cook turkey in a large skillet over medium-high heat, stirring often with wooden spoon to crumble turkey.

Cooked and crumbled turkey with seasonings added.

Cooked and crumbled turkey with seasonings added.

Add chopped onions and garlic, cooking till softened.  Add contents of seasoning envelope and chicken broth.  Cook and stir about 2 minutes.

IMG_5032

2.  Spoon mixture into a 5 1/2 quart slow cooker;  stir in corn, and next 5 ingredients until well blended.

Everything mixed together in the crock pot.

Everything mixed together in the crock pot.

Cover and cook on LOW for 6 hours.   Serve with desired toppings.

Hearty, warming, just right on a cool day.

Hearty, warming, just right on a cool day.

SOURCE:  Southern Living Magazine

Sunshine Peach Muffins

Sunshine Peach Muffins

Sunshine Peach Muffins

Looking for something not too sweet to have with morning coffee, I came upon this recipe that features fresh peaches.  Since native peaches are still available in my area of the country, and I’m loving them used in so many different ways,  I decided to give this recipe a trial run.  The recipe’s notes state that there is ” a blast of peach in every bite of these tasty muffins”.

With my mouth watering at the thought of having one of these muffins warm from the oven with a dab of butter melting into it, I got together all the ingredients and mixed them up rather quickly.  They are easy and quick to mix up.  Into the oven they went and in 18 minutes out they came, golden brown, just as the recipe predicted.  The aroma as they baked was extremely promising that they would be delicious.  The recipe states a yield of 12 muffins, but I got only 10, filling each muffin cup 3/4’s full.  That’s OK with me, I’d rather get fewer that are large, than 12 that are small.IMG_5013

Usually when I bake something new, I let Mr. D. taste it first and I kind of watch his reaction, before I have my first bite.  Most times he’s generous with praise and comments on how good it is.  This time there was no reaction,  so I was very surprised.  I tried a bite of my muffin;  I, too, had little reaction.  We just looked at each other waiting for the other one to speak.  Why, you’re asking?  Well. they don’t taste like peach, even though you can see pieces of peach scattered throughout;  they are not sweet,  with only 2 teaspoons of honey in the whole batter I shouldn’t have expected them to be.  On the whole I would say they are rather bland.  What they are, is very light, and non filling.  I could easily eat two for breakfast and not feel full.  They are healthy with the use of whole wheat flour, honey, fresh fruit with the skin left on and low-fat milk.   These would be good for someone on a sugar-restricted diet.IMG_5015

I would say that these muffins did not live up to their promise, and on a scale of 1 – 5,  I rate them at a 3.  I leave this recipe up to you to try or not, depending on your taste and  what you are looking for.   As  cooks we all know that not everything you make is wildly successful.  For me, this is one of those recipes.

SUNSHINE PEACH MUFFINS

Yield:  12 muffins   I got 10

Ingredients:

These are the ingredients .

These are the ingredients .

  • 1 cup all-purpose flour
  • 3/4 cup whole-wheat flour ( I used white whole wheat)
  • 1  1/2 tsp. baking powder
  • 1/2 tsp. baking soda
  • 1/2 tsp. cinnamon
  • 1/4 tsp. nutmeg
  • 1/4 tsp. salt
  • 2 fresh, very ripe peaches, pit removed, skin left on
  • 2 tsp. honey
  • 1 egg, lightly beaten
  • 1/2 cup  1 % milk
  • 1/4 cup vegetable oil

Instructions:

1.  Preheat oven to 400 *F.   Lightly grease 12-cup muffin pan or line with paper bake cups; set aside.

2.  In a large bowl combine flour, baking powder, baking soda, cinnamon, nutmeg, and salt.   Make a well in the center of the flour mixture;  set aside.

Mix dry ingredients, and make a well in the center.

Mix dry ingredients, and make a well in the center.

3.  In another bowl mash peaches well with honey,

Mash the peaches with the honey.

Mash the peaches with the honey.

then stir in egg, milk, and oil.  Add wet mixture all at once to flour mixture.  Stir until moistened.  Batter will be lumpy.

All the "wet" ingredients mixed together.

All the “wet” ingredients mixed together.

4.  Spoon batter into prepared muffin cups, filling each about three-fourths full.

5.  Bake 18 – 20 minutes or until golden.

IMG_5015

6.  Cool in muffin cups on a wire rack for 5 minutes.  Remove from muffin cups.  Cool slightly before serving.

IMG_5012

SOURCE:  relish.com