Stuffed Cabbage Casserole

Stuffed Cabbage Casserole

Stuffed Cabbage Casserole

Several months ago, my husband’s office staff got together for a pot-luck luncheon.  One of the dishes that was prepared for the luncheon was this one, that Mr. D. described as “layered like lasagna without the noodles”, and he declared that it was fabulous.  I suggested that he ask for the recipe which he did.  I want to thank Maggie for first making the dish and also Cheryl for sharing the link to the web site where I got the recipe.

This dish is basically a deconstructed version of stuffed cabbage, so if you love stuffed cabbage, you’re going to love this dish.  The idea is to layer shredded cabbage with ground beef, brown rice and a tomato sauce, then bake and finish off with melted cheese on top.

Just as good the second time we had it .

Just as good the second time we had it .

I had the remains of a large head of cabbage and wanted to do something with it besides make coleslaw, so remembering about this casserole dish I went looking for it.   Since the web site is called “Skinnytaste.com“, I felt pretty sure it would fit into my new diet routine.  Actually, I was browsing the web looking for a skinny person to eat, but this is what I came up with instead.  It will have to do!  🙂

To make a long story short, it turned out great.  Even though stuffed cabbage doesn’t usually contain cheese,  the addition of a cheese topping here seems like the finishing touch to a very delicious casserole.  A full recipe is meant to make 10 servings.  If this is too much you can make half the recipe, or make and freeze some.  It can be reheated for another time.  As you can see here I portioned the left-overs into individual casseroles for ease in reheating, covering with foil and reheating them in the oven.

STUFFED CABBAGE CASSEROLE

Servings:   about 10

Ingredients

Cabbage, onion, ground beef, tomato sauce, and seasonings.

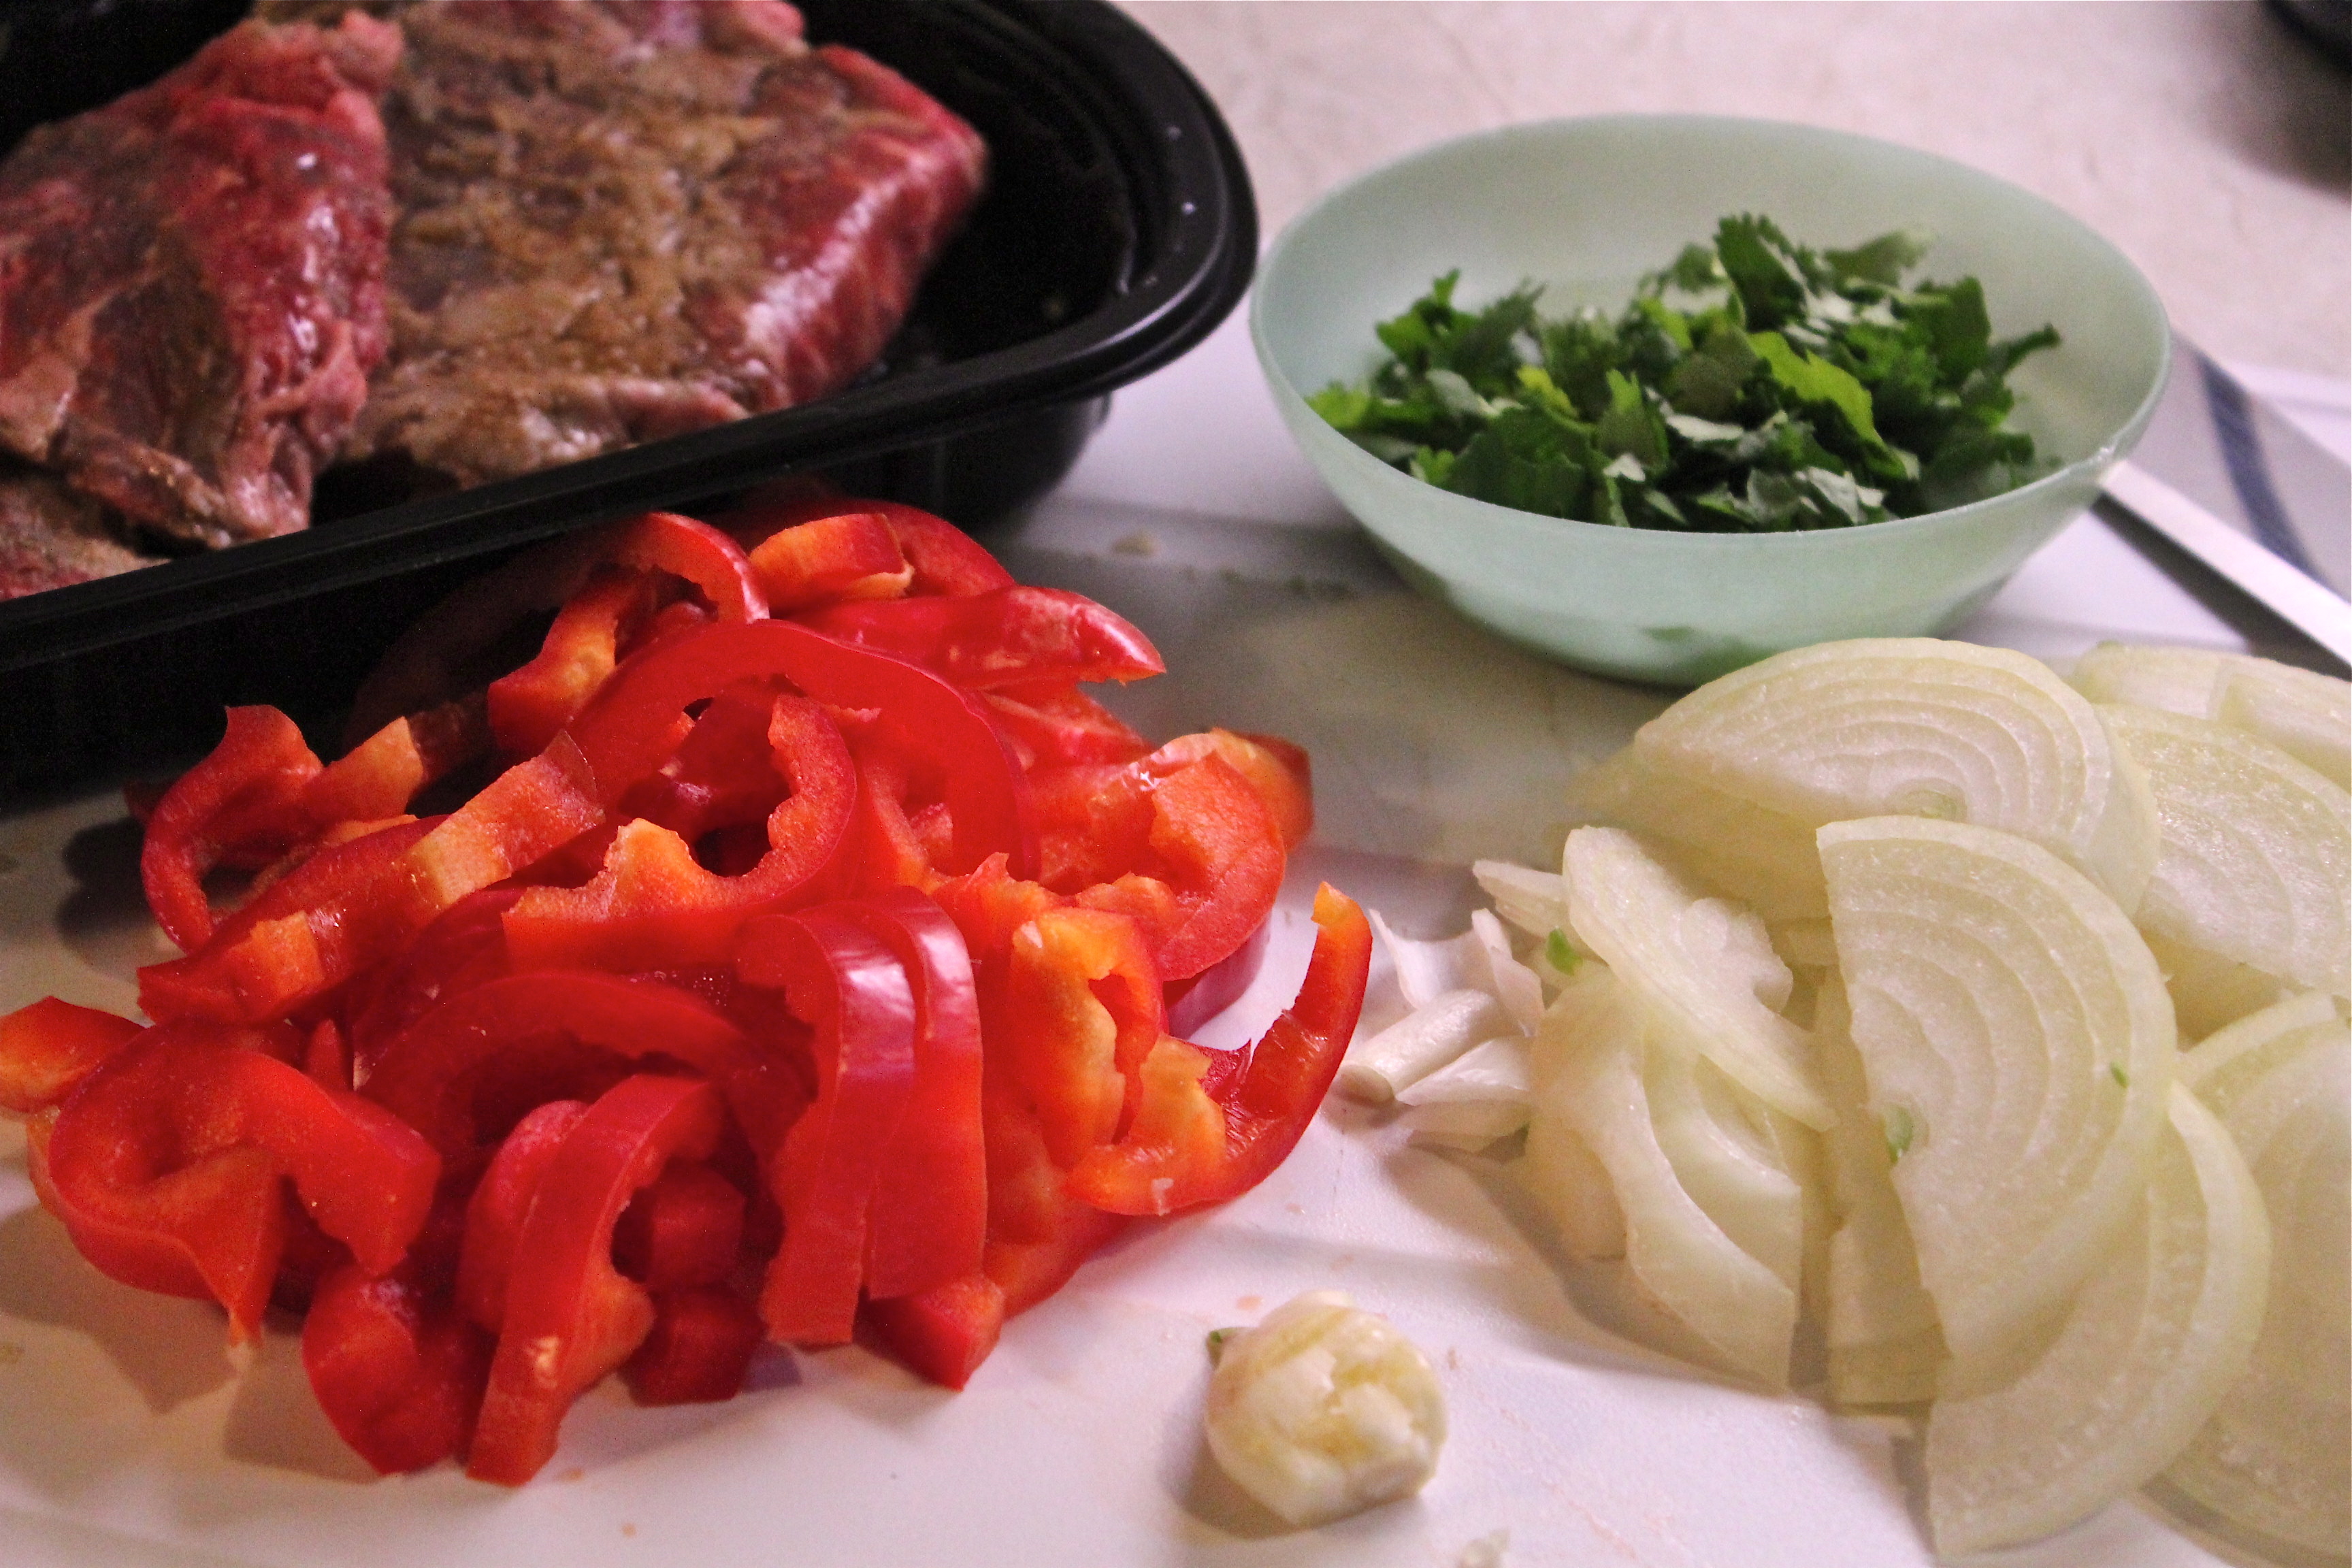
Cabbage, onion, ground beef, rice, garlic, and seasonings.

  • 2 tsp. olive oil, divided
  • 1 lb. 95% lean ground beef
  • 1 large onion, chopped
  • 1 Tbsp. finely minced garlic
  • 1 tsp.sweet Hungarian Paprika
  • 1/2 tsp. dried thyme
  • salt and ground pepper to taste
  • 1 large head cabbage, coarsely chopped
  • 1 can ( 14.5 oz.) petite dice tomatoes with juice
  • 1 can ( 15 oz ) tomato sauce
  • 1/4 cup water
  • 2 cups cooked brown rice
  • 2 cups low-fat mozzarella cheese

Instructions

1.  Preheat oven to 350*F.   Spray a large casserole dish with non-stick spray.   My dish was 13″ X 9″.

2.  Heat a large frying pan on medium heat.  Add the ground beef and cook until it’s browned and cooked through, breaking apart as it cooks.  Remove and set aside.

Browning the meat

Browning the meat

3.  In the same pan, add 1 tsp. olive oil, chopped onion and cook over medium heat until the onion is translucent and starting to brown, about 5 minutes. Add the minced garlic, thyme, and paprika and cook about 2 minutes more.

Cook onion and garlic with seasonings.

Cook onion and garlic with seasonings.

Then add the diced tomatoes and juice,plus the tomato sauce.

Add the tomatoes and sauce.

Add the tomatoes and sauce.

Then add the ground beef and water to the pan.  Simmer until it’s hot and slightly thickened,  about 15 minutes.

Add the browned beef and water to the pan.

Add the browned beef and water to the pan.

4.  While it simmers, core and cup up cabbage.  Heat remaining olive oil in another large frying pan or dutch oven;  add the cabbage and cook over medium heat until the cabbage is wilted and about half cooked, turning it over several times so it all wilts and cooks.  Season with salt and pepper.

Saute the cabbage until wilted.

Saute the cabbage until wilted.

5.  When the meat and tomato mixture has cooked and thickened a bit, stir in the 2 cups cooked rice and gently combine.

Add the cooked rice.

Add the cooked rice.

6.  To prepare casserole,  layer half the cabbage, half the meat mixture, remaining cabbage, and remaining meat mixture.

Layering it up.

Layering it up.

Cover tightly with foil and bake 40 minutes, or until the mixture is just starting to bubble on the edges.

Cover with foil and bake.

Cover with foil and bake.

7.  Remove foil and sprinkle on cheese.  Bake uncovered an additional 15 – 20 minutes, until cheese is melted and starting to brown slightly.   Serve hot.

Cover with grated cheese and bake until melted .

Cover with grated cheese and bake until melted .

This freezes well if you have left-overs.  To reheat, thaw overnight in the refrigerator and then either microwave until hot or heat in the oven in a baking dish covered with foil.

SOURCE:   Skinnytaste.com

Advertisement

I Need to Eat a Skinny Person

If the saying  “you are what you eat”, is true,  then I need to eat a skinny person in order to become one.

collage (black)

Since beginning to write this blog I have wanted to provide my readers with a broad variety of recipes and that has included baked goods and desserts.  Sweets are treats that I used to make only for special occasions and holidays.  I made scones now and then or a sweet bread like banana or zucchini bread. But over the past year I’ve used any reason to bake up bars, cookies, and desserts. Once I get turned on to sugar, and carbs in general, I become a carbohydrate addict wanting more and more. I have to get this under control  in order to lose a few pounds.  This will be difficult because I’m a petite person and not really overweight,  just a little curvy in the wrong places.

heat 185 (2)

The amount of dancing that I do no longer provides the extra calorie burn to keep off the weight like it used to.  The body adjusts to the exercise you do, and soon the exercise that once worked doesn’t do it anymore.  So what is the answer to this problem?   Eat less and exercise more!   Gee, haven’t I heard that somewhere before?  But that is the only thing that works.   So, folks, I plan to cut back on carbohydrates, particularly sugar, potatoes, pasta and breads.  Therefore you will be seeing less of those foods here for a while anyway.  The reason I am starting this effort to lose a few pounds is because I’ve made a commitment to compete in a regional dance competition in August.

heat 221 (2)

In the competition world often times the judges’ decisions comes down to how fast a dancer’s spins are, how clean and precise are her pivots, how fast does she move from here to there?  NOT how correctly does she know her steps/footwork.  Does this surprise you?  Its true,  and having a few extra pounds can slow you down and effect your overall performance.  Not to mention,  I want my gowns to fit properly!!!!

heat 282

It seems then, that the two things I love to do;  cooking and writing this blog, and dancing, are colliding with each other.   For a while at least the dancing side of me is going to be getting more attention as I try to get back in shape.  However, the cooking and blogging will continue with hopefully less  “calorific”  but still blog-worthy foods.   (I think that was a new word I just made up.)

I’ll keep you posted on how it’s going.  Wish me luck!  Included here for your interest are a few pictures of me at previous dance competitions.

Relaxing at the banquet after its all over.

Relaxing at the banquet after its all over.

Spice-Rubbed Steak with Sauteed Mushrooms

Spice-rubbed steak with sauteed mushrooms.

Spice-rubbed steak with sauteed mushrooms.

What a good spice rub will do for an ordinary cut of meat is amazing.  In this case I use a flank steak, mainly because there is no fat or waste to it, and a 1-pound steak can feed four people, or two with a good amount left over for a salad or lunch.  The spice rub uses readily available seasonings, ones you probably have in your pantry.  That plus the mushrooms elevates this dish to fabulous.

IMG_3406

When I make the spice rub, I like to mix up a double or triple (or quadruple) batch to keep on hand because it is good with chicken and firm fish, too. It calls for ancho chile powder, made from poblano peppers, that have a mild, sweet spicy flavor.  This chile powder can be found in the spice section of most large supermarkets.  Other mildly spicy chile powder can be used in its place if you prefer.   Store the mix in a jar or zip-lock baggie in your spice cabinet for an instant dinner solution.

Any type of mushrooms can be used in this recipe, but a combination with some wild mushrooms in the mix really improves the flavor. Also, if cooking with wine is not an option for you, then substitute beef broth for the Madeira in the recipe.

SPICE-RUBBED STEAK WITH SAUTEED MUSHROOMS

SERVINGS:   about 4

INGREDIENTS

For the rub:

Sliced mushrooms. shallots, and beef broth.

Sliced mushrooms. shallots, garlic and beef broth.

  • 2 teaspoons ancho chile powder
  • 1 teaspoon ground cumin
  • 1 teaspoon packed brown sugar
  • 1/2 teaspoon salt
  • 1/4 teaspoon ground pepper

Mix together all the above in a small bowl.

Remaining ingredients

  • 1 pound flank steak, trimmed
  • 5 teaspoons extra virgin olive oil
  • 1/2 cup chopped shallots
  • 5 cloves garlic, minced
  • 1 pound assorted mushrooms, trimmed and sliced
  • 1/3 cup Madeira or dry sherry
  • 1/3 cup low-sodium beef broth
  • 2 Tablespoons chopped fresh parsley

1.  Coat a broiler pan with cooking spray.   Rub the spice mixture evenly over both sides of steak and place on the prepared pan;  let stand at room temperature for about 15 minutes.

Apply spice rub to both sides of steak.

Apply spice rub to both sides of steak.

2.  Meanwhile, position oven rack 3 – 4 inches below broiler, preheat broiler to high.     Heat oil in a large skillet over medium-high heat.  Add the shallots and garlic and cook, stirring occasionally, until starting to soften, about 1 minute.  Stir in mushrooms and 1/4 teaspoon salt and cook stirring occasionally, until the mushrooms release their liquid and begin to brown,  8 – 10 minutes.  Pour in Madeira ( or sherry) and cook, stirring until absorbed, about 1 minute.  Add broth and cook until almost absorbed 2 – 3 minutes.  Remove from the heat and stir in parsley and 1/8 teaspoon ground pepper;  cover and keep warm.

3.  Broil the steak 4 to 6 minutes per side for medium.***  Transfer to a clean cutting board and let rest for 5 minutes.  Thinly slice the steak against the grain and serve with the mushrooms.

Slice steak and serve with mushrooms.

Slice steak and serve with mushrooms.

***An alternate cooking method is on an outdoor grill.  Cook to your desired level of doneness.  If you have a side burner, you can cook the mushrooms on the grill also.   YUM!   We love it this way.

A green vegetable rounds out this meal nicely.

A green vegetable rounds out this meal nicely.

SOURCE:   Eating Well Magazine,  February, 2013

Italian Sausage Soup with Tortellini

Italian Sausage and Tortellini Soup.

Italian Sausage and Tortellini Soup.

I would love to travel one day to Italy and totally absorb the culture, and especially the foods.  My preference would be to visit the small towns and villages and experience life as the Italians do. I could imagine stopping for lunch at a trottoria, sitting outside at a small table on a terrace and enjoying a special soup with some wonderful crusty bread and cheese.   This is the soup I could imagine having in that kind of setting.

For anyone not familiar with the pasta called tortellini, they are crescent shaped and filled with meat or cheese.  You can purchase them in most large supermarkets as fresh pasta in a refrigerated case or dried and shelf stable in the pasta isle.  I like to keep a package of the dried variety on hand to throw into soups or casseroles, because they provide interest and extra substance, just as they do in this soup.

A hearty bowl of goodness.

A hearty bowl of goodness.

The book I took this recipe from has been around for a long time;  from Pillsbury, ” Hearty Soups and Breads Cookbook”,  1985.  The first time I made this soup we fell in love with it, and it has been in my repertoire of well-loved recipes ever since.  It is very hearty with lots of vegetables and the blend of seasonings makes a well-flavored soup.  If you like a spicy soup, use a hot Italian sausage, instead of the mild variety.  The recipe makes a large amount, about 8 servings, but it freezes well, so its good to make and freeze some for a later meal.

ITALIAN SAUSAGE SOUP WITH TORTELLINI

YIELD:  8 SERVINGS

INGREDIENT LIST:

  • 1 lb. Italian sausage, hot or mild

    All the ingredients.

    All the ingredients.

  • 1 cup coarsely chopped onions
  • 2 garlic cloves, sliced
  • 5 cups beef broth
  • 1/2 cup water
  • 1/2 cup dry red wine or water
  • 1  14.5 oz. can diced tomatoes
  • 8  oz. can tomato sauce
  • 2 medium carrots, sliced
  • 1/2 teaspoon dried basil
  • 1/2 teaspoon dried oregano
  • 1  medium zucchini, sliced
  • 8  oz. frozen, fresh, or dried, tortellini (or very small ravioli)
  • 3 Tablespoons chopped fresh parsley.
  • Grated Parmesan cheese for serving

1.  If sausage comes in casing,  remove casing.  In 5-quart Dutch oven, brown sausage.  Remove sausage from Dutch oven; drain, reserving 1 Tablespoon drippings in the Dutch oven.

Brown sausage and remove from pan.

Brown sausage and remove from pan.

2.  Saute onions and garlic in reserved drippings until onion is tender.

Saute the onions, till soft.

Saute the onions, till soft.

Add beef broth, water, wine, tomatoes, carrots, basil, oregano, tomato sauce and sausage.  Bring to a boil.  Reduce heat; simmer with lid tipped,  30 minutes.

Add the liquids, vegetables and seasonings.

Add the liquids, vegetables and seasonings.

3.  Stir in zucchini, tortellini and parsley.  Simmer another 35 – 40 minutes until tortellini are tender.

Add zucchini and tortellini.

Add zucchini and tortellini.

4.  To serve, sprinkle with Parmesan cheese.

Serve with grated Parmesan cheese.

Serve with grated Parmesan cheese.

Make this soup.  You'll be glad you did.

Make this soup. You’ll be glad you did.

SOURCE:    Hearty Soups and Breads,   Pillsbury, 1985

When Skies Turn Gray—–

Grilled Turkey Burgers with Coleslaw and Pickles.

Grilled Turkey Burgers with Coleslaw and Pickles.

We’ve had a couple of days with temperatures in the 70’s….nice warm spring days.  From my kitchen window I can see our gas grille, with its cover still over it, on the back deck,  just waiting to be fired up.   My mouth was watering for a juicy burger, so I decided today was the day for our first cookout of the season.

I frequently use ground turkey to make burgers and I had some on hand so that was I used to make the recipe that follows.  In fact the recipe suggests adding creamy coleslaw and pickles to really dress up the burgers.  I set to work shredding the cabbage for my Creamy Garlic Coleslaw which you can find the recipe for here, then I mixed up the burger mixture.  Instead of a bulky hamburg bun I planned to use Multi-Grain Sandwich Thins, since we are cutting back on carbohydrates (again, sigh), and I added some chopped apple to my burger mixture to help keep them juicy.

IMG_3798

As I finished forming the burgers, I looked out the window and noticed that the sun had disappeared, and in its place we now had black clouds rolling in.  You have probably guessed what happened next:  a thunderstorm with pouring down rain.  So much for my cookout!

But you know what I say?  “When the skies turn gray, grill anyway”.  So out came my grill pan and I was still able to make burgers that were grilled, juicy and yummy.  My husband said “you should write about these they are really good.  And so I am.  We topped ours with sliced tomato,  pickle slices, and coleslaw with a thin spread of mayonnaise on the roll.   Perfect in spite of the rain.

GRILLED TURKEY BURGERS

SERVINGS    4

  • 1  1/2 pounds lean ground turkey
  • 1/2 cup fresh soft breadcrumbs
  • 1/2 small onion minced, or chopped green onion
  • 1 Tablespoon dried parsley, or 2 Tablespoons chopped fresh parsley
  • 1 teaspoon dried basil
  • 1 tablespoon mayonnaise
  • 1 Tablespoon Dijon mustard
  • 1 Tablespoon Worcestershire sauce
  • 1 Tablespoon hot sauce
  • 1 teaspoon salt
  • 1/2 teaspoon ground pepper
  • 1/2 cup finely diced apple, optional
  • 4 whole wheat hamburger buns, toasted

Assorted toppings:   mustard or mayonnaise, tomato slices, sliced sandwich pickles, creamy coleslaw, thinly sliced apple.

1.  Combine all the above ingredients, except buns, and form into 4  (1-inch-thick) patties.  Do not over mix, and handle lightly or burgers will be mushy. With your finger make a depression in the center of each one.

Make a depression in the center of the burgers to keep them from puffing up.

Make a depression in the center of the burgers to keep them from puffing up.

This keeps them from puffing up, so they retain their shape better. Sprinkle with additional salt and pepper, and grill on a lightly oiled rack over medium-high heat 6 – 7 minutes on each side or until done.  Remove from grill, cover loosely and let rest about 5 minutes.

2.  Spread toasted buns with mustard or mayonnaise.  Top with tomato slices, burger, pickle slices and a spoonful of creamy coleslaw.

These were nicely seasoned and very moist.

These were nicely seasoned and very moist.

SOURCE:   Country Living Magazine

Apple, Cheese and Bacon Quesadillas

Apples, bacon and cheese quesadillas.  A lovely combination.

Apples, bacon and cheese quesadillas. A lovely combination.

Are you a recipe clipper?  I think that anyone who enjoys cooking is always looking for new recipes, and magazines are  good resources for recipes.  I count myself in that group of cooks who are  always “on the hunt”.  In fact I tear out so many recipes that I have a system for organizing them and deciding which ones are keepers and which ones don’t make the cut.

For anyone who might benefit from my system,  this is what I do:

1.  Read magazine and “dog-ear” pages with a recipe that interests me.

Fold over pages that have recipes that interest me.

Fold over pages that have recipes that interest me.

2.Before discarding the magazine, look again at those pages and decide if I want to try the recipe.  If yes, then I tear out the page, and it goes into a pile with other torn-out pages.

The pile of torn-out pages grows large.

The pile of torn-out pages grows large.

3.  When the pile gets precariously high, I designate an afternoon or three?, and go through them all.  If I’m still interested in any of the recipes I trim them more carefully, and then file in folders that are named in broad categories, like bars, cookies, desserts, soups, chicken, etc.

My file of files.

My file of files.

4.  When I want to make something new, or have ingredients on hand to use, I go to a specific folder to see what’s there that I might want to try out.

5.  Then I make the recipe to test it out.  If it meets my requirements such as did we like it,  was it straightforward and easy to prepare, have readily available ingredients, reasonable cost to make,  cooked in a reasonable time frame?  Then it gets mounted into a notebook as a “keeper”, that will enter my cycle of recipes; or become a go-to when I want to make something special.

I have several afternoon's work to do!

I have several afternoons’ work to do!

I have written all the above with tongue-in-cheek, as I can imagine you are thinking to yourself (or saying out loud even) “what, is she crazy?”   Well, yes. a little.  According to the Myers-Briggs Personality Assessment Test I am a pointy-head sequential in the grand scheme of things, and detailed organization is one of my traits.   Ha-ha-ha!    🙂

OK, so what does all this have to do with today’s recipe?  The story is this:  on Saturday, my husband went out on an errand, and before he left, he asked me what we would be having for lunch.  I replied that I didn’t know, because my supplies were pretty low, and we had eaten up all the leftovers.  But I reassured him  that “I’ll think of something”.  So while he was out I consulted my folder labeled ” Pizza and Sandwiches”, and in there found a recipe for Apple and Brie Quesadillas that I had been wanting to try.

The recipe called for a Granny Smith apple, Brie cheese and flour tortillas.  Now, I didn’t have any Brie to work with but I did have some cheddar, and some Monterey Jack.  So I improvised, using those cheeses,  a Rome apple instead of Granny Smith, and added some crumbled bacon to the mix to create my recipe for Apple, Cheese and Bacon Quesadillas.  When my husband came home he said, ” I see it didn’t take you long to think of something”.    They were very good, we liked them very much,  I’ll make them again.  End of Story!

Makes a satisfying light lunch.

Makes a satisfying light lunch.

Included here is the original recipe for Apple and Brie Quesadillas, and how I modified it.

APPLE, BRIE  (and BACON)  QUESADILLAS

SERVES   2   Adjust amounts accordingly for more servings.

  • 1  Granny Smith apple  (or other firm apple), thinly sliced
  • 4  teaspoons olive oil, divided
  • 4   8-inch flour tortillas  (I  used  2  10-inch tortillas)
  • 8 ounces Brie cheese, sliced, rind removed  ( I used a combination of grated cheddar, and Monterey Jack cheeses, about 1 cup )
  • 2 strips bacon, cooked and crumbled  (my addition)
  • 1 Tablespoon whole-grain mustard
  • 1 Tablespoon maple syrup

1.   Preheat a grill pan over medium-high heat.  Toss the apple slices with 2 teaspoons olive oil and cook, turning occasionally, until marked and tender, 3 to 4 minutes.

Spread apples on grill pan and cook till barely tender.

Spread apples on grill pan and cook till barely tender.

Try to get some nice grill marks on the apples.

Try to get some nice grill marks on the apples.

2.  Lay the tortillas on a cutting board.  Top each with half the apple, half the bacon, and half the cheese, placing the filling on only half of  each tortilla.  Then fold the tortillas in half to cover the filling.

Spread a layer of apples and bacon on half the tortilla.

Spread a layer of apples and bacon on half the tortilla.

Top with shredded cheeses.

Top with shredded cheeses.

3.  Heat the remaining 2 teaspoons olive oil in a large nonstick skillet over medium heat.  (I sprayed mine with olive oil spray and cooked them on the grill pan I used for the apples.)  Working in batches, cook the quesadillas until golden brown and the cheese melts, about 2 minutes per side.

4.   Meanwhile, mix the mustard and maple syrup in a small bowl.  Slice each quesadilla into wedges.  Drizzle with the maple-mustard syrup before serving.

Serve with a drizzle of maple syrup.

Serve with a drizzle of maple mustard syrup.

SOURCE:   modified from a recipe in Food Network Magazine,  April 2012

Grapefruit-Avocado Salsa

Grapefruit and avocado salsa.

Grapefruit and avocado salsa.

I love to make salsas.  They are so easy.  A salsa can really elevate an entree above the ordinary and help bring the flavors of a dish together.  Recently I cooked some flounder filets, prepared very simply by lightly dusting with a mixture of flour and cornmeal then pan frying in a little butter and olive oil.  A very ordinary way to quickly cook fish fillets.  But to go along with it, I made this salsa using grapefruit and avocado.

My original intention was to have fish tacos, that’s why I made the salsa.  As I finished making it, however, I tasted it, and WOW, my taste buds woke up and started to sing!…it was fabulous and I didn’t want it to get lost in a taco.  I just loved the way the citrus paired with the avocado.  So I served it as an accompaniment to the flounder, along with a vegetable and a salad.   I know I will be making this salsa again very soon,  I wanted to eat it by the bowlful!

GRAPEFRUIT-AVOCADO SALSA

Only a few ingredients needed for this salsa.

Only a few ingredients needed for this salsa.

YIELD:    Serves  4

  • 1 Ruby Red grapefruit, segmented and cut into 1-inch pieces
  • 1 avocado, diced
  • 2 Tablespoons diced red onion
  • 2 Tablespoons chopped fresh cilantro
  • 1/2 jalapeño, seeded and chopped
  • 1 Tablespoon fresh lime juice
  • coarse salt

To Make the Salsa:

Combine grapefruit, avocado, onion, cilantro, jalapeño , and lime juice in a medium bowl.  Season with salt and set aside.  That’s It!

A great accompaniment to a mild flavored fish fillet.

A great accompaniment to a mild flavored fish fillet.

SOURCE:   Martha Stewart’s  Whole Living

Pappardelle with Salmon and Leeks

Every country has its pasta dishes, and we here in the U.S. are fortunate in having an abundance of pasta varieties to incorporate into our cooking.  Pappardelle, native to Italy, is a type of pasta made from eggs and whole wheat flour, then cut into wide ribbons, so it provides a lot of substance and chew-factor.  It you are looking for a healthy pasta dish, you won’t go wrong with this one.

Pappardelle, with salmon and leeks.

Pappardelle, with salmon and leeks.

This dish makes good use of leeks,  a great spring vegetable, and salmon.  If leeks are not available where you live, you could substitute any mild flavored onion.  Another nice addition would be baby spinach that gets just wilted by the heat of the pasta.  When I eat this meal I feel that I’ve indulged my craving for pasta and treated myself to something especially healthful and nutritious.

PAPPARDELLE WITH SALMON AND LEEKS

YIELD:    Serves 6

INGREDIENTS

  • 3/4 lb. uncooked pappardelle pasta

    Pappardelle,  wide pasta ribbons.

    Pappardelle, wide pasta ribbons.

  • 3 Tablespoons extra virgin olive oil, divided
  • 2  large leeks, trimmed and thinly sliced
  • 2  teaspoons minced fresh savory, or 1 teaspoon minced fresh thyme
  • 3/4  teaspoon salt, divided
  • 1/4 cup dry white wine  (or chicken broth)
  • 1/2 cup unsalted chicken broth
  • 1 Tablespoon minced flat-leaf parsley
  • 1 teaspoon grated fresh lemon rind
  • 1  ( 1 lb. salmon fillet ), fresh or frozen
  • 1/4 teaspoon black pepper
  • 2 teaspoons unsalted butter

1.  Cook pasta according to package directions.  Drain pasta in a colander over a bowl, reserving 1/4 cup cooking liquid; keep pasta and cooking liquid warm.

2.  Heat 2 Tablespoons olive oil in a large saucepan over medium heat.  Add leeks, savory, and 1/2 teaspoon salt;  cook 15 minutes or until leeks are translucent, stirring occasionally.

Saute leeks in olive oil.

Saute leeks in olive oil.

Increase heat to medium-high.  Add wine; cook 1 minute.  Add chicken broth; bring to a simmer.  Remove from heat; stir in pasta, reserved cooking liquid, parsley, and lemon rind.

Cook salmon until golden and browned, but still moist.

Cook salmon until golden and browned, but still moist.

3.  Sprinkle salmon fillet with remaining 1/4 teaspoon salt and pepper.  Heat a large skillet over medium-high heat.  Add remaining 1 Tablespoon olive oil and the butter;  swirl until butter melts.  Add salmon, and cook for 5 minutes on each side or until desired degree of doneness.  Break the salmon into large chunks.  Arrange 1 cup of the pasta mixture on each of 6 plates, and top evenly with salmon.  Serve immediately.

I added asparagus to the menu to round out the meal.

I added asparagus to the menu to round out the meal.

SOURCE:   The Glorious Pasta of Italy,   by Domenica Marchetti

Eat out at Home—Steak Fajitas

Sizzling hot and so pretty,  good enough to eat!

Sizzling hot and so pretty, good enough to eat!

Mention fajitas and I can hear that sizzling pan already.  Don’t you love that sound when the waiter brings a cast iron pan to your table sizzling with steak, onions and peppers waiting to be wrapped up in a flour tortilla?   OK, so we can’t go out as often as we might like to enjoy this kind of food, but how about making it at home!  You won’t believe how easy it is to recreate fajitas and other restaurant favorites right in your own kitchen.  And there are benefits besides.  You’ll save money,  perhaps eat more healthfully, AND have it whenever you want it.

Starting with today’s offering, I will be periodically  posting a recipe called “Eat out at Home” that will feature a restaurant dish.  Hopefully one that many people enjoy, and is universally popular.

This recipe requires only a few ingredients that are readily available:  a tender cut of steak, sliced onions, peppers, lime juice, soy sauce, tortillas, and garnishes such as grated cheese, diced tomatoes, cilantro and sour cream.  I hope you enjoy it as much as we did.

SEARED STEAK FAJITAS

YIELD:  These amounts serve 2, so adjust accordinglyIMG_3720

INGREDIENTS

  • 3/4 pound top round, skirt steak or sirloin tip steak
  • 1 Tablespoons soy sauce   (seem strange?,  it adds a depth of flavor)
  • 1/4 cup fresh lime juice  ( 2-3 fresh limes)
  • coarse salt and ground pepper
  • 1 Tablespoon extra-virgin olive oil
  • 1 garlic clove, minced
  • 1 large pepper, seeded and thinly sliced (I think red peppers are more colorful than green.)
  • 1 large onion, halved and thinly sliced
  • 4 tortillas ( corn or flour, your choice), warmed
  • 1/2 cup grated cheese; Jack cheese, cheddar or Mexican Blend are good
  • 1 large tomato chopped, or halved grape tomatoes
  • cilantro, chopped for garnish

DIRECTIONS

1.  In a shallow dish or bowl, combine steak, soy sauce, and 1/4 cup lime juice.  Refrigerate 1 hour, turning steak several times.

Marinate steak in soy sauce and lime juice.

Marinate steak in soy sauce and lime juice.

2.  Remove steak from marinade and blot dry with paper towels. Necessary to get a good sear, as moisture will cause the steak to steam rather than fry.  Season with salt and pepper.  In a heavy skillet — cast iron is best  because it can get really hot and hold the heat–heat 1 teaspoon olive oil over medium-high.  When the oil begins to shimmer, add the steak and cook about 2 minutes per side for medium rare, or to your taste.  It is important to get a nice sear on the steak as that contributes to its flavor.  Transfer to a platter, and tent with foil to keep warm.

Have all ingredients cut up and ready to cook.

Have all ingredients cut up and ready to cook.

3.  Add a small amount of additional oil to the pan if needed, add the peppers and onion, minced garlic, and season with salt and pepper.  Cook, stirring, until vegetables are crisp-tender, 4 – 6 minutes.  Squeeze the juice of half a lime over the top, and lightly mix in.

4.  While the vegetables are cooking, warm the tortillas in the oven or microwave.  Wrap in foil to keep warm.

5.  Thinly slice the steak and serve with the vegetables, tortillas, cheese, tomato and cilantro.

Additional garnishes at the table.

Additional garnishes at the table.

Building the Fajita.

Building the Fajita.

This may not be truly authentic, but it sure is good!

This is what was left!

This is what was left!

SOURCE;    Martha Stewart,  Everyday Foods

Eggs with Asparagus, Potatoes, Pancetta and Bread Crumbs

Eggs with Asparagus and Potatoes.

Eggs with Asparagus and Potatoes.

Placing an egg with a still-runny yolk on top of any roasted or sautéed vegetable is a perfect recipe.  The soft, yolk flows over the vegetable, making a simple, luscious sauce.  In springtime asparagus is a great choice, but if not available in your area, then try sautéed broccoli, or kale instead.

I made this meal not long ago and included potatoes to give it even greater substance for our supper.  If you portion the ingredients for the number of people who will eat it, you will not be tempted to over eat, because it is filling and you will be satisfied.  I used an egg poacher to cook the eggs, but you could also fry them with equally good results.  To make this into a vegetarian meal, omit the pancetta.

EGGS WITH ASPARAGUS, POTATOES, PANCETTA AND BREAD CRUMBS

SERVINGS:    4IMG_3725

  • 1  pound asparagus, tough ends removed
  • Extra virgin olive oil
  • salt and freshly ground pepper
  • 2 – 3 medium potatoes, peeled and sliced about 1/4-inch thick
  • 3 Tablespoons butter
  • 2 – 3 thin slices pancetta, finely chopped
  • 1 cup fresh bread crumbs
  • 4 large eggs
  • Freshly grated Parmesan cheese, for garnish

1.  Preheat the oven to 400*F    Spread the asparagus in a baking dish large enough to hold them in a single layer.  Drizzle with olive oil, and season with salt and pepper.  Turn the spears several times to coat them evenly with oil.  Roast, turning once or twice, until the spears are tender-crisp, about 15 minutes;  the timing will depend on the thickness of the spears.  Remove from the oven, cover loosely with foil and set aside.

2.  In a large non-stick skillet put a small amount of water – just enough to cover the bottom of the pan.  Lay the potatoes in concentric circles in the bottom of the pan placing as close together as you can.  Add water if necessary, so there is enough for them to start cooking.  Cover the pan and cook potatoes till just barely fork tender, about 5 – 6 minutes.  Drain out any remaining water.  Add 2 Tablespoons butter that has been cut into small pieces.  Let it melt in the hot pan lifting the potato slices so butter gets underneath them. You may need to turn up the heat, so potatoes get a nice browned crust on the bottom.

3. While the potatoes are cooking, in another small skillet,  over medium heat, fry the pancetta until crisp.  Set it aside in a small bowl.  In the same skillet cook the bread crumbs in any drippings from the pancetta, and it there are none add a drizzle of olive oil.  Get the bread crumbs crisp and slightly browned.  Set them aside.

4.  Place the asparagus spears on top of the now browned potatoes, and in another fry pan fry the eggs,  or you may want to poach them instead.  When the eggs are cooked to the point where whites are firm, but yolks still runny, remove them for the heat and place on top of the asparagus.

Place cooked eggs on top of   asparagus and potatoes.

Place cooked eggs on top of asparagus and potatoes.

5. Before bringing to the table, sprinkle pancetta and bread crumbs over the top.  Serve with a light sprinkle of Parmesan cheese.

IMG_3730

SOURCE:   Adapted from Williams-Sonoma Blog,  The Blender