Orange-Apricot Scones

Apricot-Orange Scones

Apricot-Orange Scones

This post might also be called “How to be a Better Scone Baker”.  Have you always wanted to make scones, but thought they were too difficult or there was something tricky about making a perfect scone?  It’s time to get over all that and take the plunge.  With just a few simple tips, you too can be enjoying flaky tender scones.  The very first thing you must do, is stop expecting perfection.  A scone is not competing in a beauty contest 🙂   But it will be so lovely to bite into! IMG_9468 So today, let’s talk about 3 ways to be a better baker.  A few small nuggets of advice to help you build confidence in the kitchen whether you are baking scones or something else.

1.  Have a good understanding of your oven.  Not ovens in general, but YOUR oven.  Some ovens have hot spots, or areas that get hotter than the rest.  You may have noticed that a cake rises unevenly or becomes more browned on one side.  If this is happening, you need to rotate your items during baking.    The very best thing you can do is invest in an oven thermometer.  This tells you the actual temperature inside the oven, and you may find that it does not match up with what  you have set the dial to. If that is the case, you will need to adjust the length of baking time accordingly.

Perfectly baked:  firm to touch, lightly browned at the edges.

Perfectly baked: firm to touch, lightly browned at the edges.

2.  You need to follow directions. Yes, really!  It’s a must if you want good results.  Baking is a delicate balance between flour, moisture, leavening and heat.  Chemical reactions are involved that produce the finished baked item.  A recipe holds your hand as you go step by step through the process, so trust in the recipe.  Not all recipes are good ones, but most of them are,  so trust the process.

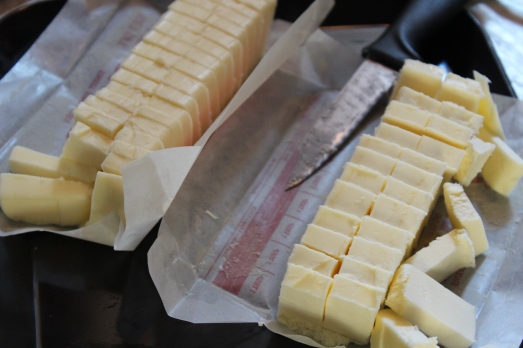
3.  Measure accurately.  To repeat my statement from above:  baking is a delicate balance between the ingredients.  If one of more is out of proportion, the whole thing ends up wrong, and there will be no way to fix it.  Flour and sugar should be spooned lightly into a measuring cup, then leveled with the flat side of a knife for an even measure.  Brown sugar is the exception.  It should be measured packed into the measuring cup, level across the top.  Liquids, likewise should be poured  exactly to the measurement line on a liquid measuring cup.  Measuring spoons should be filled, then leveled off with a knife for the same kind of precise measure as flour.  Cut sticks of butter according to the tablespoon markings on the wrapper, these are usually pretty accurate.

There are other tips for successful baking that I could share with you, but that’s enough for  today.  I’ll return to this subject another time.  Let’s make some delicious scones.  This recipe can be a master recipe for making just about any kind of scones, whether savory or sweet.  The ones I made are considered a sweet scone, but have just a touch of sweetness, relying on the dried apricots and hint of orange to add flavor.  At the end of the recipe, I list some other suggestions for add-ins that I think would made fantastic scones.  I’ll be trying them all out as time goes on…… IMG_9477

CLASSIC SCONES, MASTER RECIPE

Yield:   Makes 12 scones

Ingredients:

  • 1  1/2 cups all-purpose flourIMG_9449
  • 1  1/4 cups whole-wheat flour
  • 1 Tbsp. baking powder
  • 1/4 cup sugar (sweet), or 1 Tbsp. sugar (savory)
  • 1/2 tsp. salt
  • 5 Tbsp. cold, unsalted butter, cut into 1/2-inch cubes
  • ADD-INS  (see below)
  • 1 cup milk, reduced fat, or buttermilk
  • 1 large egg

Directions: 1.  Preheat the oven to 400*F.  Coat a large baking sheet with cooking spray.

2.  Whisk the flours, baking powder, sugar and salt in a large bowl.  Using a pastry blender, cut in the butter; or rub the butter into the dry ingredients with your fingertips.  Stir in the ADD-INS. IMG_9450 3.  Whisk together the milk (or buttermilk) and egg in a medium bowl, stir into the dry ingredients until just combined. Do not over mix.  Note:  if using a flavor extract, add it to the milk-egg mixture.

Liquids meet dry.

Liquids meet dry.

4.  Sprinkle a work surface with 1 Tbsp. flour.  Turn the dough out and sprinkle with a little more flour.  Knead three to five times, or until dough just comes together.  Divide in half and pat each piece into a 5-inch circle.  Cut each circle into 6 wedges and transfer to the prepared baking sheet.

From each circle of dough, make 6 wedges.

From each circle of dough, make 6 wedges.

5.  Bake the scones until firm to the touch and lightly browned, 18 – 24 minutes. IMG_9454

IMG_9456

Glaze 'Em!

Glaze ‘Em!

ADD-INS Sweet:

  • Orange-Apricot:   1 cup chopped dried apricots,  2 Tbsp. grated orange or lemon rind,  1/2 tsp. orange or lemon extract.
  • Lemon-Poppy Seed:  2 Tbsp. lemon zest,  2 Tbsp. poppy seeds
  • Lemon-Ginger:  2 Tbsp. lemon zest,  1/4 cup finely chopped candied ginger
  • Chocolate-Cherry:   1/3 cup dried cherries, coarsely chopped; 1/3 cup dark chocolate mini chips
  • To Glaze any of the above:  whisk 3/4 cup confectioners’ sugar and 2 Tbsp. lemon juice or milk in a small bowl until smooth.  Adjust consistency with a little more sugar or liquid as desired.  Drizzle over scones.

Savory:

  • Ham and Cheese:  1/2 cup shredded cheddar cheese, 1/4 cup chopped ham, 1/4 cup thinly sliced fresh chives
  • Smoked Salmon and Dill:  1/3 cup chopped smoked salmon,  1/3 cup finely chopped red onion,  1/4 cup minced fresh dill.
  • Sun-Dried Tomato, Thyme and Asiago:   1/3 cup chopped soft sun-dried tomatoes,  1/3 cup shredded Asiago cheese,  1/4 cup chopped fresh thyme

SOURCE:  Eating Well

Crockpot Pot Roast

Fabulous Crockpot Pot Roast

Fabulous Crockpot Pot Roast

Super easy, super flavorful they said.  It was all over Pinterest, and everyone was raving about it.  I just couldn’t let something that sounded so good go by without giving it a try.

So I made it…..as a test.   Think of me as a scientific investigator.   I do all the work of testing out a recipe by making it, eating it, then telling all of you how wonderful it was (or not).   See, I do that, just for YOU.

Today,  I’m here to tell you it was Fabulous!!!!  But there is reason to be cautious.  This recipe uses only four ingredients, plus 1/2 cup water.  Three of those ingredients are pre-packaged mixes for Brown Gravy, Ranch Dressing, and Italian Salad Dressing.   I’m sure you know as well as I, that these mixes can contain a whole lot of Sodium, and sometimes, MSG. (Mine were labeled as having no MSG.)   There may be some slight variation among the many brands available, but here’s what mine contained:   Ranch Dressing mix==110mg,  Brown Gravy mix==240mg, and the biggest culprit of all, Italian Salad Dressing mix==320mg.

There’s no way I would ever put that much salt on a piece of meat I am cooking, so let’s get real, and try to fix the problem.  Reasoning that flavorful gravy is what we’re after, not salad dressing, I used the whole package of Brown Gravy mix, but I used only half of each of the dressing mixes.   The resulting gravy was full of flavor, and about right in terms of saltiness.  I think it is the best gravy I ever made.

IMG_9234

I served egg noodles with the pot roast and we spooned the gravy over the noodles.  Therefore I used only a tad of salt in the cooking water for the noodles.  Likewise, if served over mashed potatoes, use very minimal salt in the water to cook the potatoes.

IMG_9235

It is great to find a recipe this easy to make.  All it requires is a 2-3 pound pot roast that can be with or without the bone, like a chuck, or round roast;  the three packages of mixes and water.  I simply mixed the three mixes together in a small bowl, seared the roast in a large skillet to brown it on both sides, then put it in the crockpot.  Next I sprinkled the seasoning mixture over the beef, then poured on the 1/2 cup water.  Set it and forget it, as the saying goes. It couldn’t be easier.  You really don’t need a recipe to make this, but in case you need to see it written as a step-by-step procedure, here it is….

CROCKPOT  POT ROAST

Three packaged mixes plus the beef roast.

Three packaged mixes plus the beef roast.

Yield:   depends on size of roast,  probably 6 to 8 servings

Ingredients:

  • beef pot roast, such as chuck, top or bottom round ( 2.5 – 3 pounds)
  • 1 packet  Brown Gravy Mix
  • 1 packet Ranch Dressing Mix
  • 1 packet Italian Salad Dressing Mix
  • 1/2 cup warm water

Directions:

1`.  In a hot skillet, place the beef and sear well on both sides.  Transfer to crock pot.

Sear well on both sides.

Sear well on both sides.

2.  In a small bowl, combine the three mixes, using only half the Ranch and Italian mixes.  (save them for next time, and you’ll only need to buy the gravy mix.)

3.  Sprinkle over the pot roast in the crock pot.   Pour the water over all.

Sprinkle on seasonings, pour water over all.

Sprinkle on seasonings, pour water over all.

4.  Set on LOW, and cook for 8-9 hours.

You can thicken the gravy, if you prefer it that way.

Serve the beef with gravy and mashed potatoes or noodles for a real treat.

IMG_9236

SOURCE:   Pinterest


Lemon Icebox Cookies

Lemon Icebox Cookies

Lemon Icebox Cookies

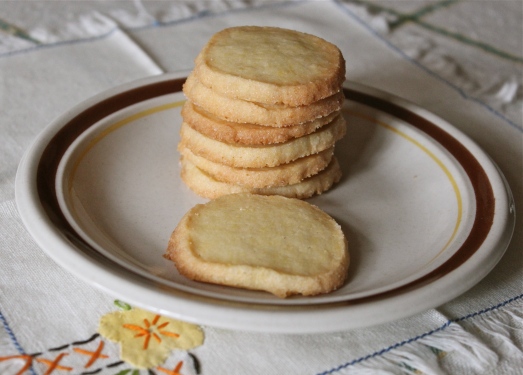
Total tart throbs….that’s what I call these buttery, lemony confections.  Cookie nirvana!  Cookie heaven!  Cookie num-yums!   I think you get how much I love these cookies.

IMG_9544

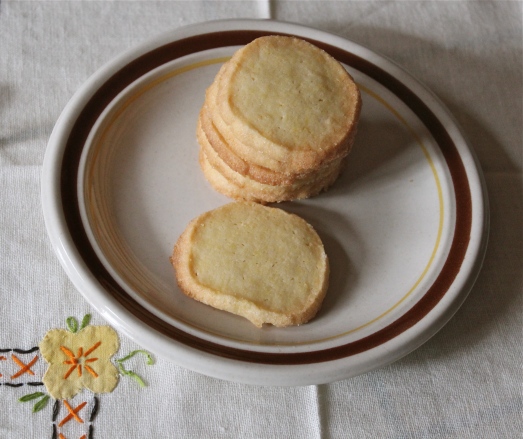
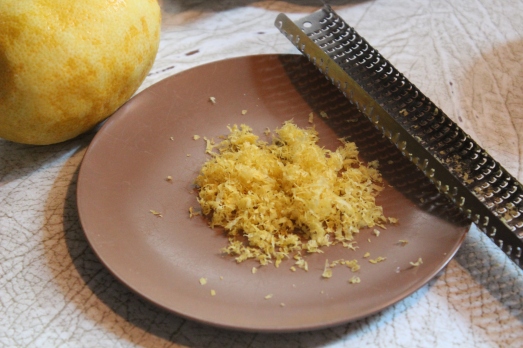
Lemon desserts seem so perfect at this time of year, more than any other, I think.  So I took my recipe for luscious butter cookies, added some (lots) lemon zest, plus a few drops of lemon juice, and zing went the strings of my heart.  Just lemony enough, just buttery enough, and just satisfying enough.  In other words…..perfection 🙂

IMG_9548

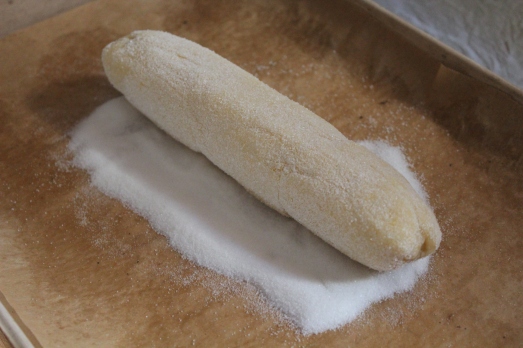
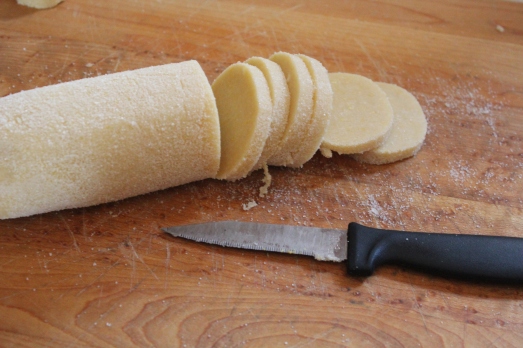
As you look over the recipe you will notice that confectioners’ sugar is used instead of granulated.   Powdered sugar gives these cookies their crumbly, sandy texture without too much sweetness, thus the lemon and butter flavors shine through.  The dough is made entirely in the food processor, divided in half and chilled before slicing and baking.  The dough cuts beautifully, not like some others I’ve made that like to crumble when you go to slice them.  Before cutting the cookies each log of dough is rolled in granulated sugar, so the edges of the cookies are glistening and crunchy once baked.

LEMON ICEBOX COOKIES

Yield:  Makes about 5 dozen cookies

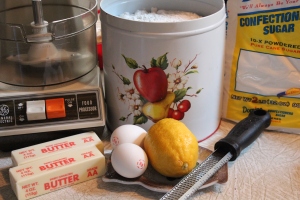
Ingredients:IMG_9519

  • 2 cups all-purpose flour
  • 1 cup confectioners’ sugar
  • 1 tsp. coarse salt
  • 1 Tbsp. + 1 tsp. lemon zest
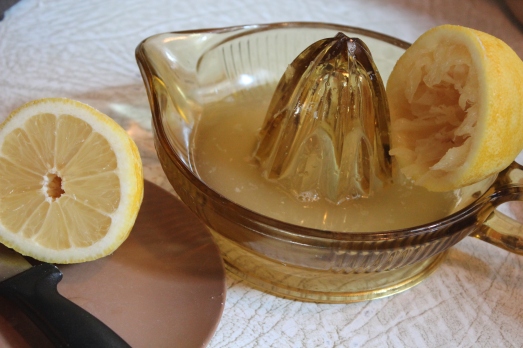
  • 1 tsp. fresh lemon juice
  • 1 cup (2 sticks) unsalted butter, cut into pieces
  • 2 large egg yolks
  • 1/4 cup granulated sugar, for rolling

IMG_9520

Directions:

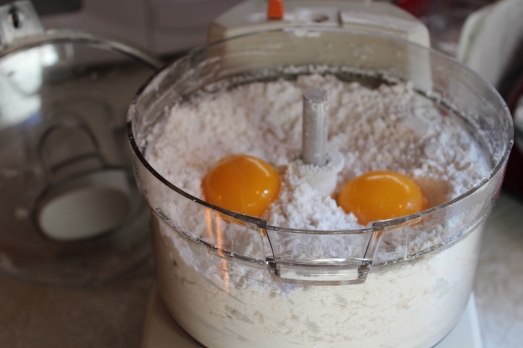
1.  In a food processor, pulse together the flour, confectioners’ sugar, salt and lemon zest until combined.

IMG_9522

This is how I cut butter into small pieces.


Add butter and process until sandy.  Add egg yolks and lemon juice; pulse until dough comes together.

IMG_9524

IMG_9523


2.  Divide dough in half and form each into a 1  1/2-inch-wide log.

IMG_9525

Wrap in plastic wrap and chill until firm, at least 2 hours, or overnight.  Or after wrapping, dough may be frozen up to a month.

IMG_9526

3.  Preheat oven to 350*F. , with racks in upper and lower thirds.  Spread granulated sugar on a piece of wax paper or parchment; roll logs over sugar to coat.

IMG_9535

Roll dough logs in sugar to coat well.


4.  Slice logs into 1/4-inch-thick slices.

This dough slices so nicely.

This dough slices so nicely.

Arrange 1 inch apart, on two (or more) parchment-lined baking sheets.  Bake until cookies are golden brown around edges, about 15 minutes, rotating sheets halfway through.

Lightly browned around the edges.

Lightly browned around the edges.

Transfer cookies to wire racks to cool.   To store, cover and keep at room temperature, up to 5 days.

IMG_9550

These are the perfect little sweet to serve with a cup of tea, or alongside a scoop of vanilla ice-cream.


SOURCE:   Carolyn’s Originals