Chocolate Chip Pumpkin Cookies

Chocolate Chip Pumpkin Cookies

Chocolate Chip Pumpkin Cookies

Happy Halloween, everyone.  There are no tricks today, just treats!!

Every fall–it never fails, when the leaves start to fall and the weather gets crisp, I start thinking about these cookies–it’s crazy.  Usually I like my cookies to be crisp or chewy, but these are the exception.  They have a cake-like consistency which seems perfect and they taste like a combination of pumpkin pie and chocolate.  After they have cooled I like to drizzle some vanilla glaze over the tops to dress them up a little.   Honestly, they are the best pumpkin cookies I’ve ever tried!

IMG_5502

CHOCOLATE CHIP PUMPKIN COOKIES

Yield:  about 2 dozen cookies, depending on size

Ingredients:

Pumpkin,  spices and chocolate chips = Yummy

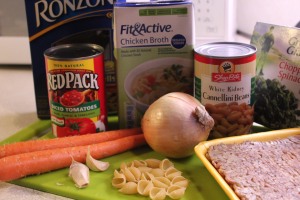
Pumpkin + spices + chocolate chips = Yummy

  • 1 cup pumpkin puree ( canned or homemade)
  • 1/2 cup granulated sugar
  • 1/2 cup brown sugar
  • 1/2 cup vegetable oil ( can use applesauce instead)
  • 1 egg
  • 3 drops red or orange food coloring (optional)**
  • 2 cups flour ( white, whole wheat, or a combination)
  • 2 tsp. baking powder
  • 2 tsp. ground cinnamon
  • 1/2 tsp. nutmeg
  • 1/4 tsp. cloves
  • 1/4 tsp. ground ginger
  • 1/4 tsp. salt
  • 2 tsp. vanilla extract
  • 1 tsp. baking soda
  • 1 tsp. milk
  • 1 cup chocolate chips (we love dark chocolate chips)
  • 1/2 cup chopped walnuts (optional)

Directions

1.  Preheat the oven to 350 *F.  Grease cookie sheets or line with parchment paper.

2.  In a large bowl, whisk together the pumpkin, sugars, oil and egg.  Add food coloring, if using.

3.  In another bowl, Whisk together the flour, baking powder, spices and salt.

4.  Dissolve the baking soda in the milk and set aside.

5.  Add flour mixture to the pumpkin mixture and stir together.  Stir in the baking soda/milk mixture and mix well.  Stir in vanilla, chocolate chips and nuts.

6.  Drop by tablespoon onto prepared cookie sheet (s) and bake at 350* for approximately 10 minutes or until lightly brown and firm.    I like to roll the dough into a ball and then flatten a little with a fork for a uniform look.  It makes the tops smoother if you plan to drizzle with icing.  An orange butter cream icing on top is wonderful also.

A little frosting drizzled on top fancies them up.

A little frosting drizzled on top fancies them up.

** These cookies will not be orange, therefore by adding the red or orange food coloring, you bring out the orange color of pumpkin.  Somehow when they look like pumpkin, the flavor of pumpkin seems to be more pronounced.  No kidding!

IMG_5505

IMG_5503

SOURCE:   ALL RECIPES.COM

Advertisement

Tuscan Sausage Soup with Shell Pasta and White Beans

Tuscan Sausage Soup  with Shell Pasta and White Beans.

Tuscan Sausage Soup with Shell Pasta and White Beans.

I’ve shared my views previously on the many shapes of pasta and how some shapes are better suited for one kind of dish while other shapes have their own perfect niche in your repertoire of recipes.  One of my absolute favorites to use in soups is shell pasta.  The reason seems obvious–they hold the broth!  Just like a spoon they carry some of the yummy flavor-laden broth to your mouth.

IMG_5393

Anyway, when I first saw this recipe for Tuscan Sausage Soup, packed with “conchiglie”, I was drawn to it.  Conchiglie is the Italian word for shell, so I felt as though it was talking to me.  It also includes white cannellini beans and spinach and is seasoned with garlic, onion and basil.  All the flavors you would expect in a rustic Italian soup such as this one.

The recipe makes a large amount of soup, and can be easily doubled  to feed a hungry crowd, or freeze some for a later date.  I made the recipe as I found it except for using frozen spinach instead of fresh. You could also use kale if you wish.   This is a recipe you need to have in your back pocket for when colder weather arrives and you want something warm and hearty to feed your family.

IMG_5387

TUSCAN SAUSAGE SOUP WITH SHELL PASTA AND WHITE BEANS

YIELD:   6 servings

Ingredients:

  • 1 pound Italian sausage, bulk or links.  If using links, remove casings.

    Gather together all the ingredients.

    Gather together all the ingredients.

  • 2 carrots, peeled and sliced
  • 1 large onion, chopped
  • 2 cloves garlic, minced
  • 6 cups chicken broth, low sodium preferred
  • 1  14.5 oz. can tomatoes, diced with juice
  • 1  15 oz. can cannellini beans, drained and rinsed
  • 1  1/2 tsp. dried basil
  • 8  oz. shell pasta, whole wheat, preferred
  • 6 oz. fresh spinach, or 1 pkg. frozen chopped spinach, well drained
  • salt and pepper to taste
  • grated Parmesan cheese for topping

Directions:

1.  Remove casings from sausage if using links.   Brown over medium-high heat in a large stock pot.  Crumble as you brown it.

Brown and crumble the sausage

Brown and crumble the sausage

2.  Add carrots, onion and garlic;  sauté until tender and starting to get a bit golden, about 7 minutes.

Add in the carrots, onion, and garlic.

Add in the carrots, onion, and garlic.

3.  Add chicken broth, tomatoes, beans, pasta and basil.

Add chicken broth, tomatoes, pasta, beans, and basil.

Add chicken broth, tomatoes, pasta, beans, and basil.

Bring to a boil, then reduce heat to a simmer.  Cover and continue cooking until pasta becomes a bit tender, about 7 minutes.

4.  Stir in spinach and cook until it is just wilted.  Taste and season with salt and pepper.

5.  Serve hot garnished with grated Parmesan cheese, if desired.

Here it is.  Looking delicious and tasting just as good as it looks.

Here it is. Looking delicious and tasting just as good as it looks.

SOURCE:   A Couple in the Kitchen

Chickpea and Chorizo Fideos

Chickpeas and chorizo fideos.

Chickpea and chorizo fideos.

In my opinion you can never have too many recipes for one-pot meals.  This one is easy to make and is a quick version of a Spanish pasta dish.  The chorizo provides a smoky flavor, but if you can’t find chorizo, pepperoni works well in its place, and that is what I used since I was not able to find the chorizo at my supermarket.  It is more likely to be found in a market that has a large department of Spanish foods.

In Spanish Fideo means noodle.  Fideo is a type of pasta commonly used in soups.  It can be long or short.  In this recipe the angel hair pasta is broken into 2-inch lengths to mimic the short fideos.

In addition to the chorizo or pepperoni, chickpeas, also known as garbanzo beans, provide an excellent source of protein.  So this dish, although consisting of only a few ingredients, is highly nutritious as well as very tasty.  We loved it and I’m sure I’ll be making it again.  If you have leftovers they can be easily reheated by adding a small amount of chicken broth to loosen it, and heat briefly in the microwave.

CHICKPEA AND CHORIZO FIDEOS

Yield:   Makes about 4 servingsIMG_5312

Ingredients:

  • 3 Tbsp. extra-virgin olive oil, divided
  • 1/2 package whole-wheat angel hair pasta ( 7-8 oz.), broken into 2-inch pieces
  • 2 large cloves garlic, minced
  • 1/2 cup chopped Spanish chorizo or pepperoni ( about 2 oz.)
  • 1 ( 14.5 oz.) can petite diced tomatoes
  • 1  1/2 cups water
  • 1/2 cup dry white wine
  • 1 15-oz. can chick peas, rinsed and drained
  • 3 scallions, sliced
Have all ingredients chopped and ready to go.

Have all ingredients chopped and ready to go.

Directions:

1.  Heat 2 Tbsp. olive oil in a Dutch oven over medium heat.  Add pasta pieces and cook, stirring, until toasted and browned in spots, 2 to 3 minutes.  Transfer to a bowl.

Toasting the pasta.

Toasting the pasta.

2.  Add the remaining 1 Tbsp. oil to the pan and heat over medium heat.  Add garlic and chorizo ( or pepperoni) and cook, stirring, until fragrant, about 1 minute.

3.  Add tomatoes, water, wine and the toasted pasta;  bring to a boil.  Reduce heat to a simmer and cook, stirring occasionally, until the pasta is tender and most of the liquid is absorbed, about 8 minutes.

Adding in the water, wine, pasta and tomatoes.

Adding in the water, wine, pasta and tomatoes.

4.  Stir in chickpeas and scallions and cook 1 minute more.

Add chickpeas and scallions.

Add chickpeas and scallions.

IMG_5318

Serve with a big green salad drizzled with a vinaigrette dressing.

SOURCE:    Eating Well.com

Beet and Orange Salad with Goat Cheese

Beets are one vegetable that I’ve had a complete turn-around on.  That is to say,  I didn’t used to like them and now I love them.  Roasting is what brought about my change of heart.  Once beets have been roasted they taste like a completely different vegetable.  I’ve described my method for roasting them in an earlier blog post that you can find here.  I frequently use them in salads as they combine well with other vegetables and some fruits.

Beet and Orange salad with Goat Cheese

Beet and Orange salad with Goat Cheese

Oranges are one of the fruits that play well with beets.  Their citrusy sweetness goes well with the sweetness that roasting brings out in beets.  Then I add some greens for color and texture contrast and nuts for crunch, in this case, pistachios.   Over the top is drizzled a Dijon vinaigrette dressing and some crumbled goat cheese.  Mr. D. loves this salad and asks for it on many occasions.  I kind of like it too!

IMG_5272

Please note, in the recipe below, directions are given for quickly cooking beets in the microwave if you are short on time for oven roasting them.  This works well in a pinch.

BEET AND ORANGE SALAD WITH GOAT CHEESE

Yield:   Makes 4 servings

Ingredients:

  • 1  1/2 pounds halved, peeled beets  (wear gloves for peeling or you will have stained fingers)
  • 1 navel orange, peeled and sectionedIMG_5271
  • 2 cups mixed salad greens
  • 1/3 cup salted pistachios
  • 2 Tablespoons goat cheese

Dressing:

  • 2 Tablespoons olive oil
  • 2 teaspoons white vinegar
  • 2 Tablespoons minced shallots
  • 1/2 teaspoon Dijon mustard
  • 1/4  tsp. salt and 1/4 tsp. pepper

Directions:

1.  Wrap beets in parchment paper.  Microwave on HIGH until tender, about 7 minutes.  Let stand 5 minutes.  Cut into 1-inch pieces and place in a salad bowl.

2.  Section the orange and place the pieces in the salad bowl with the beets.**

3.  Add the salad greens to the salad bowl with the beets and orange sections.

4.  Whisk together all the dressing ingredients till well blended.   Add to salad bowl.  Toss  to coat.

5.  Top with the  pistachio nuts and crumbled goat cheese.

IMG_5364

** When I make this salad for two of us, I construct it on salad plates, as you see pictured.

SOURCE:   Cooking Light

Pumpkin Cinnamon Rolls

Pumpkin Cinnamon Rolls

Pumpkin Cinnamon Rolls

Have you ever thought about this?—- some recipes are like a blank canvas.  Yes, they are usually great all on their own, but they also lend themselves well to showcasing other flavors. In other words, you can switch out ingredients and substitute others in their place.   The idea of pumpkin cinnamon rolls popped into my head and just wouldn’t go away and so it wasn’t long before I just had to make them.

IMG_5360

I started with a basic recipe for cinnamon rolls from my book of  bread machine recipes.  Then I added some pumpkin and a touch of fall spices, rolled them with butter, a little more pumpkin and cinnamon sugar filling the swirls, and glazed them with cream cheese frosting.   Although the rolls don’t scream pumpkin, the subtlety is nice.  A tender mildly sweet dough with all that spicy filling is to die for.  They could definitely be dessert,  I’m sure they’d be the hit at a fall brunch,  but still warm from the oven with a cup of coffee is my special treat!

Sample one while still warm from the oven.   Sigh!

Sample one while still warm from the oven. Sigh!

I made the dough for these rolls in my bread machine, but it can be made using a standard mixer with dough hooks or paddle attachment in place.  If making the dough in this way, dissolve the yeast in the water and allow to rest for 5 – 10 minutes.  It should get thicker and begin to bubble.  Then combine with the other liquid ingredients prior to adding the flour and spices.  Continue to beat to a thick smooth dough, before turning out onto a floured surface.  Knead to a smooth elastic dough, then set aside in a greased bowl to rise in a warm place, about 45 minutes, till almost doubled in size.

PUMPKIN CINNAMON ROLLS WITH CREAM CHEESE FROSTING

Yield:   Makes 15 rolls

Ingredients:

  • 1/4 cup warm water
  • 1/3 cup whole or 2 % milk
  • 1 large egg
  • 3/4 cup pumpkin puree
  • 1 Tbsp. butter, melted
  • 3  1/4 cups flour
  • 1/4 cup brown sugar
  • 1/4 cup granulated sugar
  • 1 tsp. salt
  • 1/2 tsp. ground cinnamon
  • 1/4 tsp. pumpkin pie spice

Filling:

Butter, pumpkin butter, and sugar-spice mixture ready to spread on the dough.

Butter, pumpkin butter, and sugar-spice mixture ready to spread on the dough.

  • 1/3 cup butter, softened
  • 2/3 cup granulated sugar
  • 1/4 cup brown sugar
  • 2 tsp. cinnamon
  • 1  1/2 tsp. pumpkin pie spice
  • 2 – 3 Tbsp. pumpkin puree or pumpkin butter (optional)

Frosting:

  • 4  oz. cream cheese
  • 1 Tbsp. butter
  • pinch salt
  • 1 tsp. vanilla
  • 1/2 tsp. lemon juice
  • 2 Tbsp. whole or 2 % milk
  • 2 cups confectioners’ sugar

Directions:

1.  In the bread machine canister, layer in the wet ingredients ( water through melted butter), omitting the yeast.

2.  In a separate bowl, combine all the dry ingredients ( flour through pumpkin pie spice).  Whisk together for uniformity.  Add to canister on top of wet ingredients.

3.  Make a depression in the top of the flour mixture with a spoon;  pour the yeast into the depression you’ve made.

4.  Insert canister into the bread machine and set for “dough” cycle.   Meanwhile prepare the filling by combining the sugars, cinnamon and pumpkin pie spice.   Set aside.

5.  When the cycle is complete, remove the risen dough and turn it out onto a floured surface.  Stretch or roll it into a 12″ x 16″ rectangle.  Spread butter over the dough.

Butter goes on first.

Butter goes on first.

6.  Spread with pumpkin or pumpkin butter if using, then sprinkle with the sugar mixture.

Next spread on the pumpkin or pumpkin butter, if using.

Next spread on the pumpkin or pumpkin butter, if using.

Sprinkle on the sugar mixture.

Sprinkle on the sugar mixture.

7.  Roll into a log and cut into 15 slices using a sharp knife or dental floss.

Roll up, then slice or cut with dental floss into 15 rounds.

Roll up, then slice or cut with dental floss into 15 rounds.

Place slices into a 9 x 13″ pan or two round 8″ cake pans.

Lay in baking pan, cut side up.

Lay in baking pan, cut side up.

Cover with a towel and let rise until almost doubled, about 45 minutes.

8.  Preheat oven to 375*F.  Bake for 20 – 25 minutes or until rolls are golden brown ( don’t worry if the filling rises and bubbles, it will go down once the rolls have been removed from the oven).

After baking, golden and fragrant.

After baking, golden and fragrant.

9.  While the rolls are baking, prepare frosting by beating the cream cheese, butter, vanilla, salt, and lemon juice in a medium bowl until smooth.  Gradually add the powdered sugar, continuing to beat smooth.  If the mixture is too thick, slowly add milk one half tablespoon at a time.

10.  Remove rolls from the oven and let cool on a wire rack .  Frost within  5 – 10 minutes after removal.

You know you want one!

You know you want one!

SOURCE:  adapted from The Big Book of Bread Machine Recipes

A Drive in the Country

IMG_5407

We have been having a spectacular fall here in the Northeast.  October has been a near perfect month with warm daytime temperatures and cool nights, with no frost yet.  The deep blue skies have set off the colorful foliage beautifully.  So on Mr. D’s. birthday which was last weekend, we set off on (another) foliage drive.   Even though some of the color was fading in a few areas it was still quite beautiful, and I was able to capture a variety of scenes with my camera.  Come along with us for a ride.

IMG_5406

For my readers who live in parts of the world where nature does not put on a show like this, I thought you might like to see some of what we experienced through my photographs.

A stream by the side of the road.

A stream by the side of the road.

Every bend in the road brought new delights.

Every bend in the road brought new colors.

I love these old farm houses, especially if they're red.

I love these old farm houses, especially if they’re red.

IMG_5434

A group of kayakers were out on the river, enjoying a beautiful day.  A short distance from this scene we came upon an old covered bridge spanning the river.  The following photos are from that spot.

IMG_5432

One car at a time can pass through this bridge.

Side view of the bridge.

Side view of the bridge.

Along the riverbank, orange leaves and evergreens mixed.

Along the riverbank, orange leaves and evergreens mix.

More of those orange leaves, so bright against the greens.

More of those orange leaves, so bright against the greens and browns.

Continuing on our drive,  we came upon another old farmhouse, beautifully maintained.  Note the stone chimney.

Another old red farmhouse.

Another old red farmhouse.

Another bend in the road brought new sights:

Bend in the road!

Bend in the road!

IMG_5429In New England there are many stone walls.  Constructed by hand to mark property boundaries, you see them everywhere, but I don’t think I’ve ever seen one along a river bank like this.

IMG_5446Red barns are a common sight.  This one has an unusual round window on the side.  The weathered barn in the center is attached to the back of the house, seen at the right.

Big and little barns.

Big and little barns.

IMG_5484

Another style of old barn with a silo attached.

IMG_5443

I guess we know who these folks will be rooting for. 😀

At the end of the day,  a scene in my own back yard.  As I look out my kitchen window, I see this tree set “on fire” by the setting sun.  Gorgeous!

Sugar Maple tree lit by the setting sun!

Sugar Maple tree lit by the setting sun!

Hope you have enjoyed the day’s outing with us.

Bacon Wrapped Pork Tenderloin

Bacon-Wrapped Pork Tenderloin

Bacon-Wrapped Pork Tenderloin

I just love to roast pork at this time of year.  Probably because there are so many vegetables and fruits that pair well with it.  This meal was outstanding served with baked sweet potato wedges,  steamed broccoli, and apple sauce.

I got the recipe for the pork tenderloin recently from another blogger’s web site, one that I follow: RantingChef.com.  Please make an effort to visit his site.  I’m sure you will be pleased with some of the recipes you’ll find there.

What you do is cut a large tenderloin into 4 pieces.  Then wrap  (gift wrap :-)), the pieces in sliced bacon.  I Know!  A little bacon makes everything better, but lots of bacon makes it crazy good.  This is so easy to do.  Pour the marinade over it all, then you refrigerate it at least 2 hours, but I left mine for almost 24 hours—it only gets better–then throw it into the oven set for 300*F, and let it slow roast for 2 hours.  Your kitchen will smell so good, everyone will be asking “what’s cooking, what’s for dinner?”   Guys will definitely love this, but you ladies are going to think it’s pretty good, too.   Makes a great Sunday dinner!!

Is this beautiful, or what?

Is this beautiful, or what?

BACON WRAPPED PORK TENDERLOIN

Yield:  about 8 servings

Ingredients:IMG_5349

  • 3 – 4 pound boneless pork tenderloin
  • 1 pound package sliced bacon
  • 3/4 cup soy sauce,  Low sodium, preferred
  • 1 Tbsp. minced dried onion
  • 1/2 tsp. garlic powder
  • 1 Tbsp. white wine vinegar
  • dash pepper
  • 3/4 cup brown sugar

Directions:

1.  Cut the tenderloin into 4 pieces.  Wrap each with bacon strips.  Place in a greased 9 x 13″ baking pan.

Wrap each piece of pork in bacon.

Wrap each piece of pork in bacon.

2.  Poke holes in the meat with a long-tined fork.  Combine the rest of the ingredients in a small bowl or large measuring cup and whisk together until well blended.  Pour over the meat.  Refrigerate uncovered for 2 – 3 hours or as long as overnight.

Pour the marinade over the pork.

Pour the marinade over the pork.

3.  Bake at 300*F for about 2 hours, or until internal meat temperature reaches 145*.  For the last 5 minutes or so, turn on the broiler to crisp the bacon.

If you think it looks good, you NEED to taste it!

If you think it looks good, you NEED to taste it!

4.  Remove from the oven and let rest about 5 minutes.  Slice, and serve with pan juices.

That marinade penetrates the meat making it salty, sweet, smoky, dee-lish!

That marinade penetrates the meat making it salty, sweet, smoky, dee-lish!

SOURCE:  The Ranting of an Amateur Chef.com

A Recipe of Few—

Today has been a very busy day and at this hour I’m tired so this will be a post of few words.  Luckily the recipe I have to share with you is one of few words also.  A recipe of few—-

few ingredients

few steps

few utensils

BUT

big flavor

Try it!

Old Bay Roasted Sweet Potatoes

Old Bay Roasted Sweet Potatoes

OLD BAY ROASTED SWEET POTATOES

Few ingredients:  1-2-3.

Few ingredients: 1-2-3.

Yield:   Serves 4

Ingredients:

  • 3 medium sweet potatoes  ( about 1 1/2 pounds total),  scrubbed and cut into 1-inch pieces
  • 1 Tablespoon extra-virgin olive oil
  • 1 1/2 teaspoons Old Bay seasoning

Directions:

1.  Preheat oven to 450 *F.  On a rimmed baking sheet, toss sweet potatoes, olive oil, and Old Bay seasoning.

Utensils?  a knife and a baking dish.

Utensils? a knife and a baking dish.

Bake until  potatoes are deep golden brown on all sides, about 30 minutes, flipping halfway through.

Out of the oven, crusty and brown.

Out of the oven, crusty and brown.

This side dish goes will with roasted chicken or pork, seared steak, or sautéed shrimp.

If you’ve never used Old Bay seasoning, you must try it.  It contains a mixture of several spices, usually used on shell fish, but it brings out the natural sweetness of sweet potatoes.

SOURCE:    Martha Stewart

Grapes, You Need Them!

Grapes,  juicy and sweet.

Grapes, juicy and sweet.

Grapes are ancient.  So ancient that some vines have been growing on this planet long before people arrived.  In certain areas of Italy there is still evidence of late Bronze Age vineyard posts used to train grapevines.  Over the years we’ve been trying to find  ways to make them bigger and sweeter.  Some of the grapes I see at the market are so plump and ripe, I just want to reach out and grab one or two for a juicy bite.  Don’t you?

Red, purple or green, plump or petite, grapes are a healthy pop-in-your-mouth snack.  I love grapes when they are cold as a refreshing way to cool off.  And when we travel, I like to bring along a big bunch of grapes to snack on.  One 3/4 cup serving of grapes is a good source of vitamin K, providing 25% of your daily needs.  Recent studies suggest that Vitamin K reduces the risk of bone fractures, particularly in older women.  Other studies have shown the benefits of having a glass of red wine to reduce the risk of heart and artery problems.  Grapes, particularly red  and black ones, are also rich in antioxidants.  So we know about their benefits, and we eat grapes fresh as a fruit/snack, or drink their juice fermented as wine,  but how many of you cook with grapes?  I’m not taking about making grape jam or jelly, but really incorporating them into a main dish, side dish or salad.

IMG_5263

I’m guessing not many people would even think of cooking with grapes.  Small and juicy with a hint of acid and sweet, they make perfect partners with some foods.  In the weeks ahead, I would like to introduce you to some recipes that utilize grapes in ways you may not have  considered.

Grape and Rosemary Focaccia

Grape and Rosemary Focaccia

The first one is this recipe for Grape-Rosemary Focaccia.  Scattered over the top of the focaccia, the grapes subtly sweeten each bite.  The sweet/salty combination of grapes, Parmesan cheese and rosemary is surprising, and delicious.  It can be served with a soup, or salad, as a dinner accompaniment in place of dinner rolls, or as an appetizer.  To make it quickly, use prepared whole wheat pizza dough from your supermarket, fresh or frozen.  If frozen, defrost thoroughly in the refrigerator or at room temperature.  Open the bag to give the dough room to expand, i.e. “rise”, prior to stretching and shaping.   Once the focaccia is prepared, allow it to sit at room temperature for about half an hour for another small “rise” before baking.

GRAPE-ROSEMARY FOCACCIA

Yield:    Makes 12 servings

Whole wheat pizza dough, grapes, rosemary, and Parmesan cheese.

Whole wheat pizza dough, grapes, rosemary, and Parmesan cheese.

Ingredients:

  • 1 pound prepared pizza dough, preferably whole wheat
  • 1 Tbsp. extra-virgin olive oil
  • 1/2 cup shredded Parmesan cheese
  • 2 tsp. fresh rosemary leaves or 1 tsp. dried
  • 2 cups seedless grapes.  ( If large ones, cut in half.)

1.  Position rack in upper third of oven;  preheat to 425 *F.  Coat a large baking sheet with cooking spray.

2.  Working on a lightly floured surface, pat and stretch dough with damp hands into a 10 by 12-inch oval.  If the dough will not stretch easily, let it rest for 10 minutes, then stretch it again.  Transfer to the prepared baking sheet.

Stretch dough out on a baking sheet and sprinkle with cheese.

Stretch dough out on a baking sheet, drizzle with oil and sprinkle with cheese.

3.  Drizzle the oil over the dough;  sprinkle with Parmesan cheese and rosemary.  Arrange grapes on top and press lightly into the dough.   At this point I let mine sit at room temperature for about 30 minutes to give the dough a chance to rest and rise again a little bit.

Add chopped rosemary and grapes.

Add chopped rosemary and grapes.

4.  Bake until golden around the edges and some of the grapes have burst,  18 – 25 minutes.   (Note:  Mine was done at 15 minutes, so watch carefully,)   Let cool at least 5 minutes before serving.  (The grapes will be very hot inside.)

Golden brown with a heavenly aroma after baking.

Golden brown with a heavenly aroma after baking.

Serve warm with additional olive oil for dipping.

Serve warm with additional olive oil for dipping.

SOURCE:    Eating Well

Ham and Apple Butter Panini

Ham and apple butter  panini.

Ham and apple butter panini.

The foliage this year in New England is awesome, probably due to the few chilly mornings we had a couple of weeks ago.  Even though it is still developing in our area,  north of us it has almost reached its peak.  So this year we took our annual foliage ride to New Hampshire.   It was a beautiful sunny day and we totally enjoyed our day-cation.  One of the highlights of the day was our lunch at a small cafe, situated with a  river running behind it.  There was a patio out back where we sat to enjoy not only our lunch, but also the foliage along the river.

We both ordered a bowl of soup and this Ham and Apple Butter Panini.  It was awesome, and after we returned home the thought of it kept running through my mind.  I wished I could have another one, so I made it happen.  The combination may sound a little unusual, but let me assure you, it’s all good.  Somehow it just works.  The sweet apple butter, the salty ham, crisp apple slices and melted cheese.  Irresistible.

Cheese, apples, ham and apple butter.  Superb!

Cheese, apples, ham and apple butter. Superb!

If you go to an apple orchard and come away looking for ideas to use up your apples, this sandwich is a great place to start.

HAM AND APPLE BUTTER PANINI

Yield:   4 sandwiches

Ingredients:

  • 8 slices sturdy bread, such as sourdough, or a rustic white like Scala.
  • 3 – 4 Tbsp. butter, softened
  • sliced cheddar cheese, white or yellow,
  • 2 – 3 thinly sliced apples, such as Macoun, Macintosh, or whatever is available in your area.
  • thinly sliced deli ham, about 6 – 8 oz.
  • 1/2 cup apple butter (available at the supermarket where jams are sold, or you can make your own.)

Directions:

To assemble the sandwiches, separate the slices of bread into pairs.  Generously butter one side of each slice of bread, and then place them butter side down on a work surface.  (This will be the outside of the sandwich.)

On one side of each pair, layer cheese, apple slices, and ham.

IMG_5246

On the remaining slice of each pair, spread a generous layer of apple butter.  Sandwich the two slices of each pair together with the buttered sides facing outward.

Butter the outside of bread on both sides and grill it.

Butter the outside of bread on both sides and grill it.

Warm a cast iron skillet or panini grill over medium heat.  Cook the sandwiches, turning once, until both sides are golden and the cheese is melted.  Slice in half and serve immediately.

Sweet, salty, cheesy, melty.  What's not to love?

Sweet, salty, cheesy, melty. What’s not to love?

IMG_5251