Baked Black and White Doughnuts

Baked Black and White Doughnuts

Baked Black and White Doughnuts

Ah, yes…..doughnuts!   Do you love them?   Strangely enough, I can’t say that I do.  I’ve always thought of doughnuts as greasy, fried, blobs of sweetness without many redeeming qualities.  But then about a year ago I got introduced to baked doughnuts. Up till then, I had never tried them.   Now, they may not suit everyone, especially those of you who crave your daily doughnut from the doughnut shop, but I hope you will agree with me that they are good….like, really, really good.   OK?

IMG_8998

Baked doughnuts are the drama, whereas fried doughnuts are the comedy of life, sort of like little emojies 🙂   These doughnuts in your hands, in your life, are like magic.  That’s it,  that’s all I’m saying.

These doughnuts are a take-off on those black and white cookies, we all love.  They’re for when you can’t decide it you want a chocolate glazed doughnut or a vanilla glazed one with sprinkles.  See, I’ve solved that problem for you!   Donut ignore this recipe.  (Pun intended.)

IMG_9003

I like the way these doughnuts come together,  mostly because it’s so simple.  No electric mixer involved, just two bowls and  a few measuring and mixing tools.   And since I’ve become completely captivated by browned butter and the flavor it adds to baked goods, I’ve used it here too.

IMG_8984

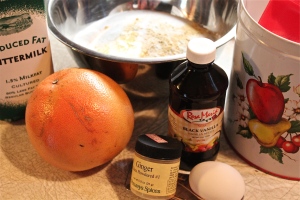
They’re basically made with flour + sugar + spice + everything nice, (i.e., buttermilk, egg, vanilla, and browned butter).

IMG_8988

Browned butter adds a lovely depth of flavor and nuttiness to the cake-y doughnuts, and lots of freshly grated nutmeg takes them over the top.

Dry ingredients are whisked together to fluff and blend them well.

IMG_8983

Wet ingredients are whisked up just so, and added to the dry.  Wet + dry, that’s how you do it.  It’s called cooking math.

IMG_8987


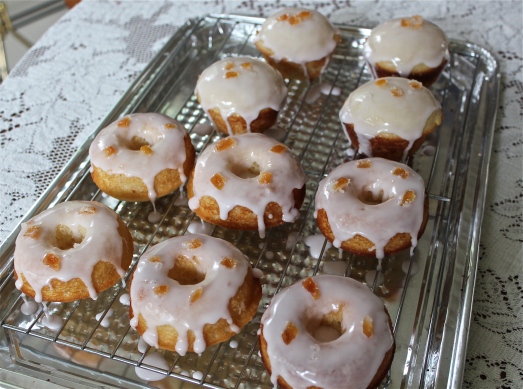
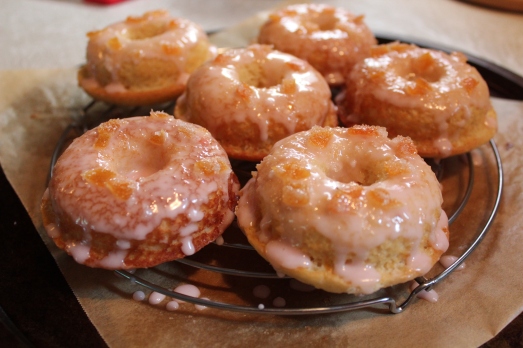
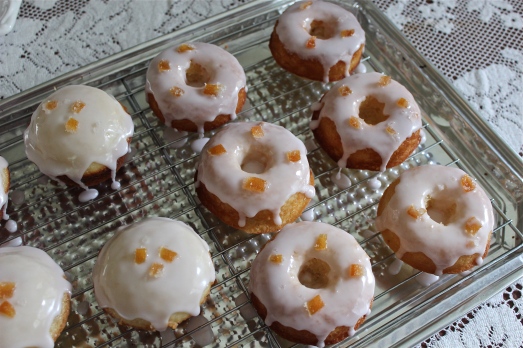
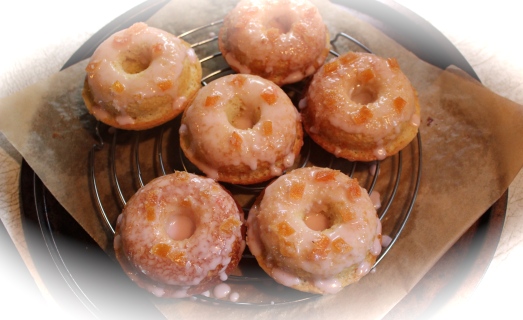
Baked up, these doughnuts are soft, tender and sweet.

IMG_8997

Chocolate and vanilla glazes are thick enough to be just spreadable.  Colored sprinkles never hurt.

Glaze one side of each doughnut with the chocolate glaze, then do the other side with vanilla glaze,  Don’t forget the sprinkles.  It will take a bit of will power to do this without taking a bite out of one of them.   I wish you luck.

IMG_9003

I’m sorry to tell you, but the final decision is yours here….will you bite into the chocolate side, or the vanilla side first????

IMG_9006


BAKED BLACK AND WHITE DOUGHNUTS

Yield:   Makes 6 doughnuts

Ingredients:

  • 1 cup all-purpose flour
  • 3/4 tsp. baking powder
  • 1/4 tsp. baking soda
  • 1/2 tsp. salt
  • 1/2 tsp. freshly grated nutmeg
  • 1/3 cup sugar
  • 3 Tbsp. unsalted butter (but you will use only 2 Tbp. of it in the recipe)
  • 1 large egg
  • 1/2 cup buttermilk
  • 1/2 tsp. pure vanilla extract

For the chocolate glaze:

  • 3/4 cup powdered sugar, sifted
  • 2 Tbsp. unsweetened cocoa powder
  • pinch salt
  • 2 to 3 Tbsp. milk
  • 1/2 tsp. vanilla extract

For the vanilla glaze:

  • 3/4 cup powdered sugar, sifted
  • 2 to 3 Tbsp. milk
  • 1/2 tsp. vanilla extract

Directions:

1.  Preheat the oven to 350*F.  Lightly grease a doughnut pan and set it aside.

2.  In a small saucepan, over medium heat, melt butter.  Butter will begin to crackle and pop as it melts.  That’s the water cooking out of it.  Once the water has evaporated out, the butter will quiet down and begin to brown.  Keep an eye on it as it browns quickly.  It will begin to smell nutty.  Remove from heat and immediately pour into a small cup or bowl to cool.

IMG_8984

3.  In a medium bowl, whisk together flour, baking powder, baking soda, salt, nutmeg, and sugar.  Set aside.

IMG_8983

4.  In a small bowl, whisk together egg, buttermilk, and vanilla extract.  Measure out 2 tablespoons of browned butter and whisk into the wet ingredients.

IMG_8989

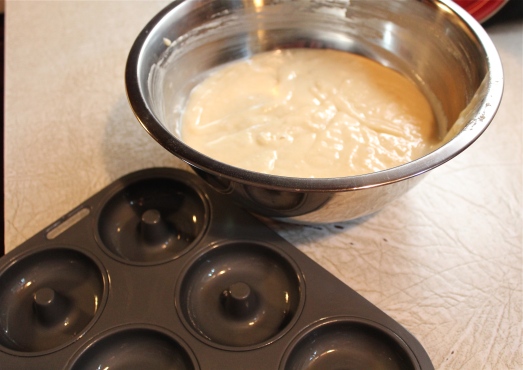
5.  Add the wet ingredients all at once to the dry ingredients.

IMG_8990

Lift and fold as you stir until no flour bits remain and all of the ingredients are well combined.  Try not to over mix the batter.  This is what makes a tender cake.

IMG_8991

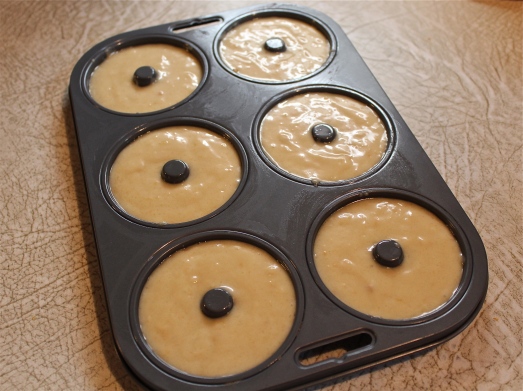
6.  Use a small spoon to dollop batter into the prepared pan.  Smooth out and fill each doughnut cup in the pan three-quarters full with batter.

IMG_8992

IMG_8995

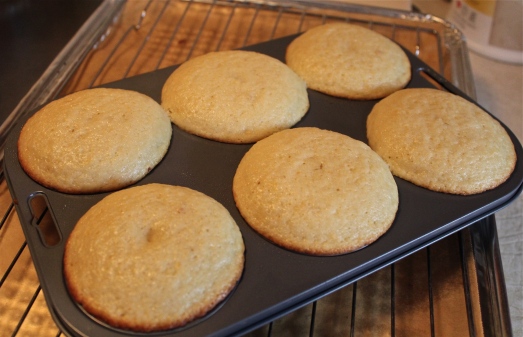
7.  Bake for 8 to 10 minutes.  Check for doneness at 8 minutes, tops should spring back slightly when touched.  Do not over bake them.  Remove from oven and allow to cool in the pan a few minutes before inverting onto a wire rack to cool completely.

IMG_8996

IMG_8997

When the doughnuts are cool, make the glazes.

1. For chocolate glaze:  whisk together the sugar, cocoa powder, and salt.  Add 2 tablespoons of milk and vanilla extract.  Stir to combine.  Add more milk as necessary to create a thick but still just pourable glaze.

2.  For vanilla glaze:  whisk together powdered sugar, milk and vanilla to create a thick put still pourable glaze.

3.  Spread half of the doughnuts with chocolate glaze, and remaining half with vanilla glaze.  Place back on the wire rack and sprinkle the vanilla side with colored sprinkles while the glaze is wet.  Allow to set for about 30 minutes before storing or serving.  These doughnuts are best within 2 days.

IMG_9001


SOURCE:   Adapted from Joy the Baker


Advertisement

Loaded Nachos

Loaded Nachos

Loaded Nachos

Around here we take our nachos very seriously.  Very, very seriously.

What this means is that we really do love nachos, and both Mr. D. and I agree we like them loaded with as much stuff as I can get my hands on.

When making nachos, it’s a little like building a house.  First you start with a good foundation (tortilla chips), then you build up the structure, a tower of multi layers of  seasoned beef, beans, crisp waffle fries, and cheeses.  Then you top it all off with some pico de gallo, that you made yourself; savory, colorful, and so delish.

IMG_8897

When you look at the ingredient list for these nachos, it looks like a lot, but really it isn’t.  It all comes together when you experience that first perfect bite that contains a little bit of everything.  Yes, indeed!

I made these for New Year’s Eve.  They served as our supper, but you can serve them as an appetizer, or a snack.  (Think Super Bowl coming up.)  Once you start on them it’s hard to stop so take my advice and make a lot.

LOADED NACHOS

Yield:  Servings:  4

Ingredients:

  • 1 Tbsp. olive oil
  • 1 medium onion, diced
  • 2 lb.  ground beef
  • 1/2 tsp. chili powder
  • 1/2 tsp. paprika
  • 1/2 tsp. cumin
  • 1/4 tsp. crushed red pepper
  • 1/2 tsp. salt
  • 1/4 tsp. pepper
  • 1 can (14.5 oz.) pinto beans, chili beans, or ranch style beans
  • 1/2 cup hot water
  • tortilla chips
  • frozen waffle potato fries
  • 1 1/2 cup grated cheddar cheese
  • 1 1/2 cup Mexican Blend, Taco blend or Monterey Jack cheese
  • 3 – 4 plum tomatoes, diced
  • 1 whole jalapeño, finely diced (optional)
  • 1/2 bunch cilantro, chopped (or use parsley)
  • juice of 1 lime
  • 1/2 tsp. salt
  • 1 avocado, pitted and diced
  • sour cream, (optional)

Directions:

Start by cooking the waffle fries.  Follow package directions for oven temperature and length of time needed to get them  crispy on the edges.  Once cooked, remove from oven and set aside. If you prefer you may omit the waffle fries and use all tortilla chips throughout.  I prefer the fries because I like the texture contrasts in the finished nachos.

IMG_8875

Next, dice up half the onion….

IMG_8876

Heat up a non-stick skillet with a little olive oil….

IMG_8877

and add in the chopped onion.

IMG_8878

Cook the onions for a minute or two, then add in the ground beef.

IMG_8879

Break it up and let it cook until the meat is browned.  Drain off any fat that has accumulated in the bottom of the pan.

IMG_8880

Open the beans and add them to the pan along with the seasonings.    Stir it around to mix in the spices and blend the flavors.

Pour in the hot water to make it a little more saucy.  Reduce the heat to Low and let it simmer while you get the rest of the ingredients ready.

IMG_8875

Next, chop up the rest of the onion, making a fine dice.

IMG_8881

Next up,   chop up those tomatoes.  This is how I do it:  cut off the tops, then cut them into slices, then cut the slices into strips.  Now cross-cut the strips to dice them.  If you are using a jalapeño, use the same technique to dice it.

IMG_8885

Peel and seed the avocado, cut into strips, then crosscut into cubes.

Now, throw the onions, tomatoes, avocado and jalapeño into a bowl.  Tell them to get acquainted, you’ll be right back.

IMG_8886

Tear the leaves off half a bunch of cilantro (or parsley) and chop roughly.   Throw that into the bowl.

Cut a lime in half, and squeeze in the juice.  Add a little salt and pepper.

IMG_8887

And  stir it all together.  That’s your Pico de Gallo!!

We like it a little chunky, but if your family likes it more finely chopped, that’s great.  It will all taste the same.

Finely, the cheese 🙂  I grated a yellow cheddar and used a package of Taco Blend.  I did not mix them together.  You’ll see why in a minute.

IMG_8888

To assemble the nachos, make a single layer of chips on a platter or large plate.

IMG_8889

Scoop up a big ole spoonful of the beef/bean mixture and sprinkle it all over the chips.  Messy is good, so let it be!

IMG_8890

Sprinkle on a layer of cheddar,

IMG_8891

This is where the goodness-level jumps up a notch:  Put on a layer of waffle fries….

IMG_8892

And another layer of beef and beans…

IMG_8893

Then a nice layer of Taco blend, and another layer of waffle fries.

IMG_8894

Now use up the remainder of the beef/bean mixture to top it all,  and a final layer of Taco blend or cheddar (your choice).

IMG_8895

I put mine back into the still warm oven (turned off), and let the cheese melt.  Alternately, you could nuke the whole shebang for about 45  seconds until the cheese is perfectly melted.

AND THEN….

Spoon the Pico de Gallo on top of it all.   Why?   Because this is the roof on the house, or the flowers in the garden.   It’s the finishing touch that keeps you going back for more.   And it looks so pretty!

AND, because it’s all the veggies that makes this platter of nachos healthy.  I know for sure it’s what makes them so delicious!

IMG_8897

I hope you enjoy my approach to making nachos.  Try them real soon, and of course, you can add whatever extras you like:  sour cream, chopped black olives, chopped green onions–anything.  My favorite part are the chips on the bottom that start to soften under all the gooey ingredients, while the waffle fries stay crisp.  Divine!

SOURCE:   Adapted from The Pioneer Woman Cooks

Caramel Apple Dip

Caramel Apple Dip

Caramel Apple Dip

Looking for a little something extra for your Halloween Party?  This one is easy to make and offers a different approach to caramel apples.

For some people, apple cider, apple pie, and caramel apples are some of the essential fall things, conjuring up memories of trips to the orchard, fall festivals, and such.  I have never been one to go out of my way for a caramel apple, finding them sticky and messy to eat.  But anything with caramel piques my interest, and this recipe for a dip really intrigued me.

In addition to the savory appetizers I served at Mr.D’s birthday party, I wanted something cold and fruit based, that children would like.  Let me tell you, this was definitely it.  Apples cut into thin wedges, arranged on a platter with this dip, some chunks of cheddar cheese, and some grapes made a perfect counterpoint to the hot and savory Salsa Wings and Baked Broccoli Parmesan Dip

This sweet smooth and fluffy dip is really a crowd-pleaser.  Be careful it’s so good that you won’t want to stop eating it.

IMG_8366

In my haste to set it out for everyone to enjoy, I forgot to take a photo of the final platter arrangement of fruit, dip, and cheese.  But what I did was set the bowl of dip in the center of a square serving platter.  In the two diagonal corners were piles of apple wedges, in another corner were the chunks of cheese, and in the fourth corner was a bunch of red grapes.  This was a pretty arrangement, with all the cool foods grouped together.

The recipe calls for 3 apples, but I cut up 6 apples, and still there was some dip leftover.  The next day, I put a small container of it and an apple in Mr. D’s lunch.  He really liked having it as a mid-day snack at work.  So this would also be good in lunch boxes for school, or as an after school snack, if you are someone looking for such ideas.

CARAMEL APPLE DIP

Yield:   2-3 cups of dipIMG_8360

Ingredients:

  • 1 package (8-ounces) low fat cream cheese
  • 1/2 cup brown sugar
  • 1/4 cup caramel ice cream topping
  • 1 tsp, vanilla extract
  • 1 cup marshmallow creme
  • 3 medium eating apples
  • 2 tbsp. lemon juice
  • 2 tbsp. water

Directions:

1.  In a small bowl, beat the cream cheese and brown sugar,

Whip brown sugar with cream cheese.

Whip brown sugar with cream cheese.

add caramel topping and vanilla and beat until smooth;

Mix in caramel topping and vanilla.

Mix in caramel topping and vanilla.

Fold in the marshmallow creme.  This can be really sticky so I used my beater on low speed to get the marshmallow mixed in evenly.


Fold in marshmallow creme.

Fold in marshmallow creme.

2.  Cut apples vertically into thin wedges.  In a small bowl, combine the lemon juice and water;  toss apples in the lemon juice mixture.  Drain.

3.  Serve apples with dip, and enjoy.

IMG_8364

Happy Halloween, everyone, and have a great weekend!


SOURCE:   Taste of Home

Grapefruit Buttermilk Doughnuts with Candied Zest

Graperfuit Buttermilk Doughnuts

Graperfuit Buttermilk Doughnuts

It was only after the fact that I learned that National Doughnut day had come and gone.  But that’s alright, I probably wouldn’t have paid any attention to it anyway.  I honestly never pay much attention to any of these so-called special days because there are so many of them, every single day it’s something, and often more than one something per day.

Who designates these special days anyhow?  No one has ever asked me what I think, or if I have a favorite food that I would like to honor with it’s own special day.  If anyone can get in on the act offering random suggestions for dedicated days, then I can do it too. Mine would be much more specific like— mulch the flower beds day, or skip work and go for a drive day, or lets’s get our nails done and then go out for lunch day, or put on some good music and dance day.  As you can see my days have a lot more to do in them than just eating one type of food… they’re more about movement and action and getting things done.  That’s the kind of gal I am.

IMG_7543

Anyway, having gotten that off my chest,  here’s a recipe for making doughnuts that are just the tiniest bit healthy because they are baked instead of fried.  I don’t know anyone who makes their own fried doughnuts, do you?  I think everybody and their mother hates deep frying foods, and that definitely includes me.   If the thought even crosses your mind, think of your thighs and reconsider!!   One impulsive act like frying doughnuts can undo weeks of careful eating, and hopefully weight loss, so get a grip on yourself.

Tiniest bit healthy baked doughnuts!!

Tiniest bit healthy baked doughnuts!!

Thank heavens these doughnuts require NO fryer.  They’re easy to make and they turn out light and cake-like. They require only one specialized pan; a doughnut pan that is generally inexpensive.  When I bought mine I thought I would never use it, but I’m finding myself using it more and more.  One little trick that I do with mine, is pour muffin batter in it and bake them.  You will get a shallow muffin, like muffin tops with a hole in the middle.  Think of it as a weight loss tactic; smaller muffin with a hole in the middle=less calories!   What you see in the above photo that looks like muffins is actually the remainder of the doughnut batter that I baked in a muffin pan.  I call them Douffins 🙂

Mr D. called these doughnuts “fabulous” and I have to agree with him.  I love the bits of tartness that the grapefruit zest adds to the flavor, and the grapefruit juice in the glaze keeps it all from becoming too sweet.  Making the candied zest is very easy to do, and now that I’ve done it, I would try it with other citrus fruits and use the candied zest as a garnish or topping on other baked goods.  Try this, it adds just the perfect touch.

IMG_7542

GRAPEFRUIT BUTTERMILK DOUGHNUTS WITH CANDIED ZEST

Yield:   1 dozen doughnuts  (I got 12 doughnuts plus 4 douffins)

Ingredients:

  • non-stick cooking sprayIMG_7533
  • 2 cups all-purpose flour
  • 2 cups granulated sugar
  • 2 teaspoons baking powder
  • 1 teaspoon ground ginger
  • 1/2 teaspoon salt
  • 1 1/4 cups buttermilk
  • 1 large egg, lightly beaten
  • 2 tablespoons canola oil
  • 1 teaspoon vanilla extract
  • zest of 1 large grapefruit, plus 4 two-inch long strips grapefruit zest thinly sliced
  • 1 cup confectioners’ sugar
  • 3 tablespoons grapefruit juice

Directions:

1.  Coat 2  six-cavity doughnut pans with nonstick spray.  Preheat oven to 350*F.  Meanwhile in a large bowl, combine flour, 1 1/2 cups granulated sugar, baking powder, ginger, and salt, and mix well.

2.  In a small bowl, whisk buttermilk, egg, canola oil, vanilla, and zest of 1 grapefruit to combine.

Mix wet ingredients together.

Mix wet ingredients together.

Add wet ingredients to dry ingredients and stir.  Spoon batter into the prepared pans, filling each cavity a little more than three-quarters.

IMG_7536


IMG_7537

3.  Bake for 25 – 30 minutes.  Let cool in pan for 5 minutes, then turn doughnuts out onto a wire rack to cool completely.

IMG_7540

4.  In a small bowl, whisk confectioners’ sugar and juice until smooth.  Set glaze aside.  In a small saucepan, combine zest strips, 3 tablespoons granulated sugar, and 3 tablespoons water, and bring to a boil.  Reduce heat to low and simmer mixture until sugar dissolves, about 5 minutes.   Drain, and discard the liquid.  Immediately toss the zest strips in the remaining sugar until coated.  Transfer to a cutting board and chop.

After cooking, coat zest strips in sugar.

After cooking, coat zest strips in sugar.


Chopped sugared zest into small pieces.

Chop sugared zest into small pieces.

5.  For each doughnut, carefully dip the top in the glaze, then set on a wire rack, glaze side up, so excess drips off.  Sprinkle immediately with chopped zest.


Dip tops into glaze, sprinkle with zest.

Dip tops into glaze, sprinkle with zest.


These are unbelievably good.

These are unbelievably good.


SOURCE:   Country Living Magazine


Avocado-Mango Salsa (with roasted corn chips)

Avocado-Mango Salsa with roast corn chips.

Avocado-Mango Salsa with roast corn chips.

Sometimes you just gotta have a snack!   And if that snack is good for you, you’ll have waaay less guilt while you munch away.  So is anything better to snack on than salsa and chips?    Not in my house there isn’t.

Munch away on this!!

Munch away on this!!

I think most people know how good avocados are for us.  Each serving of this snack provides more than half the daily requirement of  potassium and is also a good source of fiber and monounsaturated fat.  A serving of 3 tablespoons of salsa and 6 chips is only 92 calories.  Use your own judgement in deciding if you can have more than 1 serving?????  It is so good I think you will want to have more.

Whoever had the idea to combine these ingredients was really on to something:  creamy avocado, sweet mango, spicy cilantro, and tangy lime.  They just belong together.  Add in the crispiness of corn tortillas sprinkled with a little salt.   WOW!  Mr. D. says it’s the best salsa he’s ever had.  He’s become bored with the usual red salsa(s) that are tangy and spicy.  This makes a nice change from all that and it might even be considered “addicting”.

IMG_7263

If you would love to have a bowl of this yumminess pop up in front of you right now, you are not alone.  But hang on for a bit, because it only takes a few minutes to make it.  Part of the enjoyment of this salsa is the chunkiness of the avocado and mango, so don’t mash them.  Once mixed, let the mixture stand for 10 minutes to allow flavors to blend.  We loved the home-made chips too.  They are very crisp and have just a tad of salt sprinkled on them.  A tiny bit more salt in the salsa is all that’s needed to bring this whole taste experience together in a big way.

IMG_7262

AVOCADO-MANGO SALSA with ROASTED CORN CHIPS

Yield:   about 12 servings  (serving size is 3 tablespoons salsa and 6 chips)

The colors of the ingredients make it appetizing.

The colors of the ingredients make it appetizing.

Ingredients:

  •  12 (6-inch) corn tortillas, each cut into 6 wedges
  • cooking spray
  •  1/4 teaspoon kosher salt, divided
  • 1 1/4 cups chopped peeled avocado
  • 1 cup chopped peeled mango (the golden mango is an Ataulfo mango)
  • 1 tablespoon finely chopped cilantro
  • 4 teaspoons fresh lime juice
  • cilantro sprigs, for garnish, optional

Directions:

1.  Preheat oven to 425*F.

2.  Arrange tortillas wedges in a single layer on baking sheets coated with cooking spray.  Coat wedges with cooking spray.  Sprinkle 1/8 teaspoon salt evenly over the wedges.  Bake at 425* for 8 minutes or until crisp.

Cut each tortilla into 6 wedges.

Cut each tortilla into 6 wedges.

Spread out on a baking sheet and spray with cooking spray,

Spread out on a baking sheet and spray with cooking spray,

They become crispy and golden.

They become crispy and golden.

3.  Combine remaining 1/8 teaspoon salt, avocado, mango, chopped cilantro, and juice, tossing gently.  Garnish with cilantro sprigs, if desired.  Let stand 10 minutes.  Serve with chips.

IMG_7265


SOURCE:  Cooking Light

Pizza Puffs

Pizza Puffs

Pizza Puffs

These are little bites that contain all the flavors that you love about pizza!   I made these awesome nibbles as part of a brunch buffet and everyone loved them.  They are extremely easy to make, and you can vary what you put into them according to your taste.  Whatever you like for pizza toppings can go into these delicious little morsels.   I’m going to keep these in my file as an appetizer or a great snack when game watching, or having an outdoor barbecue. These delicious little puffs will have everyone wanting more.

IMG_7229

I used some crumbled pre-cooked sausage and chopped pepperoni in mine plus I added some pizza dough flavoring to the batter.  I also included shredded mozzarella cheese because, really, what is pizza without the cheese?  When you serve these you will want to have a bowl of warm marinara sauce nearby to spoon over the puffs, or for dipping.

PIZZA PUFFS

Yield:   24 mini puffs

Ingredients: 

  • 3/4 cup all-purpose flourIMG_7200
  • 3/4 tsp. baking powder
  • 1/2 tsp. garlic powder
  • 1/2 tsp. pizza seasoning (optional, but good)
  • 3/4 cup milk
  • 1 egg, lightly beaten
  • 4 ounces, shredded mozzarella cheese (about 1 cup)
  • 2 ounces chopped pepperoni,  about 1/2 cup
  • 4 ounces italian sausage, cooked and crumbled
  • 1/2 cup pizza sauce

Directions:

1.  Preheat the oven to  375*F.  Grease 24 mini muffin cups.

2.  In a large bowl whisk together all the dry ingredients. (flour through pizza seasoning)

2.  In another small bowl or measuring cup, whisk together the milk and egg.   Add to the dry ingredients.  Mix to incorporate, then stir in the cheese, pepperoni and sausage.

IMG_7202

Let stand 10 minutes.  (This is important, it’s what makes them really puff up)

3.  Stir batter again, and divide among the muffin cups.   Bake till puffed and golden, 20 – 25 minutes.

IMG_7204


4.  Warm the pizza sauce and serve with the puffs for dipping.


IMG_7228

It occurred to me after making these that they could be well suited to a breakfast menu by substituting bacon and chopped ham for the meats, and cheddar cheese for mozzarella.    I must try that next time I make these.


SOURCE:   adapted from a recipe from Little Kitchen

Skinny Chocolate Strawberry Frappé

Skinny Chocolate Covered Strawberry Frappé

Skinny Chocolate Covered Strawberry Frappé

Has anybody besides me come to the realization that it’s time to get serious about shedding some pounds and inches in order to fit into the summer wardrobe.  I mean really serious.   😦  I thought I would begin with this beverage which is delicious, but low in calories, fat and carbs.  The end of this post will give you the specifics on that.  You will be amazed.

This yummy, frappuccino is really rich and flavorful.  It’s a copycat of the McDonald’s one with a fraction of the cost and calories of the original.  Full of real fruit and chocolate, this is one drink you won’t want to miss! It reminds me of chocolate covered strawberries.

Before making it I decided to research the original Strawberry Frappé to find out what it was made of.  Before too long, I learned that this beverage had earned many negative reviews.  Two things became glaringly apparent :  the strawberry flavor tasted completely artificial; and chunks of chocolate clogged the straw, making it impossible to drink.

IMG_6712

Ahaa!  I knew I could do better than that.  So, I pulled my trusty blender out and started measuring out ingredients.  Mr. D. was at home and he was willing to be my official “taste tester”.   I have to admit my first go at it left something to be desired…it was very unsweet with a prominent chocolate flavor.  I remedied that by adding more strawberries, and more sweetener.  My choice, and what I had on hand, was agave syrup.   I added about 2 Tablespoons to each drink, and this was adequate for us.

You can whip up this ridiculously easy recipe with only 5 ingredients:   dark, strong coffee, milk, cocoa powder, strawberries, and some sweetener.  You probably have all of these in your pantry -and fridge- already!

IMG_6713

I strongly recommend using frozen strawberries instead of fresh ones.  Fresh strawberries, with their juice, will add too much liquid to the frappuccino.  Frozen strawberries are generally picked at their peak of ripeness and flash frozen which preserves their bright fruity taste.  In addition to flavor, the frozen strawberries also act as ice and help thicken the drink without watering down the taste.

To fix the second problem of chocolate chunks clogging the straw, I opted to use cocoa powder instead of pieces of chocolate.  It still adds a whole lot of chocolate flavor, but as a fine powder, it won’t plug up the straw.  Cocoa powder also has a greatly reduced number of calories and fat without sacrificing any flavor.

SKINNY CHOCOLATE COVERED STRAWBERRY FRAPPÉ

Yield:  Makes about 16 ounces.  Enough for 1 hugh drink or 2 smaller ones.

Ingredients:IMG_6710

  • 3/4 cup double-strength coffee, chilled
  • 1/2 cup skim milk (Any kind of milk will do, I used almond milk.)
  • 1  1/2 tablespoon unsweetened cocoa powder
  • 1 cup frozen unsweetened strawberries
  • 1/2 cup ice cubes
  • sweetener to taste  (agave, honey, etc.)

Instructions:

1.  Add only the coffee, milk, and cocoa powder to your blender container to begin.  You want to thoroughly mix those together before adding the frozen ingredients, so the cocoa gets uniformly mixed in, avoiding any little pockets of cocoa powder.

2.  Pour in the frozen strawberries and ice, and any sweetener desired, and blend till smooth.  Pour into a large glass and serve with a straw.   YUM!

IMG_6711

Here’s the hugh payoff—-when compared with McDonald’s, my version contains 621 fewer calories, 26.6 fewer grams fat, 89.9 fewer grams of carbs, and 89.8 fewer grams of sugar.

I am also going to keep this recipe in mind when hot weather arrives, and make it to pour into my popsicle molds.  I think this is going to be a delicious summertime cool-down treat.


Chocolate Caramel Pretzel Delights

Chocolate caramel pretzel delights.

Chocolate caramel pretzel delights.

With Valentine’s Day coming up I decided to try out this recipe that came to my attention over the Christmas holidays, but I never got around to making it.  It is a very easy candy treat that you can make up so quickly it takes hardly any time at all.  Give them as gifts, or keep for yourself.  I don’t know anyone who doesn’t like the sweetness of chocolate and caramel combined with the saltiness of pretzels.    Sooo good!

Serve your treats for Valentine's Day.

Serve your treats for Valentine’s Day.

For these I used pretzels that look like the shape of a heart as the base, but you could use round pretzels, or lattice pretzels, just not long straight ones.  You also need some kind of chocolate covered caramel candy, such as Rolo or similar, and pecan halves. ( Walnut halves would be ok, too).  These chewy little treats are a lot like turtle candies.

Here’s how to make them….

 CHOCOLATE CARAMEL PRETZEL DELIGHTS

Yield:    Make as many as you want.

Directions:

1.  Heat oven to 350*F.   Line a cookie sheet with parchment paper or foil.

2.  Place one pretzel for each treat desired on the prepared sheet.   Top each pretzel with one chocolate caramel candy.

Lay out pretzels on a baking sheet, top each one with a candy.

Lay out pretzels on a baking sheet, top each one with a candy.

3.  Bake for 3 to 5 minutes or until candy piece begins to soften, but not melt.

Bake until softened, but not melted.

Bake until softened, but not melted.

Remove from the oven.  Top each with a pecan half and press down lightly.

Top each one with a pecan half.

Top each one with a pecan half.

Cool completely before serving or packaging.

IMG_6171

SOURCE:    Celebrate with Hersheys.comIMG_6172

Roast Chickpeas

Roast Chickpeas

Roast Chickpeas

This is something you may not have noticed, but there are very few recipes for bean dishes on this blog.  That’s because beans in general are not one of my favorite foods.  Sure, I include beans in soups where I like eating them, or I enjoy baked beans at a cookout, but for the most part I’m not a big fan of beans, and most especially I don’t use chickpeas.  I think it has to do with their mealy texture.  Therefore it has come as a hugh surprise to me that I LOVE these Roasted Chickpeas.

A crunchy and nutritious snack.

A crunchy and nutritious snack.

Say hello to my new favorite snack.  I could eat these almost every single day, one by one out of my hand, or added to salads.  They make everything so much more crunchy.  Besides the pure enjoyment of eating them, there’s the nutritional value of chickpeas:  good quality carbohydrates by way of their fiber, and valuable proteins, plus, not a fat or sugar anywhere except if you add some.  So how about getting on the bandwagon with me and trying out these healthy, nutritious, snacks.  This is how I make them….

First, I want the oven to be HOT.   Partly because I have no patience waiting for them, but also because I want them to be as crispy as I can get them.  So crank that oven up to 425*F.  Hot, hot, hot.

Most of the time I use canned chickpeas, but I have also soaked and cooked them myself.  So the chickpeas are always cooked to start with.  If using canned, be sure to rinse and drain them well.   Then place them in a dish towel or paper towel and really dry them off.  Roll them around to get them super dry. This may loosen the skin on some of them.  No worries, just pick off what’s loose and continue.

Drain well, roll in a towel and pat dry.

Drain well, roll in a towel and pat dry.

Next I spread them on a baking sheet that is lined with foil, because—it just makes life a little easier.

Pour onto foil-lined baking sheet in a single layer.

Pour onto foil-lined baking sheet in a single layer.

Then I give them a quick spray of olive oil.  Olive oil in a spray can or a misto works best, but if you don’t have either, a teeny, tiny bit of olive oil sprinkled on works too.  Toss to coat well.  Using a very small amount is key.

Spray lightly with olive oil.

Spray lightly with olive oil.

After that, I season the beans with whatever I feel like.  My first version included salt, pepper, garlic powder, and sweet paprika.  This has become my go-to standby.  I don’t measure anything, just do a few shakes of each, then toss them around to coat.  Other seasonings have included cinnamon, nutmeg,  dried herbs, chili powder, and whatever else is in your spice cupboard.  It’s fun to play around with the flavors!

Sprinkle on seasonings of choice.

Sprinkle on seasonings of choice.

If you would like a sweeter version you can add some sort of sugar ( brown sugar, white sugar, honey) and it will make a caramelized outer layer.

Anyway, after seasoning, toss, toss, toss.  Make sure they are in a single layer while baking.  Bake for 15 minutes, remove and do a quick mix-around with a spoon or spatula, and bake for another 15 minutes or so till crispy.

Roast till crispy.

Roast till crispy.

My gosh, I can’t even begin to tell you how much I love these chickpeas.  Unfortunately, they don’t stay real crispy for more than a day or so, so what I do is make 2 cups at a time ( 1 can of chickpeas), eat about half of them right away, and store the rest in a small plastic container lightly covered with foil, on my counter.  We then eat them for dinner in salad, or I give some to my husband in his lunch.  He loves them as a afternoon snack when he’s starting to feel lethargic.

HOW TO ROAST CHICKPEAS

Yield:  2 cups

Ingredients:

  • 2 cups cooked chickpeas (if canned, rinse and drain)
  • 1-2 tsp. olive oil, or olive oil spray/mist
  • 1/4 tsp. salt
  • 1/4 tsp. black pepper
  • 1/4 tsp. sweet or smoked paprika
  • 1/4 tsp. garlic powder
  • dash of cayenne pepper (optional)

Directions:

1.  Preheat oven to 425*F.   Line a baking sheet with foil.

2.  Place chickpeas on a paper towel or dish towel and pat completely to dry.  Remove any loose skins.

3.  Place on the prepared baking sheet and mist with olive oil.  Roll around to coat.  Sprinkle with seasonings of your choice and toss well to coat.  Make chickpeas are in a single layer.

4.  Bake for 15 minutes, toss well and flip, then bake for about 15 minutes more.  Let cool and eat.  Enjoy!

And that’s all there is to it.  😀

Roast Chickpeas, you gotta love them.

Roast Chickpeas, you gotta love them.

Pizzazzy Sausage Crescent Sandwich

Pizzazzy  Sausage Crescent Sandwich

Pizzazzy Sausage Crescent Sandwich

This sandwich is part pizza, and part sandwich, thus the name.  It contains a sausage filling nestled inside a crescent dough pocket.

I came across the recipe in a book that is published by Pillsbury called Pillsbury Christmas 2011.  I think they put out an edition every year for the Holidays.  All the recipes contained in it use a Pillsbury product in some way.  Crescent roll dough is extremely popular as a basis for what seemed like “hundreds” of recipes.  This is just one of them that I thought sounded good and looked like it would be easy to make.   I was correct on one count;  they are very tasty and can be eaten with the hands or a knife and fork.  While they are not difficult to make, working with perforated crescent dough, that needs to be pinched together can be a bit fiddly.  I never seem to be successful at keeping it all together.  Even though mine did not turn out looking as perfect as the picture in the book, we enjoyed them non-the-less with a bowl of soup on a very cold evening.

Pizzazzy Crescent Sandwich with hot soup.

Pizzazzy Crescent Sandwich with hot soup.

PIZZAZZY SAUSAGE CRESCENT SANDWICH

Yield:   Make 8

Crescent Rolls provide the dough for this filled sandwich.

Crescent Rolls provide the dough for this filled sandwich.

Ingredients:

  • 1 pound bulk Italian sausage
  • 1/2 cup chopped bell pepper
  • 1/3 cup chopped onion
  • 1 jar pizza sauce
  • 2 cans refrigerated Crescent Rolls
  • 4 slices mozzarella cheese, each halved crosswise

Directions:

1.  Preheat oven to 375*F.  In a skillet, cook the sausage, chopped pepper and onion until the pork is no longer pink and the vegetables are tender.  Drain.  Stir in 3 Tablespoons pizza sauce.  Allow to cool slightly.

2.  Unroll crescent dough.  Make 8 rectangles, pinching seams together to seal.

3.  Put about 2 – 3 tablespoons of sausage mixture at one end of each rectangle.

Place filling on one end of dough.

Place filling on one end of dough.

Take each 1/2 slice of cheese and fold it in half again.  Place it on top of the sausage mixture.

Top with a square of mozzarella cheese.

Top with a square of mozzarella cheese.

Fold the dough over the filling, and press the edges with a fork to seal.

Fold dough over filling and press edges to seal.

Fold dough over filling and press edges to seal.

4.  Place the sandwiches on an ungreased baking sheet.  Bake 15 – 18 minutes till golden brown.  Serve with additional warmed  pizza sauce on the side.

IMG_6085

SOURCE:  Pillsbury Christmas 2011