Shrimp Fried Rice

Shrimp Fried Rice

Shrimp Fried Rice

Turn your kitchen into a Chinese restaurant.  Why order take-out when you can order in!  With this recipe you can make your own version of shrimp fried rice.

Fried rice is typically made with rice that has been pre-cooked and allowed to cool so that it will fry and not steam when added to the other ingredients of the dish.  So left over rice that is dried out is ideal.  If that is not available, cook some rice in advance and let it become cold, and some what dry.

Shrimp, rice, egg, and lots of veggies.

Shrimp, rice, egg, and lots of veggies.

Fried rice usually includes eggs, meat or seafood,  vegetables, peppers, spices and soy sauce.  Extra flavor is gained by the  addition of onions, scallions and garlic.  A wok is the cooking utensil of choice but a large non-stick skillet works equally well.

This shrimp fried rice is full of vegetables and makes 4 generous servings, so you’ll need a large skillet at least 12 inches wide or a large wok. Be sure that you do not over cook the vegetables, they should be crisp-tender.

Although the recipe states that it makes 4 servings, my husband and I were able to devour most of it with only a small dish left over.  We loved it and I can’t wait to make it again.

SHRIMP FRIED RICE

MAKES:    4  SERVINGS

Have all ingredients prepped before starting to cook.

Have all ingredients prepped before starting to cook.

  • 1  1/2  cups water
  • 1 cup instant brown rice
  • 2 Tablespoons hoisin sauce
  • 4 teaspoons reduced-sodium soy sauce
  • 2 teaspoons toasted sesame oil
  • 4 teaspoons canola oil, divided
  • 2 large eggs
  • 8  ounces peeled and deveined raw shrimp
  • 2 teaspoons minced fresh ginger
  • 4 cups stringless snap peas  ( I used asparagus in mine. )
  • 1 medium red bell pepper, cut into  1/2 inch pieces
  • 2 medium carrots, thinly sliced
  • 4 scallions, chopped

1.  Combine water and rice in a medium saucepan.  Bring to a boil over high heat.  Cover, reduce heat to med.-low and simmer until water is absorbed, 10 – 12 minutes.  Allow to cool, but stir occasionally to prevent clumping.  Spreading the rice out on a baking sheet is helpful in cooling it quickly and preventing it from clumping.

2.  Combine hoisin sauce, soy sauce, and sesame oil in a small bowl.  Set aside.

3.  Heat 1 teaspoon canola oil in a large non-stick skillet over medium-high heat.  Add eggs and cook, stirring to help break into smaller pieces, until just set, about 45 seconds.  Transfer to a small bowl.

IMG_3374

Eggs cooked just until set.

4.  Add another 1 teaspoon canola oil to the skillet and return to medium-high heat.  Add shrimp and cook, stirring occasionally, until pink  1 1/2 – 2 minutes.  Transfer to a plate or bowl.

Saute shrimp until pink and just cooked.

Saute shrimp until pink and just cooked.

5.  Heat the remaining 2 teaspoons canola oil in the skillet over medium-high heat.  Add ginger and cook, stirring, until fragrant, about 30 seconds.  Stir in snap peas, bell pepper, carrots, and scallions; cook stirring, until tender-crisp, 3 – 4 minutes.

A colorful combinations of vegetables.

A colorful combinations of vegetables.

6.  Stir in the rice and the reserved egg and shrimp;  cook, stirring until heated through, about 1 minute.  Gently stir in the sauce mixture and remove from the heat.

Add in rice, shrimp and egg.

Add in rice, shrimp and egg.

YUM!   So good.

YUM! So good.

SOURCE:    Eatingwell.com

Morning Glory Muffins

Morning Glory Muffins

Morning Glory Muffins

Just the name of these muffins puts you in a good mood doesn’t it?  Somehow it feels like you’re going to have a good day.    I like to call them “glorious morning muffins”, and they are one of my favorites.  They can turn the dreariest morning into a glorious one.  : )

IMG_3191

These carrot-flecked whole-grain muffins can be made ahead so you can hit the floor running on a busy morning.  Add a non-fat latte and your day will be off to a healthy start.

COCONUT-CARROT MORNING GLORY MUFFINS

YIELD:  12 muffins

Assemble the ingredients and they go together quickly.

Assemble the ingredients and they go together quickly.

INGREDIENTS

  • 1 cup whole wheat or white whole wheat flour
  • 1/2 cup old-fashioned rolled oats, plus 2 tablespoons for garnish
  • 2 teaspoons baking powder
  • 2 teaspoons ground cinnamon
  • 1/2 teaspoon salt
  • 1/4 teaspoon ground allspice
  • 2 large eggs
  • 1 cup unsweetened applesauce
  • 1/3 cup honey
  • 2 teaspoons vanilla extract
  • 1/4 cup vegetable oil, or coconut oil, melted if necessary
  • 2 cups shredded carrots
  • 1/2 cup shredded coconut, plus 2 tablespoons for garnish
  • 1/2 cup raisins
  • 1/2 cup chopped nuts,  optional

1.  Preheat oven to 350*F.  Coat a 12-cup muffin pan with cooking spray or line with paper liners

2.  Whisk whole-wheat flour, 1/2 cup oats, baking powder, cinnamon, salt and allspice in a medium bowl.

3.  Whisk eggs, applesauce, honey and vanilla in a large bowl.  Whisk in oil.  Gently stir in the flour mixture just until moistened.  Fold in carrots, 1/2 cup coconut, raisins and nuts, if using.

4.  Divide the batter among the muffin cups.  Mix together the remaining oats, and coconut.  Sprinkle on muffin tops.

IMG_3189

5.  Bake at 350* until they spring back when lightly touched and a toothpick inserted in the center comes out with only moist crumbs attached,  30 – 35 minutes.  Let cool in the pan for 10 minutes before turning out onto a wire rack.  Serve warm or at room temperature.

IMG_3197

Delicious as they are when first made and eaten warm, they also seem to improve over night and taste even better the next day, when flavors have had time to blend.

SOURCE:  Eatingwell.com

Peasant in a Pan

Sauted cabbage, cheddarwurst and pierogies.

Sauted cabbage, cheddarwurst and pierogies.

This dinner is about as rustic and peasant-like as it gets and it doesn’t have a recipe.  This is a put-together that I make because Mr. D. loves it, and it is so easy.  Besides that it is nutritious, utilizes convenience foods, and tastes super-good.  My only concern when I make it is the sodium content, which can be high when you use processed meats.  So be mindful of that and check labels when choosing your meat.

This is not a meal that I ever thought I would include in my blog because it is so ordinary,  but at the urging of my husband here it is.  Whenever I make it, this is what he says after the first bite:    “MMMMMMMM”      I think this is probably a “guy’s meal”.

Simple to make, hearty to eat.

Simple to make, hearty to eat.

This dish is a take off on the traditional kielbasa and sauerkraut but it also incorporates pierogies, and onions.  This is how I prepare it:

WHAT YOU NEED:

  • 1 package frozen peirogies, filling of choice.  We like potatoes and onions.
  • 1 package Cheddarwurst individual sized kielbasa, 6/pkg.  Or you can use frankfurts, or bratwurst.
  •  1/2 a medium-sized cabbage, roughly sliced or chopped.   More if you like and are feeding a large group.
  • 1 large onion, halved, then sliced into half-moons
  • 2 Tablespoons butter
  • 2 Tablespoons olive oil
  • seasonings that may include nutmeg, 5-spice powder, or some type of bavarian spice blend.
  • small amount of water

WHAT YOU DO:

1.  Bring a pot of water to boil.  Cook pierogie according to package directions.  Do not overcook.

2.  Melt butter and olive oil in a large skillet. (large enough to hold everything–this is a one pan meal.)  Add sliced onions and sauté to soften.  Add the chopped cabbage and continue to sauté to lightly brown and soften the cabbage.

3.  Season this mixture with what ever spice blend you may have.  Usually nutmeg is a good choice.  I use Tsardust Memories from Penzeys Spices and it includes salt, garlic, cinnamon, black pepper, nutmeg and marjoram.

4.  Place the cheddarwurst on the cabbage mixture and cover. If it is sticking to the pan, add a small amount of water just to keep from sticking. Allow this mixture to steam slowly while the pierogie are cooking.

5.   Add cooked pierogie to the pan, spooning some of the cabbage mixture over them.  When everything is cooked and thoroughly heated through, serve.  I like to melt some additional butter and drizzle it over the top just before bringing to the table.

A complete meal in one pan.

A complete meal in one pan.

On this occasion when I made it, I had a small amount of kale to use up, so I added the chopped up kale leaves to the mixture just before putting the cheddarwurst in the pan.  A nice way to get in some extra fiber and nutrition.   I must say that when you know how to make a meal like this you can then swap in other vegetables or substitute a different type of meat –or no meat at all for a vegetarian version–and you will never be at a loss for a quick meal idea.

Try this out,  give it your own spin,  and I hope you will like it.

IMG_3435

SOURCE:   This is a Carolyn invention.

Corned Beef Hash with Eggs

Corned Beef Hash with Eggs.

Corned Beef Hash with Eggs.

If I am lucky enough to have some corned beef left from our St. Patrick’s Day meal, I like to make corned beef hash.  I can remember  back to when I was  child visiting my grandmother, and she made this same meal in a black cast-iron frying pan.  She kept the pieces of potato rather large, almost like home-fries, and they got brown and crusty, along with the meat.  She also added any carrot that might be leftover and lots of onion.  As she served it, she topped each serving with a poached egg.   I loved, loved, loved it.  Although I now have and use her cast-iron pan, I can’t seem to quite duplicate  what she created.  Perhaps over time, my memory has enhanced what it was like, but that is what I aim for whenever I make hash.

This year I was fortunate in having a good-sized piece of corned beef left and I cooked extra vegetables so I could make this hash dish.

CORNED BEEF HASH WITH EGGS

SERVINGS:   About 4 servings

WHAT YOU NEED:

  • 3  cups of cooked potatoes, cut into cubes, about 1/2 to 1 inch.
  • 2 Tablespoons olive oil,   Or 1 Tablespoon oil and 1 Tablespoon butter;  I think it helps brown up the potatoes.
  • 1 onion, chopped
  • salt and pepper to taste
  • 2 Tablespoons Horseradish
  • 1 Tablespoon Worcestershire sauce
  • about 1/2 pound corned beef, cut into pieces about the same size as the potatoes
  • optional:  left over carrots, sliced
  • 1/4 cup heavy cream

WHAT YOU DO:

1.  Heat oil in a heavy fry-pan,  cast-iron, preferred.  Add potatoes, cook until golden in color, 10 – 12 minutes.

2.  Add onion, season with salt and pepper.  Cook until potatoes and onions are browned,  about 5 minutes

Browning the potatoes and onions.

Browning the potatoes and onions.

3.  Add horseradish and Worcestershire sauce.  Stir in corned beef ( and carrots, if using).

Add in corned beef and carrots.

Add in corned beef and carrots.

Add cream, drizzling evenly over all.

Pouring in the cream.

Pouring in the cream.

Make 4 depressions in the mixture and break an egg into each one.  Cover lightly and cook until egg whites are set.

Cook until eggs are set.

Cook until eggs are set.

Serve each portion of hash with an egg.

Serve each portion of hash with an egg.

SOURCE:  Martha Stewart

Hot Cross Buns

Hot Cross Buns

Hot Cross Buns

A hot cross bun is a spiced sweet bun made with currents or raisins and marked with a cross on top, traditionally eaten during Lent, but especially on Good Friday.

There are many superstitions associated with hot cross buns.  “One of them says that a piece given to someone who is ill is said to help them recover.  Because there is a cross on the buns, some say they should be kissed before being eaten.  If taken on a sea voyage, hot cross buns are said to protect against shipwreck.  If hung in the kitchen, they are said to protect against fires and ensure that all breads turn out perfectly.  The hanging bun is replaced each year.”**   HaHa,  I guess it would need to be!

**quote from Wikipanion

Tall, pillowy, and delicious, I'm sharing it with you!

Tall, pillowy, and delicious, I’m sharing it with you!

Another saying that I particularly like says that sharing a hot cross bun with another person is supposed to ensure friendship throughout the coming year.  By sharing this recipe with all of you I hope that we will continue to be “friends” in the coming year as I am coming up on my one year anniversary of writing this blog on March 31.  I value all of you who read this blog and all who have decided to follow me as I continue to write about my cooking adventures, some with fantastically good results (like this recipe, I think), and others with somewhat less than stellar results.  But that’s why I blog; to share it all–the good, the bad, and the in-between.

If you have seen or purchased hot cross buns at the supermarket you know that they are smallish round buns, with the white cross on top.  I, personally, find them to be quite dry, sometimes overcooked, and practically tasteless.  The ones you can make at home are so much better there really is no comparison.  Yes, they take a little time because they are a yeast dough, but if you have a bread maker it is so easy, you will wonder why you haven’t made them before.  This recipe is one that I got from King Arthur a few years ago and since I first made them I don’t deviate or make alterations because they rise so well and once baked make a light, tender, pillowy, bun with an aroma that is unbelievable.  The flavor is derived from the spices that go into the dough, but also from a flavoring called Fiori di Sicilia, an all-natural citrus- and vanilla-scented flavoring.  It is available through the King Arthur Baker’s Catalog.  In its absence you could use a little vanilla, and either lemon or orange flavoring, and they would still be fantastic .

HOT CROSS BUNS

YIELD:   Makes 14 buns

INGREDIENTS

  • 1/4 cup apple juice or rumIMG_3550
  • 1/2 cup mixed dried fruit  (I use a mixture of candied citron, lemon peel and orange peel)
  • 1/2 cup raisins or dried currants
  • 1 1/4 cups milk, room temperature
  • 3 large eggs,  1 separated
  • 6 Tablespoons butter, room temperature
  • 1/2 teaspoon Fiori di Sicilia flavoring
  • 2 teaspoons instant yeast
  • 1/4 cup light brown sugar, firmly packed
  • 1 teaspoon ground cinnamon
  • 1/4 teaspoon ground cloves or allspice
  • 1/4 teaspoon ground nutmeg
  • 1  1/2 teaspoons salt
  • 1 Tablespoon baking powder  (this is not an error)
  • 4  1/2 cups all-purpose flour

TOPPING

  • 1 large egg white, reserved from above
  • 1 Tablespoon milk

ICING

  • 1 cup + 2 Tablespoons confectioners’ sugar
  • 1/2 teaspoon vanilla extract
  • 4 teaspoons milk, or enough to make a thick, pipeable icing

1.  Mix the rum or apple juice with the dried fruit and raisins, cover and microwave briefly, just till the fruit and liquid are very warm.  In my microwave this would be 1 minute at 50% power.  Set aside to cool to room temperature.  While this is cooling you can be mixing up the remainder of the recipe, because the fruits go in at the end.

2.  Mix together all of the dough ingredients except the fruit, and knead, using an electric mixer or bread machine, till the dough is soft and elastic.  Mix in the fruit and any liquid not absorbed.

This is what I do:  Following instructions for your bread machine layer in the liquid ingredients first, followed by the flour mixture ( i.e.  4 1/4 cups flour plus all the spices, brown sugar, salt and baking powder)  Make a depression in the top of the flour and pour in the yeast last.  Start the bread machine on the dough cycle, and let it mix up everything.  When it is almost at the end of the mixing phase, add the fruits and any liquid.  Check soon after to see if the dough looks too wet, and add the remaining 1/4 flour if it needs it.  Allow the machine to finish the dough cycle till it has risen.  Proceed with step 4.

3.  Let the dough rise for 1 hour, covered.  It should become puffy, though may not double in bulk.

4.  Remove the dough to a floured surface and divide the dough into ball-sized pieces, about 3  3/4 ounces each.

IMG_3520

A 1/3 measuring cup or muffin scoop makes about the right portion.  You should make about 14 buns.  Greasing your hands helps with handling the dough and shaping into balls.  Arrange them in greased pans.  Suggested pan sizes include 10″ square, 9″ x 13′, or two 9″ round cake pans.  The cake pans were a good choice for me allowing for 7 buns in each (see picture), as I gave away one pan of buns.

Seven buns in each cake pan.

Seven buns in each cake pan.

5.  Cover pan(s), and let the buns rise for 1 hour, or until they’ve puffed up and are touching one another.  While the dough is rising, preheat the oven to 375*F.  I have had good success with putting my pans on top of a heating pad set to “low”.  The consistent temperature gives a high rise, and the baking powder in the dough gives it another boost in the oven as they bake.  I think this is what makes these buns so light and pillowy.

6.  Whisk together the egg white and milk, and brush it over the buns.  This gives the buns a nice shine when baked.

7.  Bake the buns for 20 – 22 minutes, until they are golden brown.    Check internal temperature with an instant read thermometer. Temperature should be 160 degrees.  Some people have reported that the buns in the center of the pan may be a little doughy still at 20 minutes.  Remove from the oven, and transfer to a rack to cool.

Note how high they rise and the shiny tops from the egg wash.

Note how high they rise and the shiny tops from the egg wash.

8.  Mix together the icing ingredients, and when the buns are completely cool, pipe it in a cross shape atop each bun.

Pipe crosses on top when they are cool.

Pipe crosses on top when they are cool.

Tall, Pillowy and delicious.

Tall, Pillowy and delicious.

The frosting crosses looked a little thin, so I want back after taking these pictures and made the crosses bigger with more frosting.  We like frosting!  🙂

SOURCE:   slightly adapted from King Arthur  Baking Company

My Standby One-Pan Meal

Roast chicken with vegetables, a one-pan meal.

Roast chicken with vegetables, a one-pan meal.

What I love about this meal is it simplicity;  vegetables and chicken roasted together in one pan.  The only time you spend on it is prepping the vegetables.  Put everything together with the chicken in a roasting pan, stick it in the oven and relax until its done.  If I’ve done some advance planning of my menus then I might add extra vegetables so there will be some left over for another night.

My favorite combination of vegetables include potatoes, carrots, onions, and fennel.  Other cuts of meat can be used in place of the chicken such as pork loin.  A little white wine added along with some seasonings produces a gravy that is perfect.  You can swap vegetables in and out to suit your taste;  the whole point being how easy it is to put a great meal on the table without a whole lot of work.

This is how I put it together:

ROAST CHICKEN IN WINE SAUCE

SERVINGS:   4 – 6

  • Chicken pieces:  4 bone-in thighs, and 4 drumsticks. or leg quarters cut into sections. ( dark meat is best for roasting)
  • 1/2 teaspoon Kosher salt, divided
  • 1/2 teaspoon pepper, divided
  • 2 teaspoons canola or olive oil
  • 1 large onion, chopped
  • 1 large or 2 medium ribs celery, cut into chunks
  • 1 Tablespoon garlic. minced
  • vegetables of choice, such as potatoes, carrots, fennel, turnip, cut into large chunks
  • 1/2 – 1 cup white wine (depends on amount of vegetables, i.e., more veg. = more wine)
  • 1 Tablespoon grainy mustard such as Dijon.

1.  Preheat oven to 350*F.

2.  Heat a Dutch oven over medium heat.  Sprinkle chicken pieces with 1/4 teaspoon salt and 1/4 teaspoon pepper.  Add oil to pan, swirl to coat.  Add half the chicken pieces and brown on all sides.  Remove to a plate, and repeat with remaining chicken pieces.  Set the chicken aside.

Pre-browning the chicken makes the skin crisp and the keeps the chicken moist.

Pre-browning the chicken makes the skin crisp and keeps the chicken moist.

3.To the drippings in the pan, add the onion, celery, and garlic.  Cook for a few minutes till they begin to soften.  Mix the mustard with the wine, and add to the pan.  Cook for 1 – 2 minutes scraping to loosen browned bits.

4.  Add the mixed vegetables to the pan and arrange across the bottom.  Sprinkle with the remaining 1/4 teaspoon salt and 1/4 teaspoon pepper.

Place vegetables on the bottom of the pan.

Place vegetables on the bottom of the pan.

Place chicken pieces on top of vegetables, cover and transfer pan to the oven.

5.  Bake at 350*F. for about an hour until chicken and vegetables are tender.

Moist, tender chicken and flavorful vegetables.

Moist, tender chicken and flavorful vegetables.

Note:  For the wine,  if you will be having a glass of white wine with this meal use some of the same wine for the roast chicken.  Otherwise use any wine that may be open and needing to be used up.
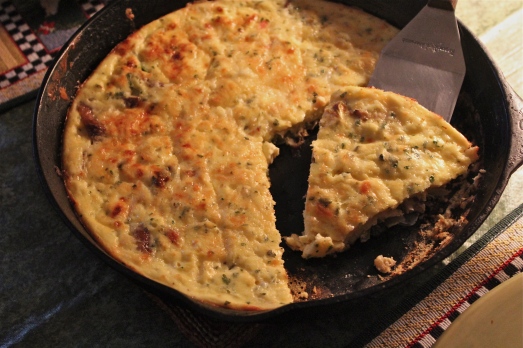
An easy and satisfying meal.

An easy and satisfying meal.

SOURCE:    Carolyn’s own recipe

Mushroom, Leek, and Cheese Frittata

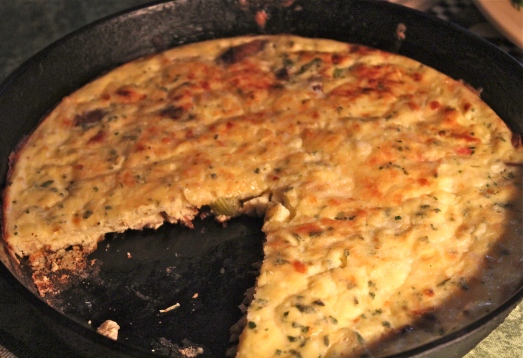
Mushroom, eggs and fontina cheese frittata.

Mushroom, leeks, and fontina cheese go into this frittata

Throughout this Lenten season I’ve been trying to cut back on the amount of meat we consume, incorporating more fish and other seafood, or going completely meatless.  Today’s recipe features a one-pan entree where eggs and cheese provide the main protein, and meaty mushrooms and leeks provide the vegetables.

A frittata is is an egg based dish, somewhat like a quiche without a crust, a little like an omelet only baked.  Hard to describe, but if you like eggs in any form you can’t miss with this dish.   Frittatas are eggs-cellent served hot or at room temperature, which means you can do it ahead.  It would be a great addition to brunch, make a light lunch, or a meatless main meal served with another vegetable and a salad as I did.

In the version you see pictured here I made only half the recipe for two of us, and we had about half of it left for another time.  Also the recipe calls for Baby Bella mushrooms, but I used Shitaki mushrooms.  I would not do that again as they do not have enough natural moisture for this kind of recipe.  Shitakis need to be cooked in a liquid in order to become tender, so I found that in this recipe they were a little tough.  Fontina is the suggested cheese to use here because it has a mild flavor and excellent melting properties.  A good substitute would be muenster or edam cheeses.

MUSHROOM, LEEK, AND CHEESE FRITTATAIMG_3465

SERVINGS      About 6

INGREDIENTS

  • 2 Tablespoons olive oil, divided
  • 2 medium leeks, whites and light green parts only, chopped
  • 8 oz. crimini (baby bella) mushrooms, thinly sliced
  • 12 large eggs
  • 1/2 cup creme fraiche or sour cream
  • 2 Tablespoons coarsely chopped parsley
  • 3/4 cup shredded Fontina cheese, divided
  • kosher salt and freshly ground black pepper

1.  Preheat oven to 350*F.    Heat 1 Tablespoon olive oil in a 10 – inch heavy weight oven proof skillet such as cast iron.

2.  Add leeks to the hot oil and cook over medium heat, stirring often until softened, about 5 minutes.  Add mushrooms and cook until softened and all liquid has evaporated, 8 – 10 minutes.

Sautee the  leeks and mushrooms.

Sautee the leeks and mushrooms.

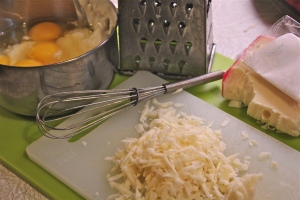
3.  Meanwhile, whisk eggs, creme fraiche or sour cream, and parsley in a large bowl; mix in 1/2 cup cheese.  Season with salt and pepper.

IMG_3469

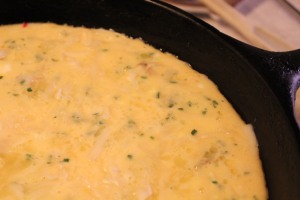
4.  Increase heat to medium-high and add remaining 1 Tablespoon oil to the skillet.  Pour the egg mixture over the mushrooms, shaking the pan to evenly distribute the mixture.  Cook the frittata, without stirring, until its edges begin to set, about 5 minutes.

Cook until the edges just begin to set.

Cook until the edges just begin to set.

5.  Sprinkle remaining 1/4 cup cheese over eggs and transfer skillet to oven.  Bake frittata until golden brown and center is set,  25 – 30 minutes.

IMG_3473

SOURCE:   BONAPPETIT.COM

Hidden Egg Cupcakes

Happy First Day of Spring, Everyone!

In celebration of the first day of Spring, I thought I would bring you an Easter/Springtime recipe to get you in the mood if you’re not already.  We are preparing for yet another snow storm as I write this, and most everyone I know has had it up to HERE with cold, winter weather.  So let’s all think of green grass, daffodils, tulips, bright spring clothes and no more jackets and coats.

Hidden Egg Cupcakes with Peeps.

Hidden Egg Cupcakes with Peeps.

We know that Easter egg hunts are great fun for children (of all ages).     Another thing we know is that everyone loves cupcakes, and chocolate-filled eggs.  Two delish things in one cupcake?  Yes, mam!  This recipe combines a Cadbury egg baked inside a chocolate cupcake, topped with vanilla buttercream.  To take this concept one step further, after I had frosted the cupcakes I topped each one with a “peep” to give the idea of a bird or chicken sitting on an egg.

These were made and photographed last Easter just after I started writing this blog.  My photography skills were not very good back then and I have since improved quite a bit,  but I’m sure you will get the idea of what they looked like.  For the eggs I used Cadbury Eggs, the regular size ones, not the minis, and the cupcakes are a fudge chocolate recipe that I like a lot.

Chicks and ducks make us think of Easter and Spring.

Chicks and ducks make us think of Easter and Spring.

There are two secrets to these cupcakes.  They get their rich, extra-chocolaty flavor from a combination of unsweetened cocoa powder and bittersweet chocolate, and their soft, moist texture from a simple hand-mixing method.  The frosting is a butter cream which I have written about before and you can find the recipe here.

EASTER EGG CUPCAKES    (aka Fudgey Chocolate Cupcakes)

SERVINGS:    Makes  12  cupcakes

Count off by color!

Count off by color!

INGREDIENTS

  • 2/3 cup all-purpose flour
  • 2  1/2 Tablespoons unsweetened cocoa powder
  • 1/4 teaspoon baking powder
  • 1/4 teaspoon salt
  • 3 oz. bittersweet chocolate, chopped
  • 1/2 cup plus 3 Tablespoons unsalted butter, cut into pieces
  • 3/4 cup plus 2 Tablespoons sugar
  • 3 large eggs at room temperature
  • 1 teaspoon vanilla extract
  • 12 Cadbury eggs, regular size
  • Vanilla Buttercream Frosting
  • 12  candy “Peeps”,  your choice of color

1.  Preheat oven to 350*F.   Line a standard 12-cup muffin pan with paper liners.

2.  In a bowl, whisk together the flour, cocoa powder, baking powder, and salt.  Place the chocolate and butter in a large heatproof bowl set over (but not touching) simmering water in a saucepan.  Stir frequently until melted and smooth, about 5 minutes.  Remove the bowl from the saucepan;  let the mixture cool to room temperature,  10-15 minutes.

3.  Using a wooden spoon, stir the sugar into the chocolate mixture until combined.  Stir in the eggs one at a time, beating until combined after each addition, and then beat in the vanilla.  Gently fold in the flour mixture just until no traces of flour remain;  do not over mix.

4.  Spoon about 1/4 – 1/3 cup batter into each muffin cup.  Place a Cadbury Egg in each cup large end down.  Continue to fill the muffin cups with the remaining batter.  Bake  22 – 24 minutes or until the tops seem set and “spring back” when touched lightly.  A toothpick inserted a little off-center may come out with a few moist crumbs attached.

5.  Let the cupcakes cool in the pan on a wire rack for 5 minutes.  Transfer the cupcakes to the wire rack and let cool completely before frosting.

6.  Frost cup cakes with vanilla buttercream, and place a “Peep” on top of each one.   CUTE!

Chicks of a feather-----

Birds of a feather—–

SOURCE:  cupcake recipe from Cupcakes, by Shelly Kaldunski

Thai Butternut Soup

Thai Butternut Soup

Thai Butternut Soup

I have a confession to make—I don’t like foods that are hot and spicy.  However my husband LOVES that kind of food.  A dilemma of hugh magnitude when you are the cook and there is only the two of you to cook for.  Which one to please?    Well, being the cook has its privileges, so I’m the one who gets the kind of food I like most of the time.  Don’t get me wrong Mr. D. is always happy and complimentary of what I cook, but what I’m saying is that I don’t go out of my way to make a dish especially for his tastes when I know that I won’t like it.IMG_3486

This recipe, then, is a first.  I made it especially for him.  I had something else lined up for me to eat because I was prepared not to like it.  Surprise!!  I liked it. I had never cooked with red curry paste before and I expected it to be hot and spicy.  However that was not the case and this soup turned out to be quite mild.  You can certainly “turn up the heat” if that is your taste, by adding more curry paste, or a little Sriracha sauce.  I also found that the squeeze of lime into your bowl is necessary for a little tang.

THAI BUTTERNUT SOUP

SERVINGS:    4

INGREDIENTS

  • 1 teaspoon canola oilIMG_3477
  • 1 cup chopped onion
  • 2  1/2 teaspoons red curry paste
  • 1  1/2 teaspoons minced fresh garlic
  • 1 teaspoon minced (grated) fresh ginger
  • 1 cup low-sodium chicken broth ( or vegetable broth for a vegetarian version)
  • 2 teaspoons brown sugar
  • 2 ( 12 oz.) packages frozen pureed butternut squash**
  • 1  (14 oz.) can light coconut milk
  • 1  1/2 teaspoons fish sauce
  • 1/4 teaspoon salt
  • 1/2 cup chopped unsalted, dry-roasted peanuts
  • 1/4 cup cilantro leaves
  • 1 lime cut into 8 wedges

** If you can’t find frozen pureed squash, you can make this soup with 4 cups cubed butternut squash.  Just add some additional cooking time–about 10 minutes–in step 2.  That is what I used to make the recipe.

1.  Heat a medium saucepan over medium-high heat.  Add oil; swirl to coat.  Add onion; sauté 3 minutes.  Add curry paste, garlic, and ginger;  sauté  45 seconds, stirring constantly.

2.  Add broth and next 5 ingredients ( through salt ); cover.  Bring to a boil.  Reduce heat, simmer 5 minutes,( or 15 minutes if using fresh squash) stirring frequently.  Puree the soup mixture with an immersion blender, or in batches with a standard blender.  Blend until smooth.

3.  To serve:  Ladle about a cup into each of 4 bowls;  top with 2 tablespoons peanuts and 1 tablespoon cilantro.  Serve with lime wedges.

Serve with peanuts, cilantro, and a wedge of lime.

Serve with peanuts, cilantro, and a wedge of lime.

Oh, Yes!  This was very good and we both liked it.  Velvety smooth and creamy, but not too thick.

A further dilemma has developed/is developing:   What’s a cook to do when the number of spices, condiments and sauces is increasing in number and space to store them is static?   Since becoming more adventuresome in my cooking, a whole line of Asian-inspired ingredients is now trying to fit into my storage cabinet.   If anyone has a solutions to this ever growing problem I’d like to hear about it.  Please!   : )

SOURCE;   Cooking Light,  March 2013

O’Rourke’s Irish Brown Bread

O"Rourke's Irish Brown Bread

O”Rourke’s Irish Brown Bread

With yesterday being St. Patrick’s Day, I cooked the traditional meal of corned beef, cabbage, potatoes and carrots. and along with it I made this recipe for Irish Brown Bread.   Neither Mr. D. nor  I have a drop of Irish blood in us, yet we love this meal and I always make it  for St. Paddy’s Day.  This bread is not the usual soda bread that is frequently served with this meal, but more closely resembles the soda breads made in Ireland back in the day when such things as caraway seeds and raisins were too costly for ordinary folks to afford.

Enjoy it with a cup of tea and some fruit for an afternoon snack.

Enjoy it with a cup of tea and some fruit for an afternoon snack.

My recipe comes from a gentleman named Brian O’Rourke who is the owner of O’Rourke’s Diner in Middletown, Ct.  This old-time diner is a fixture on Main St and has been there for years. It has been featured on the Food Network’s Diners, Drive-Ins and Dives.  It is only open for breakfast and lunch, and on weekends there is always a line of people out onto the sidewalk and up the street waiting to get in.  When you are finally seated it is hard to chose your order because everything Brian cooks is so scrumptious.  He is a very generous man when approached by any group or organization for fund raisers; and so when the diner was severely damaged by a fire a few years ago the people of Middletown held fund raisers for Brian to help him rebuild the business.  When one of the local churches was putting together a cookbook of local, favorite recipes this is the one that Brian contributed.

O’ROURKE’S IRISH BROWN BREAD

Just a few ingredients with baking soda being a prominent one.

Just a few ingredients with baking soda being a prominent one.

YIELD:    Makes 2 small round loaves

INGREDIENTS

  • 2  1/2 cups whole wheat flour
  • 3/4 cup white flour
  • 1/3 cup bran or wheat germ
  • 1/4 cup sugar
  • 1 Tablespoon salt.  ( I usually use about half this amount.)
  • 2  1/2 teaspoons baking soda
  • 1/2 teaspoon baking powder
  • 4 Tablespoons ( half stick ) butter
  • 1  3/4 cup buttermilk

1.  In a large bowl combine flours, bran, sugar, salt, baking soda and baking powder and mix well with a whisk.

2.  Cut in butter until mixture is crumbly.  Stir in buttermilk and mix until dry ingredients are moistened.  Do not over mix.

3.  Shape dough into two round loaves and cut a cross in the top of each one.  This allows for expansion. Place on a greased or paper-lined baking sheet.

Shape dough into two round loaves.

Shape dough into two round loaves.

Bake at 375*F  for 40 minutes.

Fresh out of the oven, crusty and warm.

Fresh out of the oven, crusty and warm.

This bread is best served warm with lots of sweet butter to slather on it.

Butter melts into the warm bread----good beyond description!

Butter melts into the warm bread—-good beyond description!

I like that it makes two loaves, one that I freeze for later, and one that we eat right away.  This time as I made them I added raisins to the dough for one of the breads, just for some variety.  Either way  they are delicious with a tender crumb almost like a muffin.

The texture is similar to a muffin.

The texture is similar to a muffin.

SOURCE:     Brian O’Rourke,  O’Rourke’s Diner