Creamy Garlic Coleslaw

Creamy, Garlicy Cole Slaw

Creamy, Garlicy Cole Slaw

In the days before food processors, making coleslaw was a laborious task involving cutting the cabbage with a knife.  In my growing up years I was very used to having coleslaw that was cut extremely fine, and mixed with a dressing consisting of mayonnaise, thinned with a little vinegar or pickle juice.

I had an aunt who was my mother’s sister, and she spent a great deal of time at our house.  One of her special skills was cutting the cabbage for coleslaw.  She removed the hard rib from each leaf, tightly rolled up the leaf (like a cigar), and cross cut it into very fine shreds. She thought nothing of spending an hour or more doing this, and it was her contribution to dinner.  I share this story with you so you will know that where coleslaw is concerned I am very ” spoiled”.  I like it shredded very thin therefore,  I rarely use packaged coleslaw mixes.

My solution to getting cabbage shredded thin is to use a plane grater which is adjustable for thickness, and it does a pretty good job of getting the cabbage as thin as I like it.  Which brings me to my recipe for today.  I cooked fish this past weekend, and I aways think that coleslaw is a good side dish with fish, so I made some.  Besides the usual cabbage, mayonnaise and vinegar, this recipe includes shredded carrots, a few stuffed green olives sliced thin, and some parsley for color.  The dressing includes garlic, grainy mustard, and sugar.  There is such a good balance of flavors that no single one stands out, but together they make a tangy, cool, crunchy, taste sensation.

Cool, Crunchy and Tangy

Cool, Crunchy and Tangy

CREAMY GARLIC COLESLAW

SERVINGS:  about 12 – 1/2 cup servings

INGREDIENTS

  • 4 cups  shredded cabbageIMG_2083
  • 1 large carrot shredded
  • 12 – 14 pimiento-stuffed olives, thinly sliced
  • 1/4 cup fresh parsley, minced
  • 1 or 2 small garlic cloves, minced ***
  • 1/8 teaspoon salt
  • 1/2 cup mayonnaise
  • 3 Tablespoons cider vinegar
  • 2 teaspoons sugar
  • 1 teaspoon grainy mustard
  • ***note to myself in my recipe book: ” Be sure to use enough garlic”

DIRECTIONS

1.  In a large bowl, combine the shredded cabbage, carrot, olives, and parsley;   mix well and set aside.

2.  Combine  the garlic and salt in a mortar and press with a pestle until mixture becomes a paste.  Scrape into a small bowl.

3.  To the garlic paste, add the mayonnaise, and mix well.  Add the vinegar, sugar, and mustard.  Mix well with a whisk.

Shredded vegetables in one bowl, dressing ingredients, in another.  Mix together and chill.

Shredded vegetables in one bowl, dressing ingredients, in another. Mix together and chill.

4.  Pour dressing over the cabbage mixture and toss to coat.  Cover and refrigerate as long as possible before serving.  The time allows the flavors to meld, and the cabbage to become crisp.  It is best served cold.

Creamy, Garlicy Cole Slaw

Creamy, Garlicy Cole Slaw

Another way that I love this coleslaw is on a sandwich with pulled pork.  You won’t believe how good it is unless you try it!   XOXO

SOURCE:    Simply Vegetables,   Linda Fraser

Advertisement

Herbed Chicken Parmesan

Sometimes I am in the mood for a comforting meal that’s filling and delicious, but don’t have a lot of time to prepare it.  I’m sure you have the same experience on many occasions. Well, I am alway on the look-out for easy to prepare, quick meals, and when I find ones that look interesting, I dog-ear the page, or tear out the clipping.  The problem with me is that I can’t remember where I saw it , or where I put the clipping.  I just remember enough to purchase the necessary ingredients,  and then go “where did I see  that recipe? or,” where did I put that clipping?”  I am developing a better system of recipe organization,  but that story will wait for another time!  This recipe meets all my requirements:  quick, easy, well-balanced, not very fancy, but just plain good.

Chicken Parmesan

Chicken Parmesan

For the pasta, I recommend Orzo, because it cooks quickly; and tastes good with some sauce over it.  To round out the meal add a vegetable like broccoli, which  also cooks quickly, and  looks great on the plate with the white pasta and red sauce.  A side salad would go well with this meal, but not really necessary.   I would, however, have a great white wine with it , like a Chardonnay!

Total time to prepare:  about 30 minutes.   Yield:  4 servings

  • 1/3 cup grated Parmesan cheese, divided
  • 1/4 cup dry breadcrumbs
  • 1 tablespoon minced parsley
  • 1/2 teaspoon dried basil
  • 1/4 teaspoon salt, divided
  • 1 egg, lightly beaten
  • 1 pound chicken breast tenders
  • 1 tablespoon butter
  • 1 1/2 cups bottled tomato-basil pasta sauce, or better yet, your own homemade tomato sauce.
  • 2 teaspoons balsamic vinegar
  • 1/4 teaspoon black pepper
  • 1/3 cup shredded provolone cheese
  1. Combine 2 tablespoons of Parmesan, breadcrumbs, parsley, basil, and 1/8 teaspoon salt in a shallow dish.
  2. Place egg in another shallow dish.  Dip each chicken tender in egg, then dredge in bread-crumb mixture.
  3. Melt butter in a large non-stick skillet over medium-high heat.  Add chicken;  cook 3 minutes on each side or until done.  Set aside in the pan.
  4. Combine 1/8 teaspoon salt, pasta sauce, vinegar, and pepper in a microwave-safe bowl.  Cover with plastic wrap;  vent.  Microwave sauce mixture at HIGH for 2 minutes or until thoroughly heated.
  5. Preheat broiler.
  6. Pour the sauce over the chicken in the pan.  Sprinkle  evenly with the remaining Parmesan and all of the provolone cheese.  Wrap handle of pan with foil, and broil 2 minutes or until the cheese melts.
Chicken Parmesan with Orzo and Broccoli

Chicken Parmesan with Orzo and Broccoli

Source:  slightly adapted from Cooking Light Magazine

Creamy Hash-Brown Casserole

Creamy potato hash brown casserole.

Creamy potato hash brown casserole.

I don’t know anyone who doesn’t like potatoes, do you?   And there are umpteen thousand ways to prepare them.   So this is what I was asked recently:  “Carolyn,  I love the way you make potatoes, would you, could you, make a big pan of something special for Christmas Dinner?”   Who could say “no” to that?  Start with a compliment and then ask the question.  That’s how to get results.  Here’s the situation;  when we all get together there are usually somewhere between 15 and 20 people.  So I needed to make  A LOT!

Fortunately, I knew immediately what I would make.  I’ve made it before and it was a great success.  People always go back for seconds whenever I serve these rich, cheesy potatoes.  The casserole is a snap to fix using convenience foods, and it travels well, too.

The recipe as presented here makes 12 – 16 servings.  In my need to make sure there was plenty for everyone, I expanded the recipe by adding some additional diced potato, that I cooked in advance;  added some milk to the soups for more liquid, and increased the sour cream to 1 1/2 cups.

Recipe:  CREAMY HASH-BROWN CASSEROLE

Convenience foods make it a snap to put together

Convenience foods make it a snap to put together

SERVINGS:  12 – 16

INGREDIENTS

  • 2 cans (10 3/4 oz. each ) condensed cream of potato soup
  • 1 cup sour cream
  • 1/2 teaspoon garlic salt
  • 1 package ( 32 oz.) frozen hash brown potatoes
  • 2 cups shredded cheddar cheese
  • 1/2 cup grated Parmesan cheese

In a large bowl, combine the soup, sour cream, and garlic salt.

Mix together the soup, sour cream and garlic salt.

Mix together the soup, sour cream and garlic salt.

Add potatoes and cheddar cheese;  mix well.

Mix in the hash browns and grated cheese.

Mix in the hash browns and grated cheese.

Pour into a greased 13″ x 9″ baking dish.  Top with parmesan cheese.

Spread in a greased baking dish, and top with more cheese.

Spread in a greased baking dish, and top with more cheese.

Bake, uncovered, at 350 degrees for 55 -60 minutes, or until potatoes are tender.  Top should be browned and bubbly.

Creamy potato hash brown casserole.

Creamy potato hash brown casserole.

SOURCE:   slightly adapted from TASTE OF HOME

Carrot Raisin Bread Sandwiches

Carrot Raisin Bread Sandwiches

Carrot Raisin Bread Sandwiches

Finger Foods are obviously foods you can eat with your fingers.  No utensils required.  This category of foods is actually quite broad if you think about it, covering appetizers,  main entree, and dessert.  But during this busy holiday season when we were asked to bring “finger foods” to an event, I was initially stumped as to what to bring.  The more I thought about it, however, I remembered having a rather unique sandwich at a luncheon that I attended last year.  At that event everyone loved these sandwiches and wanted to know how to make them.

Unusual in their combination of ingredients, but very delicious indeed.  They will be remembered, and your guests will want the recipe.  They are so easy to make that I don’t even need to present the usual recipe format.  Here’s all it takes:

Get these ingredients together:   1 cup grated carrots,  1 – 8 ounce  package cream cheese,  1/2 a can cream cheese frosting,  1/4 cup chopped nuts.     Mix all together and spread on raisin bread.   Use a good quality bread such as Peppridge Farms.

1 Cup grated carrots

1 Cup grated carrots

Whip cream cheese and frosting together to blend.

Whip cream cheese and frosting together to blend.

Add chopped nuts and grated carrots.

Add chopped nuts and grated carrots.

Blend everything together so its creamy and spreadable.

Blend everything together so its creamy and spreadable.

Spread filling on raisin bread.

Spread filling on raisin bread.

Cut into halves or quarters and arrange on a serving plate.   EASY.   PRETTY.  YUM-YUM Good!

Cut into quarters and plate up for an attractive presentation.

Cut into quarters and plate up for an attractive presentation.

Holiday Good Wishes

IMG_1828

I want to wish all of my readers the best and happiest Holiday.   In whatever way  you celebrate it make sure it contains Family, Friends and of course, Food.

The picture above is a Father Christmas from my collection of porcelain “Gift Givers”, all hand made by me at an earlier time.  I hope you enjoy it.  He joins me in hoping you get all that you wish for at this wonderful time of year.

Chicken Liver Pate with Crostini

Chicken Liver Pate with Crostini

Chicken Liver Pate with Crostini

When our family all gets together to open gifts on Christmas Day we always have appetizers to snack on, and everyone brings something to contribute to the table.  This year I want to bring something different.  I remember that my husband often speaks of a liver pate that his grandmother used to make, and that the family was very fond of.  So I decided to try my hand at making some.

First I did a web search, and up came quite a number of different recipes.  I read most of them, and the comments for each one,  then I developed my own recipe based on the ingredients from some of them, and added in some seasonings I thought would enhance it.   I made it today and served some to my husband.  First of all he was very surprised, then he said he loved it, and it reminded him of his grandmother’s pate.  I’m very pleased with the result which I plan to bring on Christmas Day.  I think it would go well on a table of appetizers for New Year’s Eve or anytime you are entertaining.  It takes about 30 minutes to make, and you get approximately 3 cups of pate.  Keep it covered in the refrigerator and it will last quite a long time.   Ahem—-not so long at my house because I keep snacking on it!

IMG_2233

To make the crostini,  I used a large Baguette, sliced on the diagonal, about 1/2 inch thick.  Place the bread slices on a baking sheet, brush or spray with olive oil and sprinkle with a little garlic powder. Bake in a 350 degree oven for 5 – 6 minutes till crisp.  Spread some pate on each “crostini” and top with crumbled hard-cooked egg, sliced green onions, or leaves of parsley.

CHICKEN LIVER PATE

YIELD:   Makes about 3 cups of pate

INGREDIENTS

  • 1 pound chicken livers
  • 4 Tablespoons of fat    Use chicken fat if available, or butter.
  • 1 medium onion, chopped.   I used up some green onions in mine.
  • 1 clove garlic, minced
  • 2 Tablespoons dry sherry,  white wine,  or chicken broth
  • 3 ounces cream cheese
  • 1/2 teaspoon allspice   )  here I used 1 teaspoon Penzeys Tsardust Memories, a Russian-style seasoning that contains salt, garlic, cinnamon, nutmeg, marjoram and black pepper.
  • 1/4 teaspoon nutmeg   )
  • hot sauce or cayenne pepper to taste
  • salt and pepper to taste

WHAT TO DO:

1.   Melt fat/butter in a large skillet over medium heat.  Add the liver and 1/2 the chopped onion.

Saute the liver with chopped onions.

Saute the liver with chopped onions.

Reduce heat to low and cook about 7 – 10 minutes until liver is tender and no longer pink.  Add the garlic and cook another minute till it releases it’s fragrance.  Remove from heat.

2.  Place liver mixture in a food processor or blender.  Add the liquid, i.e.. sherry, wine or chicken broth.  Also add the cream cheese, remaining chopped onion, allspice, nutmeg, salt, pepper and hot sauce/cayenne.  Process till smooth.  Scrape into a bowl, cover and refrigerate for about 2 hours to chill and firm up.

3.  To serve:  transfer the pate into a mold or serving dish and crumble hard-cooked egg over the top.  Garnish with sliced green onions, or parsley.   Spread on crostini, or serve with toasted bagel chips or crackers.

Chicken Liver Pate with Crostini

Chicken Liver Pate with Crostini

SOURCE:  a Carolyn Original

IMG_2074

Oatmeal Cookies with Peanut Butter Cream Filling

Oatmeal Sandwich Cookies with Peanut Butter Cream Filling.

Oatmeal Sandwich Cookies with Peanut Butter Cream Filling.

The thought of making these cookies has been circulating around in my head now for some time.  Another blogger  ( Joy the Baker ), who I follow, first wrote about them, and I was intrigued  enough to make note of the recipe.  The reason I didn’t rush into making them immediately was because they are basically oatmeal cookies, which I find kind of boring on their own.  But every once in a while I would hear a little voice saying “oatmeal with peanut butter filling”.

"oatmeal with peanut butter filling".

“oatmeal with peanut butter filling”.

I don’t normally hear voices, but cookies do occasionally speak to me, and when they do I’ve learned to listen because if I make them they usually turn out to be something special.  And so it is with these cookies.

They contain all sorts of good things, beginning with the oatmeal.  Everyone knows how good that is for us; add some brown sugar, butter, and spices.

Oats, brown sugar and spices. so proud of themselves.

Oats, brown sugar and spices. so proud of themselves.

Oh yeah, gotta have some spices.  You see where this is going?  If you like nuts, add some chopped nuts to the batter, it can only get better.  It is the kind of batter you will want to eat by the spoonful, but don’t.  This is only the beginning, it gets even better.

Here's all that good looking, good tasting batter.

Here’s all that good looking, good tasting batter.

Once the dough is all mixed, you will form it into small balls.

Form dough into small balls.

Form dough into small balls.

These are not big cookies because two of them get sandwiched together with more butter, sugar and peanut butter as a filling.  You should get a total of about 2 dozen sandwich cookies.

After baking.

After baking.  Note how they spread.

It will be difficult to keep from eating one of these cookies fresh and warm out of the oven, but remember we are making sandwiches and that requires and even number.  I know you’re thinking well, I could eat two,  but that line of reasoning will soon get you out of control.  Who knows where it will end?  So hang on a bit longer, you’ll be so glad you did.

Hello, peanut butter!

Hello, peanut butter!

Measure out the peanut butter, and combine it with butter, powdered sugar, vanilla, and some milk.  OOOOH, so creamy and good.  Now start putting the cookies together.  Spread some filling on the bottom of one cookie and top it with another cookie.  Now that’s something to swoon over!

Match up cookies in pairs.  Spread filling on the bottom of one and top with the other.

Match up cookies in pairs. Spread filling on the bottom of one and top with the other.

OATMEAL COOKIES WITH PEANUT BUTER CREAM FILLING

YIELD:    about 2 dozen

FOR THE COOKIES

  • 1/2 cup unsalted butter, softened
  • 1 cup brown sugar
  • 1 large egg
  • 1 teaspoon vanilla
  • 1 1/4 cups uncooked old-fashioned oats
  • 1 cup flour
  • 1/2 teaspoon baking powder
  • 1/2 teaspoon baking soda
  • 1/2 teaspoon salt
  • 1 teaspoon cinnamon
  • 1/4 teaspoon nutmeg
  • 1/2 cup chopped nuts, optional

FOR THE FILLING

  • 3 Tablespoons unsalted butter, at room temperature
  • 1/2 cup smooth peanut butter
  • 1 cup powdered sugar
  • 3-4 Tablespoons milk

Preheat oven to 350 degrees.  Line two baking sheets with parchment paper.

Beat the sugar and butter in the bowl of a stand mixer.  Beat well till creamy,  3-4 minutes.  Add egg and beat on medium for about 1 minute.  Add the vanilla extract and beat in.

In a medium bowl whisk together the oats, flour, baking powder, baking soda, spices, and salt.  Add the dry ingredients to the butter/egg mixture slowly on low speed just until incorporated.  Stir in the nuts last.

Portion about 1 heaping teaspoon of dough into your hand.  Roll into a ball an;d place on the prepared cookie sheet.  Leave adequate space between the cookies to allow for spreading.  If cookie dough begins to stick to your hands as you’re making the balls, rinse your hands and portion the dough with just slightly damp hands.

Bake for 10 – 13 minutes or until they reach your desired doneness.  A little underdone is good as they will firm up as they cool.  Transfer to a rack to cool completely.

To prepare the filling, place butter, peanut butter and powdered sugar in the bowl of a stand mixer.  Beat on medium speed adding in the vanilla.  Add the milk one tablespoon at a time until you have your desired consistency.  The filling should be creamy and spreadable.

Pair up the cookies and flip half of them over.  Spread the cookie bottoms with peanut butter filling.  Top with a similar size cookie.

These cookies will keep for about 5 days if kept covered and cool or chilled ( i.e., in the refrigerator ).

Sandwiches made.  Aren't they pretty?

Sandwiches made. Aren’t they pretty?

SOURCE:   http://joythebaker.com

White Chocolate Cherry Shortbread Cookies

White Chocolate Cherry Shortbread Cookies

White Chocolate Cherry Shortbread Cookies

When I first saw a picture of these cookies I knew I had to make them.  They were so pretty in the picture, with the pale pink cookie dipped into white chocolate, then just the edge dipped into the colorful red sugar.  I thought they would make a great addition to a tray of Christmas cookies.

The other ingredient these cookie have going for them is the addition of Maraschino Cherries.  These sweet, almond-tasting cherries are made from a bitter cherry.  The name Maraschino is from the Italian word marasca– the name of the cherry. and amaro which means bitter.  Somehow they become sweet as they soak in their liquid, and I just love them, but don’t find many ways to use them in cooking or baking.  So I was really happy to have come across this recipe. After I made them, I found them to be everything I had anticipated and more.  Just imagine for a moment biting into a buttery shortbread cookie that also includes the flavor of these cherries and almond.  Really good, yes?  Now add the smooth sweetness of white chocolate.   Oh, WOW!  If you are drooling at this point, you need to go make them NOW!

IMG_2171

Do you know what else?  There’s no need to get out your mixer.  It all gets mixed by hand, and there’s no chilling involved ( well, you can if you want to).  Pretty easy and quick to make.  And believe me, just as easy and quick to eat.

The recipe:  WHITE CHOCOLATE CHERRY SHORTBREAD COOKIES

YIELD:   about 60 cookies.  The recipe divides in half easily, which I did, and got 30 cookies

INGREDIENTS

  • 1/2 cup Maraschino cherries, cut up and drained well
  • 2 1/2 cups flour
  • 1/2 cup sugar
  • 1 cup ( 2 sticks ) cold butter
  • 12 oz. white chocolate chips or squares, finely chopped
  • 1/2 teaspoon almond extract
  • 2 drops red food coloring ( I used a little cherry juice instead for a paler color)
  • 2 teaspoons shortening
  • decorative sugar or sprinkles

DIRECTIONS

1.  Combine flour and sugar.  Cut in butter with a pastry blender.  Stir in cherries and 4 ounces ( 2/3 cup ) chopped white chocolate.  Stir in almond extract and food color ( or cherry juice).

2.  Stir as well as you can and then knead to form a smooth ball.

3.  Break off small pieces of dough and form into 3/4 inch balls.  Place on prepared cookie sheets. (Greased or lined with parchment paper.)

4.  Using a glass dipped into sugar, flatten into 1 1/2 inch rounds.

Flatten with a glass dipped into sugar.

Flatten with a glass dipped into sugar.

5.  Bake at 325 degrees, for 10 – 12 minutes.  Cookies will firm up as they cool.  Transfer to cooling racks to cool completely.

6.  In a saucepan over hot – not boiling-water, melt the remaining white chocolate with the shortening.  Dip half of each cookie, then roll the dipped edge into decorative sugar or sprinkles.  Stand upright between the tines of a cooling rack to dry.

Standing at attention to dry.

Standing at attention to dry.

Note:  I never find white chocolate easy to melt or dip into, so what I do is this.  When the chocolate becomes soft enough to stir, I use a small spatula to spread it on the cookie, making sure to cover the edge so the sugar will adhere.  This works for me. However, my cookies don’t get that perfectly half-dipped look.

SOURCE:   Martha Stewart Cookies,  I-Pad newsletter

IMG_2204  
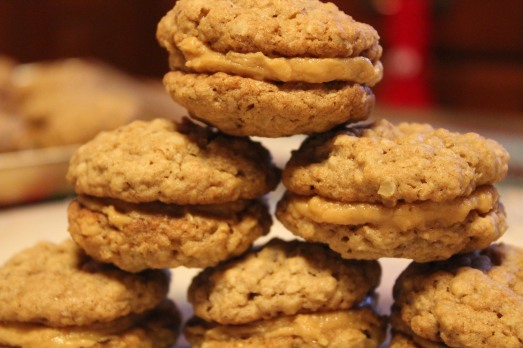
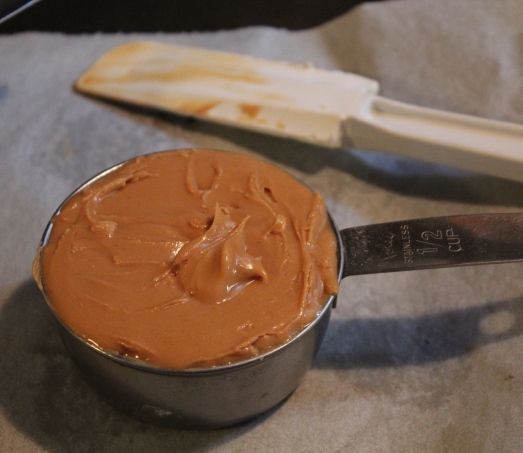
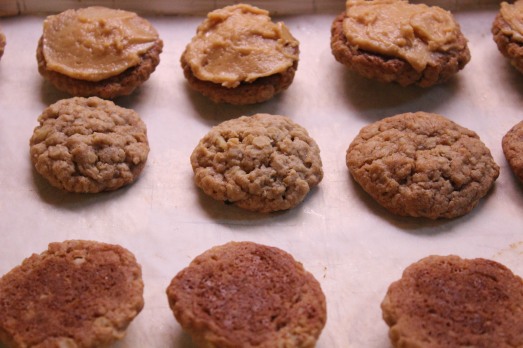
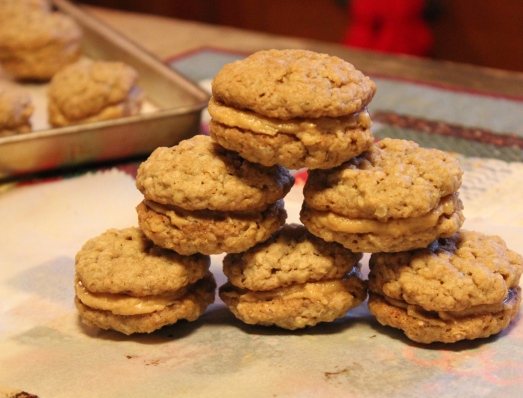
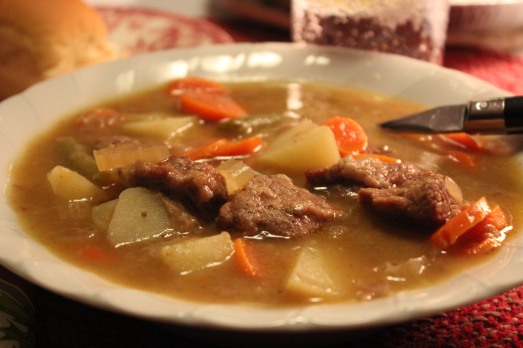
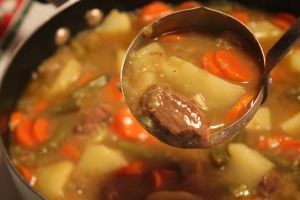
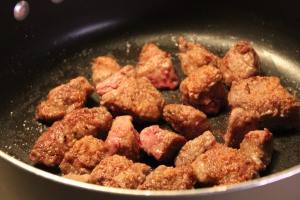
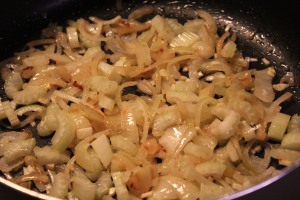
Here’s an advance look at tomorrow’s cookie recipe.  Y’all come back then.

Chocolate Caramel Pecan Thumbprints

Chocolate Caramel Pecan Thumbprint Cookies

Chocolate Caramel Pecan Thumbprint Cookies

Well, that’s rather a long title for a cookie.  I could call them simply chocolate thumbprints, but then you would miss out on the fact that there’s caramel in that little indentation, not jam as you might expect.  And why pecan?  Aren’t pecans always paired with chocolate and caramel as in “turtles”?  Of course,  I could have called them Chocolate Turtle Cookies,  but I wouldn’t want you to  get the wrong idea and think there were turtles in them either. So, Chocolate Caramel Pecan Thumbprints it is.   You’re gonna love em.

Usually when I see thumbprint cookies they are a light color with a red or green jam in the thumbprint, so I thought one with a chocolate cookie base would be a nice addition to a cookie tray. These could be rolled in powdered sugar or chopped nuts if you really want to fancy them up in addition to the caramel and pecan.

In this recipe I also pass along my trick for getting a perfect indentation to fill with jam or whatever when you make these kind of cookies.  A Cork.  Save a cork from a wine bottle and use it to make that dent and it will be symetrical and  perfectly round and hold just the right amount of filling.  S0000, here we go—-

CHOCOLATE CARAMEL PECAN THUMBPRINTS

YIELD:   about 2 dozen

INGREDIENTS

Chewy chocolate, gooey caramel, and crunchy pecan.

Chewy chocolate, gooey caramel, and crunchy pecan.

  • 1/2 cup ( 1 stick ) butter, softened
  • 2/3 cup sugar
  • 1 egg
  • 2 Tablespoons milk
  • 1 teaspoon vanilla extract
  • 1 cup flour
  • 1/3 cup baking cocoa
  • 1/4 teaspoon salt
  • caramel ice-cream topping
  • pecan halves, or large pieces

DIRECTIONS

1.  In a large mixing bowl, cream butter and sugar until light and fluffy.  Beat in the egg, milk, and vanilla.

2.  Combine flour, cocoa and salt;  gradually add to creamed mixture and mix well.  Cover and refrigerate for 1 hour or until easy to handle.

3.  Preheat oven to 350 degrees.  Grease 2 baking sheets, or line with parchment paper.

4.  Shape dough into 1 – inch balls.  Place 1 1/2 inches apart on prepared baking sheets.  Using a cork, make an indentation in the center of each cookie.   If you wish you can roll the balls in powdered sugar or chopped nuts before making the indentation.

Using a cork makes a perfect indentation for the filling.

Using a cork makes a perfect indentation for the filling.

5.  Fill each indentation with some caramel sauce, and place a pecan half on top.

Top each cookie with a pecan half.

Top each cookie with a pecan half.

6.  Bake at 350 degrees for 10 – 12 minutes or until center is set.  Remove from oven to cool on baking sheets for 5 minutes, then transfer to wire cooling racks to cool completely.   Store in an air tight tin or container with wax paper separating the layers.

Pretty cookies inviting you to take a bite.

Pretty cookies inviting you to take a bite.

SOURCE:   adapted from  The Taste of Home Baking Book

IMG_2071

Old Time Beef Stew

Old Time Beef Stew

Old Time Beef Stew

“The weather outside is frightful, and my kitchen is so delightful, and since I’ve no place to go,  let it snow, let it snow, let it snow.”  Well. it’s not actually snowing YET, but the weather forecast is for a winter mixture of sleet, rain and some snow.  A really good day to stay inside where it’s warm and do some baking, and  I am also making a good old fashioned beef stew.  I just love beef stew.

Preparing beef stew takes a few minutes to prep the meat and vegetables, brown the meat and get it all simmering, but once that’s done you can pretty much forget about it for 2-3 hours while you do other things.  It’s probably a good idea to give it a stir now and then to make sure it’s not sticking on the bottom,  but that’s about it until dinner time when you sit down to a hot bowl of brown beefy deliciousness.  So good on a cold winter’s day!IMG_2153

OLD TIME BEEF STEW

SERVINGS:   6 – 8

INGREDIENTS

  • 1 1/2 to 2 pounds beef stew meat, cut  into 1 1/2 inch cubes
  • 2 Tablespoons fat  ( I like to use half butter and half olive oil )
  • 1 large onion, sliced
  • 1 large rib or 2 medium ribs celery, sliced
  • 1 clove garlic, minced
  • 4 cups liquid (this may be water, beef broth, bouillon, or part red wine)
  • 1 Tablespoon lemon juice
  • 1 Tablespoon salt, or to taste.  You may need less if there is salt in the liquid you use.
  • 1 teaspoon Worcestershire sauce
  •  1 teaspoon sugar
  • 1/2 teaspoon pepper
  • 1/2 teaspoon paprika,
  • 1 – 2 bay leaves
  • dash allspice or cloves
  • 3 large carrots, peeled and sliced
  • 3 medium – large all purpose potatoes (not baking potatoes)
  • optional:  1 cup cut green beans, 1 cup small white onions

DIRECTIONS

1.  Thoroughly brown meat on all sides in hot fat.  Much of the deep beefy flavor you want in stew comes from properly browning the meat, right at the beginning.  I always dredge my meat in flour to which I have added a little salt and pepper and some paprika.  Then in a large deep pot, melt some butter with some olive oil, and begin to brown the meat in small batches so the pan is not crowded.  Putting in too many pieces of meat causes it to steam and not get nice and brown.

Browning the meat well is the first step in building deep beefy flavor .

Browning the meat well is the first step in building deep beefy flavor .

Once all the meat has been browned, set it aside on a platter or bowl, and add the sliced onions to any drippings left in the pan.  If need be, add a little more butter and oil,  as the onions become fragrant add in the sliced celery, and when both the onions and celery begin to soften add the garlic and sauté just until it gives off its fragrance.

Sauteing the onions, celery and garlic.

Sauteing the onions, celery and garlic.

2.  Return the beef to the pot, and add the 4 cups of liquid, and all the rest of the seasonings (through allspice or cloves).  Bring to a boil and then reduce heat to simmer.  Cover and cook slowly for about 2 hours, stirring occasionally to prevent sticking.

Add liquid and seasonings.

Add liquid and seasonings.

3.  Add cut up carrots and potatoes and continue cooking for another 20 – 30 minutes until tender.  Add optional vegetables at this time and cook another 10 – 15 minutes to thoroughly warm them.

Add in carrots and potatoes and cook till tender.

Add in carrots and potatoes and cook till tender.

4.  Thicken stew with the following:  1/4 cup water mixed with 1/2 cup flour, or  1/4 cup cornstarch.  Add in small amounts stirring all the while until stew reaches desired level of thickness.

5.  Bring to the table and serve family-style with a good crusty bread or rolls for soaking up all the gravy.

Comforting beef stew, so good on a cold day.

Comforting beef stew, so good on a cold day.

Note:   I have tried cooking this recipe in a crock-pot, but was not satisfied with the end result.  I thought the flavors became too dilute, and the meat was stringy, rather than tender.

SOURCE:    Adapted from Better Homes and Gardens New Cookbook