Impossible Coconut Cream Pie


Coconut Cream Pie

Coconut Cream Pie

Tomorrow is Pi Day, folks!

In case you are not aware of it, the first three digits of the mathematical constant pi are 3.14; so March 14th has earned the title Pi Day.  Since the date this year is March 14th, 2015, we have the first five digits of pi, 3.1415, an extra special day for celebrating.   And it’s so nice to have another food holiday (besides Thanksgiving) to celebrate each year.

IMG_9381

Of course, we love our pies for Thanksgiving, but most of us stick to the traditional ones–pumpkin, apple, pecan, etc.   I like Pi day because it gives me a reason to make a pie (#1), and because it gives me a chance to bake a new pie I haven’t tried yet (#2).  As I do each year I browse through many pie recipes, mulling over the choices in my mind, considering both sweet and savory options.   This coconut cream pie just got stuck in my head and wouldn’t let me rest until I made it.  I don’t remember trying coconut cream pie before this.  Newsflash—-it’s fabulous.  Don’t be thrown by the name.  This pie is not impossible to make, just impossibly good!

IMG_9379

Naturally since this is my first attempt at coconut cream pie, I have no basis for comparison, but we do love this pie.  The coconut custard filling is silky smooth and luscious without being too rich.  A cap of freshly whipped cream on top makes almost any pie better, and this is no exception.  I decided to go the extra mile and toasted some coconut chips for a garnish—so fun and so pretty.  I just love the way it looks.

Will you be celebrating Pi Day with pie?  I’d like to know what flavors you all are making!

IMPOSSIBLE COCONUT CREAM PIE

Yield:   Makes 8 servings

Ingredients:

  • 1 9-inch pie crust, unbaked ( your favorite recipe or a refrigerated pie crust)
  • 2 eggsIMG_9361
  • 3/4 cup sugar
  • 1/4 cup flour
  • 1/2 tsp. baking powder
  • 1/8 tsp. salt
  • 1 cup non-sweet coconut milk
  • 1 tsp. vanilla extract
  • 2 Tbsp. butter, melted
  • 1 cup sweetened flaked coconut

Directions:

1.  Preheat oven to 350*F.  Grease and flour a 9-inch pie plate.  Set aside.

2.  Flour a work surface and roll the pie crust out to fit your pie plate.  Carefully place the crust in the pie plate, flute the edges and refrigerate until ready to fill.

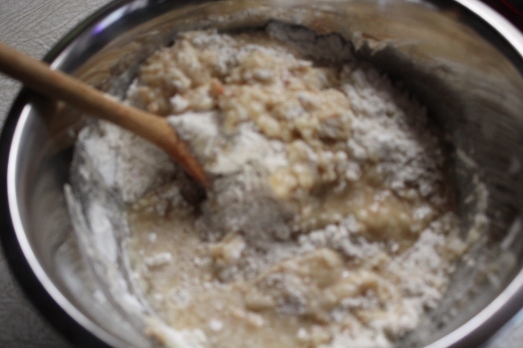
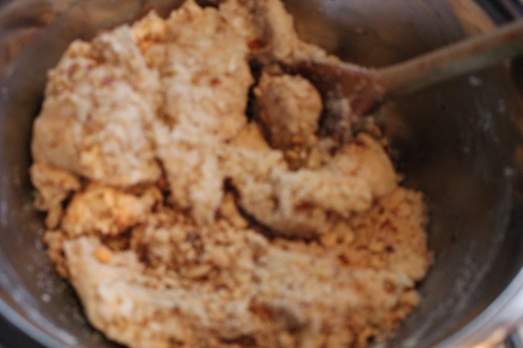
3.  In a large bowl, beat the eggs well.  Add the sugar, flour, baking powder, salt , milk, vanilla and melted butter.  Mix well.  Fold in the coconut.  IMG_9362

Fold in the coconut.

Fold in the coconut.

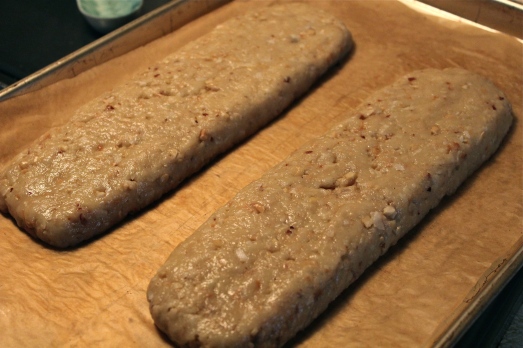
4. Pour into the pie crust.

IMG_9365

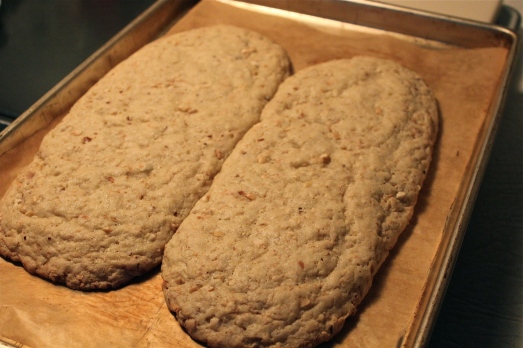
Bake  at 350*F. for 45 minutes or until lightly browned and edges are set.  The center may still be a bit jiggly.  It will become firm as it cools.  Allow to cool at room temperature about 2 hours, then refrigerate.

Baked, and lightly browned at the edges.

Baked, and lightly browned at the edges.

5.  Serve with a dollop of whipped cream on top and garnish with some coconut flakes that have been lightly toasted.  You can easily do this when the pie is cooked and out of the oven. Leave the oven on and toast the coconut flakes for 2-3 minutes. Watch carefully that they do not become too brown.

IMG_9377

IMG_9378

IMG_9380

IMG_9382

Looking for more Pi day inspiration?  Be sure to check the Pie category—there are many more options to choose from.


SOURCE:   adapted from a recipe by Penzey’s Spices


Advertisement

Coconut Biscotti


Coconut Biscotti

Coconut Biscotti

When you serve biscotti, you’re styling’, did you know that?  These crunchy, nutty, hard cookies are custom-made for dunking in a frothy cappuccino, or nibbling on between sips of dark, thick, espresso.  Or maybe you’re having them at the end of the day with a glass of sweet dessert wine.  If it’s wine you’re having, make it a wine from Tuscany, the reputed home of biscotti.

IMG_9141


A surprising fact to me is that biscotti were first developed for Lent, when all types of festive and fancy baking was curtailed. Their plain appearance is deceiving.  You may think that the cookie is plain and boring, but not so.  In going through my recipes recently, I noted that I have quite a number of recipes for biscotti, and they are all different.  The several characteristics they all share are the elongated shape, usually cut on a diagonal, the inclusion of toasted nuts, and the fact that they are twice baked, making them crisp and crunchy.

IMG_9127

The name of these cookies, when translated, breaks down to bis (twice) and cottare (to cook).  Because they are a firm, sturdy cookie they are perfect for packing and shipping to someone far from home.

IMG_9140

This recipe utilizes coconut in several forms;  toasted and finely ground in the dough, and coconut oil used for shortening in the dough; there is also coconut cream (liquid) and coconut flavoring in the glaze.  The basic cookie is not sweet, but the glaze they are dipped into adds a touch of sweetness at the end.  If you choose not to dip them into the glaze, they will still be a very enjoyable mildly sweet treat.

IMG_9146

The nuts called for in the recipe are salted macadamia nuts, chopped; however I didn’t have any so I used a combination of hazelnuts and cashews from a jar of salted nuts, and they worked just fine.

If you have never made biscotti before this could be the recipe to get you started,  especially as we approach the start of Lent.  I have never given up sweets for Lent because I can’t survive without a goodie now and then, but I do try to abstain from rich decadent desserts.   With biscotti on hand, I know I can have my “goodie” without going overboard.

IMG_9128


COCONUT BISCOTTI

Yield:  Makes about 24 cookies

Ingredients:

  • 1  1/2 cups unsweetened coconut flakes
  • 1 cup granulated sugar
  • 2 cups all-purpose flour

    Coconut oil, melted, is the shortening in this recipe.

    Coconut oil, melted, is the shortening in this recipe.

  • 1 tsp. baking powder
  • 1/4 tsp. baking soda
  • 1/4 tsp. salt
  • 1/3 cup coconut oil
  • 1 tsp. vanilla extract
  • 1/2 cup salted macadamia nuts, chopped
  • 1 cup confectioners’ sugar
  • 2 Tbsp. coconut cream ( may use milk or cream instead)
  • 1/8 to 1/4 tsp. coconut extract
  • coarse sugar for decorating, if desired

Directions:

1.  Position racks in the upper and lower thirds of the oven; preheat to 350*F.  Line 2 baking sheets with parchment paper.

2.  Spread 1 cup coconut flakes on a baking sheet and bake until toasted, about 3 minutes.

Coconut flakes, toasted

Coconut flakes, toasted

Let cool completely.  Transfer to a food processor; add the granulated sugar and pulse until finely ground.

Pulse in processor with sugar.

Pulse in processor with sugar.

3.  Whisk the coconut-sugar mixture, the flour, baking powder, baking soda and salt in a bowl.

Mix all the dry ingredients together.

Mix all the dry ingredients together.

Melt the coconut oil in the microwave;  add to the flour mixture along with 1/3 cup water and the vanilla, and mix with a wooden spoon until a stiff dough forms.

IMG_9100

Stir in the chopped nuts and the remaining 1/2 cup coconut flakes, gently knead until the dough comes together.

IMG_9102

4.  Divide the dough in half and shape into two 9-by-2-inch logs;  place 1 log on each baking sheet.

IMG_9106

Bake, switching the pans halfway through, until the logs are firm and golden, about 25 minutes.  Reduce the oven temperature to 300*F.

I baked them both on one sheet and they spread into each other.

I baked them both on one sheet and they spread into each other.

5.  Let the logs cool 10 minutes, then transfer to a cutting board.  Slice diagonally, with a serrated knife, into 3/4-inch thick pieces.

Cut on the diagonal and lay flat on baking sheet to be re-baked.

Cut on the diagonal and lay flat on baking sheet to be re-baked.

Arrange the slices cut-side down on the baking sheets.  Bake, flipping halfway through, until just golden and centers still have a little give, 20 to 25 minutes.  (It has been my experience that over-baking can happen at this stage of the game, so I underbake a little to be cautious.)  With these cookies, I baked 8 minutes on the first side, turned them over and baked for 10 minutes more.  They were plenty crispy, and they continue to crisp up as they cool.  Cool completely on wire racks before glazing.

IMG_9112

6.  Whisk the confectioners’ sugar, coconut cream, (or milk) and coconut extract in a small bowl until smooth.  Dip the biscotti in the glaze and sprinkle with decorative sugar if desired.

To store:   Allow the glaze to harden completely before storing in an air-tight container.  Separating the layers with wax paper will keep the cookies from sticking together.  They will keep “forever”, but we always eat them up way before then 🙂

IMG_9148


SOURCE:   FoodNetwork Magazine

Coconut Cream Poke Cake

Coconut Cream Poke Cake

Coconut Cream Poke Cake


For the time being can we just put aside the kale and zucchini?  We don’t need them.  We’re also going to set aside any twinges of guilt.  What we are going to do is make a white coconut cake that’s gooey with Cream of Coconut, fluffy whipped topping and lots of flaked coconut.  There! I said it and I’m not sorry in the least.  In fact I feel really good about it and I hope you do too.

IMG_7803

This is a very easy cake to make as most “poke” cakes are.  It is so moist and has such a great  creamy, coconut flavor that I think even folks who are not coconut lovers will fall in love with this one!  It’s a surprisingly light and fluffy cake in spite of being soaked with the cream of coconut.

IMG_7793

Coconut Cream Poke Cake:

Yield:  20 -24 servings:

Just a few ingredients.

Just a few ingredients.

Ingredients:

  • 1  (18-oz.) box white cake mix
  • ingredients needed to make cake ( eggs, oil and water)
  • 1 (15-oz,) can Cream of Coconut**
  • 1 (8-oz.) container frozen whipped topping, thawed
  • 1 (8-oz.) package sweetened flaked coconut

** Be sure to use Cream of Coconut–not coconut milk.  Cream of Coconut can usually be found where alcohol supplies and mixers are in your grocery store.   It tends to be near the margarita mixes.  You will need to shake the can well or stir well when you open it, because the cream part tends to separate from the liquid.

Directions:

1.  Prepare and bake the white cake as the package directions specify.  Bake in a 9 x 13″ pan that has been well greased.

2.  Remove cake from oven, and while still hot, poke holes all over the top of the cake using a large fork.

Poke hole all over the top with a fork.

Poke hole all over the top with a fork.

3.  Open the can of Cream of Coconut –making sure to stir it well –and pour over warm cake.  Make sure you evenly coat the whole cake and spread it around so it will soak in.

Pour Cream of Coconut all over the top and let it soak in.

Pour Cream of Coconut all over the top and let it soak in.

4,  Let cake cool completely then frost with whipped topping.

Frost with whipped topping.

Frost with whipped topping.

5.  Top with flaked coconut.  If you like you can toast your coconut first but I prefer it un-toasted.

Top with flaked coconut.

Top with flaked coconut.

Keep cake refrigerated.   The cake will taste best after it has cooled for at least a couple of hours.  This gives it time for the coconut flavors to really soak in.

IMG_7798

Poke cakes are so easy to make, but give the impression  that you spent a lot of time on them.  If left in the baking pan and covered securely, they can be transported safely to an outing or picnic.  This one is no exception.  We all loved it!!


IMG_7801

SOURCE:  The Country Cook


Chocolate Chip Coconut Mounds

Chocolate Chip Coconut Mounds

Chocolate Chip Coconut Mounds

A bake sale table is always an inviting sight. All those assorted cakes, cookies, pies, breads and bars just begging to be taken home. Everything looks so good they practically sell themselves.

Bake sale items, by definition, are lovingly homemade in the same way as baked goods auctioned off at church suppers, or judged at country fairs.  They are the real deal, no fillers, no ingredients to prolong shelf life, or strange chemicals you can’t pronounce.

IMG_7477


The recipe I have for you today is a bake sale favorite that contains chocolate chips, flaked coconut, and chopped walnuts.  Probably  the chocolate chips alone would be enough to entice most people, but add in the coconut and nuts, and they become chock full of true blue flavor and goodness.IMG_7483

I made these recently to bring to an end of the year picnic event.  They disappeared “quick as a wink”.  Give these chunky cookies a try for your family or the next time you’re asked to bake for a bake sale.  They are really good!!

CHOCOLATE CHIP COCONUT MOUNDS

Yield:  About 2  1/2  dozen cookies

Ingredients:IMG_7472

  • 1  1/4 cups all-purpose flour
  • 5 tablespoons cake flour
  • 1/4 teaspoon baking soda
  • 1/8 teaspoon cream of tartar
  • 1/2 teaspoon salt
  • 10 tablespoons ( 1 stick plus 2 Tablespoons) unsalted butter, softened
  • 1/2 cup plus 2 Tablespoons light brown sugar
  • 1/2 cup granulated sugar
  • 1 large egg
  • 1  1/2 teaspoons hot water
  • 2  1/2 teaspoons vanilla extract
  • 1 cup (lightly packed) sweetened flaked coconut
  • 1 1/2 cups semisweet chocolate chips
  • 1 cup coarsely chopped walnuts

Directions:

1.  In a medium bowl, whisk together the all-purpose flour, cake flour, baking soda, cream of tartar and salt.

2.  In the large bowl of an electric mixer, cream the butter for 2 – 3 minutes on low speed.  Add the light brown sugar and beat for 30 seconds on moderate speed; add the granulated sugar and beat for 30 seconds longer.  Beat in the egg.  Blend in the hot water and vanilla extract.

3.  Add the flour in thirds, mixing well after each addition.  Remove the bowl from the beater, and stir in the coconut, chips and nuts.

Stir in chips, coconut and nuts.

Stir in chips, coconut and nuts.

Chill the dough, covered with plastic wrap, for 30 minutes.  Can leave longer if necessary, up to 48 hours.  No need to bring to room temperature prior to baking.

4.  In advance of baking, preheat the oven to 350*F.  Line 3 baking sheets with parchment paper.  Drop dough in mounds of approximately 2 tablespoon size, leaving 1  1/2 inches  between cookies.  A cookie scoop helps to form uniformly sized cookies.

IMG_7474

5.  Bake the cookies for 12 – 14 minutes, or until just set and light golden here and there around the edges and golden in spots on top.  Let the cookies cool on the sheets for 10 minutes, then transfer them to cooling racks, using a wide spatula.  Store the cookies in an airtight container, or pack in food-safe containers or bags for sale.

IMG_7476


A little chewy, a little crunchy, totally good!

A little chewy, a little crunchy, totally good!


IMG_7480


SOURCE:  A Country Baking Treasury by Lisa Yockelson, via Chocolatier Magazine

Coconut Lime Scones

Coconut Lime Scones

Coconut Lime Scones

By now it’s no secret how much I like coconut, and I have been having a craving that just won’t quit.  Just when I think I’ve reached the end of my coconut obsession, another recipe pops up,  I start to salivate, and then you know what happens….I bake!


IMG_7133

I’m head over heels for coconut and seem to have gone bonkers for it.  I just hope you are not bored by the number of recipes I’ve  posted that contain coconut, because here is another one. These scones contain a match-up of coconut with lime and they are incredibly good.  Their texture is not quite as crumbly as some scones, leaning more toward cake-like, but served warm from the oven, plain or with raspberry jam they are perfect.  You can also serve them for dessert with fresh strawberries or coconut sorbet for a special treat.  My idea for dressing them up was to make a glaze from confectioners’ sugar and lime juice .    I hope you enjoy these scones.

IMG_7130

You will note that the recipe calls for heavy cream in the dough and for brushing the tops.  I thought that with the butter they contain, more fat from the cream was not needed, so I substituted buttermilk and still got a very tender scone.  Since these are made primarily in the food processor, you must be careful not to over-process the dough or the scones will not be tender.  If the dough seems wet, that’s OK, work in extra flour by kneading lightly on a floured surface.

Ingredients:

  • 2  1/2 cups all purpose flour
  • 1/2 cup sugar
  • 1  1/2 cups unsweetened coconut
  • 1 teaspoon baking powder
  • 1/2 teaspoon baking soda
  • 1/2 teaspoon salt
  • 8 tablespoons (1 stick) cold butter, cut into chunks
  • zest of 2 limes
  • 1/4 cup freshly squeezed lime juice
  • 1/2 cup whipping cream (or buttermilk)
  • 1 egg
  • 1 – 2 tablespoons cream for brushing tops

For the glaze:

  • 1 cup powdered sugar
  • 2 tablespoons lime juice

Directions:

Preheat the oven to 425*F. and prepare a baking sheet by lining with parchment paper or silicon mat.

In the bowl of a food processor, combine the flour, sugar, coconut, baking powder, baking soda and salt.  Pulse it together just to mix.  Add the cold butter and pulse until the butter has been cut into the floor and you have a coarse crumb. Add the lime juice and about 2/3’s of the zest and pulse.

In a small bowl or measuring cup, whisk together the 1/2 cup cream (or buttermilk) and egg.  Add it to the mixture and pulse until you have a dough that comes together but is still crumbly and wet.

Turn the dough out onto a well floured surface, and using the extra flour, work it into the dough and pat the dough into a round disc. Using a floured knife cut into 8 wedges.

Brush tops of the scones with the 1-2 tablespoons cream (or buttermilk).  Bake for 10 minutes until slightly golden around the edges.  Let the scones cool for a few minutes and firm up before removing them from the pan.  While they are cooling, make the glaze.

IMG_7125

In a small bowl, combine the powdered sugar  and lime juice   Whisk together to get a thin glaze.  Drizzle over the tops of the warm scones and sprinkle with remaining zest.

IMG_7129


IMG_7127

SOURCE:   adapted from a recipe by Heathercristo. com


Banana Chip Muffins

Banana Chip Muffins

Banana Chip Muffins

It’s hard to know when would be the best time to eat these wonderful muffins.  Certainly, for breakfast, but they make a mighty fine dessert or snack as well.  I tested out this recipe last weekend because I plan to make them for an Easter Bake sale.  Muffins are always great with coffee on Easter morning, when you know there will be a big meal sometime later in the day.

When I was a teenager our youth group always got up really early to attend an Easter sunrise service.   At that hour of the morning, it was quite chilly outside, so when the service was over we always went to someone’s house or back to church for hot chocolate and whatever other goodies were provided.  Moving and beautiful as the service was, I always looked forward to the refreshments that followed.  These muffins are the essential accessory  to a hot beverage, and would be perfect served at an early morning function, or maybe an early meeting at the office.

Muffin and a hot beverage.

Muffin and a hot beverage.

These are sturdy muffins chock full of flaked coconut, chocolate chips, and nuts if you care to add them.  The tropical taste of the coconut blends beautifully with the banana flavor and develops the batter along the way; the inclusion of  chocolate chips is a necessity for those  individuals who require chocolate in every bite of muffin.

IMG_7057

What makes the texture of these banana muffins somewhat cake-like and soft is the process by which the batter is assembled: the butter and brown sugar are creamed together until fluffy and smooth.  This builds the batter’s creamy quality and prepares the mixture for the addition of the whole eggs.  Once the eggs are added, the flavoring extract and the mashed bananas are incorporated, followed by the final mix-in of the dry ingredients and enough buttermilk to moisten the whole.  The batter is now ready to accept the shredded coconut, mini chips and nuts.

Spooned into lined muffin cups and baked, the batter bakes up into plump muffins that have lovely rounded tops.  When you break open a warm muffin, you’ll find a tender, moist, “crumb” holding chocolate chips and coconut, all wrapped by the taste of banana.  Sigh!!

Can anything make them better?   Yes, butter!!

Can anything make them better? Yes, butter!!

BANANA CHIP MUFFINS

Yield:   12 muffins

Ingredients:

  • 2 cups all-purpose flour (I used 1 cup white whole wheat and 1 cup regular flour.)IMG_7014
  • 1  1/2 teaspoons baking powder
  • 1/4 teaspoon baking soda
  • 1/4 teaspoon salt
  • 8 tablespoons ( 1 stick) unsalted butter, softened
  • 1/2 cup packed light brown sugar
  • 2 large eggs
  • 1 cup mashed ripe bananas (about 2 large bananas)
  • 1/3 cup buttermilk
  • 1 teaspoon vanilla extract
  • 3/4 cup flaked coconut
  • 3/4 cup semisweet chocolate chips ( I used mini chips.)

IMG_7015

Directions:

1.  Preheat the oven to 375*F.  Line 12 muffin cups (3-ounce size)  with paper liners, or grease lightly.

2.  In a large bowl, whisk together the flour, baking powder, baking soda and salt.  In the bowl of an electric mixer, cream the butter and the brown sugar for about 2 minutes, until light and fluffy.

3.  Beat in the eggs to incorporate,  add in the banana and vanilla.   The mixture may look curdled.   Add the flour mixture alternately with the buttermilk, continuing to mix just to combine.

4.  Reserve 2 tablespoons chocolate chips.  Add the rest of the chips, the coconut, and nuts, (if using) to the batter and stir in to distribute evenly.

5.  Spoon the batter into the prepared muffin cups.  Sprinkle the tops with the reserved chocolate chips.  Bake 25 – 30 minutes until a toothpick into the center of one muffin comes out clean.

IMG_7016

6.  Remove the muffin tin to a wire rack.  Cool the muffins in the pan for 5 minutes.  Remove muffins from the cups and finish cooling on the rack.  Serve warm or cool completely and store the muffins in an airtight container at room temperature.

IMG_7021

Happy Easter!  :)

Happy Easter! 🙂


SOURCE:   Chocolatier Magazine


Macaroon Cookies

Chocolate Pistachio Macaroons

Chocolate Pistachio Macaroons

During my time in college I roomed with a gal who was Jewish.  We became close friends and continued rooming together throughout our four years.  This resulted in many visits to her home, and time spent with her parents and sisters.  As a result I felt that I became one of the family, learning about Jewish Holidays and food traditions.  I have participated in the Seder meal for Passover and become acquainted with the traditional foods that are eaten during this time and the need for unleavened breads and baked goods.

IMG_6987

One of the popular desserts served at this meal is macaroon cookies.  I have a strong affinity for these cookies, and I always stop to admire them whenever I pass a Jewish Deli or bakery.  Jewish baking has tremendous significance, and the ingredients and shapes are directly tied to specific holidays when they are prepared.  For Passover, observant Jews eat unleavened foods to commemorate their ancestors’ hurried departure from Egypt.  These macaroons are flourless and get their texture from egg whites, making them the ideal cookie for the holiday.IMG_6992

The basic macaroon, while certainly enjoyable without anything added, can be “dressed up” with additions and minor changes to its shape.  What I’ve included here are several ways to embellish these sweet, delectable cookies if you should choose to do so.  They are very easy to make, and I’m sure you will enjoy them with or without the extras.  The cookies pictured in my photos are the chocolate pistachio variety.

COCONUT MACAROONSIMG_6988

Yield:  Makes about 30 macaroons

Ingredients:

  • 3 large egg whites
  • 1/2 cup sugar
  • 1/8 tsp. salt
  • 1/2 tsp. vanilla extract
  • 1 (14-ounce) package shredded, sweetened coconut

Directions:

1.  Preheat the oven to 325*F.  and line a baking sheet with parchment paper.  In a large bowl, whisk the egg whites till foamy, add the sugar, salt and vanilla mixing well.  Fold in the coconut.

2.  Scoop heaping tablespoons of the coconut mixture about 1-inch apart onto the baking sheet.  Using your fingers (dampened) to form into pyramids.

Use your fingers to form into pyramid shapes.

Use your fingers to form into pyramid shapes.

Bake until golden brown around the edges, 20 – 25 minutes.  Let cool 10 minutes on the baking sheet, then transfer to a rack to cool completely.

Golden brown around the edges when fully baked.

Golden brown around the edges when fully baked.

Variations:

1.  Chocolate Pistachio:  Substitute 1/4 tsp. almond extract for the vanilla and stir in 1/2 cup chopped dried cherries before adding the coconut.  Bake as directed and cool.   Melt some semisweet chocolate chips in the microwave until smooth.  Dip the tops of the macaroons into the chocolate, sprinkle with chopped pistachios and chill until set.

Dipping the tops into melted chocolate and sprinkling with pistachios.

Dipping the tops into melted chocolate and sprinkling with pistachios.

2.  Cocoa-Cinnamon:  Whisk 2 tablespoons unsweetened cocoa powder, 2 teaspoons cinnamon and 1 teaspoon grated orange zest into the egg white mixture before adding the coconut.

3.  Run-Raisin:  Stir 1/4 cup dark rum and 1/3 cup raisins into the egg white mixture before adding the coconut.

4.  Raspberry Thumbprints:  Scoop the macaroon mixture onto the baking sheet; bake 10 minutes.  Make an indentation in each cookie using the back of a teaspoon, or a cork;  fill with 1/4 tsp. raspberry jam, then continue baking until golden brown around the edges, 10 to 15 minutes more.

SOURCE:  FOOD NETWORK MAGAZINE

IMG_6982

IMG_6991

Black Bottom Coconut Bars


Black Bottom Coconut Bars

Black Bottom Coconut Bars

The name of these bars sounds like a dance right out of the “roaring 20’s”.  But, no, we are going to bake and eat them.  Oh, Yum!

IMG_6913

Coconut and chocolate is a flavor combination I particularly love, and recently I’ve had a craving for coconut. It’s been so bad that I over-bought coconut; would you believe in my pantry there are three bags of shredded, two bags of flakes, and a container of “chips”. Not to mention a large package of “bite-size” Mounds bars!!    What was I thinking?

If there’s one thing I’ve learned it’s that when a craving strikes the best thing to do is give in to it.  So I baked these bars.  A friend’s birthday was my reason for baking, but at the same time I reasoned, I could have 1-2 bars to “taste”, and hopefully that would be the end to my craving.  We’ll just see how that works out…..

IMG_6909

These bars are moist chewy brownies on the bottom, with a wonderfully, gooey, coconut-y mixture on top, and that layer is topped with more coconut that I toasted and sprinkled over all.   Let me tell you, it’s a good thing I gave most of these away or I could have eaten them all myself.   They are incredibly good.  I’m thinking they would make a perfect dessert for Easter. 😀

IMG_6915

If you like brownies and you like coconut, you really need to try these seriously addictive bars.

BLACK BOTTOM COCONUT BARS

Yield:   16 – 24 bars

Ingredients:

For the brownie layer:

  • 1/2 cup unsalted butter
  • 1/2 cup granulated sugar
  • 1/4 teaspoon salt
  • 1 large egg
  • 1/4 cup unsweetened cocoa powderIMG_0261
  • 1/4 cup all-purpose flour

For the coconut layer:

  • 2 large eggs
  • 3/4 cup granulated sugar
  • 1/2 teaspoon coconut extract
  • 1 cup all-purpose flour
  • 7 ounces sweetened, shredded coconut,  reserve 1/2 cup for sprinkling on top

Instructions:

1.  Preheat oven to 375*F.   Line a 9-inch square baking pan with parchment paper or foil, leaving an overhang.  Spray bottom and sides of paper lining.

2.  Toast the reserved 1/2 cup coconut by spreading on a baking sheet and baking for about 5 – 7 minutes.  Watch carefully that it doesn’t get too dark.  Stir twice during baking time.  Remove and set aside for later.

3.  Make brownie layer:  using a microwave-safe bowl, melt butter in microwave.  Whisk in sugar and salt.  Whisk in egg, then cocoa powder and flour.  Mix until smooth.  Spread evenly in prepared pan.

4.  Bake for 10-15 minutes.  The sides should be starting to pull away from the pan. Don’t over bake.  Set aside while you make the topping.

5.  Make coconut layer:  Whisk eggs with sugar and coconut extract.

IMG_0262

Mix in flour and coconut.  Drop mounds of topping onto chocolate base.  Spread and press into base with moistened fingers.  Sprinkle with the toasted coconut.

IMG_0264

6.  Bake 25 – 30 minutes, or until a toothpick inserted in the center comes out with moist crumbs attached.  Cool completely in pan.  Then remove from pan using the overhang.  Peel back paper or foil, and cut into bars.  Store in an airtight container for 3 -4  days.

IMG_6908

IMG_6912

IMG_6914

Don’t wait.   Go. Now. Make these bars.


SOURCE:  Adapted from Martha Stewart


OOPS, I Goofed!

Cranberry Coconut Quick Bread

Cranberry Coconut Quick Bread

Sweet breads– those simple sweet treats that come together in just about ten minutes, are taking the place of dessert for me.  I place them in the same category as pudding, meaning that they satisfy that longing for something sweet, yet are not overly rich, and with quick breads you can use ingredients that are good for you, like whole wheat flour, and additives such as fruits and nuts.  This recipe takes  tart little cranberries to new heights by pairing them with coconut – and chocolate chips, too. (Another flavor combination I’m stuck on.)  They do a nice job of off-setting the tartness of the cranberries.

So where does the OOPS come in?  It’s coming, read on….

I love cranberries,  and I think most of us associate them with Thanksgiving, and the Christmas holidays; but cranberries are good any time of year.  The problem is that the growing season is pretty short,  so what I like to do is grab a few extra bags when they’re available and stash them in the freezer for use at a later time.   Some recipes are so routine/ordinary that I don’t want to use one of my precious bags of cranberries to make them,  so I’m quite selective about what I will use a bag for.  This recipe is definitely “bag-worthy”.    I also feel that if a recipe is “bag-worthy”, then it must certainly be “blog-worthy”, so I’m sharing it with you.

Still waiting for OOPS?  Hang in there!

One of my precious bags of cranberries went into this recipe.

One of my precious bags of cranberries went into this recipe.

There is not a whole lot of liquid in this recipe; only what is offered by the butter and 3 eggs, so the resulting batter is quite thick–a lot like cookie dough.  I needed to put it into the pan in small amounts, making sure to tap out any air pockets.  The pan was almost full.  Edit note added after baking:  The recipe does not direct you to chop the cranberries, so I used them whole, and mine were frozen.  I baked the bread for the full 70 minutes and a toothpick inserted into three places all came out clean.  When the bread was taken from the oven, it was a light golden brown with bright spots of cranberries,  looking so pretty.  Within a few minutes the center of the bread began to sink, developing that tell-tale sign of being undercooked.  I was so disappointed.  (and mad!)

Undercooked bread.   BOO_HOO!

Yup,  HERE IT IS!!    Undercooked bread. BOO_HOO!

The flavor is wonderful, (please do add the almond flavoring, its what makes this bread so good )and we really liked the parts of it that we could salvage.**   I am not giving up on this bread.  Next time I will use cranberries that are not frozen, and perhaps I’ll chop them up before adding to the batter. No, on second thought, I like the whole cranberry, so I’ll try cooking it longer.  I think they were probably the cause of the problem.   I hope my experience will not deter you from trying this bread, but instead alert you to possible problems that you could solve in advance.

CRANBERRY AND COCONUT BREAD

Yield:  1  9×5 inch loaf

Ingredients:IMG_6279

  • 3 large eggs
  • 2 cups sugar
  • 3/4 cup unsalted butter, cubed and softened at room temperature
  • 1 tsp. vanilla extract
  • 1 tsp. almond extract, optional, but good
  • 2 cups all-purpose flour
  • 1 tsp. salt
  • 1 tsp. baking powder
  • 2  1/2 cups cranberries, (12-oz. bag)
  • 1/2 cup shredded sweetened coconut
  • 1/2 cups mini chocolate chips

Directions:

1.  Preheat oven to 350*F.  Lightly grease and flour a 9″ x 5 ” loaf pan.

2.  Place eggs and sugar in the bowl of a stand mixer and beat on high until mixture is pale yellow, and doubles in volume, about 5-6 minutes.

IMG_6280

3.  Add in butter, vanilla and almond extract (if using), until incorporated; about 2 minutes.  Then using using a sturdy spatula or wooden spoon,  fold in the flour salt, and baking powder.  Do not over mix.  Next fold in the cranberries, coconut and chips.  Batter will be thick.  Pour batter into prepared pan and spread evenly.

Thick batter.   Nice colors.

Thick batter. Nice colors.

4.  Bake for 60 – 70 minutes.   Start checking at 60 minutes.  Bread is done when cake tester or toothpick removed from the center shows only moist crumbs. ( should not be wet and doughy)

** I took all the under cooked section of the loaf, put it into a smaller loaf pan, and rebaked it.  Not quite the same with a second baking, but at least it became dry and firm, so we could eat it anyway.

The slices at each end were cooked well.

The slices at each end were sufficiently cooked that we could experience what the whole loaf should have been like.

Note to self:  If at first you don’t succeed, try gain.  I am going to get this right because it’s so worth it.

SOURCE:  Baker’s Royale

Coconut Tapioca Pudding with Mango

Tapioca Pudding with Mango and Coconut Cream

Tapioca Pudding with Mango and Coconut Cream

Are you still sticking with your New Year’s Resolution?  You know, the one about exercising and losing weight.  You are?  Why that’s just  great!  And I’m here to help with that.  Isn’t it hard going without desserts though, denying yourself those sweets you love?  What happens most often is–you can hold out for a while, but then youabsolutelymusthavesomething for dessert.IMG_6265

For me pudding seems to be the answer.  I cannot completely cut desserts out of my life, so I think that having a limited quantity of a dessert that is not excessively decadent is exactly what’s needed.  It keeps me sane (at least I think so). In my opinion there is no better dessert for this purpose than pudding.  This week my pudding of choice is tapioca.   OK, so call me old-fashioned.  I served it in dessert cups that I found in my parent’s attic;  I love these old vintage dishes, too.

Served in vintage dessert dishes.

Served in vintage dessert dishes.

Tapioca is a pudding that doesn’t get much attention in the pudding/dessert world.   It’s a puzzle to me, as I think it’s gorgeous, has a chewy starchy texture, and comes from the plant world.  Tapioca pearls come in several sizes, but I like the tiny ones.  They get cooked in a custard to which you can add vanilla or lemon, orange, or cinnamon.  Tapioca pudding is like a blank slate.  In this case, since I am feeling the effects of this long cold winter, I included ingredients that I associate with the tropics;  mango, lime and coconut.  I used mango pureed with lime juice, and topped off the whole thing with whipped coconut cream, and toasted coconut chips for garnish.

A luxurious, but surprisingly low-fat dessert.

A luxurious, but surprisingly low-fat dessert.

If you are dreaming of warmer places, places with palm trees and tropical fruits, places where one does not need to pull on heavy snow boots with ski socks, a down-quilted jacket, knit hat, scarf and gloves just for a grocery store run, then this dessert might just be the dessert for you.

As I write this, the southern parts  of the U.S are feeling the full brunt of a winter snow-sleet-ice storm.  I feel your pain, people.  We here in the northeast know just what you’re going through.  Hang in there, Spring is on its way!

COCONUT TAPIOCA PUDDING WITH MANGO

Yield:    4  1/2-cup servings,  plus toppings

Pudding:

Tiny pearl tapioca, plus "light" coconut milk.

Small pearl tapioca, .

  • 1/3 cup small pearl tapioca, such as Bob’s Red Mill
  • 2  1/2 cups coconut milk ( light or full-fat, or use regular milk)
  • 1 egg yolk
  • 1/4 – 1/3 cup granulated sugar
  • 1/4 tsp. table salt
  • 1/2 tsp. vanilla extract

 Mango Puree:IMG_6258

  • 1 very ripe mango, peeled, pitted and roughly chopped
  • 2 tsp. granulated sugar, optional ( I used it, but would skip it next time)
  • 1 squeeze or two of fresh lime juice

Optional garnishes:

  • whipped coconut cream
  • 1/2 cup toasted coconut chips or flakes
  • few gratings of lime zest

Make Pudding:  In a medium saucepan, soak tapioca in coconut milk for 30 minutes.  Whisk in egg yolk, sugar, and salt.  Place saucepan over medium heat until mixture comes to a simmer, then reduce it to very low so it’s barely bubbling, and cook it until it thickens, about 15 minutes, stirring frequently.

Cooking the tapioca vanilla custard

Cooking the tapioca vanilla custard

Remove from heat and stir in vanilla extract.  Pour into pudding cups to chill for several hours.  Pudding may seem thin going into the cups but after chilling in the fridge, it will set on the firm side.

Pour pudding into dessert cups to chill.

Pour pudding into dessert cups to chill.

To make a softer, lighter pudding you may want to beat the egg white you separated from the yolk, separately with a spoonful of sugar you would otherwise have added to the tapioca.  Beat until glossy peaks form.  After the pudding has cooled for about 15 minutes, spoon some of the pudding mixture into the egg white and fold in, then pour all of it back into the pudding, folding in until it has all been uniformly incorporated.

Make Mango  Place mango chunks in a small food processor or blender with lime juice and sugar and blend until very smooth.  Refrigerate puree until needed.

Make Whipped Coconut Cream:  Place 1 can of full fat coconut milk in the fridge overnight.  This will cause the coconut fats and thin milk/watery part to separate.  Also place small/medium mixing bowl (ideally metal) in the freezer.  The next day, turn the can of coconut milk upside down before opening it, so that the thickened coconut fat will be at the bottom.  Pour off the thin coconut milk;  you should have about 1 cup and this can be used towards the amount needed for the tapioca.  About 2/3 thickened coconut fat will remain at the bottom of the can.  Scrape this into the chilled bowl, and beat it with an electric mixer until thick and whipped, like cream.  Dollop it over desserts such as this, though you will have more than you need for 4 puddings.  It will keep, covered, in the refrigerator for several days.

Thick coconut milk whips up like cream.

Thick coconut milk whips up like cream.

To Toast Coconut Chips:  Heat an oven to 350*F.  Spread coconut flakes on a rimmed baking sheet and toast until golden brown and fragrant, about 5 minutes, tossing once if needed to help them brown evenly.  Let cool before using.

To Serve:  Dollop a spoonful of mango puree on the tapioca, then top it with a some coconut cream.  Sprinkle with toasted coconut before serving.

IMG_6267

SOURCE:  Smitten Kitchen