Greek-Style Chicken Breasts
Do you like to buy olives from the olive bar in the supermarket? I love them, and frequently buy an assortment to have on hand. I like to include olives in a mixed green salad, or add them to the salads I prepare for our lunches. As luck would have it, I had just returned from my grocery shopping on the very day that I came across this recipe for Greek-Style Chicken that called for kalamata olives. With the olives on hand I knew I had everything necessary to prepare this fantastic entree.

Grilled Chicken goes Greek!
Besides being very tasty, this meal can be prepared in just about 30 minutes. The recipe as it was printed contained a recipe for herbed potatoes, and when I cooked the chicken, I prepared the herbed potatoes as well. So I’m including them here for you also. This meal goes together so easily and is really good. I would not hesitate to serve this to guests, who would think you spent longer on its preparation than you actually did. Many of you may be grilling now that summer has officially arrived, and the chicken would be lovely cooked out on the grill, then topped with the onion-tomato-olive mixture.
GREEK-STYLE CHICKEN BREASTS
Yield: Serves 4
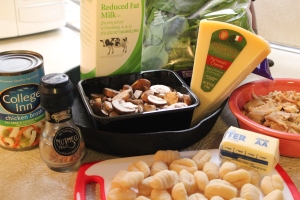
Ingredients:
- 4 (6-ounce) skinless, boneless chicken breast halves
- 1/4 tsp. kosher salt
- 1/4 tsp. black pepper
- 1 1/2 Tbsp. olive oil
- 1 3/4 cups vertically sliced onion
- 1 Tbsp. minced garlic
- 12 – 14 pitted kalamata olives, chopped
- 1 medium tomato, halved and sliced
- 1/4 cup chopped fresh parsley
- 2 tsp. chopped fresh oregano (or 3/4 tsp. dried)
- 2 tsp. fresh lemon juice
- 1 ounce feta cheese, crumbled (about 1/4 cup)

Tomatoes and olives ready for the pan.
Directions:
1. Heat a grill pan over medium-high heat. Coat pan with cooking spray. Sprinkle chicken with salt and pepper. Add chicken to pan; cook 6 minutes on each side or until done.

Grilling the chicken
2. Heat a large skillet per medium-high heat. Add oil to pan; swirl to coat. Add onion and garlic, sauté 4 minutes.

Add olives and tomatoes; cook 3 minutes or until tomato begins to break down, stirring occasionally.

This smells fantastic!!
Remove pan from heat; stir in parsley, oregano and lemon juice. Top chicken with tomato and olive mixture; sprinkle feta evenly over chicken.

Spoon sauce over chicken and sprinkle with feta cheese.
HERBED POTATOES
Place 1 1/4 pounds baby gold potatoes – or medium yukon gold potatoes, quartered – in a large saucepan. Cover with water and cook 14 minutes or until potatoes are tender; drain.
Combine 1 tablespoon melted butter, 1 tablespoon white wine vinegar, 2 teaspoons extra-virgin olive oil, 2 teaspoons chopped fresh oregano leaves, 1/2 teaspoon ground black pepper, and 1/4 teaspoon kosher salt in a large bowl, storing with a whisk. Add potatoes and toss to coat. Garnish with parsley or oregano leaves, if desired.
If you have extra time you can roast rather than boil the potatoes. Toss them in the vinaigrette mixture, and bake at 400*F for 30 minutes, stirring after 20 minutes. This is what I did to get the version you see below.

Oven Roasted Potatoes

SOURCE: Cooking Light