When Skies Turn Gray—–

Grilled Turkey Burgers with Coleslaw and Pickles.

Grilled Turkey Burgers with Coleslaw and Pickles.

We’ve had a couple of days with temperatures in the 70’s….nice warm spring days.  From my kitchen window I can see our gas grille, with its cover still over it, on the back deck,  just waiting to be fired up.   My mouth was watering for a juicy burger, so I decided today was the day for our first cookout of the season.

I frequently use ground turkey to make burgers and I had some on hand so that was I used to make the recipe that follows.  In fact the recipe suggests adding creamy coleslaw and pickles to really dress up the burgers.  I set to work shredding the cabbage for my Creamy Garlic Coleslaw which you can find the recipe for here, then I mixed up the burger mixture.  Instead of a bulky hamburg bun I planned to use Multi-Grain Sandwich Thins, since we are cutting back on carbohydrates (again, sigh), and I added some chopped apple to my burger mixture to help keep them juicy.

IMG_3798

As I finished forming the burgers, I looked out the window and noticed that the sun had disappeared, and in its place we now had black clouds rolling in.  You have probably guessed what happened next:  a thunderstorm with pouring down rain.  So much for my cookout!

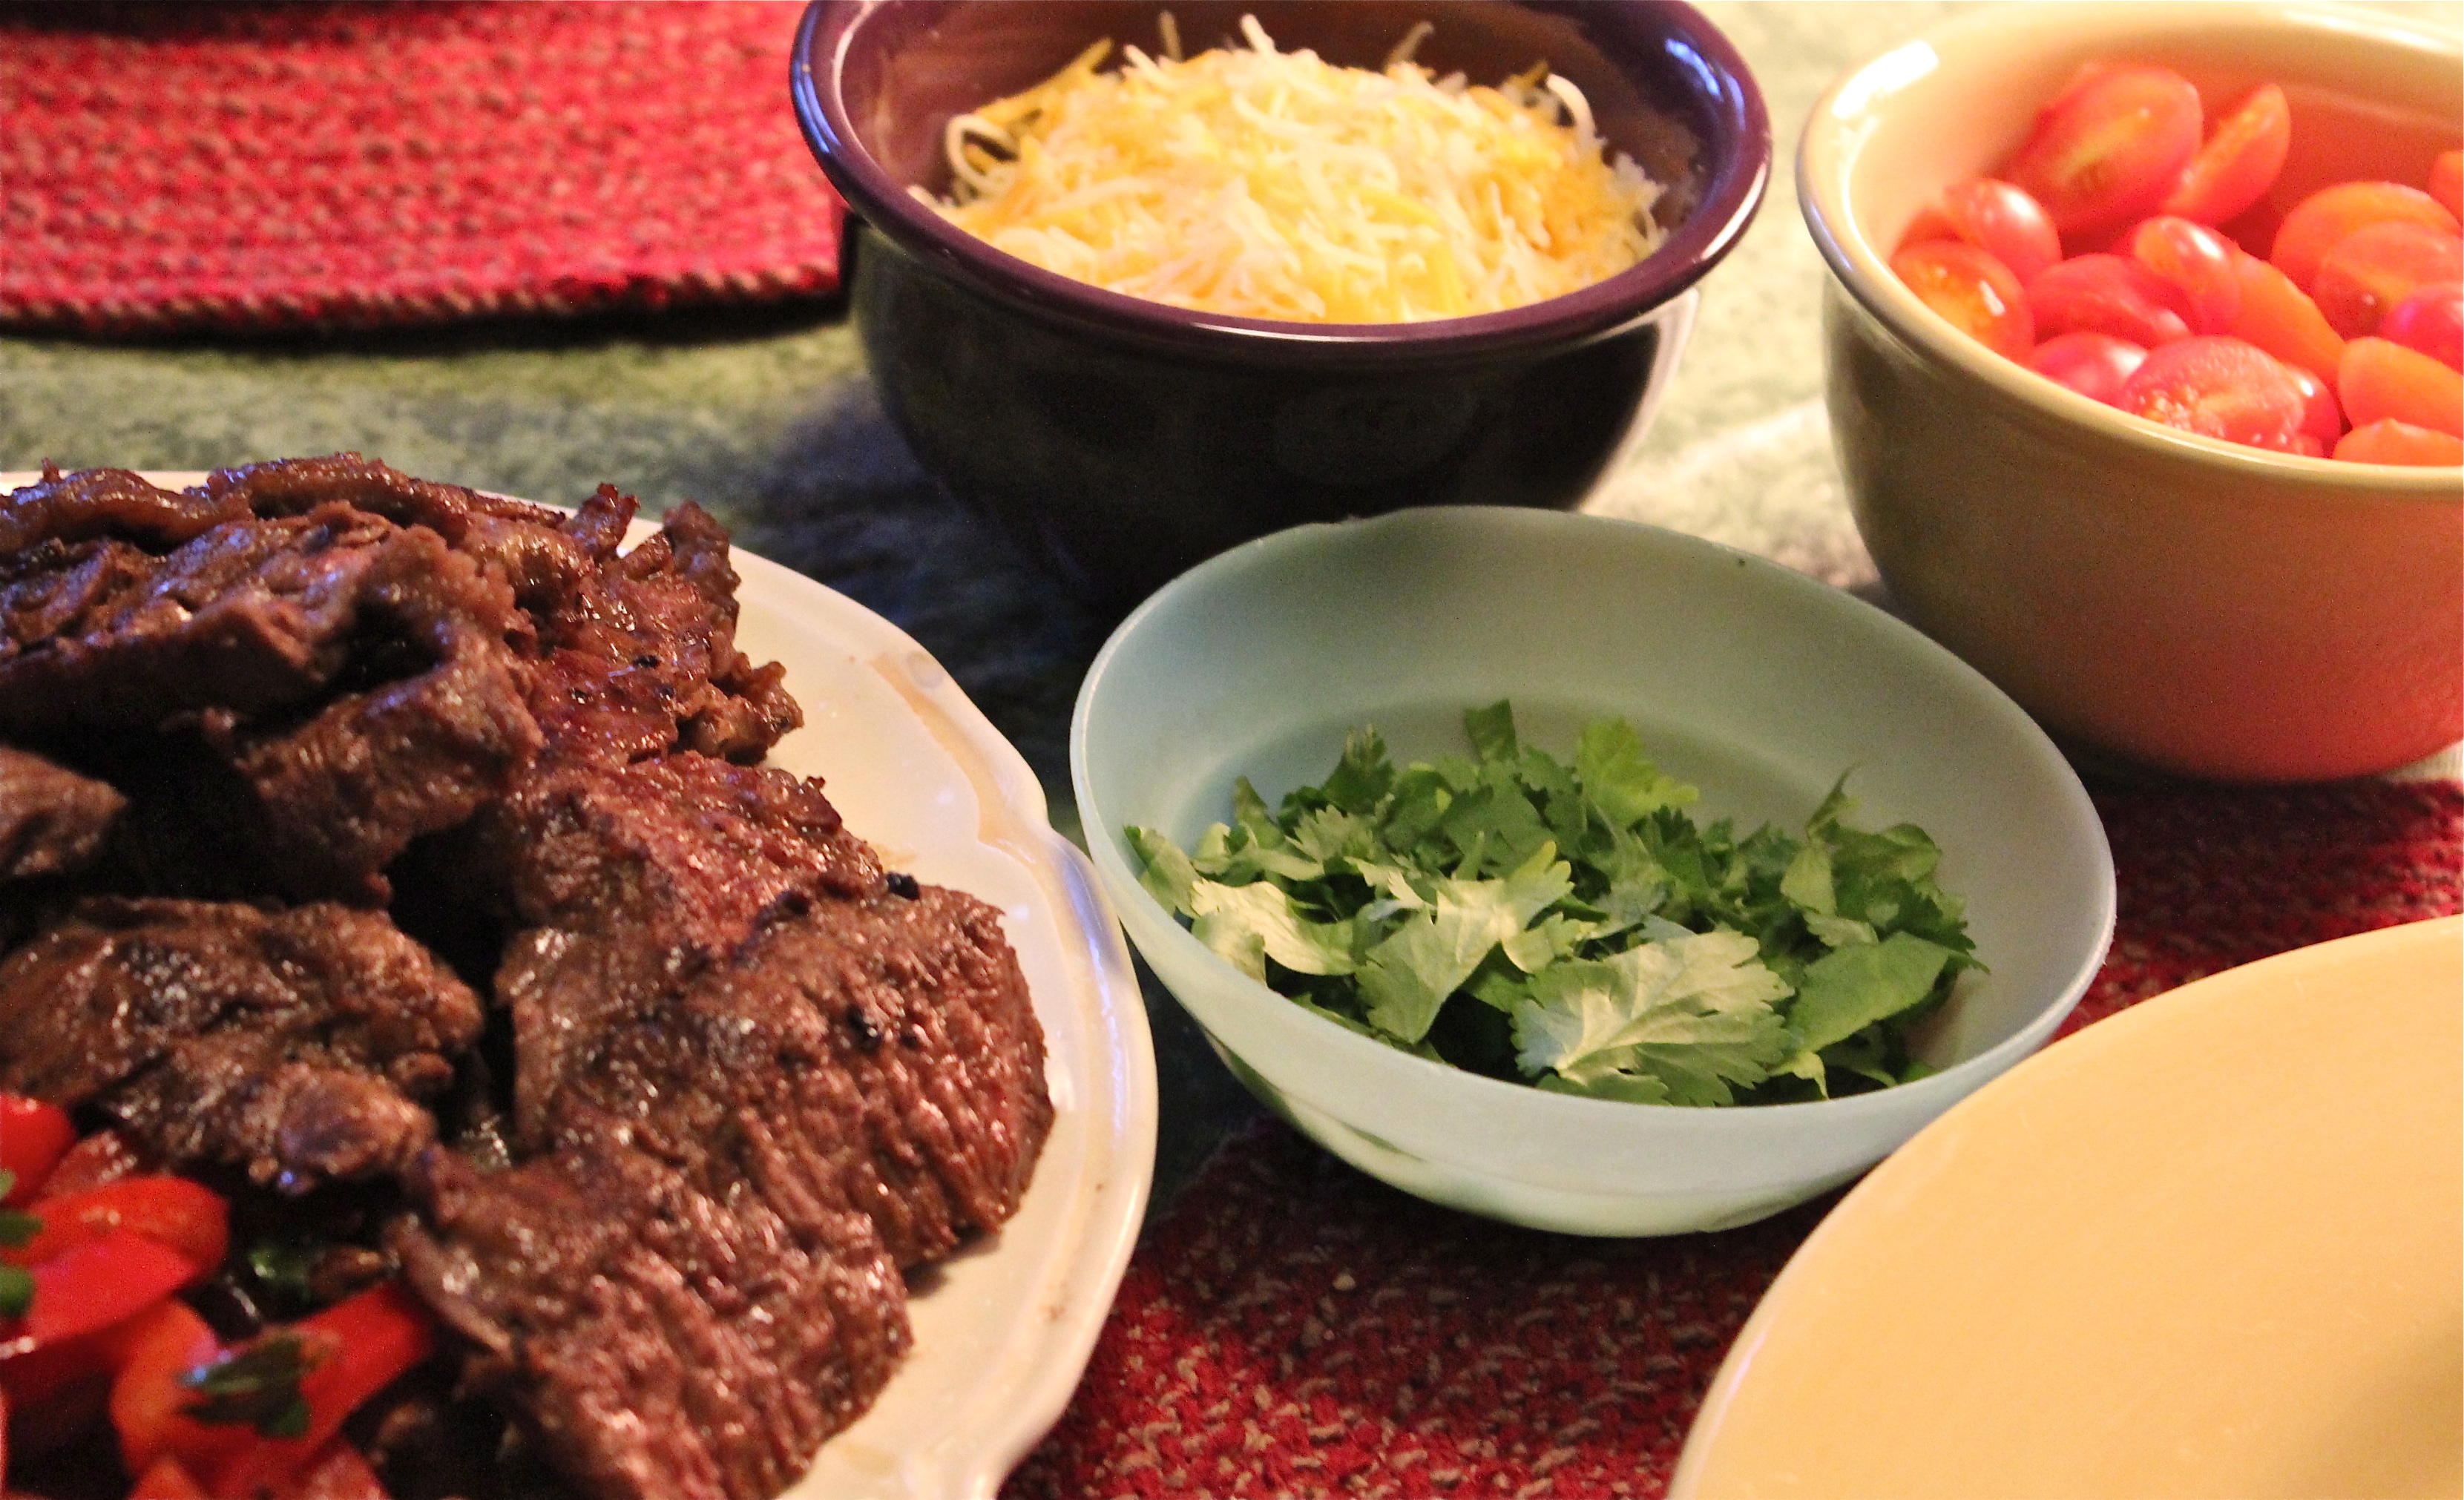
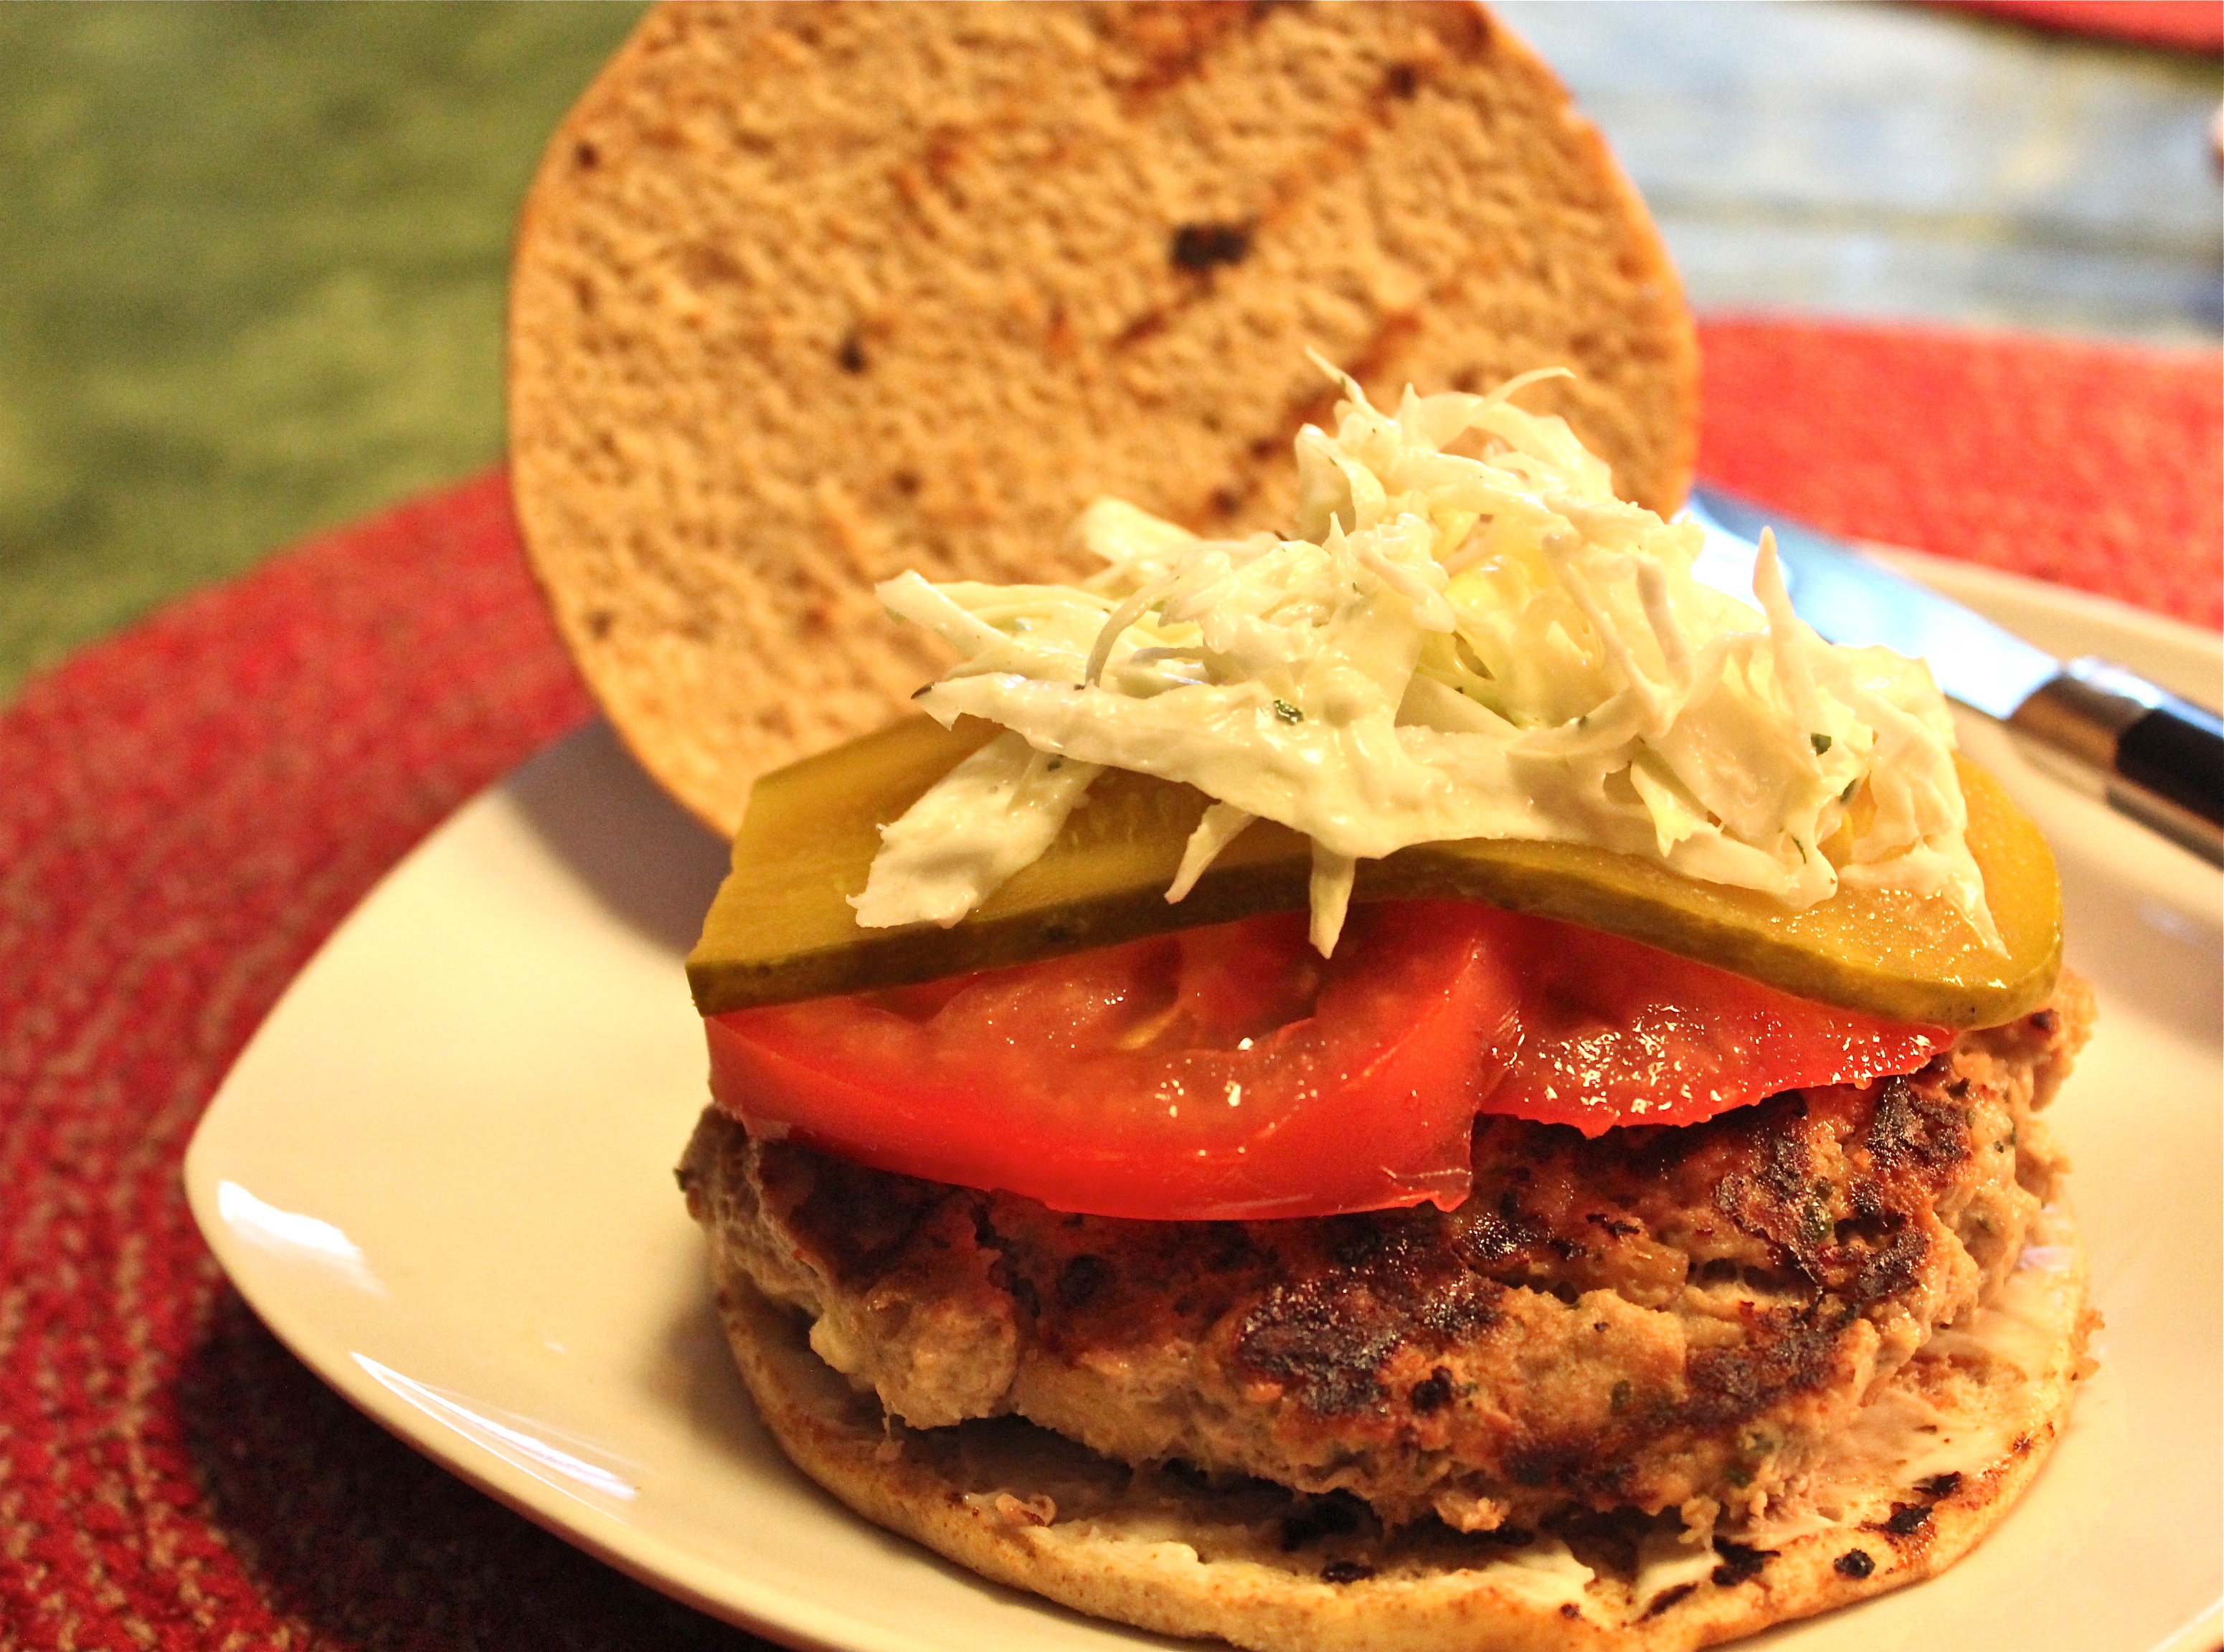
But you know what I say?  “When the skies turn gray, grill anyway”.  So out came my grill pan and I was still able to make burgers that were grilled, juicy and yummy.  My husband said “you should write about these they are really good.  And so I am.  We topped ours with sliced tomato,  pickle slices, and coleslaw with a thin spread of mayonnaise on the roll.   Perfect in spite of the rain.

GRILLED TURKEY BURGERS

SERVINGS    4

  • 1  1/2 pounds lean ground turkey
  • 1/2 cup fresh soft breadcrumbs
  • 1/2 small onion minced, or chopped green onion
  • 1 Tablespoon dried parsley, or 2 Tablespoons chopped fresh parsley
  • 1 teaspoon dried basil
  • 1 tablespoon mayonnaise
  • 1 Tablespoon Dijon mustard
  • 1 Tablespoon Worcestershire sauce
  • 1 Tablespoon hot sauce
  • 1 teaspoon salt
  • 1/2 teaspoon ground pepper
  • 1/2 cup finely diced apple, optional
  • 4 whole wheat hamburger buns, toasted

Assorted toppings:   mustard or mayonnaise, tomato slices, sliced sandwich pickles, creamy coleslaw, thinly sliced apple.

1.  Combine all the above ingredients, except buns, and form into 4  (1-inch-thick) patties.  Do not over mix, and handle lightly or burgers will be mushy. With your finger make a depression in the center of each one.

Make a depression in the center of the burgers to keep them from puffing up.

Make a depression in the center of the burgers to keep them from puffing up.

This keeps them from puffing up, so they retain their shape better. Sprinkle with additional salt and pepper, and grill on a lightly oiled rack over medium-high heat 6 – 7 minutes on each side or until done.  Remove from grill, cover loosely and let rest about 5 minutes.

2.  Spread toasted buns with mustard or mayonnaise.  Top with tomato slices, burger, pickle slices and a spoonful of creamy coleslaw.

These were nicely seasoned and very moist.

These were nicely seasoned and very moist.

SOURCE:   Country Living Magazine

Apple, Cheese and Bacon Quesadillas

Apples, bacon and cheese quesadillas.  A lovely combination.

Apples, bacon and cheese quesadillas. A lovely combination.

Are you a recipe clipper?  I think that anyone who enjoys cooking is always looking for new recipes, and magazines are  good resources for recipes.  I count myself in that group of cooks who are  always “on the hunt”.  In fact I tear out so many recipes that I have a system for organizing them and deciding which ones are keepers and which ones don’t make the cut.

For anyone who might benefit from my system,  this is what I do:

1.  Read magazine and “dog-ear” pages with a recipe that interests me.

Fold over pages that have recipes that interest me.

Fold over pages that have recipes that interest me.

2.Before discarding the magazine, look again at those pages and decide if I want to try the recipe.  If yes, then I tear out the page, and it goes into a pile with other torn-out pages.

The pile of torn-out pages grows large.

The pile of torn-out pages grows large.

3.  When the pile gets precariously high, I designate an afternoon or three?, and go through them all.  If I’m still interested in any of the recipes I trim them more carefully, and then file in folders that are named in broad categories, like bars, cookies, desserts, soups, chicken, etc.

My file of files.

My file of files.

4.  When I want to make something new, or have ingredients on hand to use, I go to a specific folder to see what’s there that I might want to try out.

5.  Then I make the recipe to test it out.  If it meets my requirements such as did we like it,  was it straightforward and easy to prepare, have readily available ingredients, reasonable cost to make,  cooked in a reasonable time frame?  Then it gets mounted into a notebook as a “keeper”, that will enter my cycle of recipes; or become a go-to when I want to make something special.

I have several afternoon's work to do!

I have several afternoons’ work to do!

I have written all the above with tongue-in-cheek, as I can imagine you are thinking to yourself (or saying out loud even) “what, is she crazy?”   Well, yes. a little.  According to the Myers-Briggs Personality Assessment Test I am a pointy-head sequential in the grand scheme of things, and detailed organization is one of my traits.   Ha-ha-ha!    🙂

OK, so what does all this have to do with today’s recipe?  The story is this:  on Saturday, my husband went out on an errand, and before he left, he asked me what we would be having for lunch.  I replied that I didn’t know, because my supplies were pretty low, and we had eaten up all the leftovers.  But I reassured him  that “I’ll think of something”.  So while he was out I consulted my folder labeled ” Pizza and Sandwiches”, and in there found a recipe for Apple and Brie Quesadillas that I had been wanting to try.

The recipe called for a Granny Smith apple, Brie cheese and flour tortillas.  Now, I didn’t have any Brie to work with but I did have some cheddar, and some Monterey Jack.  So I improvised, using those cheeses,  a Rome apple instead of Granny Smith, and added some crumbled bacon to the mix to create my recipe for Apple, Cheese and Bacon Quesadillas.  When my husband came home he said, ” I see it didn’t take you long to think of something”.    They were very good, we liked them very much,  I’ll make them again.  End of Story!

Makes a satisfying light lunch.

Makes a satisfying light lunch.

Included here is the original recipe for Apple and Brie Quesadillas, and how I modified it.

APPLE, BRIE  (and BACON)  QUESADILLAS

SERVES   2   Adjust amounts accordingly for more servings.

  • 1  Granny Smith apple  (or other firm apple), thinly sliced
  • 4  teaspoons olive oil, divided
  • 4   8-inch flour tortillas  (I  used  2  10-inch tortillas)
  • 8 ounces Brie cheese, sliced, rind removed  ( I used a combination of grated cheddar, and Monterey Jack cheeses, about 1 cup )
  • 2 strips bacon, cooked and crumbled  (my addition)
  • 1 Tablespoon whole-grain mustard
  • 1 Tablespoon maple syrup

1.   Preheat a grill pan over medium-high heat.  Toss the apple slices with 2 teaspoons olive oil and cook, turning occasionally, until marked and tender, 3 to 4 minutes.

Spread apples on grill pan and cook till barely tender.

Spread apples on grill pan and cook till barely tender.

Try to get some nice grill marks on the apples.

Try to get some nice grill marks on the apples.

2.  Lay the tortillas on a cutting board.  Top each with half the apple, half the bacon, and half the cheese, placing the filling on only half of  each tortilla.  Then fold the tortillas in half to cover the filling.

Spread a layer of apples and bacon on half the tortilla.

Spread a layer of apples and bacon on half the tortilla.

Top with shredded cheeses.

Top with shredded cheeses.

3.  Heat the remaining 2 teaspoons olive oil in a large nonstick skillet over medium heat.  (I sprayed mine with olive oil spray and cooked them on the grill pan I used for the apples.)  Working in batches, cook the quesadillas until golden brown and the cheese melts, about 2 minutes per side.

4.   Meanwhile, mix the mustard and maple syrup in a small bowl.  Slice each quesadilla into wedges.  Drizzle with the maple-mustard syrup before serving.

Serve with a drizzle of maple syrup.

Serve with a drizzle of maple mustard syrup.

SOURCE:   modified from a recipe in Food Network Magazine,  April 2012

Grapefruit-Avocado Salsa

Grapefruit and avocado salsa.

Grapefruit and avocado salsa.

I love to make salsas.  They are so easy.  A salsa can really elevate an entree above the ordinary and help bring the flavors of a dish together.  Recently I cooked some flounder filets, prepared very simply by lightly dusting with a mixture of flour and cornmeal then pan frying in a little butter and olive oil.  A very ordinary way to quickly cook fish fillets.  But to go along with it, I made this salsa using grapefruit and avocado.

My original intention was to have fish tacos, that’s why I made the salsa.  As I finished making it, however, I tasted it, and WOW, my taste buds woke up and started to sing!…it was fabulous and I didn’t want it to get lost in a taco.  I just loved the way the citrus paired with the avocado.  So I served it as an accompaniment to the flounder, along with a vegetable and a salad.   I know I will be making this salsa again very soon,  I wanted to eat it by the bowlful!

GRAPEFRUIT-AVOCADO SALSA

Only a few ingredients needed for this salsa.

Only a few ingredients needed for this salsa.

YIELD:    Serves  4

  • 1 Ruby Red grapefruit, segmented and cut into 1-inch pieces
  • 1 avocado, diced
  • 2 Tablespoons diced red onion
  • 2 Tablespoons chopped fresh cilantro
  • 1/2 jalapeño, seeded and chopped
  • 1 Tablespoon fresh lime juice
  • coarse salt

To Make the Salsa:

Combine grapefruit, avocado, onion, cilantro, jalapeño , and lime juice in a medium bowl.  Season with salt and set aside.  That’s It!

A great accompaniment to a mild flavored fish fillet.

A great accompaniment to a mild flavored fish fillet.

SOURCE:   Martha Stewart’s  Whole Living

Pappardelle with Salmon and Leeks

Every country has its pasta dishes, and we here in the U.S. are fortunate in having an abundance of pasta varieties to incorporate into our cooking.  Pappardelle, native to Italy, is a type of pasta made from eggs and whole wheat flour, then cut into wide ribbons, so it provides a lot of substance and chew-factor.  It you are looking for a healthy pasta dish, you won’t go wrong with this one.

Pappardelle, with salmon and leeks.

Pappardelle, with salmon and leeks.

This dish makes good use of leeks,  a great spring vegetable, and salmon.  If leeks are not available where you live, you could substitute any mild flavored onion.  Another nice addition would be baby spinach that gets just wilted by the heat of the pasta.  When I eat this meal I feel that I’ve indulged my craving for pasta and treated myself to something especially healthful and nutritious.

PAPPARDELLE WITH SALMON AND LEEKS

YIELD:    Serves 6

INGREDIENTS

  • 3/4 lb. uncooked pappardelle pasta

    Pappardelle,  wide pasta ribbons.

    Pappardelle, wide pasta ribbons.

  • 3 Tablespoons extra virgin olive oil, divided
  • 2  large leeks, trimmed and thinly sliced
  • 2  teaspoons minced fresh savory, or 1 teaspoon minced fresh thyme
  • 3/4  teaspoon salt, divided
  • 1/4 cup dry white wine  (or chicken broth)
  • 1/2 cup unsalted chicken broth
  • 1 Tablespoon minced flat-leaf parsley
  • 1 teaspoon grated fresh lemon rind
  • 1  ( 1 lb. salmon fillet ), fresh or frozen
  • 1/4 teaspoon black pepper
  • 2 teaspoons unsalted butter

1.  Cook pasta according to package directions.  Drain pasta in a colander over a bowl, reserving 1/4 cup cooking liquid; keep pasta and cooking liquid warm.

2.  Heat 2 Tablespoons olive oil in a large saucepan over medium heat.  Add leeks, savory, and 1/2 teaspoon salt;  cook 15 minutes or until leeks are translucent, stirring occasionally.

Saute leeks in olive oil.

Saute leeks in olive oil.

Increase heat to medium-high.  Add wine; cook 1 minute.  Add chicken broth; bring to a simmer.  Remove from heat; stir in pasta, reserved cooking liquid, parsley, and lemon rind.

Cook salmon until golden and browned, but still moist.

Cook salmon until golden and browned, but still moist.

3.  Sprinkle salmon fillet with remaining 1/4 teaspoon salt and pepper.  Heat a large skillet over medium-high heat.  Add remaining 1 Tablespoon olive oil and the butter;  swirl until butter melts.  Add salmon, and cook for 5 minutes on each side or until desired degree of doneness.  Break the salmon into large chunks.  Arrange 1 cup of the pasta mixture on each of 6 plates, and top evenly with salmon.  Serve immediately.

I added asparagus to the menu to round out the meal.

I added asparagus to the menu to round out the meal.

SOURCE:   The Glorious Pasta of Italy,   by Domenica Marchetti

Eat out at Home—Steak Fajitas

Sizzling hot and so pretty,  good enough to eat!

Sizzling hot and so pretty, good enough to eat!

Mention fajitas and I can hear that sizzling pan already.  Don’t you love that sound when the waiter brings a cast iron pan to your table sizzling with steak, onions and peppers waiting to be wrapped up in a flour tortilla?   OK, so we can’t go out as often as we might like to enjoy this kind of food, but how about making it at home!  You won’t believe how easy it is to recreate fajitas and other restaurant favorites right in your own kitchen.  And there are benefits besides.  You’ll save money,  perhaps eat more healthfully, AND have it whenever you want it.

Starting with today’s offering, I will be periodically  posting a recipe called “Eat out at Home” that will feature a restaurant dish.  Hopefully one that many people enjoy, and is universally popular.

This recipe requires only a few ingredients that are readily available:  a tender cut of steak, sliced onions, peppers, lime juice, soy sauce, tortillas, and garnishes such as grated cheese, diced tomatoes, cilantro and sour cream.  I hope you enjoy it as much as we did.

SEARED STEAK FAJITAS

YIELD:  These amounts serve 2, so adjust accordinglyIMG_3720

INGREDIENTS

  • 3/4 pound top round, skirt steak or sirloin tip steak
  • 1 Tablespoons soy sauce   (seem strange?,  it adds a depth of flavor)
  • 1/4 cup fresh lime juice  ( 2-3 fresh limes)
  • coarse salt and ground pepper
  • 1 Tablespoon extra-virgin olive oil
  • 1 garlic clove, minced
  • 1 large pepper, seeded and thinly sliced (I think red peppers are more colorful than green.)
  • 1 large onion, halved and thinly sliced
  • 4 tortillas ( corn or flour, your choice), warmed
  • 1/2 cup grated cheese; Jack cheese, cheddar or Mexican Blend are good
  • 1 large tomato chopped, or halved grape tomatoes
  • cilantro, chopped for garnish

DIRECTIONS

1.  In a shallow dish or bowl, combine steak, soy sauce, and 1/4 cup lime juice.  Refrigerate 1 hour, turning steak several times.

Marinate steak in soy sauce and lime juice.

Marinate steak in soy sauce and lime juice.

2.  Remove steak from marinade and blot dry with paper towels. Necessary to get a good sear, as moisture will cause the steak to steam rather than fry.  Season with salt and pepper.  In a heavy skillet — cast iron is best  because it can get really hot and hold the heat–heat 1 teaspoon olive oil over medium-high.  When the oil begins to shimmer, add the steak and cook about 2 minutes per side for medium rare, or to your taste.  It is important to get a nice sear on the steak as that contributes to its flavor.  Transfer to a platter, and tent with foil to keep warm.

Have all ingredients cut up and ready to cook.

Have all ingredients cut up and ready to cook.

3.  Add a small amount of additional oil to the pan if needed, add the peppers and onion, minced garlic, and season with salt and pepper.  Cook, stirring, until vegetables are crisp-tender, 4 – 6 minutes.  Squeeze the juice of half a lime over the top, and lightly mix in.

4.  While the vegetables are cooking, warm the tortillas in the oven or microwave.  Wrap in foil to keep warm.

5.  Thinly slice the steak and serve with the vegetables, tortillas, cheese, tomato and cilantro.

Additional garnishes at the table.

Additional garnishes at the table.

Building the Fajita.

Building the Fajita.

This may not be truly authentic, but it sure is good!

This is what was left!

This is what was left!

SOURCE;    Martha Stewart,  Everyday Foods

Eggs with Asparagus, Potatoes, Pancetta and Bread Crumbs

Eggs with Asparagus and Potatoes.

Eggs with Asparagus and Potatoes.

Placing an egg with a still-runny yolk on top of any roasted or sautéed vegetable is a perfect recipe.  The soft, yolk flows over the vegetable, making a simple, luscious sauce.  In springtime asparagus is a great choice, but if not available in your area, then try sautéed broccoli, or kale instead.

I made this meal not long ago and included potatoes to give it even greater substance for our supper.  If you portion the ingredients for the number of people who will eat it, you will not be tempted to over eat, because it is filling and you will be satisfied.  I used an egg poacher to cook the eggs, but you could also fry them with equally good results.  To make this into a vegetarian meal, omit the pancetta.

EGGS WITH ASPARAGUS, POTATOES, PANCETTA AND BREAD CRUMBS

SERVINGS:    4IMG_3725

  • 1  pound asparagus, tough ends removed
  • Extra virgin olive oil
  • salt and freshly ground pepper
  • 2 – 3 medium potatoes, peeled and sliced about 1/4-inch thick
  • 3 Tablespoons butter
  • 2 – 3 thin slices pancetta, finely chopped
  • 1 cup fresh bread crumbs
  • 4 large eggs
  • Freshly grated Parmesan cheese, for garnish

1.  Preheat the oven to 400*F    Spread the asparagus in a baking dish large enough to hold them in a single layer.  Drizzle with olive oil, and season with salt and pepper.  Turn the spears several times to coat them evenly with oil.  Roast, turning once or twice, until the spears are tender-crisp, about 15 minutes;  the timing will depend on the thickness of the spears.  Remove from the oven, cover loosely with foil and set aside.

2.  In a large non-stick skillet put a small amount of water – just enough to cover the bottom of the pan.  Lay the potatoes in concentric circles in the bottom of the pan placing as close together as you can.  Add water if necessary, so there is enough for them to start cooking.  Cover the pan and cook potatoes till just barely fork tender, about 5 – 6 minutes.  Drain out any remaining water.  Add 2 Tablespoons butter that has been cut into small pieces.  Let it melt in the hot pan lifting the potato slices so butter gets underneath them. You may need to turn up the heat, so potatoes get a nice browned crust on the bottom.

3. While the potatoes are cooking, in another small skillet,  over medium heat, fry the pancetta until crisp.  Set it aside in a small bowl.  In the same skillet cook the bread crumbs in any drippings from the pancetta, and it there are none add a drizzle of olive oil.  Get the bread crumbs crisp and slightly browned.  Set them aside.

4.  Place the asparagus spears on top of the now browned potatoes, and in another fry pan fry the eggs,  or you may want to poach them instead.  When the eggs are cooked to the point where whites are firm, but yolks still runny, remove them for the heat and place on top of the asparagus.

Place cooked eggs on top of   asparagus and potatoes.

Place cooked eggs on top of asparagus and potatoes.

5. Before bringing to the table, sprinkle pancetta and bread crumbs over the top.  Serve with a light sprinkle of Parmesan cheese.

IMG_3730

SOURCE:   Adapted from Williams-Sonoma Blog,  The Blender

Lemon Tassies

Lemon Tassies

Lemon Tassies

A “tassie” is a small cup-shaped cookie or tart, and comes from the Scottish word tass + ie. which means small cup.  Taking this idea to its simplest form I made the lemon tassies from supplies that I had on hand.  They were extremely easy to make and insanely good to eat.

I started with a package of refrigerated sugar cookie dough,  the kind that comes in a block and can be separated into 24 “squares”,  one for each cookie.  Using two mini-muffin pans,  I placed a block of cookie dough into each well, and with my fingers pressed it to cover the bottom, and up the sides of the muffin cups.  Then I baked them.  After baking, there was a depression in the center of each one where I spooned about 1 teaspoon of lemon curd.

IMG_3663

The heat from the still warm cookies, softened the curd so that it spread and filled the depression.  After they were completely cool, I put a dab of white frosting on each one.  (Frosting was left over from a previous baking project.)  If I didn’t already have the frosting, I would have dusted them with confectioners’ sugar, because I thought they needed something white on them for garnish.  For a special occasion a candied flower, like a violet, would be a lovely garnish.

IMG_3665

When first made the cookie part was crisp, but I kept them in a covered container, and the next day the cookie had softened and become chewy.  That seemed to fit the smooth, lemony filling better and we liked them better that way.

For some reason I always seem to want something lemon in spring time, and I already had a small amount of lemon curd that I had made, so that’s how I came up with this idea.  I think these little finger cookies ( or tarts) would be great served at a tea, a Mother’s Day Brunch,  a shower, or any other springtime occasion.

A few simple supplies are all you need:

  • mini-muffin pans, for a total of 24 cookies
  • 1 package of preformed , refrigerated sugar cookie dough, 24/pkg.
  • 1 jar lemon curd, or your own homemade.**
  • a small amount of vanilla frosting, or other garnish

Spray the muffin cups with non-stick spray.  Preheat the oven as the cookie package suggests.

Place one block of cookie dough in each of the muffin cups; with your fingers press to cover the bottom and up the sides to form a shell.

Press dough into the wells of a mini-muffin pan.

Press dough into the wells of a mini-muffin pan.

Bake for the recommended time on the cookie package, starting to check on them early, so they don’t get too brown.  Remove from the oven, and while still warm, spoon about 1 teaspoon of the lemon curd into the depression of each cookie.

After baking the shells, fill depressions with lemon curd.

After baking the shells, fill depressions with lemon curd.

Allow to cool completely on a wire rack,  loosening the cookies so they don’t stick.

Garnish the top of each cookie with your choice of frosting or other decorative garnish.

IMG_3667

**If lemon curd is not available, any flavor of jam would be a nice substitute.

SOURCE:  A Carolyn Original

Breakfast Before Bed. Really!

Slow cooker oatmeal.

Slow cooker oatmeal.

Did you ever think of making your breakfast before going to bed ?  No?  Me, either.  But then I got this idea from something I read.   So simple, really,  why haven’t I thought of this before now?

The whole idea is to use your crock pot or slow cooker to cook breakfast overnight and when you get up in the morning, instead of starting then to cook cereal, voila, there it is hot and waiting for you.

Hot and waiting for you in the morning.

Hot and waiting for you in the morning.

On the weekends I often will cook steel-cut oats for hot  oatmeal which we both love, but it usually takes about 20 minutes of cooking time.  So of course, I never make it on weekdays.  But with starting it in the crockpot the night before, we can now have oatmeal anytime we want.  And the recipe makes about 6 servings, so once made, I refrigerate the extra, and can warm up just one serving in the microwave very easily whenever I want.   I am so proud of myself for coming up with this.  When I told my daughter about it she said, “yeah, I know,  I’ve done that before.”   Duh!  Where have I been?

In case there’s anyone else out there who has never done this,  here’s all you do:

1.  Peel and slice 2 apples and  put in the bottom of a crockpot,   sprinkle  1/3 cup brown sugar, and 1 teaspoon cinnamon over the apples.  If you are not fond of apples in oatmeal use raisins, or just leave out the fruit completely.

Apples, brown sugar, cinnamon and oatmeal.  What's not to like.

Apples, brown sugar, cinnamon and oatmeal. What’s not to like.

2.  Pour 2 cups regular or steel-cut oats on top,  then add 4 cups water.   Do not stir!   Cook overnight  8 – 9 hours on low.

Layer it all in the crock pot, set it to low, and forget it.

Layer it all in the crock pot, set it to low, and forget it.

3.   Before serving give the pot a stir to mix it all up and enjoy with milk or cream poured over the top.   YUM!

A hot breakfast waiting for you.

A hot breakfast waiting for you.

Sausage, Fennel and Ricotta Pizza

Sausage, fennel and ricotta pizza.

Sausage, fennel and ricotta pizza.

Friday evenings feel like pizza night to me.  Not always, but quite frequently I make it for dinner.  When you make it often you need a variety of toppings to fall back on- at least I do.   As I have said previously,  variety is the spice of my life.  I get bored easily with the repetition of the same foods, and pizza is one of those foods that lends itself to whatever you may have on hand to put on it.

Last week’s version ended up with a crazy combination of things, that somehow worked together, and became an instant favorite.  I’m writing this down so that I don’t forget it.   It started with a roll of refrigerated pizza dough from the supermarket.  This was my first time using this particular product.  I usually use a ball of dough from the bakery department.  The pizza dough was very easy to use.  Just unroll it onto your pan and with your fingers press it out to fit.  Make it thick or thin;  however you like it.

IMG_3573

The toppings consisted of half pound of sausage meat,  half a fennel bulb, thinly sliced, some sliced red onion, and ricotta cheese to which I added some Italian herbs and minced garlic.  A pizza like this could be vegetarian by omitting the sausage and adding in some other vegetables like broccoli, and/or peppers.  In place of the fennel, you might use baby spinach.

SAUSAGE, FENNEL AND RICOTTA PIZZA

YIELD:   8 slices

INGREDIENTS

  • 1   12 oz. roll refrigerated pizza dough
  • 1 -2 links Italian turkey or pork sausage
  • 1 cup thinly sliced fennel bulb
  • 1 Tablespoon cornmeal
  • 2 Tablespoons pesto
  • 1/3 cup part-skim ricotta cheese
  • 1 teaspoon minced garlic
  • 1/2 teaspoon dry Italian seasoning
  • 1/3 cup thinly sliced red onion
  • 2 teaspoons fennel seeds (optional)
  • 1/2 teaspoon crushed red pepper
  • 1/2 teaspoon black pepper
  • 1/8 teaspoon kosher salt

1.   Remove pizza dough from refrigerator and bring to room temperature while oven preheats.   Preheat oven to 450*F.  Lightly grease a pizza pan,  baking sheet, or pizza stone.   Sprinkle cornmeal evenly on baking pan or stone.

2.  Heat a large nonstick skillet over medium-high heat.  Remove casings form sausage.  Crumble and add to pan, cook 4 minutes or until lightly browned.    Add fennel bulb; cook 4 minutes or until tender.

3.  Roll pizza dough into a 16 – inch oval and place on baking sheet, or press into the pan with your fingers.

4.  Brush the dough evenly with the pesto.  Sprinkle the sausage mixture evenly over the dough.  Combine ricotta with the minced garlic and Italian seasoning in a small bowl;  top pizza with teaspoonfuls of ricotta mixture.  Sprinkle red onion and remaining ingredients evenly over pizza.

Layer on all the ingredients.

Layer on all the ingredients.

5.  Bake at 450*F for 10 – 11 minutes or until golden.  Cut into 8 slices.

In my version, the crust was thin and crispy.

In my version, the crust was thin and crispy.

Served with a hearty salad this made a very filling meal.

We never get tired of pizza.

We never get tired of pizza.

SOURCE:    My own creation

Butternut Ravioli in Sage Browned Butter Sauce

Butternut Ravioli with Sage Brown Butter Sauce

Butternut Ravioli with Sage Brown Butter Sauce

Not too long ago we were out for a special dinner that was catered, and for the appetizer we were served this dish; butternut squash ravioli with a sage brown butter sauce.  It was so good I wanted the recipe, but, sadly, it was not available from the chef.  So I went on the hunt for a similar recipe, and on the Food Network website, I found this one by Emeril Lagasse.

He roasted his squash for starters, but I simply steamed mine, then mashed it with the same results.  Possibly roasting the squash brings out a debt of flavor that mine lacked, but with the nice balance of seasonings that are added I was perfectly satisfied with my results.  I found that using won ton wrappers is a good substitute for fresh pasta dough, if you’re in a time crunch.  However you don’t get that toothy “al dente” texture.  Not a big issue for me;  we enjoyed them all the same.

In trying out this recipe I served the ravioli as a side dish with roast chicken, and it was a good compliment.  The original recipe is written to be served as an appetizer, and that is very nice for a sit-down dinner where silverware is in use. But I would not try to serve it when people need to balance a plate and use a fork to eat it.

IMG_3103

BUTTERNUT SQUASH RAVIOLI WITH A SAGE BROWN BUTTER SAUCE

YIELD:   4 servings

INGREDIENTS

  • 9 Tablespoons butter
  • 3 Tablespoons minced shallots
  • 1 cup cooked butternut squash, mashed
  • salt
  • freshly ground pepper
  • 3 Tablespoons heavy cream
  • 3 Tablespoons grated Parmesean cheese, plus more for serving
  • pinch nutmeg
  • fresh pasta dough,rolled out into wide ribbons,  or won ton wrappers
  • 12 fresh sage leaves
  • 1 Tablespoon finely chopped fresh parsley

DIRECTIONS

1.  In a large saute pan, over medium heat, melt 1 Tablespoon of the butter.  Add the shallots and sauté for 1 minute.  Add the squash puree and cook until the mixture is slightly dry, about 2 to 3 minutes.  Season with salt and pepper.  Stir in the cream and continue to cook for 2 minutes.  Remove from the heat and stir in 3 Tablespoons cheese and nutmeg.  Season with additional salt and pepper as needed.  Cool completely.

2.  Start a large pot of salted water over medium-high heat and bring to boiling.  Cut the pasta into 3 – inch squares.  (Or alternately, use won ton wrappers.)  Place 2 teaspoons of the filling in the center of each square.  Bring one corner of the square to the opposite corner, forming a triangle, and seal completely, by wetting the edges slightly and pressing together.  Add the ravioli to the pot of boiling salted water.  Cook until al dente, about 2 to 3 minutes or until the ravioli float and are pale in color.

Remove the pasta from the water and drain well.  Season with salt and pepper.

3.  In a medium saute pan, melt the remaining 8 Tablespoons butter.  Add the sage leaves to the butter and continue to cook until the butter starts to brown.  Remove from the heat.

4.  Place some of the ravioli in the center of each serving plate.  Spoon the butter sauce over the ravioli.  Sprinkle with additional cheese and garnish with parsley.

Can be served as a side dish also.

Can be served as a side dish also.

SOURCE:  Emeril Lagasse, via Food Network