Lasagna Soup

IMG_9054       IMG_9053

Here in Ct. we’re having what has been predicted as “the Blizzard of the Century”, although at the half-way-point it seems to have lost some of its strength, at least where I live. The snow is no longer falling, but there is a lot of it out there.  On such a day as this I’m making soup for dinner.  That should come as no surprise, as my mind and taste buds turn to a good hot soup on a cold and wintery day, as many of you well know.
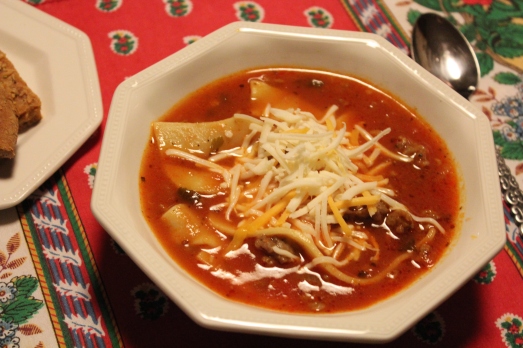
Lasagna Soup

Lasagna Soup

In my opinion there is no  better way to keep warm than with a bowl of steamy, hot soup!

Within the past few days two different recipes for Lasagna Soup have come to my attention, so I feel that I was destined to make this soup.  It’s so nice when you decide on the spur of the moment to make something and find everything that’s needed right in your refrigerator or cupboard.  Lucky me, since cars are forbidden on the roads, no trips to the grocery store are allowed.

IMG_9067

In a bowl of this soup, you will find everything you love about lasagna….sausage, lasagna noodles, marinara and cheese.   It’s filling, easy to make, and hearty.  Everything you want in a soup and perfect for a cold winter’s night.  It’s also family friendly–kids will love it.  The dollop of cheese on top really makes it.  You can use regular Italian sausage, sweet or spicy, or chicken sausage, any of which will give it great flavor.

IMG_9070

Two other benefits of this soup;  there are fewer calories than eating “for real” lasagna, and it’s all made in one pot.

LASAGNA SOUP

Yield:  Makes about 8 servings

Ingredients:

For the soup:

  • cooking sprayIMG_9049
  • 14 oz.- 1 lb. Italian sausage, pork or chicken, casings removed
  • 1/2 a large onion, chopped
  • 2 cloves garlic, crushed
  •  4 Tbsp. fresh parsley, chopped
  • 3 cups low-sodium, fat free chicken broth
  • 2  1/2 cups water
  • 2 cups jarred marinara sauce
  • 2 bay leaves
  • fresh black pepper
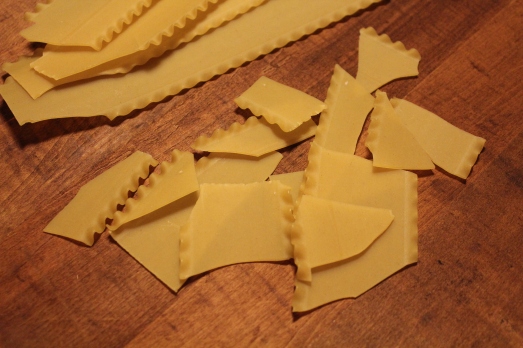
  • 6 oz. broken lasagna noodles, regular, whole wheat, or gluten free

For topping:

  • 6 Tbsp. part skim shredded mozzarella cheese
  • 1/2 cup part skim ricotta cheese
  • 3 Tbsp. parmesan cheese
  • 2 Tbsp. chopped fresh parsley
  • basil leaves for garnish, if desired

Directions:

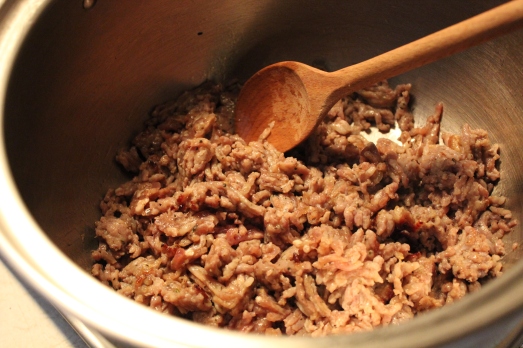
1.  Heat a large soup pot or Dutch oven over medium heat, spray with cooking spray and add the sausage.  Cook until browned, breaking it up as it cooks with a wooden spoon, about 4 to 5 minutes.

IMG_9050

2.  Add the chopped onion and crushed garlic and cook 2 to 3 minutes.

IMG_9051

3.  Add the broth, water, marinara sauce, parsley, bay leaves and black pepper.  Bring to a boil, cover, reduce heat and simmer about 30 minutes.

IMG_9052

4.  Add the broken lasagna noodles and cook uncovered according the package directions.

IMG_9062

IMG_9066

While noodles cook, make topping:

In a medium bowl, combine the ricotta, parmesan, and parsley and stir to mix well.

To serve:  Ladle soup in bowls, and top each serving with 2 Tbsp. ricotta cheese mixture, some mozzarella, and fresh basil on top.

IMG_9068

SOURCE:  adapted from  Skinny Taste

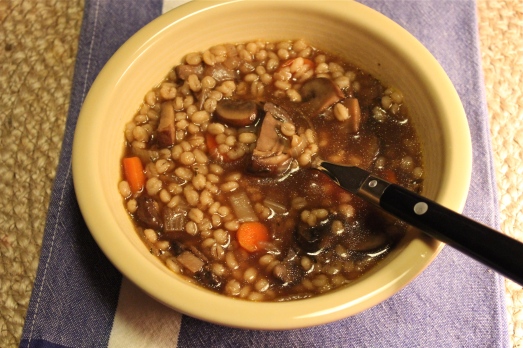
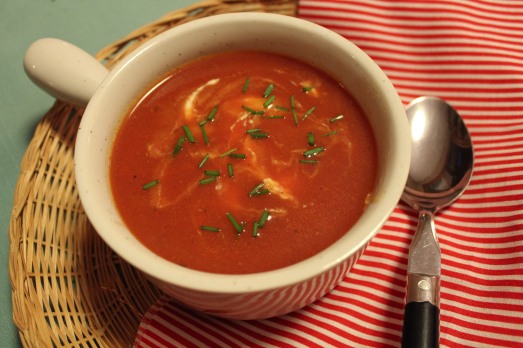
Here’s  a selection of some other easy, healthy soup recipes that are in the recipe index:

Advertisement

Eggplant Rollatini


Eggplant Rollatini

Eggplant Rollatini


I’ve eaten eggplant rollatini at a restaurant and loved it,  but I had forgotten about it until recently when I was out and ordered it again.  I knew that I had to try to recreate it at home.  A meal this good should not be forgotten about.

Eggplant is not a vegetable that I cook a lot.  Mostly I make eggplant Parmesean with it, or add it to ratatouille. It’s not way up there on my favorites list.  But prepared in this way…I just love it because it’s crispy, and has a filling rolled up inside it.  Add a flavorful tomato sauce ( homemade marinara is best) and serve with your favorite kind of pasta.  The filling I made works very well for a meatless meal, but you could include some crumbled sausage, or ground beef with the cheese filling.  Chopped baby spinach would also make a great addition.  So here again is a recipe that offers many possibilities for changing up the ingredients to your liking.  Be Bold!   Experiment!  🙂

IMG_8062

Usually in preparing this dish the eggplant is breaded and pan-fried in oil till crisp tender, but in the interest of lowering the calorie content  I elected to broil the eggplant slices with equally good effect. Once baked the edges were crisp, but the centers of the slices were moist and tender.

EGGPLANT ROLLATINI

(eggplant= aubergine, melanzane)

Yield:  Serves 4

Ingredients:IMG_8052

  • 1 eggplant, peeled and cut lengthwise into 1/4 inch slices
  • 1 egg, beaten with a little water to loosen
  • 1 cup Italian seasoned bread crumbs
  • 1 cup ricotta cheese
  • 1 garlic clove, grated
  • 1 egg yolk, or use 1 Tbsp. egg beater, egg substitute
  • 1/4 cup shredded mozzarella cheese
  • 1/2 tsp. Italian blend seasoning
  • dash of salt and pepper
  • 2 cups marinara sauce
  • 1/2 cup shredded mozzarella cheese
  • 1 pound pasta such as angel hair, or penne,or rigatoni

Directions:

1.  Preheat the broiler.  Line 1 or 2 baking sheets with parchment paper and spray lightly with non-stick cooking spray.

2.  Dip the eggplant slices in egg, then into the bread crumbs, coating evenly on both sides.  Lay on baking sheet(s)

Dip in egg wash, then in seasoned crumbs.

Dip in egg wash, then in seasoned crumbs.

Lay prepared slices on parchment paper-lined baking sheets.

Lay prepared slices on parchment paper-lined baking sheets.

3.  Broil for about 4-5 minutes on each side, till nicely browned, but take care not to let them burn.  Turn over and cook another 4-5 minutes.  They should be browned but pliable, not crisp.

4.  In a medium bowl, stir together the ricotta, garlic, egg yolk ( or egg substitute), mozzarella cheese, and seasonings.  Divide evenly among all the slices of eggplant and spread evenly.

Divide filling among slices and roll up.

Divide filling among slices and roll up.

Starting at the narrow end of each slice, roll up tightly and place seam side down in a 9 x 13 inch baking dish. A toothpick may help keep them rolled.  Pour marinara sauce over the rolls, and top with the 1/2 cup mozzarella cheese.

Pour marinara sauce over the rolls and top with shredded mozzarella cheese.

Pour marinara sauce over the rolls and top with shredded mozzarella cheese.

5.  Bake for 15 – 20 minutes, until heated through and the cheese is melted.

IMG_8058

6.  While the eggplant rolls are baking, bring a large pot of lightly salted water to a boil.  Add the pasta, and cook as package directs for the type of pasta you are using.  Drain.

7.  Serve eggplant rolls and sauce over pasta.

IMG_8060

IMG_8061


SOURCE:   CAROLYN’S ORIGINAL


Cherry Almond Ricotta Drop Scones

Cherry Almond Ricotta Drop Scones

Cherry Almond Ricotta Drop Scones

Knowing what to eat for breakfast when you are dancing in a competition is difficult.  It’s important to eat foods for energy, but equally important  to avoid foods that will make you feel full or sluggish.  In any hotel a full breakfast is always available, but it is not my habit to partake of them.  Instead I usually bring along simple foods that I can eat quickly with some coffee while I am getting ready.

IMG_7928

These scones  were the ones I made to take along on my trip.  They met my requirements for easy to eat, nutritious, low in fat, and a good source of energy.

Most scones fall into one of two categories:  the English version which is very dry and crumbly, a platform for slathering on jam and clotted cream; or the Americanized version that folds the cream directly into the batter, along with a hefty measure of butter and sugar.  Either way you’re starting your day with about 500 calories, and that’s way too much for me.  So I was on the hunt for a recipe for a lightened up scone that would still provide a fruity, whole-grain, buttery  biscuit.   I found it in this recipe.

IMG_7929

The key is part-skim ricotta cheese.  It has a richness similar to that of whipping cream with a fraction of the fat.  Whole wheat pastry flour is worked in, and some of the butter is replaced by heart-healthy canola oil for scones that bake up light and fluffy.  Dried cherries are plumped up in orange juice for a flavor boost, and nutty almonds add crunch.  If you wish you can use half the ricotta, whipped with vanilla and citrus zest, to dollop on the freshly baked scones in place of clotted cream or butter.   I felt that having one of these crumbly, cake-like biscuits early in the day got me off to a good start.

CHERRY ALMOND RICOTTA DROP SCONES

Yield:  Makes about 10 sconesIMG_7912

Ingredients:

  • 1/2 cup dried tart cherries
  • 1/4 cup fresh orange juice
  • 1 cup part-skim ricotta cheese
  • 1/4 cup packed brown sugar, divided
  • 1 tsp. grated orange rind
  • 1 tsp. vanilla extract
  • 1/3 cup plus 1 tbsp. fat-free buttermilk, divided
  • 2 tbsp. canola oil
  • 4.5 ounces whole-grain pastry flour (about 1 cup)
  • 3.4 ounces unbleached all-purpose flour (about 3/4 cup)
  • 1 tbsp. baking powder
  • 1/2 tsp. salt
  • 4 tbsp. cold unsalted butter, diced
  • 1/3 cup sliced almonds, toasted
  • 1 large egg, lightly beaten

Directions:

1.  Preheat oven to 425*F.   Line a baking sheet with parchment paper.

2.  Combine cherries and juice in a small microwave-safe bowl.   Microwave at HIGH 1 minute; let stand 5 minutes.  Drain;  discard liquid.  Finely chop cherries.

3.  Combine ricotta cheese, 1 tablespoon sugar, rind, and vanilla in a medium bowl.  Reserve 1/2 cup of the ricotta mixture.  Add 1/3 cup buttermilk and canola oil to remaining ricotta mixture, stirring until smooth.

Combine vanilla and orange zest with ricotta cheese.

Combine sugar, vanilla and orange zest with ricotta cheese.

4.  Weigh or lightly spoon flours into dry measuring cups;  level with a knife.  Combine flours, remaining 3 tablespoons sugar, baking powder, and salt in a large bowl; cut in butter with a pastry blender or 2 knives until mixture resembles coarse meal.

Cut in butter with a pastry blender.

Cut in butter with a pastry blender.

Add cherries and almonds; toss.  Add buttermilk mixture; stir just until combined.

5.  Drop dough by 1/4 cupfuls 3-inches apart onto the prepared baking sheet.  Combine egg and remaining 1 tablespoon buttermilk, stirring with a whisk.  Gently brush top and sides of dough with egg mixture.

Brush tops with buttermilk-egg mixture.

Brush tops with buttermilk-egg mixture.

Bake at 425*F. for 15 to 16 minutes or until golden.  Remove from the pan and cool slightly on a wire rack before serving.

Bake till golden brown.

Bake till golden brown.

6.  Beat the reserved ricotta mixture at medium speed 3 minutes or until fluffy.  Serve with warm scones.

IMG_7927

IMG_7930


As a finale to this recipe, I’m including here the photos I’ve been waiting for that show me dancing rhythm dances.  This costume has a lot of fringe that moves with the dancing, and shows the judges that you are using your hips correctly.  This will be the end of my show and tell about the competition,  I promise.

GRN1415_143511-(ZF-0011-31094-1-004)

GRN1415_142059-(ZF-0011-31094-1-003)


GRN1415_132836-(ZF-0011-31094-1-001)


SOURCE:  Cooking Light

Limoncello Glazed Ricotta Drops

The baking marathon has begun!!. This week my oven is going into overdrive, and I’ll be all about holiday baking. These cookies are the first ones I’ve made, and the reason I chose them is because they make use of the limoncello I also just made.  What a coincidence that I should find this recipe, and I think it’s a super-good one.

Limoncello-Glazed Ricotta Drops

Limoncello-Glazed Ricotta Drops

The cookies are light and cake-like with a definite lemon flavor, and the glaze is made with limoncello so that carries the lemon flavor throughout the cookie.  I tasted one and found it hard to stop at just one.  The ricotta cheese is not detectable in the cookie, but contributes to the tender soft texture.  These would be delightful served at any time of year, but I like to add some yellow color to my plate of Christmas cookies, so these worked in very nicely, since I decorated them with yellow sugar and yellow sprinkles.

Yellow decoration suggests the lemon flavor.

Yellow decoration suggests the lemon flavor.

LIMONCELLO-GLAZED RICOTTA DROPS

YIELD:   Makes about 36 -40 cookies

Ingredients:

  • 2 cups flour

    My own Limoncello, lemon extract and lemon zest give the cookies a definite lemon flavor.

    My own Limoncello, lemon extract and lemon zest give the cookies a definite lemon flavor.

  • 2  1/2 tsp. baking powder
  • 1/2 tsp. baking soda
  • 1/2 tsp. salt
  • 1/2 cup butter ( 1 stick), softened
  • 1 cup sugar
  • 1 egg
  • 1 cup ricotta cheese
  • 1/2 tsp. vanilla extract
  • 1/2 tsp. lemon extract
  • 1 Tbsp. limoncello liqueur
  • 1 tsp. lemon zest

Glaze ingredients:

  • 3/4 cup confectioners’ sugar
  • 2 Tbsp. limoncello
  • grated lemon zest (optional for garnish)

Directions:

1.   In a medium bowl, whisk together the flour, baking powder, baking soda, and salt.

2.  In the bowl of an electric mixer, place butter and sugar.  Blend on medium speed to cream.  Add egg and continue beating.  Add vanilla, lemon extract, limoncello, and lemon zest.  Add ricotta cheese and blend well.

3.  Gradually add the dry ingredients and mix on low speed to incorporate.

4.  Spoon dough into a smaller bowl and refrigerate for 30 – 45 minutes for easier handling.

5.  Preheat oven to 350*F.  Line baking sheets with parchment paper or spray with non-stick spray.

6.  Drop dough by Tablespoons onto prepared baking sheets.  Bake for 12 – 13 minutes.  Edges should be light brown and bottoms evenly browned.  Cool on pans for about 5 minutes, then transfer to wire cooking racks to cool completely before glazing.

7.  Make glaze by mixing together the sugar and limoncello.  Stir till smooth, adding a drop or two of water to reach glazing consistency.  Spread lightly on cooled cookies and sprinkle with lemon zest to garnish, or sprinkle with decorative sugar.

 Glaze and decorate cookies.


Glaze and decorate cookies.

IMG_5931

Enjoy with coffee, tea or cocoa.

Enjoy with coffee, tea or cocoa.

SOURCE:   My Gourmet Connection

Jumbo Pasta Shells with Cheese Filling

Baked, stuffed jumbo pasta shells.

Baked, stuffed jumbo pasta shells.

This one-dish meatless  meal has always been considered a comfort food in my mind, and one that I’m more likely to make during the colder months of the year.  However, I had all the right ingredients, but in small quantities,  so I put together a smaller-sized version, while I was cooking on the weekend, refrigerated it, and had it ready to pull out and stick in the oven on a weeknight when I knew I would be having a busy day.  The ingredients for the filling are some of the same ones as for the stuffed portabellos, therefore I had open containers that needed to be used up.

This meal takes me back to my years living at home when my mother made it often with her homemade marinara sauce.  That’s usually what I do also, but as I said this is my “quickie” version.  I don’t think that I would have included it here on the blog except for Mr. D’s urging.  My thoughts are that most people must know how to make stuffed shells,  but Mr. D. thinks otherwise.  He says it is excellent and I should share it, so here is how it all goes together.

JUMBO PASTA SHELLS WITH CHEESE FILLING

Yield:   Serves 4 – 5

Ingredients:

  • 16 – 20 jumbo pasta shellsIMG_4714
  • 1 1/2 cups ricotta cheese
  • 4 oz. shredded mozzarella cheese
  • 1/4 cup grated Parmesan cheese
  • 1 egg
  • 1/2 package frozen chopped spinach, thawed and squeezed as dry as possible
  • 1/2 tsp. dried Italian seasoning
  • 1/4 tsp. salt
  • 1/4 tsp. pepper
  • 1/8 tsp. ground nutmeg
  • 1 jar  (30 0z. ) prepared spaghetti sauce or homemade marinara suce

Directions:

1.  Prepare pasta as directed on the package.  Undercooked a little so they keep their shape is good.  Drain.  Rinse with cold water. Drain and arrange on a kitchen towel in a single layer ready to fill.

2.  Meanwhile mix together the ricotta, 1/2 cup mozzarella cheese, and the Parmesan cheese.  Add egg, spinach and seasonings and mix to blend well.

Ricotta cheese, spinach, egg, cheese and seasonings.

Ricotta cheese, spinach, egg, cheese and seasonings.

3.  Using a smallish spoon, fill the shells with the cheese mixture.

4.  Lightly spray a square baking dish ( 9″ square) with baking spray.  Spoon sauce into the bottom of the dish, enough to cover the bottom in an even layer.  Arrange the shells in a single layer on the sauce.

Arrange filled shells on a layer of sauce.

Arrange filled shells on a layer of sauce.

5.  At this point,  if you will be baking the casserole at a later time,  cover tightly with plastic wrap and refrigerate until you plan to bake it.  If baking now, continue by pouring 1 – 1 1/2 cups more sauce over the shells and bake at 350*F for 30 minutes or until hot.  Sprinkle with additional mozzarella cheese.   Turn off the oven and allow the dish to remain in the warm oven to melt the cheese.

Hot and melty, just out of the oven.

Hot and melty, just out of the oven.

6.   To bake at a later time:   remove the casserole from the fridge about 1 hour ahead to bring to room temperature.  Preheat the oven and then bake as above,  sprinkling on the mozzarella at the end of baking time.

Note:  a serving is 3 – 4 shells per person.   Serve with a side salad and garlic bread if desired.

So good---with just a salad.

So good—with just a salad.

SOURCE:    Family recipe, source unknown

Sausage, Fennel and Ricotta Pizza

Sausage, fennel and ricotta pizza.

Sausage, fennel and ricotta pizza.

Friday evenings feel like pizza night to me.  Not always, but quite frequently I make it for dinner.  When you make it often you need a variety of toppings to fall back on- at least I do.   As I have said previously,  variety is the spice of my life.  I get bored easily with the repetition of the same foods, and pizza is one of those foods that lends itself to whatever you may have on hand to put on it.

Last week’s version ended up with a crazy combination of things, that somehow worked together, and became an instant favorite.  I’m writing this down so that I don’t forget it.   It started with a roll of refrigerated pizza dough from the supermarket.  This was my first time using this particular product.  I usually use a ball of dough from the bakery department.  The pizza dough was very easy to use.  Just unroll it onto your pan and with your fingers press it out to fit.  Make it thick or thin;  however you like it.

IMG_3573

The toppings consisted of half pound of sausage meat,  half a fennel bulb, thinly sliced, some sliced red onion, and ricotta cheese to which I added some Italian herbs and minced garlic.  A pizza like this could be vegetarian by omitting the sausage and adding in some other vegetables like broccoli, and/or peppers.  In place of the fennel, you might use baby spinach.

SAUSAGE, FENNEL AND RICOTTA PIZZA

YIELD:   8 slices

INGREDIENTS

  • 1   12 oz. roll refrigerated pizza dough
  • 1 -2 links Italian turkey or pork sausage
  • 1 cup thinly sliced fennel bulb
  • 1 Tablespoon cornmeal
  • 2 Tablespoons pesto
  • 1/3 cup part-skim ricotta cheese
  • 1 teaspoon minced garlic
  • 1/2 teaspoon dry Italian seasoning
  • 1/3 cup thinly sliced red onion
  • 2 teaspoons fennel seeds (optional)
  • 1/2 teaspoon crushed red pepper
  • 1/2 teaspoon black pepper
  • 1/8 teaspoon kosher salt

1.   Remove pizza dough from refrigerator and bring to room temperature while oven preheats.   Preheat oven to 450*F.  Lightly grease a pizza pan,  baking sheet, or pizza stone.   Sprinkle cornmeal evenly on baking pan or stone.

2.  Heat a large nonstick skillet over medium-high heat.  Remove casings form sausage.  Crumble and add to pan, cook 4 minutes or until lightly browned.    Add fennel bulb; cook 4 minutes or until tender.

3.  Roll pizza dough into a 16 – inch oval and place on baking sheet, or press into the pan with your fingers.

4.  Brush the dough evenly with the pesto.  Sprinkle the sausage mixture evenly over the dough.  Combine ricotta with the minced garlic and Italian seasoning in a small bowl;  top pizza with teaspoonfuls of ricotta mixture.  Sprinkle red onion and remaining ingredients evenly over pizza.

Layer on all the ingredients.

Layer on all the ingredients.

5.  Bake at 450*F for 10 – 11 minutes or until golden.  Cut into 8 slices.

In my version, the crust was thin and crispy.

In my version, the crust was thin and crispy.

Served with a hearty salad this made a very filling meal.

We never get tired of pizza.

We never get tired of pizza.

SOURCE:    My own creation

Pie For Dinner

I’m Stressed!  I’m experiencing two things that are not compatible with each other.  One is writing this blog where I want to include baked goods, and more importantly reading other blogs where there is all kinds of wonderful baking going on; and two is trying to follow a low carbohydrate diet plan.  Baked goods, generally speaking, have no place on a strict low carb diet.  I need to bake something to bring my stress level down.  I want to stir something or roll out something like pie dough or cookie dough.  Yeah, that would help out a lot!  I don’t need to eat it, just make it.  What to do?

Well after giving this situation a lot of thought,  I decided to make a pie.  Not a dessert pie, no sireee; a dinner pie.  My analysis of the standard pie crust shows that 1/8th of a 9-inch pie contains 13 Gms. carbohydrate, none of which comes from sugar.  This is well under the 20 Gms. I’m limiting myself to per day.  So then I needed to figure out what the filling should be.  I decided on cheeses and fresh tomatoes flavored up with pesto.  With the creative juices flowing, and the stress level coming down, I set to work mixing up the pie dough. Cutting in that shortening and rolling out that dough takes muscle, but I was up for it!

Here then,  ladies and gentlemen, I present to you for the first time, my newest creation:  Fresh Tomato and Ricotta Cheese Pie

INGREDIENTS:

Makes 8 servings

  • pie dough for a single crust 9-inch pie, either home made or store-bought
  • 1 cup ricotta cheese
  • 1/2 cup Parmesan cheese
  • 1/2 cup shredded mozzarella cheese
  • salt and pepper
  • 1 large egg, lightly beaten
  • 2 large tomatoes, and 4-5 grape or cherry tomatoes
  • 1/2 cup packed basil leaves
  • 2 cloves garlic
  • 2-3 Tablespoons olive oil

DIRECTIONS:

1.  Preheat oven to 450 degrees.  Fit pie dough into a 9-inch pie pan.  Do not prick.  Line with heavy-duty foil.

2.  Bake at 450 degrees for 5 minutes.  Remove foil and continue baking for 8 more minutes.  Remove from oven.  Reduce oven temperature to 375 degrees.

3.   In a medium bowl mix together the ricotta cheese, Parmesan and mozzarella cheeses, salt and pepper to taste, and egg.

4.  Spread the cheese mixture in the partially cooked pie crust.

5.  Slice each large tomato into wedges, small tomatoes in half.  Remove as many seeds as possible.   Arrange attractively  on top of cheese layer.  Heirloom tomatoes produce vibrant colors ranging from pale yellow, pale pink,   purplish red,  even striped.  No two taste alike.  A tomato is a beautiful thing!  Mixing 2-3 varieties together makes a pretty presentation.

6.  In a food processor, process basil, garlic and olive oil until coarsely chopped.  Drizzle over the tomatoes.  I used my own previously made basil pesto, or you could use commercially prepared pesto here.

7.  Bake at 375 degrees for 40-45 minutes, until a knife inserted in the center comes out clean.  The filling will firm up a little more as it cools, so allow to cool for a few minutes before cutting.

8.  The finished product!  I served this pie with chicken salad on a bed of greens and a cucumber salad with a vinaigrette dressing.  I would also serve this dish as an entree for brunch along with some bacon or ham.  Oh, Yum!  The best part of all folks,  I didn’t just make it —-I got to eat it, too.  I am no longer stressed!

SOURCE:   a Carolyn Original

Homemade Ricotta Cheese

“Little Miss Muffet sat on a tuffet, eating her curds and whey”.  Ever wonder what that nursery rhyme was all about?  Well there’s no better way to explain than through the making of Ricotta Cheese.

Whipping up a batch of fresh ricotta cheese gets you bragging rights and a delicious product that is free of additives,etc.  Try some with a few Italian herbs and a little olive oil mixed in and served on bruschetta.  Sit back and enjoy the compliments.  You deserve them!

Before I get to the 1-2-3’s, let me talk a little bit about the process.  Because we are making cheese, we need milk.   It is best to use whole milk as it will give you a nice, rich ricotta that is smooth and creamy; not grainy like some commercial products can be.  From a half-gallon of milk, you will get about two cups of cheese.

Milk is made up of mostly water, with milk fat and some proteins.  The major proteins are of two types:  curds and whey.  Proteins are long strands of amino acids which when exposed to heat or acid, bond to each other producing curds.  The remaining liquid which is left behind is the whey.  Milk can “curdle” naturally as it ages and the bacteria in it multiply causing the milk to sour.  But the cheese we are making is achieved by causing the curdling intentionally by heating the milk and adding an acid.

Have the following supplies ready before you begin:

  • 1/2 gallon of milk
  • 3 tablespoons white vinegar
  • 1/2 teaspoon salt
  • a cooking thermometer
  • a colander lined with 5-6 layers of cheesecloth
  • a heavy-bottom saucepan

Combine the milk, vinegar and salt in the saucepan and heat to 185 degrees.  Stir frequently to prevent it from scorching.  As it heats, you will see the curd proteins clumping together.  Once it comes to temperature, take it off the heat, and let it sit for about 10 minutes to make sure it curdles completely.

Place the lined colander over a bowl to collect the whey. ( It can be used in place of milk in anything that uses milk i.e., pancakes, muffins, etc.)  Pour or ladle the curds into the cheesecloth and let it drain from 5-30 minutes.  A shorter drainage time will give a creamier cheese; a longer time will produce a drier more coarse cheese.  Pick up the bundle and gently squeeze out remaining whey.

Use the cheese warm on bruschetta or pasta, or place in an airtight container and refrigerate it.  It will keep for several days.

I used most of mine to make Stuffed Shells with Marinara Sauce, and I will be posting the recipe for that soon.  I’m sure I will be making the ricotta cheese again as I would like to try it in a cheesecake.  Oh, my thoughts just went spinning off imagining it served with  fresh strawberries.  Yum, Yum!  I’ll keep you posted.