Reese’s Peanut Butter Oatmeal Cookie Bars

Reese's Peanut Butter Oatmeal Bars

Reese’s Peanut Butter Oatmeal Bars

Let’s take out some butter to soften up.   Check that your pantry has plenty of flour, sugar and brown sugar.  Oh, and we’re going to need peanut butter, peanut butter in several forms.  Why?  Because today is baking day.

Today we are going to make Peanut Butter Oatmeal bars, and we’re pulling out all the stops with these, incorporating peanut butter-flavored baking chips, peanut butter, and Reese’s Miniature candies.  Total peanut butter heaven!  I’ve been enthralled with all kinds of bar cookies lately, and these leave no room for disappointment.  If you have Reese’s Cups left from Halloween this is a great way to use them up.

IMG_8240

These bars are fabulous in every way;  besides the wonderful taste, the centers are perfectly soft and chewy, and the Reese’s cup surprise in the middle makes them even more drool-worthy.   It takes very little time to whip these up, but everyone who tastes them will want the recipe.  To make sure the Reese’s are nicely distributed I put down a layer of about half the dough in the bottom of the baking dish and then sprinkled the chopped candy on top.  Next I dolloped the remaining dough on top of all that, making a kind of peanut butter oatmeal cookie sandwich with a Reese’s filling.   Turned out to be a great way to do it, as every bite gives you all that yumminess combined.

IMG_8235

These will bake up beautifully and cut nicely also.  I cut mine into 16 bars for the photos here, but you may want to cut them diagonally in half if you’re serving a large group, or double up on all the ingredients and bake in a 13″ x 9″ pan for a larger batch.  Be sure to treat yourself to a whole bar… you deserve it.   I know I did! 🙂

REESE’S PEANUT BUTTER OATMEAL COOKIE BARS

Yield:   Makes 16 barsIMG_8222

Ingredients:

  • 6 Tbsp. unsalted butter, softened
  • 1 cup brown sugar
  • 1/4 cup creamy peanut butter
  • 1 egg
  • 1 tsp. vanilla extract
  • 1 cup all purpose flour
  • 1/2 cup old fashioned oats
  • 1 1/4 tsp. baking powder
  • 1/4 tsp. salt
  • 1/2 cup peanut butter-flavored baking chips
  • 1 cup Reese’s miniatures, chopped or Reese’s minis

Directions:

1.  Preheat the oven to 350*F.   Spray an 8-inch square baking pan with non-stick cooking spray.

2.  Cream butter and brown sugar together in a large mixing bowl.  Add peanut butter and continue mixing.

3.  Add egg, mix in well, then add vanilla.

4.  Combine flour, oats, baking powder, and salt in a small bowl.   Add flour mixture to the creamed mixture and stir in well.

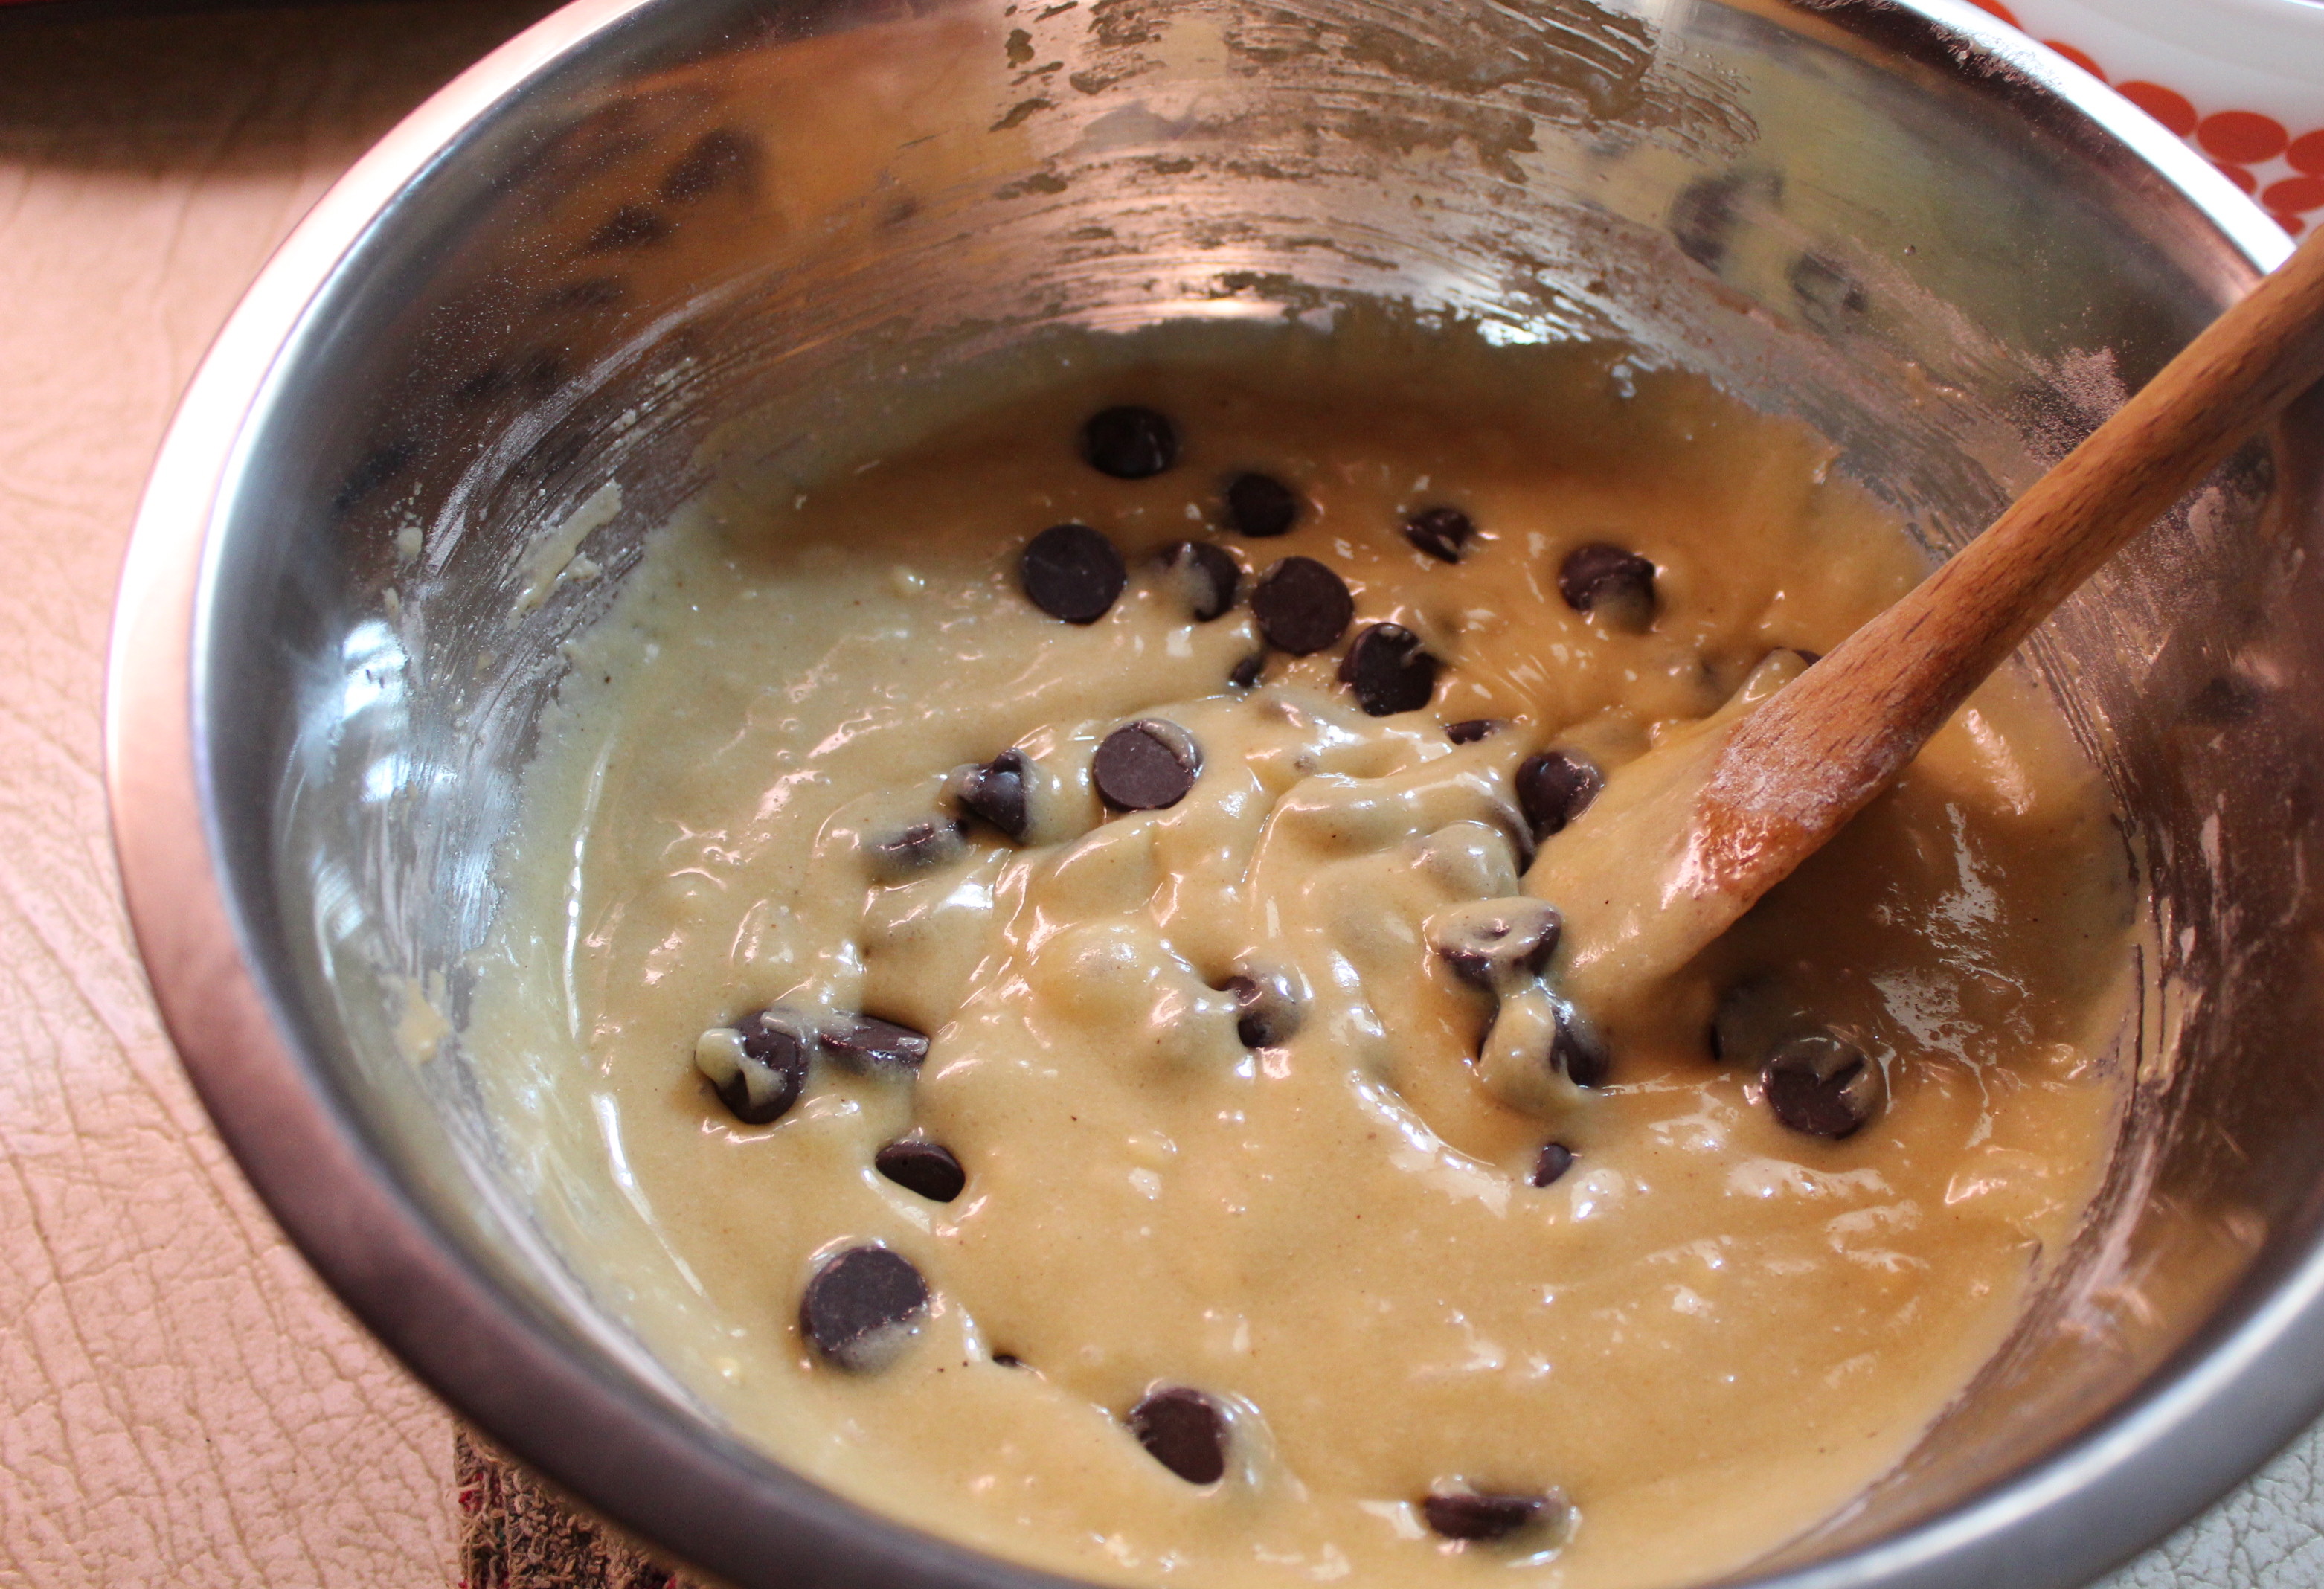
5.  Stir in the peanut butter chips.

6.  Spread 2/3 of the dough on the bottom of the pan.  Top with chopped Reese’s miniatures.  Dollop the remaining dough on top by the teaspoon.  It doesn’t have to completely cover all the Reese’s.

About half the dough on the bottom, a layer of Reese's cups, and the remaining dough on top.

About half the dough on the bottom, a layer of Reese’s cups, and the remaining dough on top.

7.  Bake for about 30 minutes.  Let cool completely before cutting into bars.

IMG_8238

Serve with a glass of cold milk for supreme satisfaction!!


SOURCE:  Slightly modified from Mom on Time Out.com


Advertisement

Black Bottom Coconut Bars


Black Bottom Coconut Bars

Black Bottom Coconut Bars

The name of these bars sounds like a dance right out of the “roaring 20’s”.  But, no, we are going to bake and eat them.  Oh, Yum!

IMG_6913

Coconut and chocolate is a flavor combination I particularly love, and recently I’ve had a craving for coconut. It’s been so bad that I over-bought coconut; would you believe in my pantry there are three bags of shredded, two bags of flakes, and a container of “chips”. Not to mention a large package of “bite-size” Mounds bars!!    What was I thinking?

If there’s one thing I’ve learned it’s that when a craving strikes the best thing to do is give in to it.  So I baked these bars.  A friend’s birthday was my reason for baking, but at the same time I reasoned, I could have 1-2 bars to “taste”, and hopefully that would be the end to my craving.  We’ll just see how that works out…..

IMG_6909

These bars are moist chewy brownies on the bottom, with a wonderfully, gooey, coconut-y mixture on top, and that layer is topped with more coconut that I toasted and sprinkled over all.   Let me tell you, it’s a good thing I gave most of these away or I could have eaten them all myself.   They are incredibly good.  I’m thinking they would make a perfect dessert for Easter. 😀

IMG_6915

If you like brownies and you like coconut, you really need to try these seriously addictive bars.

BLACK BOTTOM COCONUT BARS

Yield:   16 – 24 bars

Ingredients:

For the brownie layer:

  • 1/2 cup unsalted butter
  • 1/2 cup granulated sugar
  • 1/4 teaspoon salt
  • 1 large egg
  • 1/4 cup unsweetened cocoa powderIMG_0261
  • 1/4 cup all-purpose flour

For the coconut layer:

  • 2 large eggs
  • 3/4 cup granulated sugar
  • 1/2 teaspoon coconut extract
  • 1 cup all-purpose flour
  • 7 ounces sweetened, shredded coconut,  reserve 1/2 cup for sprinkling on top

Instructions:

1.  Preheat oven to 375*F.   Line a 9-inch square baking pan with parchment paper or foil, leaving an overhang.  Spray bottom and sides of paper lining.

2.  Toast the reserved 1/2 cup coconut by spreading on a baking sheet and baking for about 5 – 7 minutes.  Watch carefully that it doesn’t get too dark.  Stir twice during baking time.  Remove and set aside for later.

3.  Make brownie layer:  using a microwave-safe bowl, melt butter in microwave.  Whisk in sugar and salt.  Whisk in egg, then cocoa powder and flour.  Mix until smooth.  Spread evenly in prepared pan.

4.  Bake for 10-15 minutes.  The sides should be starting to pull away from the pan. Don’t over bake.  Set aside while you make the topping.

5.  Make coconut layer:  Whisk eggs with sugar and coconut extract.

IMG_0262

Mix in flour and coconut.  Drop mounds of topping onto chocolate base.  Spread and press into base with moistened fingers.  Sprinkle with the toasted coconut.

IMG_0264

6.  Bake 25 – 30 minutes, or until a toothpick inserted in the center comes out with moist crumbs attached.  Cool completely in pan.  Then remove from pan using the overhang.  Peel back paper or foil, and cut into bars.  Store in an airtight container for 3 -4  days.

IMG_6908

IMG_6912

IMG_6914

Don’t wait.   Go. Now. Make these bars.


SOURCE:  Adapted from Martha Stewart


Orangeburst Cookie Bars

Orangeburst Cookie Bars

Orangeburst Cookie Bars

When I was growing up there were two kinds of oranges, eating oranges from California, and juice oranges from Florida.  Now when I survey the display of citrus fruits in the market, the variety of oranges is mind-boggling.  So each week when I grocery shop, I buy a different kind of orange, just so I can try them all and learn the differences between them.

My last shopping trip resulted in my bringing home Blood Oranges.  The color of the flesh of these oranges is deep red/maroon and the juice is dark pink.  The flavor is hard to describe, but seems almost to have a cranberry flavor mixed with the orange.    Besides simply eating them, I wanted to capture that flavor in something baked.  So I turned to this recipe for cookie bars that uses orange juice and zest in the  filling that is baked on a sugar cookie crust.  The juice from the Blood oranges gave the filling a soft pink color that is quite attractive, and the flavor is intense.

Blood orange juice made my filling a pink color.

Blood orange juice made my filling a pink color.

I really liked the texture of these bars;  the filling is soft and chewy while the base is firm sugar cookie.  A nice contrast.  Chopped hazelnuts provide some crunch and a dusting of confectioners’ sugar is all that’s needed to get them ready for serving.

Cut into squares and dust with powdered sugar.

Cut into squares and dust with powdered sugar.

On a personal note:  I found these bars to be a little too sweet.  In making them again, I would use less sugar because there is sweetness in the cookie base, plus corn syrup and white sugar in the filling.  My feeling is that you could reduce the sugar by half and thereby let the orange flavor become even more prominent.

ORANGEBURST COOKIE BARS

The convience of sugar cookie dough makes an easy crust.

The convenience of sugar cookie dough makes an easy crust.

Yield:    about 24 bars

Ingredients:

  • 1 roll refrigerated sugar cookie dough
  • 1/2 cup hazelnuts, chopped (almonds are a good substitute)
  • 1/2 cup sugar ( you could use as little as 1/4 cup)
  • 5 tsp. all-purpose flour
  • 1/3 cup light corn syrup
  • 2-3 tsp. orange zest
  • 1/2 cup fresh orange juice
  • 1 Tbsp. butter, melted
  • 1 egg
  • 1-3 Tbsp. powdered sugar for garnish

Directions:

1.  Preheat oven to 350*F.  Lightly spray a 13×9-inch pan.

2.  Cut cookie dough into 1/2-inch slices.   Line button of pan with the cookie slices, and using fingers press together and flatten evenly to form a bottom crust.

Press sliced cookie dough into pan to form a crust.

Press sliced cookie dough into pan to form a crust.

Sprinkle with 1/4 cup of the nuts, and press into the dough.   Bake 12 – 15 minutes until dough is puffed.

Sprinkle on some nuts and press into the dough.

Sprinkle on some nuts and press into the dough.

3.  Meanwhile in a medium bowl, mix sugar and flour.  With a whisk mix in the corn syrup and remaining ingredients (except powdered sugar).  Stir in remaining 1/4 cup nuts.

4.  Carefully pour the filling over the partially baked crust.

Pour the orange mixture onto the partially baked crust.

Pour the orange mixture onto the partially baked crust.

5.  Return to oven and bake 18 – 23 minutes till edges are brown and filling is set.

After baking the bars.

After baking the bars.

Cool completely on a wire rack.  Sprinkle with powdered sugar and cut into bars.   Makes 24 bars.

Delightfully chewy.

Delightfully chewy.

IMG_0176

SOURCE:  Pillsbury Christmas, 2011

Holiday Baking Time is Here

Greetings, fellow bakers!

What with Thanksgiving being so late this year, I’m rather behind in planning my holiday baking.  This week I’ve been getting a mind set for the Christmas Holidays, ordering a few gifts, and am just now trying to sort out all those tempting recipes for baking up cookies and other goodies for gift-giving.  It’s at this time of year that I can bake to my heart’s content and not feel guilty about who is going to eat it all.  I’m giving most of it away!!  Each year I struggle with choosing which treats will make the cut and be included in the packages I make for friends and family, and each year the choice becomes more difficult as I always find a couple new must-makes to include.

For many of you Christmas cookies conjure up thoughts of rolled out gingerbread boys and girls, or brightly decorated trees.  I like decorated cookies certainly, but with time having gotten away from me,  my focus this year will be on great texture and superior flavor rather than cutting and piping. I’m also going to try and emphasize some of the popular flavors and get a diverse mixture going.

While I sort this all out and come up with a few treats to share with you, here are some previous favorites that I will be considering  when I finalize my list this week.

Anytime Sugar Cookies

Anytime Sugar Cookies

Of all the incredible holiday cookies out there, in my opinion, nothing beats a great sugar cookie. These Anytime Sugar Cookies  are simply delicious and are so adaptable to any kind of decorating;  frost or not, sprinkles, colored sugars, etc.  They are sure to please.

Funfetti Truffles

Funfetti Truffles

Truffles are always a favorite of mine.  These Funfetti Truffles are so easy to make, and  you can vary the colors and flavors.

Salted Butterscotch Blondies

Salted Butterscotch Blondies

When I’m baking so many large quantities of treats, I aways appreciate something that is simple to make but garners rave reviews every time.  That would be these Salted Butterscotch Blondies.  One batch makes a large panful and goes a long way.

Chocolate Caramel Thumbprints

Chocolate Caramel Thumbprints

Last year I made these Chocolate Caramel Thumbprints and they totally wowed everyone.  Sort of  a pecan pie in cookie form.

Gingerbread Biscotti

Gingerbread Biscotti

Some kind of biscotti are always included in my gift packages.  These chocolate dipped Gingerbread Biscotti with crystalized ginger are my favorites, and everyone who has received them always loves them.

Red Velvet Crinkle Cookies

Red Velvet Crinkle Cookies

These Red Velvet Crinkle Cookies, made from a cake mix, are so festive, they really add color to a cookie platter.  They are so moist and chewy, always a popular addition to a box of treats.

Maraschino cherries in a buttery shortbread cookie, dipped in white chocolate, with colored sprinkles decorating the edges.  I made these Shortbread Cookies for the first time last year and they moved right to the top of my list of favorite cookies.  They are pretty to look at, and the flavor is awesome.  I know I’ll be making these again this year.  Can’t wait!!

If, like me, you do a lot of baking for the Holidays, any one of these recipes would be a good place to start.  By next week I should be better organized with my own baking plans and have some new goodies to share with you.  Happy Baking!  😀

Brown Sugar Toffee Bars

You know those hard little nuggets of sugar you sometimes get in a bag of brown sugar?   Ya know what I do with them?  I eat them!!   Yup!  In fact whenever I open a new bag of brown sugar I look for them first, so I can give myself a little treat.  Around here I do all the cooking and baking so a girl’s got to reward herself once in a while.

Brown Sugar Toffee Bars

Brown Sugar Toffee Bars

Today I was wishing for something made with brown sugar so I came up with  this idea for brown sugar bars with toffee bits mixed in.  Thus….. Brown Sugar Toffee Bars.  These bars are so simple really, but they have flavors that are so outstanding.  Chewy, buttery, and rich.  They are deceptively delicious.

IMG_5609

The Leaning Tower of Toffee Bars 😀

If you’re not as nuts-o for dark brown sugar as I am then by all means use light brown sugar, you’ll get a somewhat milder flavor, and lighter colored bar.  All the other usual pals go into these bars like butter, eggs, vanilla, etc, but you’ll also need a bag of toffee bits.  I wanted to use the kind that are covered in milk chocolate but didn’t have any on hand.  Went to my grocery store but they didn’t have them so I used the plain toffee bits, and added about 1/2 cup chocolate chips.  You can use  the plain toffee bits, chocolate covered bits, or add chocolate chips as I did.  It’s totally up to you.

This is what I used.

This is what I used.

The batter mixes up quickly, stir in the toffee, spread in a baking pan and pop into the oven.  Before long your tummy will be thanking you in a big way.

Here’s what your bars will look like……

IMG_5603

BROWN SUGAR TOFFEE BARS

Yield:  Makes approximately 30 bars

All this good stuff goes into these fab bars.

All this good stuff goes into these fab bars.

Ingredients:

  • 1 cup butter ( 2 sticks), at room temperature
  • 1 1/2 cups dark brown sugar, packed
  • 2 eggs
  • 1 Tbsp. vanilla
  • 2  1/2 cups flour
  • 1 tsp. baking soda
  • 1 tsp. kosher salt
  • 1 (8oz)bag of Toffee Bits (Heath Toffee Bits, with or without chocolate covering)

Directions:

1.  Preheat the oven to 350*F.   Spray a 9″ x 13″ baking pan with cooking spray.

2.  With an electric mixer, cream the butter and brown sugar together, about 2 minutes on medium speed until combined and fluffy…..

Cream together the brown sugar and butter.

Cream together the brown sugar and butter.

Add in eggs and vanilla and continue mixing until incorporated.

3.  Turn mixer to low speed and add in baking soda, salt and flour, mixing until incorporated.

4.  Pour in the toffee bits and stir until evenly combined…..

Add in all those yummy toffee bits and chocolate chips.

Add in all those yummy toffee bits and chocolate chips.

5.  Spread batter in prepared pan and bake for 20 – 25 minutes until golden and center is just set.  Don’t over bake.

6.  Cool pan on wire rack and cut into squares when ready to serve.

IMG_5607

IMG_5610

SOURCE:   A major adaptation of a recipe for Toffee Squares from Taste of Home Baking Book

Magic Pumpkin Bars

Magic Pumpkin Bars

Magic Pumpkin Bars

It seems now that Fall weather has set in recipes featuring pumpkin in some form or other are flooding the air-waves, web and periodicals.  Well, not to be left out, I wanted to get in on the fun of baking something with pumpkin.

You know what magic cookie bars are, right?  They’re also known as 7-layer bars.  But I like to call them magic cookie bars because 1) they don’t always have 7 layers, and 2)  the sweetened condensed milk performs the magic by tying all the layers together.

IMG_5071

Let’s start by reviewing all the layers in this version,  OK?

1. Gingersnap Crust.   I think that gingersnap and pumpkin are a match made in heaven.  They were made for each other.

2.  The chips.  White chocolate chips, preferred for color contrast and silky texture.  However, the day I made these bars I plunged into making them without checking and found I was out of white chips, so used chocolate instead.  But then, chocolate also goes well with pumpkin.  So use what ever kind you prefer or have on hand.

3.  Pecans, (or any nuts, really).  You gotta have them, especially in a fall dessert.

4.  Coconut.  This is totally optional, but it’s usually found in magic bars.

5.  Toffee Bits.  In my opinion, you can never have enough of these.  See #3.

6..  Pumpkin.  Come on……they are called pumpkin magic bars.

7.  Sweetened condensed milk.  The top and final layer;  the tie that binds it all together!   In this recipe it gets mixed with the pumpkin and some pumpkin pie spice and poured over the top.

Fudgy, chewy.  I love the way all the layers blend together.

Fudgy, chewy. I love the way all the layers blend together.

MAGIC PUMPKIN BARS

Yield:  12 -16 bars

Ingredients:

Get all the ingredients ready.

Get all the ingredients ready.

  • 25 gingersnaps
  • 2 Tbsp. sugar
  • 5 Tbsp. butter, melted
  • 1 cup white chocolate chips
  • 1/2 cup chopped pecans
  • 1/4 cup coconut
  • 1/4 cup toffee bits
  • 1/2 cup sweetened condensed milk
  • 1/4 cup pumpkin puree
  • 1/2 tsp. pumpkin pie spice

Instructions:

1.  Preheat oven to 350*F.  Line a 9 x 9-inch pan with foil and spray with cooking spray.

2  Grind gingersnaps to a fine crumb in a food processor.  Mix with sugar and melted butter.  Press into prepared pan.

3.  Sprinkle with white chocolate chips, nuts, coconut, and toffee bits over the top of the crust.

4.  Whisk pumpkin, pumpkin pie spice and condensed milk in a small bowl or measuring cup and pour over the top of the bars.

All layered up and ready for the oven.

All layered up and ready for the oven.

5.  Bake for 29 – 31 minutes, until edges have started to brown.  Cool completely before cutting.  Using edges of foil, lift completely from the pan to a cutting surface and using a bench knife or other sharp knife, cut into 12 or 16 squares.

Use the foil "handles" and lift the whole square out of the pan for ease in cutting.

Use the foil “handles” and lift the whole square out of the pan for ease in cutting.

Looking sooo good!

Looking sooo good!

These are surprisingly not too sweet.

These are surprisingly not too sweet.

SOURCE:  Crazy For Crust

Black and White Bars

Black and White Bars

Black and White Bars

Black and white, the classic color combination;  found in so many places.  In the fashion world with black and white you can’t go wrong.  I always feel as though I am well put-together when I wear it.  Any season, any reason it’s always right.  Think of a piano keyboard, another perfect example of this combination, and nothing can improve upon it.   Well, in this recipe for black and white bars, the same is true.  White chocolate with bittersweet dark chocolate make beautiful music together.  I can’t think of one thing to make them better.

So good!

So good!

They are pretty simple to make requiring one large bowl, a smaller one, and a hand mixer.  The recipe calls for baking them in a 9 – inch square pan, but I made a mistake and used an 8 – inch pan.  They came out quite thick, but for me, thicker is better, and more chewy.  So use what you have, remembering that if you use a smaller pan you need to bake them at least 5 minutes longer.  (test with a toothpick). You will not be disappointed in these bars, except maybe at how fast they disappear.  Be sure to get yours before they’re all gone!

BLACK AND WHITE BARS

YIELD:  16 squares

INGREDIENTS

  • 1 cup chopped white chocolate, or white chipsIMG_3617
  • 1/4 cup ( 1/2 stick ) butter
  • 3/4 cup granulated sugar
  • 2 teaspoons vanilla extract
  • 1/4 teaspoon nutmeg
  • 1/4 teaspoon salt
  • 2 large eggs
  • 1  1/4 cup all-purpose flour
  • 1/2 teaspoon baking powder
  • 1 cup bittersweet chunks or large chips

1.  Preheat the oven to 350*F.  Lightly grease a 9 – inch square pan

2.  Place the white chocolate, butter, and sugar in a heatproof bowl.  Heat at low power in the microwave for 1 minute intervals, or over simmering water, until the chocolate softens.  White chocolate is sensitive to to scorching, so watch carefully.

Melting the white chocolate, sugar and butter over simmering water.

Melting the white chocolate, sugar and butter over simmering water.

3.  When the butter is melted and the white chocolate looks soft, stir in the vanilla, nutmeg and salt.  Let the mixture cool to lukewarm,  then beat in the eggs.

Beating in the eggs.

Beating in the eggs.

4.  In a separate medium bowl whisk together the flour and baking powder; stir into the egg mixture.

Stir in the flour and baking powder.

Stir in the flour and baking powder.

Stir in 3/4 cup of the dark chocolate chunks.

Stir in the dark chocolate chunks or chips.

Stir in the dark chocolate chunks or chips.

Spoon the batter into a greased 9″ square pan, and sprinkle the remaining chocolate chunks over the top.

In the pan, ready for the oven.

In the pan, ready for the oven.

5.  Bake the squares for 25 minutes,  ( 30 minutes for a smaller pan), until light golden brown and the edges pull just slightly away from the pan.  Remove from the oven and cool before cutting.

It was hard to wait for them to cool.

It was hard to wait for them to cool.

I cheated a little and cut them before they were completely cool, so the chocolate is still warm and melty-like—nothing wrong with that–except you don’t get a nice clean cut.  Who cares when they taste this good!

SOURCE:  King Arthur Flour.com/recipes/bars

Chocolate Caramel Oatmeal Bars

I made these bar cookies this week for my husband to take to a meeting.  (He always signs up to bring a dessert.  I wonder why? ) Anyway, these can be put together pretty easily and the recipe makes a 13″ x 9″ pan full.  That way I get to keep about 6 squares for us at home and he takes the rest.  Any dessert with chocolate in it seems to call me repeatedly until its gone, so I have to protect myself from such temptation.

The basis of the cookie dough is a boxed yellow  cake mix to which butter, egg, and oatmeal is added to make a crumbly mixture.  Press half of it in the baking pan,  partially bake it, then layer chocolate chips and walnuts on top, drizzle with caramel syrup, and cover with the remaining crumb mixture.  Finish baking and Voila!  you have delicious, chewy, chocolaty bars.  Whenever I bring these somewhere, or serve them, I get asked for the recipe.

INGREDIENTS

Yield:  24 bars  Cut 6 rows x 4 rows

  • 1 boxed yellow cake mix
  • 3/4 cup butter, softened
  • 1 egg
  • 2 cups Quick Oats
  • 1 1/2 cups chocolate chips
  • 1 cup walnuts, chopped
  • 1 cup caramel ice cream topping
  • 1 Tablespoon flour

DIRECTIONS

  1. Preheat oven to 350 degrees.  Grease a 13″ x 9″ pan.
  2. With electric mixer beat cake mix with the butter and egg till crumbly.  Stir in oats. Reserve 1 1/2 cup oat mixture.
  3. Press remaining crumbs into baking pan.   Bake  14 – 18 minutes until light golden brown.  Do not over bake.
  4. Remove from oven and sprinkle chocolate chips and nuts over hot crust.
  5. Mix caramel syrup with the 1 T. flour.  Drizzle over chips and nuts.
  6. Use the reserved crumb mixture to sprinkle over the top.  Pat down lightly.
  7. Bake for another 20 – 25 minutes till golden brown.  Its best not to over bake these as they will get very firm and hard to remove from the pan.  Allow to cool slightly, and run a knife around the edges to loosen caramel from pan while still warm.  When cooled completely, cut into bars.    Makes about 24 bars.

SOURCE:    Taste of Home Annual Recipes, 2000

Mississippi Mud Bars

I think I’ve said this before, but I’ll say it again:  I.  Love. Chocolate.  It is always my first choice in desserts.  So if there’s chocolate in it, on it, around it, or anywhere close by, you can be sure I’ll find it!   When I was asked to bring a “finger-type” dessert to an end-of-year picnic, this recipe came right to mind.  What else but chocolate could produce Mississippi Mud?  (As a food, that is.)

The recipe was published in the Winter 2012 Baking Sheet, from King Arthur Flour.  I am a faithful subscriber to this little recipe-filled periodical many of which have turned down pages for recipes I want to try.

Mention Mississippi Mud and like the ice cream, I think of chocolate chips, nuts and peanut butter.  These bars have not one, but two kinds of chocolate:  dark and white, plus pecans – a Southern touch.  Pure deliciousness in one little cookie bar.  Since they are eaten with your hands it’s OK to lick your fingers!

INGREDIENTS

  • 1/2 cup unsalted butter
  • 1 cup brown sugar, packed
  • 1/2 cup creamy peanut butter
  • 1 large egg
  • 1 tablespoon vanilla
  • 1 1/2 cup all-purpose flour
  • 1/2 teaspoon baking soda
  • 1/2 teaspoon salt
  • 3/4 cup white chocolate, coarsely chopped, or white chips
  • 2 cups semisweet or bittersweet chocolate chips or chunks, divided
  • 1 cup coarsely chopped pecans, divided

A word here about pan size:  You may choose a 9”x13″, a 9″x9″, or an 8″x8″ pan. The smaller pans will produce 16-20 bars that are thick with a thick layer of chocolate on top.  The 9″x13″ pan will produce 24-32 bars, but only about an inch thick.  That’s the size I used to bake the bars pictured here.

  1. Preheat oven to 325 degrees.  Select your pan and grease generously with non-stick spray.
  2. Cream the butter and brown sugar in a large bowl until smooth.  Beat in the peanut butter followed by the egg and vanilla.  Mix well; scrape the bowl.
  3. In a small bowl, mix together the flour, baking soda, and salt.  Stir the dry ingredients into the butter mixture.
  4. Add the white chocolate, 1 cup of the semisweet or bittersweet chocolate, and half of the pecans.
  5. Spread the batter evenly in the prepared pan.  Using a spatula works well to spread it to the edges.  Bake for 40-45 min. for 8″ or 9″ square pans;  30-35 min. for the 9″x13″ pan. The bars should be golden brown all over.
  6.   Remove from the oven and immediately sprinkle the remaining chocolate over the top of the bars.  Return to the oven for 1 minute to soften the chocolate, then take the pan out of the oven and spread the now-melted chocolate evenly over the top.  Sprinkle with the remaining pecans, pressing them lightly into the chocolate.  Allow to cool before cutting into bars.

SOURCE:  The Baking Sheet, Winter 2012,  from King Arthur Flour

Mounds Brownie Bars

The recipe for these rich and chewy bar cookies came about as a result of a challenge given to me by a dear friend whose  favorite candy bar is a Mounds bar.  If I remember correctly it went like this:  “I wonder if you can make a bar cookie that tastes like a Mounds bar! ” Always up for a challenge,  I replied ” Oh, of course I can!”

The first thing I did was treat myself to a Mounds candy bar in order to examine how it is made, and savor the flavors that go into the total experience of eating one.  I must say this was really hard work, but I had to do it.  What I discovered was that it had a chocolate, chewy base, a coconut layer, chocolate covering and an almond underneath the chocolate.   This will be a piece of cake, I told myself.

And so I began the process of development, which included several attempts at getting the base just right.  Mr. D. was so good about eating my experiments;  he never complained about taste testing several kinds of brownies.  Finally I was satisfied that I had the right texture for the base.  The rest was the easy part:  the coconut layer with a hint of almond flavoring, and a chocolate frosting to cover.   I decided to top each bar with an almond, instead of placing them under the frosting, so each bar would have one,  and for folks allergic to nuts, it could be easily removed.

Here then, is my interpretation of  Mounds candy in cookie bar form.

Ingredients List

Brownie Layer:

  • 1 1/2 cups butter
  • 4 squares unsweetened chocolate
  • 2 1/4 cups sugar
  • 3 eggs, beaten
  • 1 cup all-purpose flour
  • 1 teaspoon vanilla

Coconut Layer:

  • 2 cups flaked coconut
  • 14 0z. can sweetened condensed milk
  • 1 teaspoon almond flavoring

Frosting:

  • 2 1/2 cups confectioners sugar
  • 3 tablespoons cocoa
  • pinch salt
  • 3 tablespoons butter, softened
  • 1/2 teaspoon vanilla
  • 3-4 tablespoons milk
  • 20-24 whole almonds
  1. Preheat oven to 350 degrees.  Lightly grease a 13 x 9 inch baking pan.  In a saucepan, over low heat, melt butter and chocolate; cool slightly.  Add sugar.  Stir in eggs, flour and vanilla.
  2. Pour into a greased  pan.  Bake at 350 degrees for 20 minutes.  Center will not be firm.  Remove from the oven.
  3. Meanwhile, combine coconut with condensed milk and almond flavoring.  Gently spoon and spread over partially baked base.  Return to oven and bake another 15 minutes, or until light golden brown.  Cool slightly.
  4. Blend frosting ingredients; beating 2 minutes until fluffy.  Spread over warm bars.  Top each bar with a whole almond.
  5. Taste tested and approved!  Oh, and by the way—-I successfully met the challenge.  My friend was duly impressed.   
SOURCE:  A Carolyn Original