Whole Wheat Brownies

Whole Wheat Brownies

Whole Wheat Brownies

The start of the holiday weekend, and there we were with no desserts on hand.  Horrors!!  How can you even think of having a cookout without some kind of dessert to end the meal.  Just about everybody loves brownies, the fudgy-er the better.  And if a person wanted to add a scoop of ice cream and maybe a tiny drizzle of chocolate sauce, I certainly would be the last one to object.  Sooooo, brownies it is.

Was that a brownie sundae you wanted?

Was that a brownie sundae you wanted?

Let me see what I can do to make them “healthy”.   Gee, is there really such a thing as a healthy brownie?   Martha Stewart seems to think so, therefore I’ll take her word for it.  These whole wheat brownies get a healthy boost from whole wheat flour and applesauce, while cocoa powder and semisweet chocolate make them nice and fudgy;  really deep, dark and moist, but not heavy.

IMG_7399

WHOLE WHEAT BROWNIES

Yield:   Makes 16

Ingredients:IMG_7385

  • 6 tablespoons ( 3/4 stick) unsalted butter
  • 1/2 cup all purpose flour
  • 1/2 cup whole wheat flour
  • 1/3 cup unsweetened cocoa powder
  • 1 1/4 teaspoon baking powder
  • 1 teaspoon coarse salt
  • 1/4 teaspoon baking soda
  • 1 cup light brown sugar, packed
  • 1  1/4 cup unsweetened apple sauce, or Lighter Bake
  • 1 large egg
  • 8 oz. semisweet chocolate, chopped
Lighter Bake is made from applesauce.

Lighter Bake is made from applesauce.

Directions:

1.  Preheat oven to 350*F.  Butter or spray an 8-inch square baking dish.  Line it with parchment paper; leaving a 2″ overhang on all sides.  Butter or spray the parchment paper.

2.  Place butter and 6-oz. of the chocolate in a heat proof bowl set over (not in) a pot of simmering water;  stir until melted.  remove from heat and set aside to cool slightly.

Butter and chocolate melted together.

Butter and chocolate melted together.

3.  In a medium bowl, whisk together the flours, cocoa powder, baking powder, salt and soda.

Mix dry ingredients together.

Mix dry ingredients together.

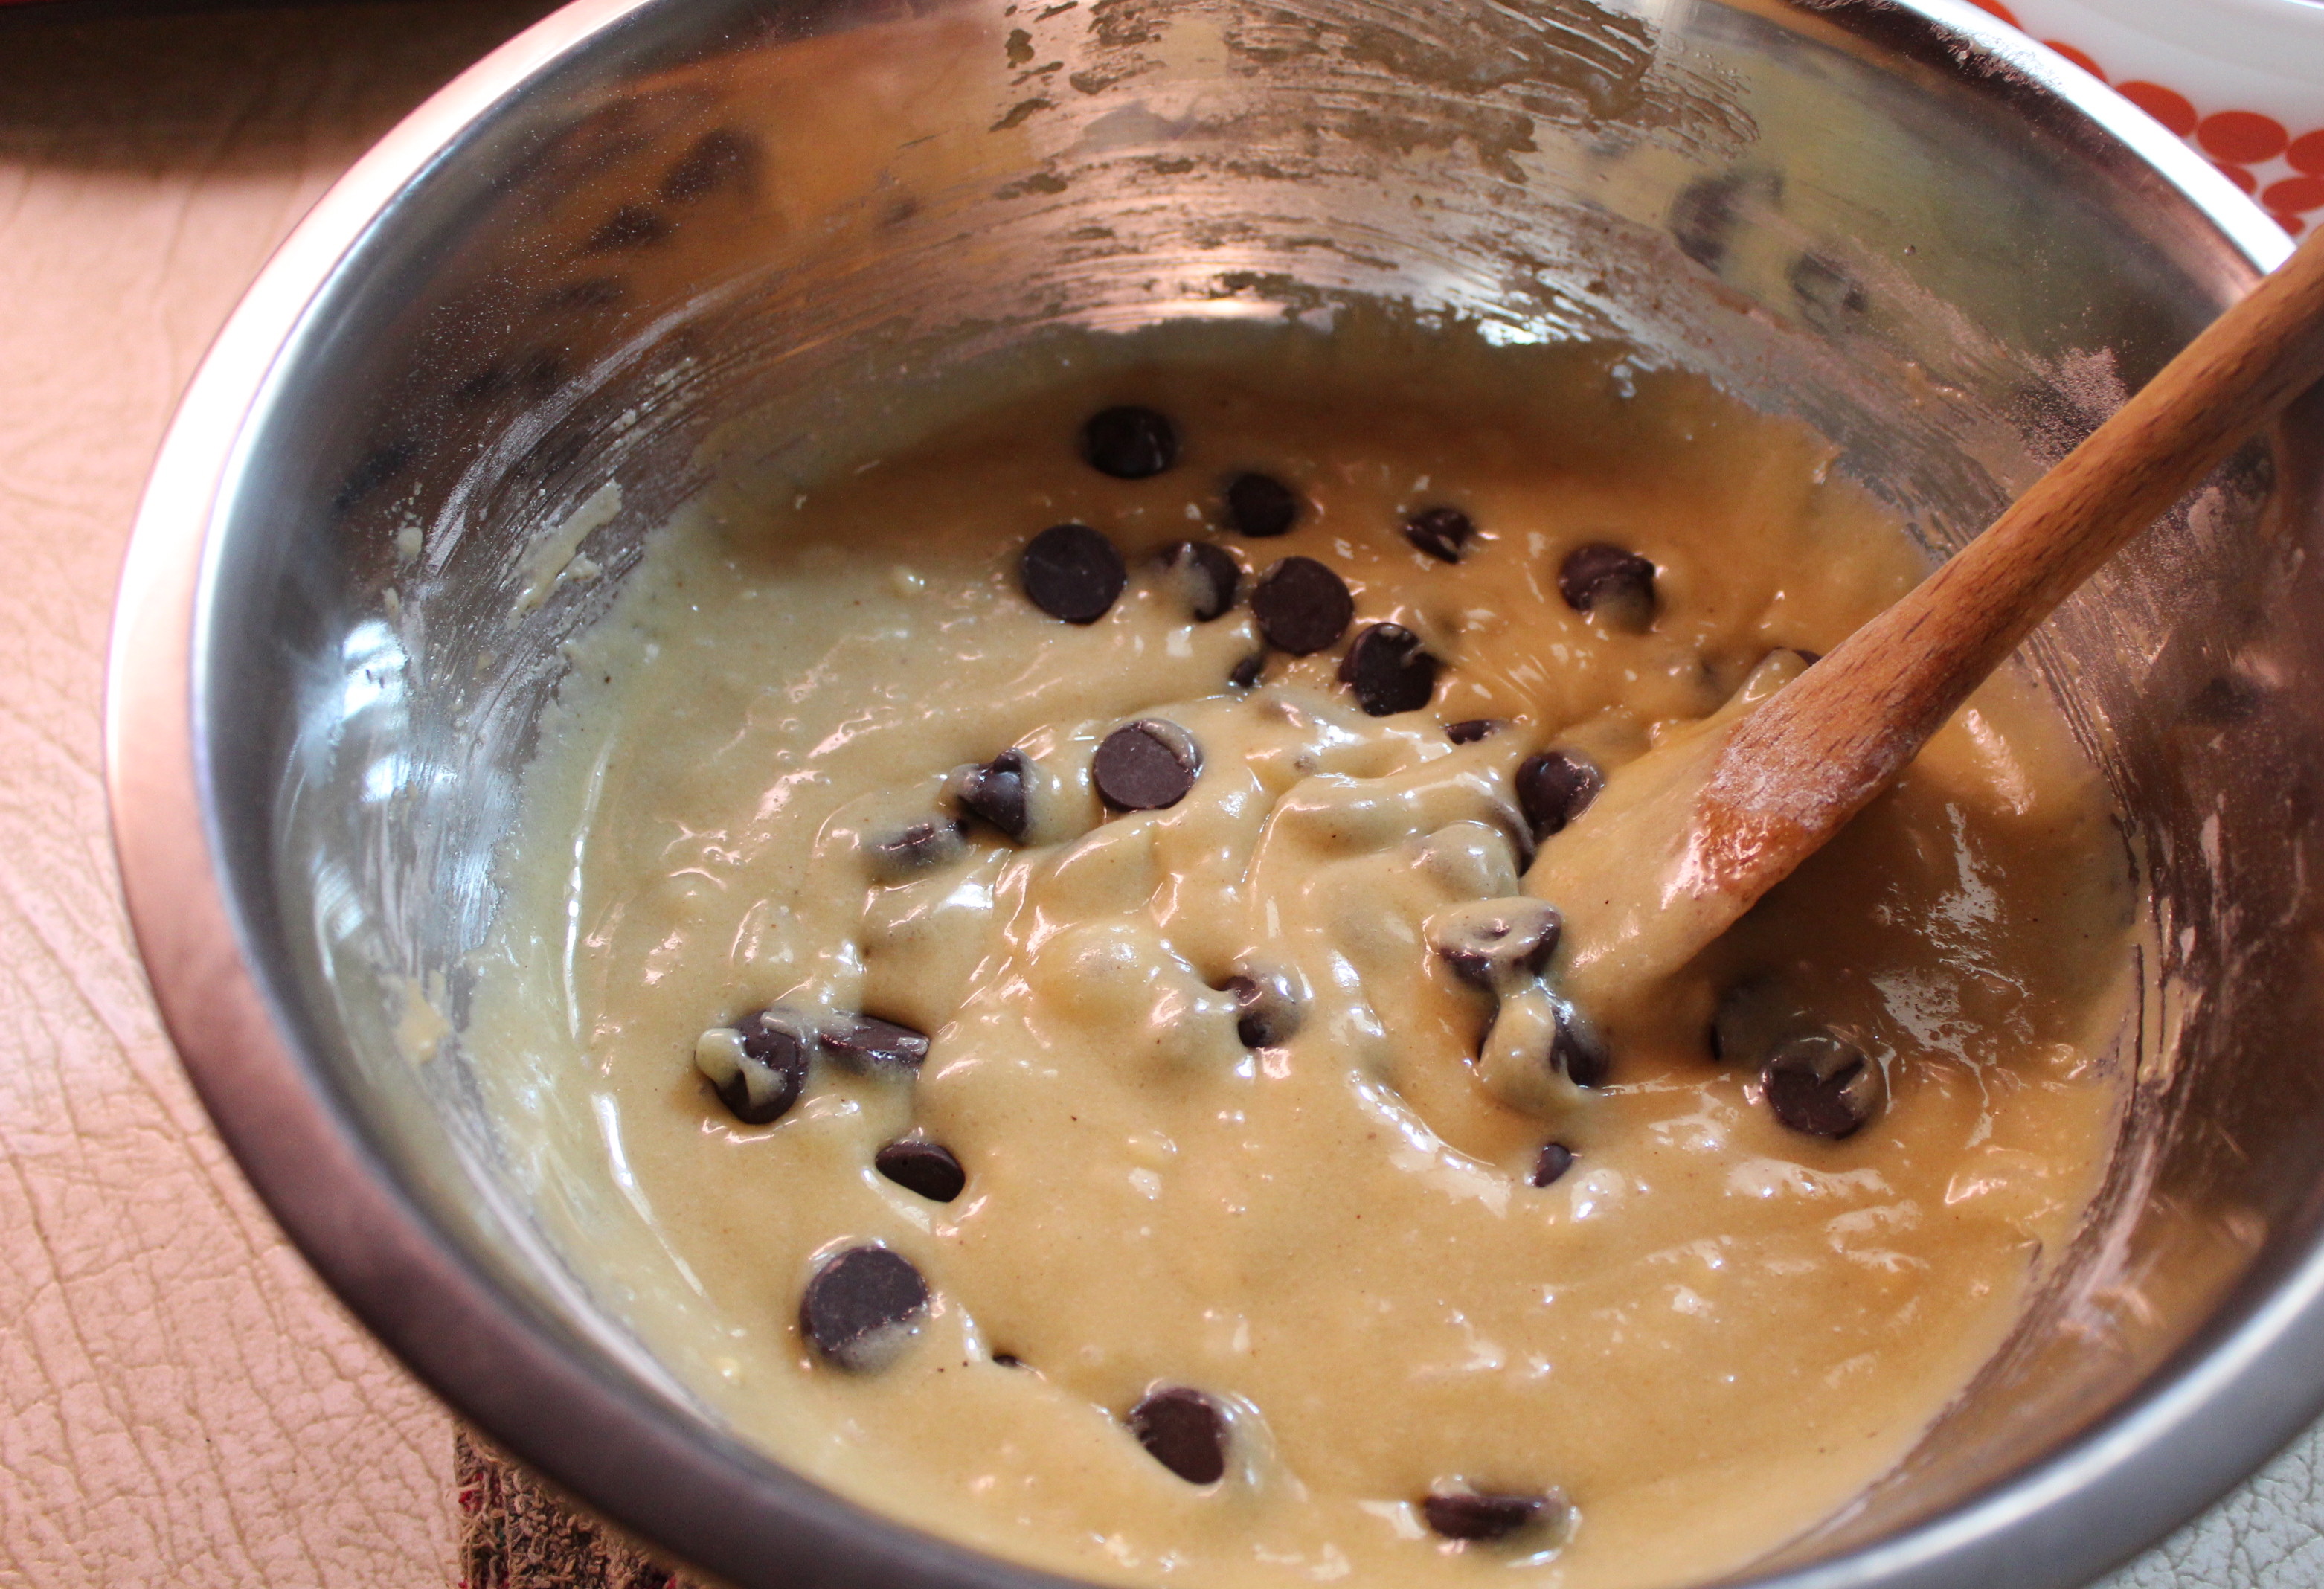
4.  In a large bowl, stir together the sugar, applesauce and egg.  Stir chocolate mixture into sugar mixture.  Add flour mixture and stir just to blend.

IMG_7391

Pour into prepared baking dish and top with the remaining 2 ounces of chopped chocolate.

Top batter with remaining chopped chocolate.

Top batter with remaining chopped chocolate.

5.  Bake about 40 minutes until a toothpick inserted in the center comes out with moist crumbs attached.  Let cool in pan on a wire rack.  Use the parchment to lift from the pan, cut into 16 squares.

Lift brownies from pan with parchment paper.

Lift brownies from pan with parchment paper.

Cut into squares to serve.

Cut into squares to serve.


SOURCE:   MarthaStewart.com

Advertisement

Dulce de Leche Fluff Brownies

Dulce de Leche Fluff Brownies

Dulce de Leche Fluff Brownies

So many celebrations this month!  May is one of the busiest months around here.  Beginning today with Cinco de Mayo and continuing right on through Memorial Day, I have something on my calendar every weekend, sometimes more than one event, and they all involve preparation of food on my part. I just hope I can keep up with it.  If I drop out of sight for a day or two you’ll know what happened…..I fell off the edge.

So,  today Mr. D. has an office pot-luck lunch in honor of Cinco de Mayo.  His co-workers have special dishes they prepare around that theme so I’m not going to compete with them,  I’ll tackle the dessert.   What I decided on are these Dulce de Leche Brownies.  Who doesn’t like brownies?   When you add toppings like Marshmallow Creme and Dulce de Leche plus chopped pecans…..swoon!!….If I were there, I’d start with dessert, thank you.

Imagine a fudgy brownie underneath all this gooey-ness.

Imagine a fudgy brownie underneath all this gooey-ness.

I just know these are fabulous brownies, I’ve made them before this.   I couldn’t taste them, however, because  when you bake for an event, you really can’t send a pan of brownies with one corner missing….. or can you?    Anyway I hope my photos get you salivating and anxious to try these wonderful brownies.  I omitted the chopped pecans on top because of possible nut allergies among the group of people who will be eating these.

DULCE DE LECHE FLUFF BROWNIES

Yield:    42 servings

Ingredients:

  • 6 0unces unsweetened chocolate, coarsely chopped

    A pan of brownies, + marshmallow creme, + dulce de leche=heaven.

    A pan of brownies, + marshmallow creme, + dulce de leche=heaven.

  • 1 cup butter
  • 2 cups sugar
  • 4 eggs
  • 2 teaspoons vanilla
  • 1  1/3 cups all-purpose flour
  • 1/2 teaspoon baking soda
  • 1 cup mini semisweet chocolate chips
  • 1  13.4- ounce can dulce de leche
  • 1  7-ounce jar marshmallow creme
  • 1/2 cup chopped pecans, toasted

Directions:

1.  In a medium saucepan cook and stir unsweetened chocolate and butter over low heat until melted and smooth.  Remove from heat; cool slightly.  Meanwhile, preheat oven to 350*F.  Line a 13 x 9-inch baking pan with foil, extending the foil over the edges of pan.  Grease foil; set pan aside. I omitted this step because my brownies are going to travel in the baking pan which has a cover—-much safer for Mr. D. to carry to work.

2.  Stir sugar into chocolate mixture.  Add eggs, one at a time, beating with a wooden spoon after each addition just until combined.  Stir in vanilla.  In a small bowl stir together flour an baking soda.  Add flour mixture to chocolate mixture; stir just until combined.  Stir in semisweet chocolate pieces.  Pour batter into the prepared baking pan, spreading evenly.  Bake for 20 to 25 minutes or until ages are set and center is almost set.

3.  Meanwhile transfer dulce de leche to a small microwave-safe bowl (or leave it in its jar if that is microwaveable).  Microwave on 100 percent power about 1 minute or until softened, stirring once.

4.  Remove brownies from oven and set pan on a wire rack.  Immediately spoon marshmallow creme in mounds on top of hot brownies. (Having a glass of water handy to dip knife blade into, makes dealing with the sticky marshmallow creme a whole lot easier.)

Drop mounds of marshmallow fluff on top of warm brownies.

Drop mounds of marshmallow fluff on top of warm brownies.

Drop spoonfuls of dulce de leche between mounds of marshmallow creme.  Let stand for a few minutes to soften.  Using a table knife or narrow metal spatula, gently swirl marshmallow creme and dulce de leche together to marble.  Sprinkle with pecans,  Cool in pan on rack.

Fill in the open spaces with dulce de leche, and swirl together.

Fill in the open spaces with dulce de leche, and swirl together.

5.  Using the edges of the foil, lift uncut brownies out of pan.  Cut into brownies, wiping knife as needed between cuts.

These brownies are oowey, gooey good!

IMG_7187


SOURCE:   Better Homes and Gardens

Black Bottom Coconut Bars


Black Bottom Coconut Bars

Black Bottom Coconut Bars

The name of these bars sounds like a dance right out of the “roaring 20’s”.  But, no, we are going to bake and eat them.  Oh, Yum!

IMG_6913

Coconut and chocolate is a flavor combination I particularly love, and recently I’ve had a craving for coconut. It’s been so bad that I over-bought coconut; would you believe in my pantry there are three bags of shredded, two bags of flakes, and a container of “chips”. Not to mention a large package of “bite-size” Mounds bars!!    What was I thinking?

If there’s one thing I’ve learned it’s that when a craving strikes the best thing to do is give in to it.  So I baked these bars.  A friend’s birthday was my reason for baking, but at the same time I reasoned, I could have 1-2 bars to “taste”, and hopefully that would be the end to my craving.  We’ll just see how that works out…..

IMG_6909

These bars are moist chewy brownies on the bottom, with a wonderfully, gooey, coconut-y mixture on top, and that layer is topped with more coconut that I toasted and sprinkled over all.   Let me tell you, it’s a good thing I gave most of these away or I could have eaten them all myself.   They are incredibly good.  I’m thinking they would make a perfect dessert for Easter. 😀

IMG_6915

If you like brownies and you like coconut, you really need to try these seriously addictive bars.

BLACK BOTTOM COCONUT BARS

Yield:   16 – 24 bars

Ingredients:

For the brownie layer:

  • 1/2 cup unsalted butter
  • 1/2 cup granulated sugar
  • 1/4 teaspoon salt
  • 1 large egg
  • 1/4 cup unsweetened cocoa powderIMG_0261
  • 1/4 cup all-purpose flour

For the coconut layer:

  • 2 large eggs
  • 3/4 cup granulated sugar
  • 1/2 teaspoon coconut extract
  • 1 cup all-purpose flour
  • 7 ounces sweetened, shredded coconut,  reserve 1/2 cup for sprinkling on top

Instructions:

1.  Preheat oven to 375*F.   Line a 9-inch square baking pan with parchment paper or foil, leaving an overhang.  Spray bottom and sides of paper lining.

2.  Toast the reserved 1/2 cup coconut by spreading on a baking sheet and baking for about 5 – 7 minutes.  Watch carefully that it doesn’t get too dark.  Stir twice during baking time.  Remove and set aside for later.

3.  Make brownie layer:  using a microwave-safe bowl, melt butter in microwave.  Whisk in sugar and salt.  Whisk in egg, then cocoa powder and flour.  Mix until smooth.  Spread evenly in prepared pan.

4.  Bake for 10-15 minutes.  The sides should be starting to pull away from the pan. Don’t over bake.  Set aside while you make the topping.

5.  Make coconut layer:  Whisk eggs with sugar and coconut extract.

IMG_0262

Mix in flour and coconut.  Drop mounds of topping onto chocolate base.  Spread and press into base with moistened fingers.  Sprinkle with the toasted coconut.

IMG_0264

6.  Bake 25 – 30 minutes, or until a toothpick inserted in the center comes out with moist crumbs attached.  Cool completely in pan.  Then remove from pan using the overhang.  Peel back paper or foil, and cut into bars.  Store in an airtight container for 3 -4  days.

IMG_6908

IMG_6912

IMG_6914

Don’t wait.   Go. Now. Make these bars.


SOURCE:  Adapted from Martha Stewart


Black and White Bars

Black and White Bars

Black and White Bars

Black and white, the classic color combination;  found in so many places.  In the fashion world with black and white you can’t go wrong.  I always feel as though I am well put-together when I wear it.  Any season, any reason it’s always right.  Think of a piano keyboard, another perfect example of this combination, and nothing can improve upon it.   Well, in this recipe for black and white bars, the same is true.  White chocolate with bittersweet dark chocolate make beautiful music together.  I can’t think of one thing to make them better.

So good!

So good!

They are pretty simple to make requiring one large bowl, a smaller one, and a hand mixer.  The recipe calls for baking them in a 9 – inch square pan, but I made a mistake and used an 8 – inch pan.  They came out quite thick, but for me, thicker is better, and more chewy.  So use what you have, remembering that if you use a smaller pan you need to bake them at least 5 minutes longer.  (test with a toothpick). You will not be disappointed in these bars, except maybe at how fast they disappear.  Be sure to get yours before they’re all gone!

BLACK AND WHITE BARS

YIELD:  16 squares

INGREDIENTS

  • 1 cup chopped white chocolate, or white chipsIMG_3617
  • 1/4 cup ( 1/2 stick ) butter
  • 3/4 cup granulated sugar
  • 2 teaspoons vanilla extract
  • 1/4 teaspoon nutmeg
  • 1/4 teaspoon salt
  • 2 large eggs
  • 1  1/4 cup all-purpose flour
  • 1/2 teaspoon baking powder
  • 1 cup bittersweet chunks or large chips

1.  Preheat the oven to 350*F.  Lightly grease a 9 – inch square pan

2.  Place the white chocolate, butter, and sugar in a heatproof bowl.  Heat at low power in the microwave for 1 minute intervals, or over simmering water, until the chocolate softens.  White chocolate is sensitive to to scorching, so watch carefully.

Melting the white chocolate, sugar and butter over simmering water.

Melting the white chocolate, sugar and butter over simmering water.

3.  When the butter is melted and the white chocolate looks soft, stir in the vanilla, nutmeg and salt.  Let the mixture cool to lukewarm,  then beat in the eggs.

Beating in the eggs.

Beating in the eggs.

4.  In a separate medium bowl whisk together the flour and baking powder; stir into the egg mixture.

Stir in the flour and baking powder.

Stir in the flour and baking powder.

Stir in 3/4 cup of the dark chocolate chunks.

Stir in the dark chocolate chunks or chips.

Stir in the dark chocolate chunks or chips.

Spoon the batter into a greased 9″ square pan, and sprinkle the remaining chocolate chunks over the top.

In the pan, ready for the oven.

In the pan, ready for the oven.

5.  Bake the squares for 25 minutes,  ( 30 minutes for a smaller pan), until light golden brown and the edges pull just slightly away from the pan.  Remove from the oven and cool before cutting.

It was hard to wait for them to cool.

It was hard to wait for them to cool.

I cheated a little and cut them before they were completely cool, so the chocolate is still warm and melty-like—nothing wrong with that–except you don’t get a nice clean cut.  Who cares when they taste this good!

SOURCE:  King Arthur Flour.com/recipes/bars

Peppermint Patty Brownies

Peppermint Patty Brownies

Peppermint Patty Brownies

York Peppermint Patties are one of my husbands’s favorite candies.  So I attempted to recreate those sweets in this brownie recipe.  The candy has a peppermint filling encased in a dark chocolate shell.  To make it into a quick recipe I started with a brownie mix which in this case is Ghirardelli Triple Chocolate Brownies that have chocolate chips in the mix.  After the brownies were baked according to the directions on the package and thoroughly cooled, I made the peppermint filling, then topped it with dark chocolate.

My intention was to casually drizzle the chocolate over the top so some of the white filling would show through. However I had just gotten the chocolate melted when I was interrupted, and couldn’t continue for a few minutes and so the chocolate began to harden in the bowl.  As you can see by the pictures, it went on in dabs rather than a drizzle.  The taste was unaffected by that, and the whole brownie did recreate the taste and cool sensation of eating a peppermint patty.  I keep them refrigerated as I just love them when they’re cold.  My husband thought my experiment was a success, even though they didn’t come out looking exactly as I had planned.

PEPPERMINT PATTY BROWNIES

SERVINGS    16

A.   Brownie Layer:   Prepare a boxed brownie mix that makes an 8 or 9 – inch pan of brownies, according to the package directions.

B.   Mint Layer:   In the small bowl of a stand mixer beat together till smooth and creamy:

  • 2 cups powdered sugar
  • 1 1/2 Tablespoon butter, softened
  • 3 Tablespoons milk,  half and half, or light cream
  • 1/4 teaspoon vegetable oil
  • 1/4 teaspoon vanilla
  • 1/4 teaspoon peppermint extract

Spread evenly over the brownie layer.

Spread peppermint cream over the brownie layer.

Spread peppermint cream over the brownie layer.

C..  In a small bowl place 1 cup dark chocolate chips, and melt in micro-wave for 1 minute.  Stir to smooth.  Spread or drizzle over the top of peppermint layer.

Spread, drizzle or "plop " chocolate over white layer.

Spread, drizzle or “plop ” chocolate over white layer.

Place in refrigerator to cool and firm up.  Cut into 16 squares and enjoy!

These are so cool and refreshing when served cold.

These are so cool and refreshing when served cold.

SOURCE:   slightly adapted from   How Sweet It Is

Another Elf!

Another Elf!

This is another of my elves. He usually sits in a cookie cutter on my kitchen window sill where he can watch all that I do.  However this morning I found him perched on an old scale that I keep on one of my cupboards.  I think he has been eating too many cookies and wanted to check his weight.   ( I think I should check mine too.  La-la-la )

Ballroom Dancing and Brownies

A few dancers on the floor.

I need to start getting myself geared up and thinking like a competitor. November is not so far away, when I will be out there on the dance floor dancing my heart out for the judges. That’s pretty much why I’m following my current diet plan. Besides that, I need to get totally immersed in ballroom dancing, and step up to the training that’s involved when I compete. When I’m not thinking about foods and cooking (and writing about it), I’m involved with my dance lessons. I take two private lessons and attend group classes –as many as I can manage–in a week. But that’s my usual routine. I will be increasing my lessons to 3/week and trying to get in as much dancing as I can to increase my tolerance and stamina. It’s a matter of really ramping up my activity level, working hard and keeping focused. Ballroom dancing is like any sport, needing strong muscles, balance, rhythm, and being aware of every part of your body as well as being in top physical condition. If you watched any of the Olympic athletes, I’m sure you have an appreciation for that.

The ladies’ gowns are so beautiful.

Well this past weekend I took some time out to attend a local, regional competition just to watch the dancers and to attend the banquet at the end of it all. There’s nothing like a competition to get you in the mood for competing. It’s a friendly environment with all the dancers supporting each other and people like me cheering them on. One thing I know about dancing is that it makes you hungry, and snacks as a source of energy, for those who are dancing, are always welcome. So I baked some brownies to bring along.

I’m not sure if my idea for these brownies is original or if I perhaps read about using pretzels with brownies in one of the many blogs I read, or some other source, but I did not have a recipe. What I did have was a package of peanut butter filled pretzels, so I decided to incorporate them into a nice fudgey brownie, ice the brownies with chocolate peanut butter ganache and put more pretzels on top. More is always better with me, as in: “you can never have too much of a good thing”. And when it comes to anything chocolate usually peanut butter is a good companion. I must confess that in this instance I took a shortcut and used a boxed brownie mix. Ghirardelli Brownie Mix is absolutely the best!

Another view of the dance floor.

PEANUT BUTTER PRETZEL BROWNIES

SERVINGS: 30

Preheat oven to 350 degrees. Grease the bottom of a 13″ x 9″ pan.

Prepare the brownie mix as the package directs for fudge brownies.

Crush about 1 cup of peanut butter filled pretzel bites, keeping some of the pieces large. ( mine were Clancy’s brand ) The easiest way to do this is put the pretzels in a zip-lock bag and pound lightly with a meat tenderizer, or rolling pin.

Pour half the brownie batter in the pan, sprinkle on the cup of pretzels, cover with the remaining brownie batter. Bake as directed on the package.

Let brownies cool completely in the pan. Ice with chocolate peanut butter ganache. Cut the brownies into squares ( 5 across by 6 down), and place one whole pretzel on top of each one.

CHOCOLATE PEANUT BUTTER GANACHE

2 cups semi-sweet chocolate chips

1 & 1/4 cups heavy whipping cream

1/4 cup creamy peanut butter

pinch salt

1. Place chocolate chips in a heat proof bowl.

2. Combine cream, peanut butter and salt over low heat. Stir until smooth. Increase heat to medium-low and, stirring constantly, heat until bubbles form along the edges of the pan.

3. Pour the hot cream over the chocolate chips and let sit for 5 minutes. The chips will become all melty like. Gently whisk the chocolate chips until the mixture is shiny and combined. Stop mixing when the mixture is combined or it will become kind of grainy. Let the ganache sit to thicken up a bit to spreading consistency. You can put it in the refrigerator, or place over a bowl of ice to speed this up if you are in a hurry.

4. Spread the ganache with an off-set spatula. Hide any left over ganache in the back of the refrigerator, because you will want to eat it with a spoon!

Raspberry Cream Cheese Brownies

This recipe was developed out of boredom with plain ole brownies.  Not that there’s anything wrong with a good brownie!  I’ll never turn away from one especially if served with a dab of ice cream.  But on this particular day I needed to bake something to bring to a pot-luck get-together, and since brownies are always a popular choice, I decided to dress these up  with the addition of a cheesecake swirl using cream cheese and some raspberry jam.  They turned out to be very moist and chewy, and somewhat decadent .

RASPBERRY CREAM-CHEESE BROWNIES

Servings;   16 brownie squares

FILLING INGREDIENTS

  • 1/3 cup sugar
  • 4 0z. 1/3 -less- fat cream cheese, softened
  • 2 teaspoons flour
  • 1/2 teaspoon vanilla
  • 1 large egg

BROWNIE INGREDIENTS

  • cooking spray
  • 3/4 cup all-purpose flour
  • 1/4 teaspoon baking powder
  • 1/4 teaspoon baking soda
  • 1/8 teaspoon salt
  • 1 cup sugar
  • 2/3 cup unsweetened cocoa
  • 1/4 cup butter, melted
  • 1 Tablespoon water
  • 1 teaspoon vanilla
  • 2 eggs
  • 3 Tablespoons raspberry preserves
  1. Preheat oven to 350 degrees.  Spray bottom only of an 8 inch square baking pan.
  2. To prepare filling, place filling ingredients in a medium mixer bowl; beat at medium speed until well blended.  Set aside.
  3. To prepare brownies,  combine flour, baking powder, baking soda and salt in a bowl and whisk together lightly.  Combine sugar, cocoa, melted butter, water, vanilla, and eggs, and stir well with a whisk.  Add the flour mixture, stirring just until moist.
  4. Pour/spread two-thirds of batter into prepared pan.  Pour filling over batter, spreading evenly.  Carefully drop the remaining batter and preserves by spoonfuls over filling;  swirl together using the tip of a knife to marble.
Bake at 350 degrees for 40 minutes or until a toothpick inserted in center comes out almost clean.  Cool on a wire rack.
 SOURCE:    This is the fusion of two recipes from Better Homes and Gardens The Complete Book of Baking

Mounds Brownie Bars

The recipe for these rich and chewy bar cookies came about as a result of a challenge given to me by a dear friend whose  favorite candy bar is a Mounds bar.  If I remember correctly it went like this:  “I wonder if you can make a bar cookie that tastes like a Mounds bar! ” Always up for a challenge,  I replied ” Oh, of course I can!”

The first thing I did was treat myself to a Mounds candy bar in order to examine how it is made, and savor the flavors that go into the total experience of eating one.  I must say this was really hard work, but I had to do it.  What I discovered was that it had a chocolate, chewy base, a coconut layer, chocolate covering and an almond underneath the chocolate.   This will be a piece of cake, I told myself.

And so I began the process of development, which included several attempts at getting the base just right.  Mr. D. was so good about eating my experiments;  he never complained about taste testing several kinds of brownies.  Finally I was satisfied that I had the right texture for the base.  The rest was the easy part:  the coconut layer with a hint of almond flavoring, and a chocolate frosting to cover.   I decided to top each bar with an almond, instead of placing them under the frosting, so each bar would have one,  and for folks allergic to nuts, it could be easily removed.

Here then, is my interpretation of  Mounds candy in cookie bar form.

Ingredients List

Brownie Layer:

  • 1 1/2 cups butter
  • 4 squares unsweetened chocolate
  • 2 1/4 cups sugar
  • 3 eggs, beaten
  • 1 cup all-purpose flour
  • 1 teaspoon vanilla

Coconut Layer:

  • 2 cups flaked coconut
  • 14 0z. can sweetened condensed milk
  • 1 teaspoon almond flavoring

Frosting:

  • 2 1/2 cups confectioners sugar
  • 3 tablespoons cocoa
  • pinch salt
  • 3 tablespoons butter, softened
  • 1/2 teaspoon vanilla
  • 3-4 tablespoons milk
  • 20-24 whole almonds
  1. Preheat oven to 350 degrees.  Lightly grease a 13 x 9 inch baking pan.  In a saucepan, over low heat, melt butter and chocolate; cool slightly.  Add sugar.  Stir in eggs, flour and vanilla.
  2. Pour into a greased  pan.  Bake at 350 degrees for 20 minutes.  Center will not be firm.  Remove from the oven.
  3. Meanwhile, combine coconut with condensed milk and almond flavoring.  Gently spoon and spread over partially baked base.  Return to oven and bake another 15 minutes, or until light golden brown.  Cool slightly.
  4. Blend frosting ingredients; beating 2 minutes until fluffy.  Spread over warm bars.  Top each bar with a whole almond.
  5. Taste tested and approved!  Oh, and by the way—-I successfully met the challenge.  My friend was duly impressed.   
SOURCE:  A Carolyn Original