Zucchini and Onion Gratin

Zucchini and Onion Gratin

Zucchini and Onion Gratin

I know that later in the summer we will be so overwhelmed by the amount of zucchini that is available, we won’t know what to do with it all, but right now the thought of making a zucchini baked dish with some tender young zucchini, seemed like a good idea to go with my grilled chicken menu.  And later on when all those zucchini show up on my doorstep, I’ll be returning to this recipe again, and again.

IMG_7579

The use of the term gratin in food preparation means that an ingredient is topped with a browned crust that can be made from breadcrumbs, grated cheese, eggs or butter.  A gratin is usually prepared in a shallow dish, then baked or cooked under an overhead grill or broiler to form a golden crust on top and is traditionally served in its baking dish, a gratin dish.

This recipe pretty much meets that description.  Using just a few key additives to enhance the rather bland flavor of zucchini, it turns out to be wonderfully flavorful.  Pre-broiling the zucchini helps to get them browned, and sprinkling a small amount of Parmesan cheese on top further forms a browned crisp crust.  You can serve this dish hot, but it’s also great at room temperature.

ZUCCHINI AND ONION GRATIN

Yield:  serves 6    ( Note:  1 serving is about 1 cup and equals 92 calories and 7 gm carbs.)
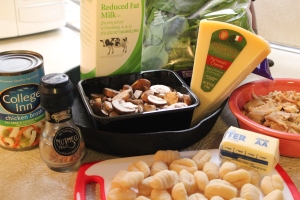
Ingredients:IMG_7565

  • 2 tablespoons olive oil, divided
  • 1 large onion, quartered lengthwise and thinly sliced
  • 1 tablespoon tomato paste
  • 2 teaspoons grated lemon rind
  • 1 teaspoon fresh thyme leaves, or 1/2 teaspoon dried
  • 3/8 teaspoon kosher salt, divided
  • 1/4 teaspoon ground black pepper
  • 1  1/2 pounds zucchini, diagonally sliced into 1/4-inch thick pieces
  • 1 oz. Parmesan cheese, grated (about 1/4 cup)

Directions:

1.  Heat a large skillet over medium heat.  Add 1 tablespoon oil to pan, swirl to coat.  Add onion; cook 6 minutes, stirring occasionally.  Stir in tomato paste, cook 2 minutes.   Stir in lemon rind, thyme, 1/8 teaspoon salt and  pepper; cook 2 minutes, stirring occasionally.

Sauté onions and thyme, then add tomato paste and lemon rind.

Sauté onions, then add tomato paste, thyme and lemon rind.

2.  Preheat broiler to high.

3.  Arrange zucchini on a jelly-roll pan.  Drizzle with remaining 1 tablespoon oil; toss.  Broil 7 minutes or until lightly charred.  Sprinkle with remaining salt.

Lay zucchini slices out on a baking sheet for broiling.

Lay zucchini slices out on a baking sheet for broiling.

4.  Preheat oven to 375*F.

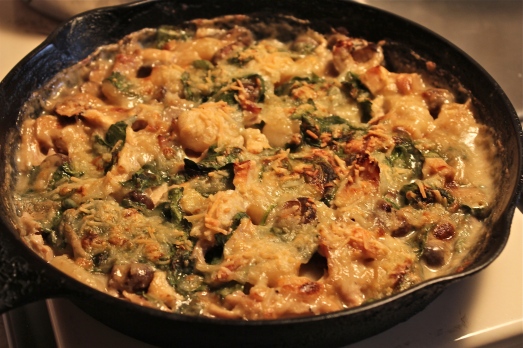
5.  Spread onion mixture in a 2-quart gratin dish.  Arrange zucchini mixture over onion mixture.  Sprinkle with cheese.  Cover and bake at 375*F. for 25 minutes.  Remove from oven.

Arrange in a baking dish and top with grated cheese.

Arrange in a baking dish and top with grated cheese.

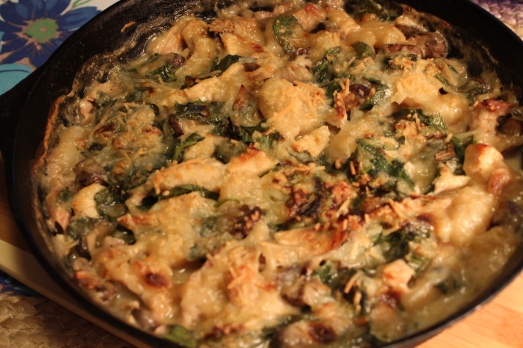
6.  Uncover zucchini mixture; broil 1  1/2 minutes to lightly brown the top if needed.   Note:  I thought mine was adequately browned after baking, so I omitted this step–use your judgement if it’s needed.

IMG_7578


SOURCE:   Quick Vegetarian Pleasures

Broccoli Mac and Cheese with Bacon

Broccoli Mac and Cheese with Bacon

Broccoli Mac and Cheese with Bacon

Comfort Foods!  Just those two words bring to mind certain foods that we grew up with, or crave at one time or another.  Maybe you’ve had a bad day, and just want a familiar meal that you know you love.  Perhaps it’s mid-winter, freezing cold, and you want something to eat that feels like being wrapped up in a warm quilt.  Or you just broke up with your boyfriend, best friend, or had to have a pet “put to sleep”.  You want food that will make you feel better, if that’s possible.  Food that gives you comfort is naturally called “comfort food”.

IMG_7499

Well, here’s a question that I’ve been pondering;  do you crave comfort foods in hot weather?  Aren’t comfort foods warm foods that give you a “warm fuzzy”?  I can’t think of any cold foods that do that, and in hot weather don’t we usually want cold foods to cool us off, so where do comfort foods fit in?

That is the dilemma I faced last week.  The weekend had served up warm, sunny days in the mid to high 80’s.  It was hot, we ate salads!   Come Monday, the temperature is in the 60’s, and its raining, cold and damp outside.  Then I go for my dance lesson, where every move I make gets corrected, and I can’t seem to do anything right.  (That’s an exaggeration, but it felt that way).  And to top it all off, I forgot to take something out of the freezer for dinner.  Does this day qualify for a comfort meal?  I thought it did.

This recipe for a variation on Mac and Cheese is my solution to wanting, no needing, something comforting to eat, but little time to prepare it, so let’s call this “Quick Comfort Broccoli Mac and Cheese with Bacon”.  Even though the calendar tells us it’s late spring or early summer, this dish was perfect for my needs.  And Mr. D.  loved it too, saying it was fabulous, and “hit the spot”.

IMG_7502

Note:  included here is a trick I learned at one time:  a little bit of turmeric enhances the color, making you perceive the sauce as cheesier than it actually is.  It adds no additional flavor of its own, it’s only there for color, so if it’s not in your cupboard, just omit it and use a yellow cheddar cheese.

BROCCOLI MAC AND CHEESE WITH BACON

Yield:  Serves 4IMG_7492

Ingredients:

  • 6 ounces uncooked large or regular elbow macaroni
  • 3 cups prechopped broccoli florets
  • 3 bacon slices, coarsely chopped
  • 1 tablespoon minced garlic
  • 1/8 teaspoon ground turmeric (optional)
  • 1 cup 1 % low-fat milk
  • 1 jar Alfredo Sauce with cheese
  • 1 1/4 cups sharp cheddar cheese, shredded

Directions:

1.  Cook pasta according to package directions, adding a little salt to the water.  Add broccoli to pan during last 2 minutes of cooking.  Drain.

Add broccoli to end of pasta cooking time.

Add broccoli to end of pasta cooking time.

2.  While pasta cooks, place bacon in a large ovenproof skillet over medium-high heat;  cook 4 minutes or until browned, stirring occasionally.  Remove bacon from pan with a slotted spoon.  Reserve 1 1/2 teaspoons drippings in the pan.  Add chopped garlic and the turmeric, if using.  Cook 1 minute, stirring throughout.

3.  Combine the milk with the Alfredo sauce, stirring with a whisk to blend well. Add to skillet with garlic, and mix together.  Bring to a simmer, and add 3/4 cup shredded cheese.  Stir to melt and blend in the cheese, stir in half the bacon.  Taste sauce and add salt and pepper if needed.

Making the cheese sauce with Alfredo sauce.

Making the cheese sauce with Alfredo sauce.

4.  Add the drained pasta and broccoli,  toss to coat.  Sprinkle remaining 1/2 cup cheese and remaining bacon over the top.

Add macaroni and broccoli to cheese.

Add macaroni and broccoli to cheese sauce.

Preheat the broiler to high.   Broil 2 minutes or until cheese melts and just begins to brown.  If time allows,  this dish could be baked for about 30 minutes, or until the cheese is melted and the top a little browned.

IMG_7498


Broccoli Mac and Cheese served with a salad.

Broccoli Mac and Cheese served with a salad.


SOURCE:   a Carolyn’s Originals


Orange Beef and Broccoli

Orange Beef and Broccoli

Orange Beef and Broccoli

On rare occasions we like to order Chinese take-out, and one of our favorite dishes is beef and broccoli.  The rice comes separate and I can limit or not take any rice if I choose not to, so I feel this is probably one of the healthier entrees that is available.

With this recipe I’m woking (pun intended) a little on the wild side, because I haven’t attempted to make this dish before now.  I don’t own a wok as the recipe suggests using, but any large heavy skillet will do fine.  The most time consuming aspect of the recipe is preparing the ingredients.  Have everything chopped, sliced, measured and ready to go before you start cooking, because once you turn on the heat, the cooking goes quickly.

IMG_7306

Orange rind and five-spice powder flavor the dish with sweet notes that are countered by a hit of red pepper’s heat.  Decrease the pepper for anyone who would prefer to walk on the mild side.  Serve rice on the side.

IMG_7307

I’m really enjoying using the asian seasonings I’ve acquired and now making use of.  They provide salty, sweet, sour, and spicy flavors.   Some essential basic ingredients that you might consider for your pantry are:  Siracha, a spicy chile sauce that saves you the time of working with fresh chiles;  brown sugar, an easy way to add instant caramel notes and some sweetness; lower-sodium soy sauce that provides deep umami notes;  dark sesame oil, intensely tasty oil that coats food with savory richness;  and rice vinegar, more mellow than most vinegars, only a splash brings flavors into balance.

Some basic seasonings for asian cooking.

Some basic seasonings for asian cooking.

ORANGE BEEF AND BROCCOLIIMG_7299

Yield:    serves 4

Ingredients:

  • 1 pound flank steak, trimmed  ( I used a strip steak)
  • 3/4 teaspoon five-spice powder
  • 3/4 teaspoon black pepper
  • 1/4 teaspoon kosher salt
  • 2 tablespoons peanut oil, divided
  • 2 cups small broccoli florets
  • 1  1/2 cups vertically sliced onion
  • 8 (1-inch) strips orange rindIMG_7301
  • 4 garlic cloves, thinly sliced
  • 1/2 cup unsalted beef broth
  • 3 tablespoons orange juice
  • 3 tablespoons hoisin sauce
  • 1 tablespoon lower-sodium so sauce
  • 2 teaspoons rice vinegar
  • 1 teaspoon cornstarch
  • 3/4 teaspoon crushed red pepper
  • 1/2 cup sliced green onions (garnish)
  • 2 tablespoons toasted sesame seeds (garnish)
  • 1 package precooked white rice such as Uncle Ben’s

Directions:

1.  Sprinkle steak evenly with five-spice powder, black pepper and salt.   Heat a large wok or skillet over high heat.  Add 1 tablespoon peanut oil to the pan; swirl to coat.  Add steak;  cook 4 minutes on each side or until browned.  Remove steak from pan; let stand 5 minutes.  Cut steak across grain into thin slices.

IMG_7303

2.  Return pan to high heat.  Add remaining 1 tablespoon oil, swirl.  Add broccoli, onion, rind, and garlic; stir-fry 3 minutes or until lightly browned.

IMG_7304

Combine broth and next 6 ingredients (through red pepper) in a bowl stirring with a whisk.  Add stock mixture to pan; cook 1 minute or until slightly thickened.

3.  To serve, spoon some rice onto a plate, top with 3/4 cup broccoli mixture and 3 ounces beef.  Sprinkle evenly with green onions and sesame seeds.

IMG_7305


SOURCE:   Cooking Light


Banana Upside-Down Cake

Banana Upside-Down Cake

Banana Upside-Down Cake

Upside-down cakes were something that we had often when I was growing up.  A one layer cake that had its own topping, therefore there was no need for frosting.  The only kind my mom made was with pineapple;  I never considered that there was any other kind.  That may be true for many of you too, because it is only recently that I’ve been seeing recipes that use other kinds of fruits for the topping.

IMG_7346

When my Spring edition of the Baking Sheet arrived last week it contained this recipe for Banana Upside-down Cake.  And what a happy coincidence,  I had two bananas just at that ready to use stage of ripeness.  In addition to the bananas the topping also includes raisins or cranberries, and chopped nuts.  Playing on the banana/tropical theme some spiced rum is included in the topping and in the cake.  There is no alcohol content left after baking, but the rum does lend its flavor to the cake in a subtle way.

IMG_7332

It’s absolutely best to serve this cake while it is still warm, with a whipped cream topping or ice cream on the side if you’re feeling indulgent.  This was a nice change from the usual pineapple upside-down cake, and we enjoyed it very much.

IMG_7347


BANANA UPSIDE-DOWN  CAKE

Topping ingredients

Topping ingredients


Yield:    8 servings

Ingredients:

 Topping:

  • 1/4 cup ( 1/2 stick) unsalted butter
  • 1/2 cup cup brown sugar
  • 1 tablespoon light corn syrup
  • 1 tablespoon spiced rum
  • 2 medium ripe bananas, sliced about 1/2″ thick
  • 1/4 cup raisins or dried cranberries
  • 1/4 cup chopped walnuts or pecans

 Cake:

  • 1  1/2 cups Unbleached Cake Flour

    Cake ingredients

    Cake ingredients

  • 1  1/2 teaspoons baking powder
  • 1/2 teaspoon salt
  • 2 tablespoons butter, softened
  • 2 tablespoons vegetable oil
  • 2/3 cup sugar
  • 2 large eggs
  • 1 teaspoon vanilla
  • 1/2 cup milk
  • 2 tablespoons spiced rum

Directions:

1.    Preheat the oven to 350*F.  Lightly grease an 8″ round cake pan that is at least 2″ deep.  If you don’t have one, use a 9″ pan.

2.  For the topping:  Melt the butter.  Add brown sugar, corn syrup, and rum and stir until well combined.  Pour into the bottom of the pan and pat even.  Arrange bananas, raisins (or cranberries) and nuts over this and pat down gently.

Arrange bananas and remaining ingredients in bottom of cake pan.

Arrange bananas and remaining ingredients in bottom of cake pan.

3.  For the cake:  Whisk together the flour, baking powder, and salt in a medium bowl; set aside.

Cream butter, oil and sugar thoroughly.  Add eggs and vanilla and beat well.

Add the flour mixture alternately with milk and rum to the creamed mixture, stirring and blending after each addition.  Gently pour the batter over the banana topping.

4.  Bake for 35 – 40 minutes or until the cake just begins to pull from the side of the pan.  Remove from the oven and allow to cool for 10 minutes before turning upside down on a serving plate.

IMG_7327


Turn out onto serving plate.

Turn out onto serving plate.


IMG_7333


Serve warm and enjoy.  YUM!

Serve warm and enjoy. YUM!


SOURCE:   The Baking Sheet,  King Arthur Flour

Braised Chicken with Honey Lemon Leeks

Chicken Thighs with Honey Lemon Leeks

Chicken Thighs with Honey Lemon Leeks

Some of the earliest vegetables to be harvested from the garden are those from the onion family.  Known as alliums, there’s more to these beauties than just the round white onions that we all know.  If you peel back the layers you’ll discover the delicate flavor of leeks, chives and young green onions.  Even the flowers taste good, and they make a lovely garnish on a platter when onions are in a starring role.


Leeks were in abundance at the farmer’s market this week;  big, fat ones with long white stalks.

Big fat leeks, honey and lemon.

Big fat leeks, honey and lemon.

If they have been growing in particularly wet, muddy soil, they can be somewhat of a challenge to clean, requiring much rinsing to remove the grit.  However these were exceptionally clean, and I couldn’t wait to cook something with them.  Mr. D’s most favorite soup is potato-leek soup, and that is what I usually make (I probably will still make some), but I decided to give this recipe a trial run because it incorporates honey to help caramelize the leeks.

IMG_7323

Using chicken thighs with bone, allows you to cook this dish slowly so all the flavors blend.  Lemon partners well with the leeks, which cook twice.  They are first sautéed, then roasted to meld with the honey and lemon.  This is a dish that takes you by surprise at how “stinking” good it is;  nicely browned chicken, and tender roasted leeks nestled together.  Serve with a salad and some garlic bread, or rice and a green vegetable.  I think you will love this chicken dish.

BRAISED CHICKEN WITH HONEY-LEMON LEEKS

Yield:    serves 4

Ingredients:IMG_7318

  • 4 teaspoons olive oil, divided
  • 8  bone-in skinless chicken thighs
  • 3/4 teaspoon kosher salt
  • 1/2 teaspoon freshly ground pepper
  • 1 tablespoon grated lemon peel
  • 4 cups thinly sliced leek (about 3 large)
  • 3 tablespoons fresh lemon juice
  • 2 teaspoons honey
  • 2 tablespoons chopped fresh parsley or chives (optional)

Directions:

1.  Preheat the oven to 400*F.

2.  Heat a large ovenproof skillet over medium heat.  Add 2 teaspoons oil; swirl to coat.  Sprinkle chicken evenly with 1/2 teaspoon salt and pepper.  Massage lemon rind into chicken.

3.  Place chicken in pan; cook 4 minutes on each side or until browned.  Remove chicken from pan and keep warm.

Browning the chicken.

Browning the chicken.

4.  Add remaining 2 teaspoons oil to pan swirl to coat.  Add leek and remaining 1/4 teaspoon salt; cook 15 minutes or until leek begins too brown, scraping pan to loosen browned bits.  Remove pan from heat; stir in lemon juice and honey.

Sautéing the leeks.

Sautéing the leeks.

5.  Return chicken to pan.  Mound leeks on top of chicken thighs.  Bake at 400*F. for 20 – 25 minutes or until a thermometer registers 165*, and juices run clear.   Garnish with fresh parsley or chives, if desired.


IMG_7321

SOURCE:    Cooking Light

Check out these other recipes that also incorporate leeks:

Pappardelle with Salmon and Leeks

Brown Rice Pilaf

Mushroom, Leek and Cheese Frittata

Broccoli Calzones

Broccoli Calzones

Broccoli Calzones

Oh. My. Gosh.   These are soooo good,  I did not want to stop eating them.  Do I have any regrets?   Yes, I wish I had made more to freeze.

Some calzones can be rather heavy because they are so loaded with filling that includes meat and cheeses, that after eating one, you’re done.  These, however, are lighter than that. The filling consists of chopped broccoli, ricotta cheese, Parmesan cheese and mozzarella used in moderation.  A pizza dough makes the outside, holding all that great filling.  Served with warm tomato sauce, i.e., spaghetti or pizza sauce, and a side salad,  this is a delicious and satisfying meatless meal.

IMG_7370

This recipe makes eight calzones that can be frozen before baking, so when you’re in the mood for one–or two–, just remove the quantity you want, and bake them frozen.  I made only half the recipe for a quantity of four calzones, and I’m regretting that I didn’t make the whole recipe.  It doesn’t take much extra time or effort to make more to freeze, and you’ll be so glad you did.  One of these would be great with a bowl of soup, or with a salad for a light meal.

Note:  the following recipe calls for frozen, chopped broccoli, but fresh broccoli may also be used.  Cut the broccoli into small florets and steam until tender before proceeding with the recipe.  The convenience of frozen store-bought pizza dough helps to speed up and simplify making this recipe, as does jarred tomato sauce.

IMG_7366

BROCCOLI CALZONES

Yield:   8 calzonesIMG_7356

Ingredients:

  • 1 tablespoon extra virgin olive oil
  • 1 medium onion, chopped
  • 2 packages (10 oz.) chopped broccoli, thawed
  • 4 garlic cloves, chopped
  • red pepper flakes to taste
  • 2 ( 1 pound) packages frozen pizza dough, thawed
  • 1 cup ricotta cheese ( can use small curd cottage cheese instead)
  • 1/2 cup grated Parmesan cheese
  • 1 1/2 cup shredded mozzarella, or pizza blend cheese
  • salt and pepper to taste
  • tomato sauce

Directions:

1.   Heat oil in a medium skillet over medium-high heat.  Add onion and cook till soft ( 4-5 minutes).  Add broccoli, garlic, and red pepper flakes.  Cook 5-7 minutes till any liquid has evaporated and mixture is hot.  Set aside to cool.

IMG_7358

2.  Preheat the oven to 400*F.  Prepare 2 baking sheets by lining with parchment paper.

3.  Divide each ball of dough into four ( 4) pieces.  On a lightly floured surface stretch each piece out.  First to a 3 x 4″ oval, then stretch again to 6 x 8″ oval.  Let dough rest as needed to relax before continuing to stretch it. Don’t worry if the ovals are not perfect, they almost never are.

Stretch dough pieces out into oval shapes.

Stretch dough pieces out into oval shapes.

4.  Stir cheeses into cooled broccoli mixture.  Season with salt and pepper.

Add cheeses to broccoli mixture.

Add cheeses to broccoli mixture.

5.  To assemble:  Spread about 1/2 cup broccoli mixture onto half of each dough piece.  Leave 1/2-inch border all around.  Fold over to form a semi-circle/ half moon.  Press edges to seal.  Cut two slits in the top of each one.

IMG_7362

Fold dough over filing the press edges to seal.

Fold dough over filling then press edges to seal.


6.  Using a wide spatula or bench knife, transfer the calzones to the baking sheets.  Reshape as needed.

IMG_7363

7.  Bake at 400*F for about 25 minutes, till golden brown.   Serve with warm sauce.


Serve with warm sauce.

Serve with warm sauce.

IMG_7369

To freeze for later use:  Proceed through step #5 above, then tightly wrap each calzone in plastic wrap, freeze until firm.  Transfer to zip-lock bags; label and date.  Freeze up to 2 months.  To cook and serve, unwrap and place on parchment-lined baking sheet.  Bake without thawing until golden, 35 – 40 minutes.

IMG_7368


SOURCE:   MarthaStewart.com


Bacon-Cheddar Chicken Tenders

Bacon-Cheddar Chicken Tenders

Bacon-Cheddar Chicken Tenders

Kids love chicken nuggets or chicken tenders, but how about adults?  Do you love them, too?  I know I do, yet I hardly ever think to make them.   With the laid-back holiday weekend just past, I wasn’t doing any heavy-duty cooking.   I just wanted to eat foods that were easy, and able to lend themselves to a picnic on the back porch.   No fancy serving dishes, or china plates with this meal.

IMG_7410

So with a package of boneless chicken breasts on hand,  I cut them into “fingers” and came up with this way of cooking them in the oven that resulted in crispy cheesy chicken dippers that were so easy to make and seriously delicious to eat.  These are friendly to kids and adults alike.  They can be used for snacking or as the basis for a whole meal, as I did here.  They were served with my mashed potato salad, celery and carrot sticks and ranch dressing to dip them in.  Mr. D. thought they were wonderful, and claimed the left-overs for his lunch this week.   What was the perfect dessert with this meal?   Brownie sundaes, of course 🙂

BACON-CHEDDAR CHICKEN TENDERS

Yield:   4 servings

Ingredients:

Line up pans in the order chicken will be dipped.

Line up pans in the order chicken will be dipped.

  • non-stick pan spray
  • 2 tablespoons all-purpose flour
  • 1 egg
  • 1/2 cup plain panko crispy bread crumbs
  • 1/2 cup finely shredded cheddar cheese, about 2 oz.
  • 1 (3-0z.) jar cooked real bacon bits
  • 1 pkg. uncooked chicken tenders, or skinless, boneless breasts, cut into strips
  • Ranch dressing for dipping, or make a chive and sour cream sauce, or
  • For sauce with a kick to it, try equal amounts mayo and sour cream plus add some sriracha sauce to it.

Directions:

1.  Heat oven to 400*F.  Spray a large cookie sheet with cooking spray.

2.  In a shallow foil pan or bowl, place the flour;  in another similar pan or bowl, place the egg.  With a wire whisk, lightly beat the egg with 1-2 teaspoons of water.

3.  In another deeper container, place the panko crumbs, cheese and bacon bits.

Panko, bacon, cheese mixure.

Panko, bacon, cheese mixure.

Dip the chicken first into the flour to coat, then the egg, and then into the crumb mixture, turning to cover all sides.  Place chicken on the cookie sheet.

IMG_7405

4.  Bake 15 – 20 minutes, turning once, until chicken is no longer pink in center and bread crumbs are golden brown.  Serve with dipping sauce.

IMG_7408


SOURCE:  A major adaptation of a recipe from Pillsbury

Egg-Drop Noodle Soup

Egg-Drop Noodle Soup

Egg-Drop Noodle Soup

Oodles of noodles is what’s in this soup.  And vegetables, asian seasonings, and eggs all swirled together in a chicken broth.  A light meal to be sure, one to have on hand for when you’re not starving,  just feeling a little peckish, and need something to stimulate your taste buds.   This is what I would want if I had been sick, and was just getting my appetite back.

IMG_7282

With healthy ingredients going into it, you’re bound to feel healthy after eating it.  Rich chicken broth, green onions, ginger, garlic, carrots, noodles and eggs.  Sounds like a prescription to me, but certainly not a bitter pill to swallow.  Think of it as a dressed up chicken soup.

IMG_7281

This recipe makes a large quantity of soup, but it keeps well refrigerated.  I’m not sure about freezing it–I think the already cooked noodles might get mushy, but have not tried it.

EGG-DROP NOODLE SOUP

Yield:   Makes 8 – 10 servings

Ingredients:

  • 8 cups chicken stock or broth

    Healthy ingredients, so good for you.

    Healthy ingredients, so good for you.

  • 1 teaspoon lower-sodium soy sauce
  • 1 teaspoon sesame oil
  • 1 (2-inch) piece fresh ginger, peeled and smashed
  • 3 cloves garlic, peeled and smashed
  • 3 medium carrots, peeled and sliced
  • 3 green onions, white and green parts, sliced
  • 2 packages ramen noodle soup, flavor packets discarded
  • 3 eggs, slightly beaten
  • salt and pepper to taste
  • 2 teaspoons cornstarch
  • 2 teaspoons water, or use 2 teaspoon saved chicken broth

Directions:

1.  In a large saucepan or soup kettle, combine the chicken broth, soy sauce and sesame oil.   Bring to a boil.

2.  Add the piece of ginger, garlic cloves, carrots, and all of the green onions, except for 2 tablespoons green parts–save these for garnish.   Return to a boil and simmer for about 10 minutes, until carrots are tender. With a slotted spoon, remove the ginger and garlic and discard.

IMG_7276

3.  Mix together the cornstarch and water to dissolve the cornstarch.  Pour into boiling broth and stir to combine.  Add the noodles (minus the flavor packets), and continue to cook for about 3 minutes.

4.  In a small bowl, whisk the eggs together with a little salt and pepper to taste.  While gently stirring the soup, pour in the egg mixture and stir to swirl and cook the eggs.  Remove from heat and serve with reserved green onions as garnish.

Served with a sandwich, this makes a light meal.

Served with a sandwich, this makes a light meal.


SOURCE:   adapted from Allrecipes.com


Baked Gnocchi with Chicken

Baked Gnocchi with Chicken

Baked Gnocchi with Chicken

Rotisserie chickens are so useful when you want to cook a dish requiring cooked chicken.  Whenever I buy a rotisserie chicken we always have the first meal from it as you would any roast chicken with appropriate side dishes and/or salad.  But the amount of cooked chicken that is left is a sizable quantity–I can usually get two more meals from it.  (Remember there are just two of us here.)  So that gives me plenty of opportunity to search out recipes that use cooked chicken in them.

IMG_6816

Besides making good use of the rotisserie chicken, this recipe also includes gnocchi, those little Italian potato dumplings that I’ve already introduced you to here.  It also includes fresh baby spinach and mushrooms in a very light cream sauce. The casserole is baked and then briefly run under the broiler, so the Parmesan cheese on top gets browned and crusty. As you can see by what’s left, we loved it!

IMG_6823

BAKED GNOCCHI AND CHICKEN

Yield:   Makes 4 servings

Chicken, gnocchi, spinach and mushrooms in a light cream sauce with cheese.

Chicken, gnocchi, spinach and mushrooms in a light cream sauce with cheese.

Ingredients:

  • 1 tablespoon extra-virgin olive oil
  • 8 ounces white mushrooms, sliced
  • Kosher salt and black pepper
  • 2 tablespoons unsalted butter
  • 2 tablespoons all-purpose flour
  • 1  1/2 cups whole milk ( I used 2% milk.  The added fat in the milk helps to thicken the sauce.)
  • 1 cup low-sodium chicken broth
  • 1/4 teaspoon ground nutmeg
  • 1/2 rotisserie chicken, skin removed, meat cut into small pieces (about 2 cups)
  • 1  (16-oz) package potato gnocchi
  • 1  1/2 cups loosely packed baby spinach
  • 1/4 cup grated parmesan cheese (about 1 ounce)

Directions:

1.  Position an oven rack in the upper third of the oven and preheat to 425*F.

2.  Heat the olive oil in a deep ovenproof skillet over medium-high heat.  Add the mushrooms, season with salt and pepper and cook, stirring occasionally, until lightly browned, about 4 minutes.  Transfer to a plate, and reuse the skillet.

Browning the mushrooms.

Browning the mushrooms.

3.  Melt the butter in the skillet over low heat; add the flour and cook, whisking, 3 minutes.  Whisk in the milk and chicken broth until smooth; simmer, whisking constantly, until slightly thickened, about 5 minutes.  Whisk in 1/2 teaspoon salt and the nutmeg.

Making the sauce .

Making the sauce .

4.  Add the chicken, mushrooms, gnocchi and spinach to the sauce and stir until coated and the spinach wilts.

Add chicken and gnocchi.

Add chicken and gnocchi.

Stir in the spinach.

Stir in the spinach.

Sprinkle with the parmesan, transfer the skillet to the oven and bake until bubbling, about 20 minutes.  Turn on the broiler; broil until lightly browned on top, about 3 more minutes.

The cheese topping gets browned and crispy,

The cheese topping gets browned and crispy,

Make a salad to go with it and you've got a meal.

Make a salad to go with it and you’ve got a meal.

SOURCE:   Food Network Magazine

Southwestern Egg Casserole

Southwestern Egg Casserole

Southwestern Egg Casserole

With Mother’s Day this weekend you may be thinking about having a mid-day brunch.  Egg-based casseroles are often what anchor a brunch menu, but sometimes they can be time consuming to prepare or you don’t get the timing right so they’re hot and ready to serve when everyone is ready to eat.   It gets a little tricky there.  I’ve had that experience, so when I want to serve a large egg casserole, I like to have it prepared in advance so I can pop it in the oven at just the right time and it will be cooked and served hot when everyone is ready.

IMG_7240

This casserole will meet that requirement.  It can be made in parts, and the parts put together quickly just before putting it in the oven.  What you do is cook up the sausage with onion and pepper,  mix up the eggs and cream, combine the two parts and add cheese. Now, all that can be done ahead and refrigerated.  The last part involves cutting up refrigerated  biscuits, laying them in a skillet or casserole, and pouring the egg-sausage mixture over them.  Top with more grated cheese and bake for 25 – 30 minutes.  Really easy and so so good.  This is a dish that can be spicy if you like it that way, or go easy on the spicy stuff to tame it down to your liking.

Mom will love this dish, especially if someone else is making it for her.   Hint, hint.  🙂

An egg casserole that Mom will love.

An egg casserole that Mom will love.

SOUTHWESTERN EGG CASSEROLE

Yield:  Servings,  8 – 10IMG_7230

Ingredients:

  • 1 package  (12-oz.) bulk chorizo or spicy pork breakfast sausage
  • 1/2 cup chopped onion
  • 3/4 cup chopped bell pepper, any color
  • 10 eggs
  • 1/4 cup milk or cream
  • 2 cups shredded pepper Jack or Mexican cheese blend ( 8-oz)
  • 1 teaspoon red pepper flakes
  • 1 can (16.3-oz.)  Grands Flaky Layers refrigerated original biscuits (Pillsbury or store brand)
  • 1 tablespoon vegetable oil

Directions:

1.  Heat oven to 375*F.  In a 12-inch ovenproof skillet, cook sausage, onion and bell pepper over medium-high heat, stirring frequently, until sausage is no longer pink; drain.  Remove mixture from skillet; set aside.

Cooking up the sausage, onion and pepper.

Cooking up the sausage, onion and pepper.

2.  In a large bowl, beat eggs and cream.  Stir in 1 cup of cheese, the pepper flakes and sausage mixture.

Mix sausage mixture into egg and cream mixture.

Mix sausage mixture into egg and cream mixture.

Separate dough into 8 biscuits.  Cut each biscuit into 6 pieces.

Cut each biscuit into 6 pieces.

Cut each biscuit into 6 pieces.

3.  Spread oil in bottom of skillet.  Place biscuits in skillet in an even layer.  Pour egg-sausage mixture over biscuits.  Top with remaining 1 cup cheese.

Ready for the oven.

Ready for the oven.

4.  Bake 25 to 30 minutes or until egg mixture is set and crust is deep golden brown.  Cool 5 minutes before serving.

Using the same skillet you cooked the sausage in is easy, and a black iron skillet conveys that “southwestern look”, but if you don’t have an oven-proof skillet, you can bake it in a greased or sprayed 13 x 9-inch baking dish.  Baking time should be the same, but start checking for doneness at around 20 minutes.

Puffed and golden, smelling wonderful.

Puffed and golden, smelling wonderful.

If you’re like me, and you like to have breakfast for supper sometimes,  this is a great dish to serve.  Just add a side salad.

Breakfast for supper.

Breakfast for supper.


SOURCE:    Pillsbury