Apple and Sage Pork Chops

Apple and Sage Porkchops

Apple and Sage Porkchops

When I was a young girl, my family lived next door to a farm, and on this farm they raised some pigs.  No, their name was not McDonald, but in addition to the pigs they raised cows for milking.  They also grew strawberries, and other fruits and vegetables and my family was often the lucky recipient of their over abundance.  Well one year I was witness to their slaughtering one of the pigs.  I won’t go into details, but suffice it to say that I will never forget it and for a long time afterward I would not eat pork of any kind.  As I grew older and became responsible for preparing meals for my family, the vivid memory faded, and I gradually got over it.  Pork came back into my diet and now I can say that it is a meat I like very much and look for different ways to prepare it.

I just got around to making this dish, but I’ve had the recipe for quite some time now.  Don’t know why I waited so long.  Actually it seems  like the perfect fall meal, and that’s about when I clipped out the recipe.  But some things just take time to get to.  No matter, it is outstanding whenever you make it.

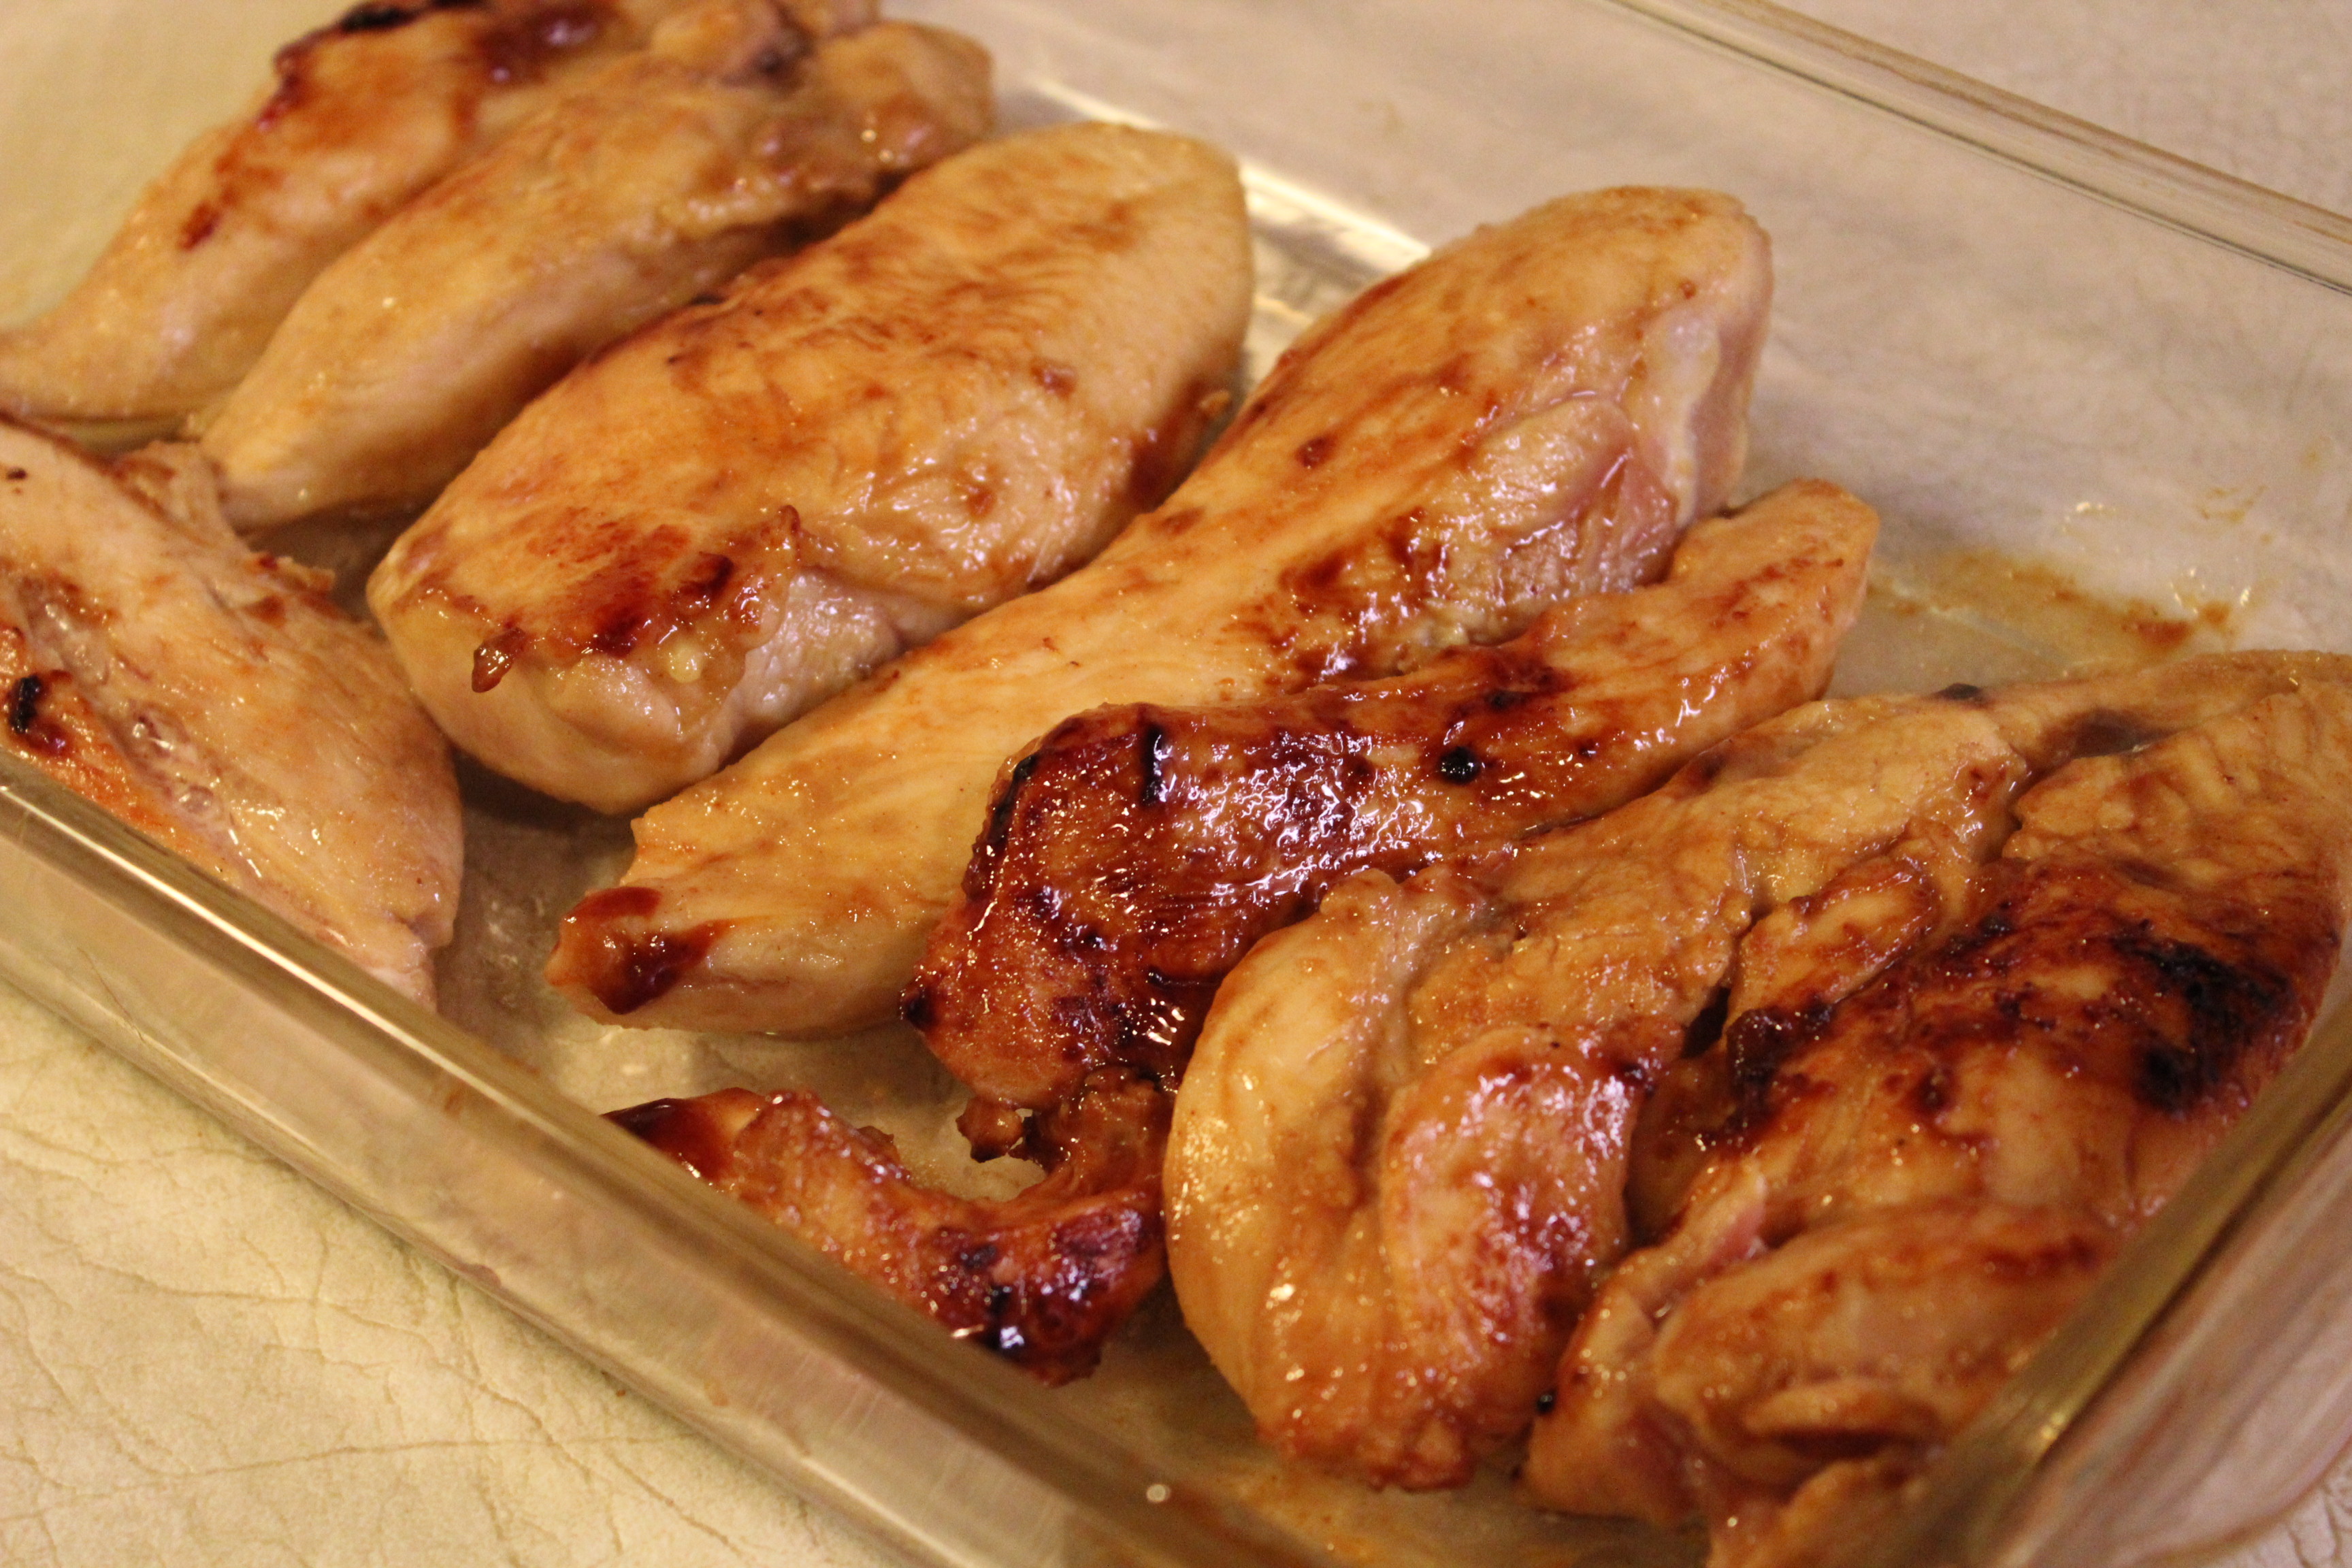
Pork chops—I used the boneless variety—apples, onions and a highly seasoned sauce.  Not a big time investment to make but a hugh payoff when you sit down at the table for dinner.  Wow! they were delicious.

IMG_3136

APPLE AND SAGE PORK CHOPS

SERVINGS:   4

YOU WILL NEED:

Cider, apple, onion and seasonings.

Cider, apple, onion and seasonings.

  • 4 pork chops, 1-inch thick, about 1 1/4 pounds
  • 1 Tablespoon flour
  • 1 teaspoon salt
  • 1 1/2 teaspoons rubbed sage
  • 1 teaspoon minced garlic
  • 1 teaspoon thyme leaves
  • 1/2 teaspoon ground allspice
  • 1/2 teaspoon paprika
  • 2 Tablespoons olive oil
  • 1 medium onion, thinly sliced
  • 2 red apples, cored and thinly sliced
  • 1/2 cup apple juice or cider
  • 1 Tablespoon brown sugar

DIRECTIONS

1.  Whisk together the flour, salt and all the seasonings in a small bowl.   Sprinkle both sides of pork chops with 1 Tablespoon of the seasoned mixture.  Pat lightly to make it adhere.

2.  Cook pork chops in hot oil in a large skillet on medium-high heat until browned on both sides.

Season chops and brown on both sides.

Season chops and brown on both sides.

Remove from the skillet to a plate.  Add onion to skillet; cook and stir 3 minutes or until tender.  Add the apples;  cook and stir 2 minutes.

Add onions, then apples to skillet.

Add onions, then apples to skillet.

3.  Stir in juice, sugar and remaining seasoned flour until well mixed.  Return pork chops to skillet.  Bring to a boil.  Reduce heat to low; cover and simmer 6 – 8 minutes or until desired doneness.

Return chops to skillet and continue cooking till done.

Return chops to skillet and continue cooking till done.

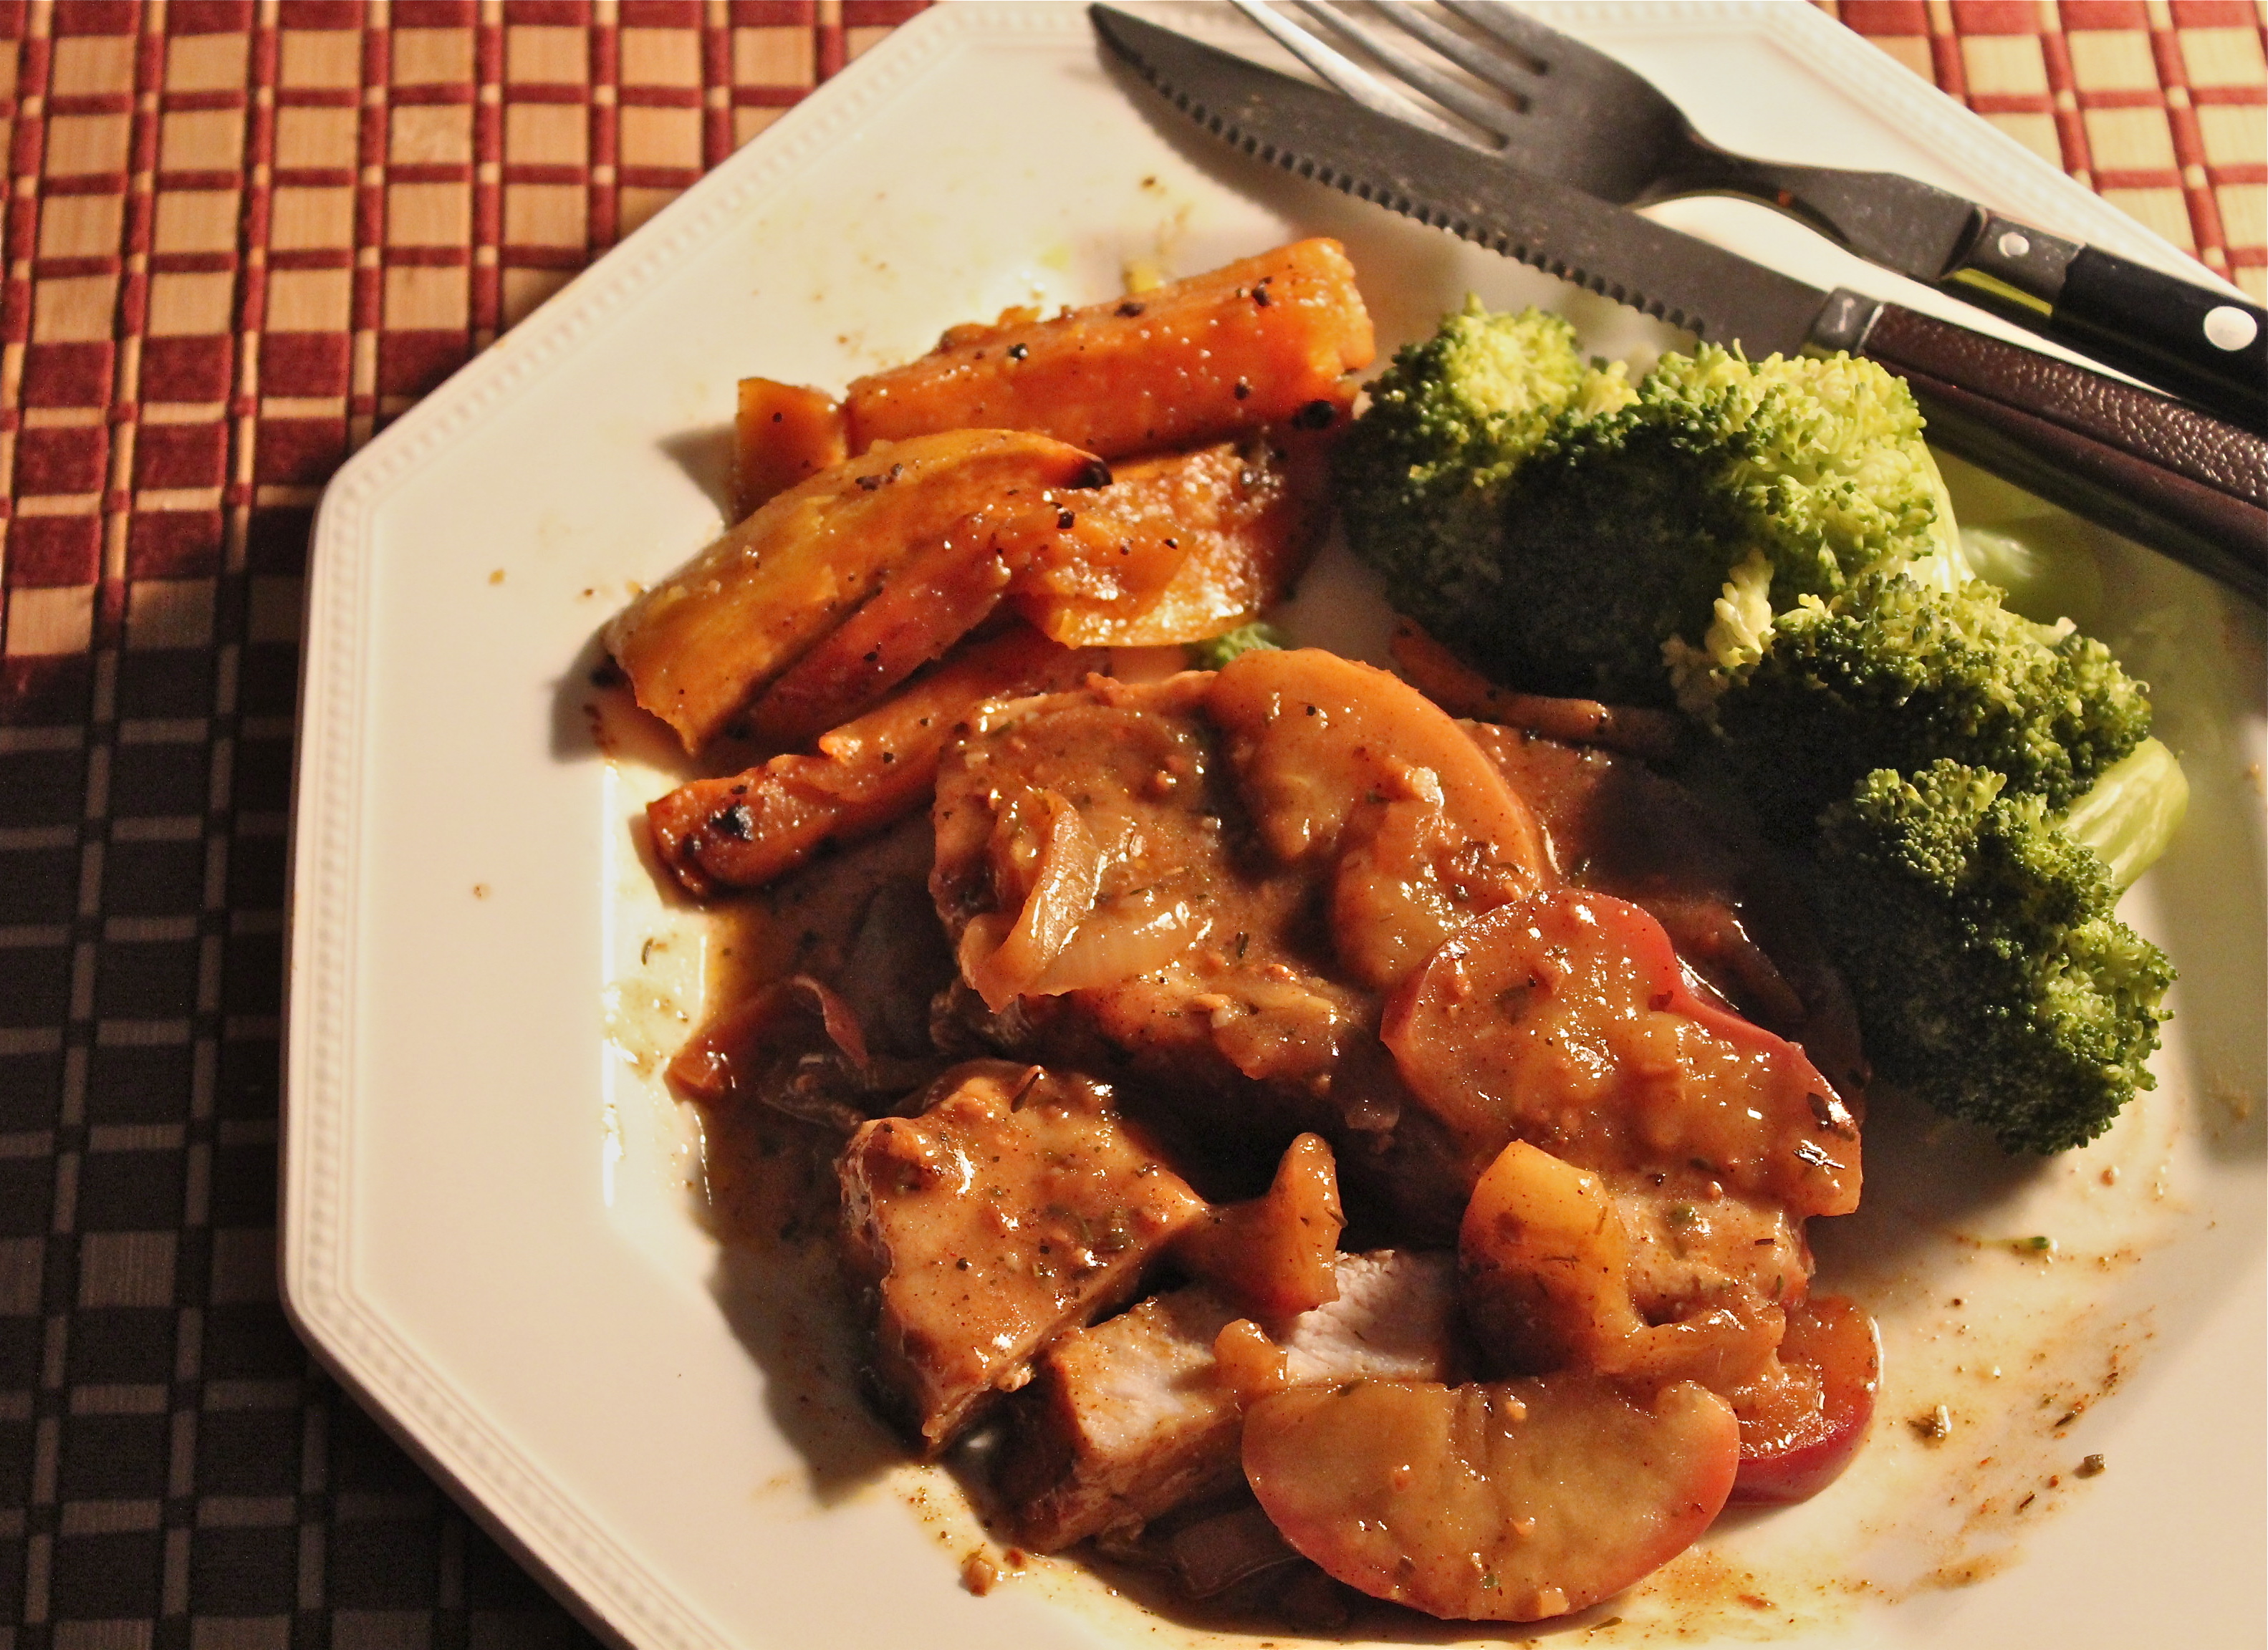
4.  To serve, arrange chops, onions and apples in a shallow bowl.  Pour sauce over all.

Arrange in a serving dish with apples and onions poured over chops.

Arrange in a serving dish with apples and onions poured over chops.

Served with broccoli and sweet potato.

Served with broccoli and sweet potato.

SOURCE:  Bon Appetite.com

Maple Soy Salmon with Roast Cauliflower

Maple-Soy Salmon

Maple-Soy Salmon

Since I went  a little hog-wild at the supermarket and purchased a lot of different forms of citrus fruits, now I’m in the situation of trying to use them in as many ways as possible.  Eating them peeled and sectioned “out of hand” and in fruit salads is a given.  A tangerine, a Mineola, or a clementine  make a quick snack any time.  I’ve already shared with you my recipe for Lemon Cream Squares here, so this week I will be featuring recipes that contain other forms of citrus.

Roast Cauliflower with Clementines, Cranberries, and Pistachios

Roast Cauliflower with Clementines, Cranberries, and Pistachios

One of the recent dinners I made was this one, Soy Maple Salmon with Roast Cauliflower.  Even  though you see no mention of a citrus in the title it’s there none the less, in both the salmon part and the cauliflower.  We thought this meal was fabulous and one that I want to repeat again soon.  During this season when seafood is also plentiful, I try to prepare a fish item at least once per week.  The total calories for these two items is under 400 calories, and only 18 Gm. Carbohydrate.  There is a bargain of goodness in this meal any way you look at it.

In planning my time to prepare this meal I found that if I roasted the cauliflower and made a salad while the salmon was marinating, I could then pop the salmon in the hot oven, finish the cauliflower dish and dress the  salad.

SOY-MAPLE SALMON

SERVINGS:    4

Marinating the salmon.

Marinating the salmon.

INGREDIENTS

  • 2  Tablespoons low-sodium soy sauce
  • 2  Tablespoons maple syrup
  • 1 Tablespoon fresh orange juice
  • 2 cloves garlic, smashed
  • 4   4-5 ounce salmon fillets

1.   Mix all the ingredients (except salmon) plus  2 Tablespoons water in a large bowl or zip-lock baggie.  Add the salmon and turn to coat.  Allow this to marinate in the refrigerator for about 20 minutes.

2.   When ready to cook, preheat the oven to 400*F.   Coat a rimmed pan with cooking spray.  Drain the fish, season with salt and pepper and place on the prepared baking sheet.  Bake until slightly golden and beginning to crisp around the edges, 8 – 10 minutes.  The salmon should be moist, and flake easily with a fork.

Note:  Salmon will be baked after cauliflower at a lower oven temperature.

ROAST CAULIFLOWER WITH CLEMENTINES, CRANBERRIES AND PISTACHIOS

SERVINGS:   4

INGREDIENTS

Cauliflower brushed with oil and ready for the oven.

Cauliflower brushed with oil and ready for the oven.

  • 1 small head cauliflower, trimmed and cut crosswise into 1/2-inch slabs
  • 3 Tablespoons extra virgin olive oil
  • coarse salt and freshly ground pepper
  • 2 clementines, zested and segmented
  • 2 Tablespoons dried cranberries
  • 2 Tablespoons whole or chopped pistachios
  • 1 teaspoon zest from clementines
  • 1 Tablespoon chopped fresh parsley

1.    Preheat oven to 450*F.  Arrange cauliflower on a rimmed baking sheet in a single layer and brush with 2 Tablespoons olive oil.  Season with salt and pepper.  Roast, flipping once, about half way through cooking time, until tender and a little charred at edges, about 25 minutes.

Cauliflower after roasting.

Cauliflower after roasting.

2.  Transfer to a serving platter with clementine segments and cover with foil to keep warm.  Turn down oven heat to 400*F to cook salmon.

3.  In a small saucepan, heat the remaining 1 Tablespoon olive oil, add the cranberries, pistachios, clementine zest, and a little salt and pepper to taste. Stir to heat through.  When ready to serve, drizzle over the cauliflower and clementines.  Sprinkle with chopped parsley.

IMG_3182

IMG_3180

This dinner entree is a mash-up of two recipes that I put together with some major modifications.

SOURCES:   Salmon:   Food Network Magazine;   Cauliflower:  Whole Living Magazine

Shades of Green

I’m thinking green, people.  I don’t mean environmentally green as in recycle, reduce, reuse or regift.  I mean the color green, as in grass,  spring,  shamrocks, emeralds,  (woo-hoo, my birthstone!).

Penne with Asparagus and Shrimp

Penne with Asparagus and Shrimp

What got me thinking along these lines was a display of fresh asparagus at the supermarket.  This vegetable says spring to me like no other so I had to buy some.  And then the question, ‘what shall I make with it?’  I pondered:  roast asparagus?  steamed asparagus with butter sauce?   asparagus with eggs?  No,  even though I like all those dishes, I wanted something more substantial that would make a whole meal.  So, remembering that I had a bag of frozen shrimp in the freezer,  ( remember my resolution not to forget about foods in the freezer?)  I decided on the following recipe for Penne with Asparagus and Shrimp.  This is a healthy, hearty, yet easy recipe that is good enough to serve to guests.  It also makes a great take-along lunch for the next day.

PENNE WITH ASPARAGUS AND SHRIMP

SERVES:   about 4 generously

INGREDIENTS

Beautiful green asparagus, shrimp, onions and garlic.

Beautiful green asparagus, shrimp, onions and garlic.

  • 1 pound penne pasta
  • 2 Tablespoons olive oil
  • 2 cloves garlic, minced
  • 1 medium onion, chopped
  • 1 cup white wine
  • 1/4 teaspoon crushed red pepper flakes
  • 2 Tablespoons butter
  • 1 pound fresh asparagus, trimmed and cut into 2-inch pieces
  • 1 pound peeled and deveined large shrimp
  • 2 Tablespoons lemon juice
  • salt and pepper to taste
  • 2 Tablespoons chopped fresh parsley
  • 1/4 cup grated Parmesan cheese, plus more for the table

DIRECTIONS

1.  Bring a large pot of lightly salted water to a boil.  Add the penne and cook until al dente, 8 to 10 minutes; drain

2.  Meanwhile, heat the olive oil in a large skillet over medium heat.   Stir in the garlic and onion, and cook until the onion has softened and turned translucent, about 5 minutes.

Onions doing their thing.

Onions doing their thing.

3.  Pour in the white wine, and simmer for 2 minutes.  Stir in the red pepper flakes, butter, and asparagus;

White wine, butter and asparagus added.

White wine, butter and asparagus added.

Cook until the asparagus is just tender, about 3 minutes.  Add the shrimp and lemon juice, continue cooking until the shrimp have turned pink and are no longer translucent in the center.  Season with salt and pepper.

Shrimp, lemon juice, and then pasta added.

Shrimp, lemon juice, and then pasta added.

4.  Toss the cooked penne pasta with the shrimp and asparagus mixture.  Sprinkle with parsley and Parmesan cheese to garnish.

This just keeps getting better and better!

Sprinkle on more Parmesan cheese.

Sprinkle on more Parmesan cheese.

Serve with more parmesan cheese at the table to sprinkle on each serving.

SOURCE:  AllRecipes.com

Chicken Yakitori Rice Bowl

Chicken Yakitori

Chicken Yakitori

I didn’t know what “Yakitori” was, since I had never had it, but I was willing to experiment with a new recipe.  The title was intriguing, and besides that it promised to take only 20 minutes cooking time.  On a Friday evening I’m usually looking for a quick-to-fix meal and this one seemed to fit the bill.

I glanced at the recipe initially and knew that I had everything on hand that it called for with the exception of snow peas, so while I was out doing some errands, I stopped at the market to get some.  Snow peas are tender and crisp, some with tiny peas inside the shell, but they do have a tough “string” along the side that needs to be pulled off.  So to prepare them for the recipe, you need to wash them, then remove the tips and the string.  Then each one gets cut in half lengthwise.

Snow peas, trimmed and cut diagonally lengthwise .

Snow peas, trimmed and cut diagonally lengthwise .

The bunch of green onions called for also need to be cut into 1-inch pieces.  Therefore you need to plan for some prep time for the vegetables. Once all that is done the rest goes together quickly.

Green onions cut into one-inch pieces

Green onions cut into one-inch pieces

The seasoning in this dish is achieved thru the use of Asian ingredients;  soy sauce, mirin (sweet rice wine), rice vinegar and peanut oil. Together they make a pleasant flavoring that is very enjoyable.  Mirin is low in alcohol content, and most of it cooks off in this recipe.  For a non-alcoholic version, substitute an equal amount of chicken broth and another tablespoon of rice vinegar.

Asian seasonings

Asian seasonings

CHICKEN YAKITORI RICE BOWL

YIELD:   Serves   4

  • 2  ( 3.5-ounce ) bags boil-in-bag basmati rice
  • 1/4 cup lower sodium soy sauce
  • 1/4 cup mirin  (sweet rice wine)
  • 3 Tablespoons sugar
  • 1 Tablespoon rice vinegar
  • 2 Tablespoons lower-sodium chicken broth
  • 3 teaspoons peanut oil, divided
  • 1 pound boneless chicken, either breast or thigh meat. ( If meat is thick cut in half lengthwise)
  • 8 ounces snow peas, halved lengthwise diagonally
  • 1 bunch green onions, cut into 1-inch pieces

1.  Cook rice according to package directions, omitting salt and fat.

2.  Combine soy sauce through chicken broth in microwavable bowl.  Heat on HIGH for 1 minute to dissolve sugar.  Stir, and set aside.

3.  Heat a large non-stick skillet or wok over medium heat.  Add 2 teaspoons peanut oil to pan; swirl to coat.  Add chicken pieces to pan; cook for 3 minutes on each side or until browned.

Lightly brown chicken pieces.

Lightly brown chicken pieces.

Transfer to a cutting board; cool slightly.  Cut into ( 1-inch ) strips.

4.  Return pan to medium-high heat; add remaining 1 teaspoon oil to pan.  Add snow peas and onions; sauté 2 minutes.

Saute snow peas and onions.

Saute snow peas and onions.

Add soy sauce mixture and chicken to pan;

Add in chicken pieces.

Add in chicken pieces and soy sauce mixture.

Cook 2 minutes or until liquid is syrupy and chicken is throughly cooked, stirring frequently.

5.  To serve, place 1 cup rice in each of 4 shallow bowls; top each serving with 1 cup of chicken mixture.

Serve over rice.

Serve over rice.

Our assessment of this recipe?  Both of us liked it well enough for me to make it again.  I am not generally fond of main course foods that  are sweet.  So for me,  it was a little too sweet.   Next time I will reduce the sugar to 2 Tablespoons from the 3 called for and I will probably add some matchstick cut carrots to the mix, just to get in another vegetable and for more color.

With some advance planning;  i.e. prepping the vegetables the night before and keeping them refrigerated,  this meal will go together quickly.  In the time it takes to cook the rice, you can have the chicken skillet made.

Chicken Yakitori

Chicken Yakitori

Source:   Cooking Light,  December, 2012

Quesadilla Casserole

Quesadilla Casserole

Quesadilla Casserole

We really like quesadillas, but for me they don’t hold enough food or variety of food to feel like I’ve eaten a whole meal, To remedy that situation I combined some typical foods found in TexMex dishes with south-western seasonings and flour tortillas into a casserole and baked it. That provided us with a satisfying, filling meal with all the flavor and cheesiness you would expect. I got the idea for this from a recipe on the back of a package of McCormick seasonings. This is what we had for dinner on Super Bowl Sunday. My husband commented that he hoped I would make it often because it contained every thing he likes into one casserole dish.

IMG_2980

The product I used for the seasoning is one put out by McCormick Spices. It is a little card with small amounts of different spices needed for a recipe. The recipe is printed on the back so that you can pick up any other ingredients you made need while you are at the grocery store. The spices used here are pretty commonly found in most kitchens so you may already have them. I know I did but I wanted to try the recipe so I bought the card.

The casserole turned out to be quick to make and really good!

You just need a few cans of vegetables; black beans, corn and green chilies, and a large can of tomato sauce.

Add a pound of ground beef, flour tortillas and some cheddar cheese and you will be all set to make an ooey, gooey, cheesy dish of yumminess.

QUESADILLA CASSEROLE

Ingredients probably already in your pantry

Ingredients probably already in your pantry

YIELD: Serves 6

  • 1 pound lean ground beef
  • 1/2 cup chopped onion
  • 2 tsp. chili powder
  • 1 tsp. ground cumin
  • 1 tsp. dried minced onion
  • 1/2 tsp. oregano
  • 1/2 tsp. crushed pepper (optional)
  • 16 oz tomato sauce
  • 1 can ( 15 oz. ) black beans, drained and rinsed
  • 1 can ( 8 3/4 oz. ) whole kernel corn, undrained
  • 1 can ( 4 1/2 oz. ) green chilies, undrained
  • 6 flour tortillas ( 8 -inch size)
  • 2 cups shredded cheese; cheddar, Monterey jack, or pepper jack

1. Brown beef and onion in a large skillet on medium high. Add tomato sauce, beans, corn and green chilies. Mix well. Stir in all of the spices except the red pepper. Bring to a boil, reduce heat to low and simmer 5 minutes. Add red pepper if desired.

Combine meat, vegetables, and spices in a large skillet.

Combine meat, vegetables, and spices in a large skillet.

2. Spread 1/2 cup of the beef mixture on the bottom of a 13 x 9″ pan, previously sprayed with non-stick spray. Top with 3 of the tortillas, overlapping as needed. Layer with 1/2 of the remaining beef mixture and 1/2 of the cheese. Repeat with remaining tortillas, beef an cheese.

Layer in baking dish with tortillas and cheese.

Layer in baking dish with tortillas and cheese.

Top with more cheese.

Top with more cheese.

3. Bake at 350*F. for 15 – 20 minutes till heated through and bubbly. Let stand 5 minutes before serving. Top with sour cream and guacamole if desired.

Serve it up, fragrant, cheesy and delicious.

Serve it up, fragrant, cheesy and delicious.

SOURCE: McCormick Seasonings

Alice Springs Chicken

Alice Springs Chicken

Alice Springs Chicken

One time when we were at Outback Steakhouse, I ordered Alice Springs Chicken.  The name of the dish, first of all, made me curious, but the description said it was boneless chicken breast in a honey-mustard marinade with bacon, mushrooms and melted cheese on it.  Well, with all those good things on one piece of chicken how could it not be good?  So, I ordered it;  and I was not disappointed in the least.  It was moist, a complex blend of flavors, crispy around the edges, and gooey with melted cheese.

I’ve thought about that chicken often and wished I could have it again.  And although I kinda remembered all the ingredients and how it tasted I didn’t know the proportions, or exactly how it was prepared.  Then just last week I saw a recipe for it on Zip List.  It claimed to taste just like the version served at Outback Steakhouse.  You know I had to try it!

People, you will love it.  It looks a little messy, but believe me, it is fantastic.  It tastes just like the one I remember having at OBSH.

Bacon, Mushrooms, Melted Cheese.  What's not to love?

Bacon, Mushrooms, Melted Cheese. What’s not to love?

ALICE SPRINGS CHICKEN

SERVES   4

INGREDIENTS

Honey Mustard Marinade:

A simple marinade locks in the flavor.

A simple marinade locks in the flavor.

  • 1 cup Dijon Mustard
  • 1 cup honey
  • 2 tsp. vegetable oil
  • 1 tsp. lemon juice

Chicken:

  • 4  skinless, boneless, chicken breast halves
  • 1 Tablespoon vegetable oil
  • 2 cup sliced mushrooms
  • 2 Tablespoons butter
  • salt and pepper
  • paprika
  • 8 slices bacon, cooked (I used precooked bacon)
  • 1 cup shredded Monterey Jack cheese
  • 1 cup shredded Cheddar cheese
  • 2 tsp. finely chopped fresh parsley

INSTRUCTIONS:

1.  Combine the mustard, honey, 1 1/2 teaspoons oil and lemon juice in a small bowl.  Whisk for about 30 seconds.  Pour half of the mixture into a zip-top bag.  Add the chicken breasts and marinate them in the refrigerator for about 2 hours.  My pieces of chicken were very thick, so I cut them in half lengthwise.

2.  Chill and save the remainder of the marinade for later.

3.  When ready to cook, preheat the oven to 375*F.   Using an ovenproof frying pan large enough to hold all the chicken, heat 1 Tablespoon oil over medium heat.  If you don’t have an ovenproof frying pan, you will transfer the chicken to a baking dish.

4.  Sear the chicken for 3-4 minutes or until golden brown on all sides.  Remove from the heat, but keep in the pan.  (Here’s where you may need to transfer to a baking dish.)

Browned chicken in a baking dish.

Browned chicken in a baking dish.

5.  In another smaller frying pan, melt the butter and saute the mushrooms just till they start to give up some of their liquid.  Remove from the heat.

Sauteing the mushrooms.

Sauteing the mushrooms.

6.  Brush the seared chicken breasts with a little of the reserved honey-mustard marinade.  (Not the portion the chicken soaked in.) Season the chicken with salt, pepper, and paprika.  Lay two strips of bacon crisscross on top of each piece of chicken.  Spoon the mushrooms onto the bacon, being sure to distribute them evenly over all the chicken.

Bacon and mushrooms on top of the chicken.

Bacon and mushrooms on top of the chicken.

Sprinkle the Monterey Jack cheese evenly onto each chicken breast followed by the cheddar cheese.

7.  Bake for 7 – 10 minutes or until cheese is melted and bubbly.  Sprinkle each piece with the chopped parsley before serving.  Put extra honey mustard marinade into a small bowl to serve on the side.

Sprinkle with chopped parsley before serving.

Sprinkle with chopped parsley before serving.

Served with herbed rice pilaf and a salad, this was a great dinner.

Served with herbed rice pilaf and a salad, this was a great dinner.

An idea for leftover chicken .  The next day, I made a sandwich from one of the pieces of chicken:  on a “sub” roll, spread both cut sides of the roll with Honey Mustard Mayonnaise,  lay a chicken piece on the bottom half of the roll, top with sliced tomatoes and lettuce.  This made a “man-sized” sandwich that my husband raved about..

SOURCE:   Family Favorite Recipes

Pork Tenderloin with Cheesy Polenta

Pork Tenderloin and Mushroom Sauce

Pork Tenderloin and Mushroom Sauce

With a name like pork tender loin you would expect this cut of meat to be tender, right?   I may be in the minority here, but I’ve had the experience where it wasn’t tender at all;  more like dry, stringy, tough.  Did I do something wrong that ruined it,  or was it the cut of meat?   Most of the recipes I see for pork tenderloin have you cooking it (in the oven) at a very hot temperature, for a short time.  This may be the method of choice, but it doesn’t give me the results I want.

One thing I know about cooking most meats, is that the outside of it needs to be sealed in some way in order to contain its juices within.  This is what makes a cut juicy.  Without this step, cooking it at a high temperature will only dry it out,  and that equals tough!

So, with that in mind, I experimented with a pork tenderloin that weighed about a pound.  The recipe that follows describes what I did, and I’ll tell you right now that I got the results  I wanted:  a juicy, tender piece of meat with the added benefit of deep umami flavor thanks to the browning of the meat and the mushrooms used in the sauce.  Served with a cheesy polenta to spoon the sauce over,  this meal was outstanding.  In the words of my husband, it was “plate-licking good”.

A moist cut of pork with mushroom sauce to spoon over polenta.

A moist cut of pork with mushroom sauce to spoon over polenta.

PORK TENDERLOIN with CHEESY POLENTA

SERVINGS:   about 4

  • 3 Tablespoons EVOO, divided
  • 1 pork tenderloin, about 1 pound weight
  • salt and pepper
  • 2 small – medium shallots, finely chopped
  • 1  8-ounce pkg. mushrooms, sliced
  • 1 cup chicken broth
  • 1/2 cup cream, light cream or half and half
  • 1 cup polenta ( cornmeal that cooks in 3 minutes)
  • 6 ounces shredded semisoft cheese, such as fontina, gouda, or jarlsburg
  • chopped flat-leaf parsley, or dried parsley, for garnish

1.  Preheat the oven to 375*F, and lightly spray a baking dish appropriately sized to the meat.

2.  In a large skillet, heat 1 Tablespoon oil over medium heat.  Season the meat all over with salt and pepper, and cook in the skillet, turning until browned, about 10 minutes.  Do not skimp on this step, it’s what produces the sear to keep the juices inside.

3.Transfer meat to the prepared baking dish.  Insert a meat thermometer into the thickest part of the meat.  Put into the oven and roast until the temperature registers 145*—-about 12 – 15 minutes.  When temperature has been reached, remove from the oven, cover with foil to keep warm and let rest while you continue.

4.  In the skillet, add the remaining 2 Tablespoons oil, and over medium heat cook the shallots and mushrooms until softened, about 5 minutes.  Add the chicken broth and simmer until reduced, about 3 minutes.  Cover and remove from heat.

5.  Meanwhile, in a saucepan, bring 3 1/4 cups water and the cream to a boil.  Whisk in the polenta.  Lower the heat to medium-low and cook, whisking, until thick, about 3 minutes.  Remove from heat and stir in the cheese;  season with salt and pepper.  Cover and keep warm.

6.  Transfer the pork to a cutting board and slice on an angle.  Arrange on a serving dish, top with mushroom sauce and garnish with parsley.  Serve with polenta.

Slice pork, pour mushroom sauce over top.

Slice pork, pour mushroom sauce over top.

Cheesy Polenta

Cheesy Polenta

IMG_2966

This meal can be completed by the addition of a green vegetable, such as green beans or broccoli.  In the event polenta does not appeal to you,  substitute mashed potatoes or rice to spoon the sauce over.  It will be very good however you serve it.

SOURCE:  A Carolyn Original

Slow Cooker Blade Steaks

Slow cooker blade steaks served with noodles and acorn squash.

Today was one of those days when I am very glad that I have a slow-cooker. Busy, Busy, Busy!  But I was still able to put an attractive and very tasty meal together and my husband and I really enjoyed it. The only time I spent on it was to saute the onions before putting everything in the crock pot early in the morning, and as the saying goes “set it and forget it”.

This recipe was originally  written using a pot roast which I often do make, but today I used blade steaks instead and got an extremely tender and flavorful result. You will note that the recipe calls for adding carrots and potato to the slow cooker with the meat, but for today I cooked some wide egg noodles to go with it.  The recipe produces a good quantity of gravy and so its good to have some thing that will go with the gravy like mashed potatoes or noodles.

To produce a successful meat in the slow cooker you need something to give lots of flavor;  in this case sun-dried tomatoes, herbs and garlic. You will also be using less liquid than oven or stovetop versions, but the moisture in the slow-cooker  plus meat juices will contribute to the gravy.

SLOW COOKER BLADE STEAKS

SERVINGS:   6-8

INGREDIENTS

  • 6-8 blade steaks, about 2 pounds
  • 1 1/2 teaspoons salt
  • 1 teaspoon pepper
  • 1 teaspoon olive oil
  • cooking spray
  • 1 large onion, chopped
  • 1 cup fat-free, less sodium beef broth
  • 3/4 cup red wine
  • 1/4 cup chopped, drained oil-packed sun-dried tomatoes
  • 1 teaspoon dried thyme
  • 4 garlic cloves, crushed
  • 2 bay leaves
  • 3 large carrots, peeled and cut into 1-inch pieces
  • 2 pounds baking potatoes, peeled and cut into 1 inch pieces

DIRECTIONS

1.  To prepare meat: sprinkle steaks evenly with salt and pepper.

2.  Spray the interior of the cooker insert with non-stick spray.  Place the meat in the cooker.

Blade steaks in the slow cooker insert.

3.  In a skillet, add olive oil, then onion and sauté 6-8 minutes or until lightly browned.  Add the broth and next ingredients through bay leaves.  Bring to a simmer.  Add the broth mixture to the slow cooker.  If using vegetables, arrange them around the meat.  Cover and cook 2 hours on HIGH, reduce heat to LOW and cook 4 hours more. Or start on LOW and cook 6-8 hours.

4.  To serve, remove bay leaves and discard,  serve with the gravy.

Blade Steaks with gravy , noodles and stuffed acorn squash.

SOURCE:  adapted from a recipe from  Cooking Light

Baby, It’s Cold Outside

Frigid, but beautiful.

Frigid, but beautiful.

Right about now, the thermometer reads 7 degrees, with a wind-chill factor of –18*!.   We are in a deep freeze and this is day number 6 of it.  Brrrrr!  What’s a body to do to keep warm?  First and foremost, stay indoors.  If that’s not possible dress in multiple layers, covering ears, nose and fingertips.

What I love to do in this kind of weather is Make Soup.  There is something soothing and warming just in making it, and then simmering away, it promises more warmth and comfort later when you eat it.  Since I live in the Northeast, and this area is  well known for its creamy New England style clam chowder,  what I am making today is a variation of it called Fish Chowder (chowda, as we say).

Creamy New England Fish Chowder

Creamy New England Fish Chowder

New England style chowder is a cream or milk based soup that always contains potatoes, onions, and clams or other kinds of seafood.  You can make it rich and thick using cream, or lighten it up with light cream or milk.  I usually make mine with milk to reduce some of the fat, so that I can use bacon and its drippings for additional flavor and to sauté the onions and celery.  You may have heard of another kind of chowder that is popular here.  It is a clear broth soup served mostly in Rhode Island and parts of southeastern Connecticut.  Rhode Island style  chowder contains potatoes, clams, onions, lot of seasonings and a clear broth made from clam juice.  Everyone seems to have their favorite kind and their own way of making it, believing that theirs is the best.

My recipe is one that I have had for a long time and  I think it came from a community cookbook put out by one of the churches in the area.  This version is easy to make and we all love it.  Top each serving with some crisp bacon bits and a shake or two of hot sauce to add a little spice.

CREAMY FISH CHOWDER

Seafood. potatoes, and bacon crisped.

Seafood. potatoes, and bacon crisped.

SERVINGS:  about 8

INGREDIENTS:

  • 3 strips of bacon
  • 1 Tablespoon butter
  • 1 Tablespoon olive oil
  • 1 large onion, chopped
  • 1 large or 2 medium stalks celery
  • 4 cups chicken broth
  • 4  medium potatoes, peeled and diced
  • 2 pounds cod or other firm white fish, cut into 1/2″ pieces***
  • 1/4 teaspoon Old Bay Seasoning, or to taste
  • salt to taste
  • ground black pepper
  • 1 ( 8 0z.) bottle clam juice
  • 1/2 cup all-purpose flour
  • 1 1/2 cups cream, light cream or milk

***I use 1 pound cod or other white fish and then add a can of clams with their juice, some bay scallops and small-medium shrimp to make the other pound of fish.

DIRECTIONS

1.  In a skillet, cook the bacon crisp.  Remove and drain on paper towels.  Set aside till serving.

2.  In a large soup pot melt the butter and olive oil, add bacon drippings.   Add the chopped onion and celery.  Sauté until tender.

Saute onions and celery.

Saute onions and celery.

3.  Add chicken stock and potatoes; simmer for about 10 minutes.

4.  Add the fish, and simmer another 10 minutes.

5.  Season to taste with the Old Bay, salt and pepper.  Mix together the clam juice and flour till smooth.  Stir into the soup.  Add the cream or  milk and heat but do not boil.  When heated through, serve in bowls, topped with bacon bits.  Shake on a dash of hot sauce if you like a little spiciness.

Sprinkle with bacon  bits to serve.

Sprinkle with bacon bits to serve.

Enjoy a bowl of hearty hot chowder and stay warm, everyone.

Hearty fish chowder.

Hearty fish chowder.

Not My Mother’s Meatballs

Swedish Meatballs

Swedish Meatballs

I grew up in a household where meatballs were served regularly.  Mostly they were the kind made by church ladies for potluck suppers–my mother being one of them.  I remember gobbling up tiny sweet and sour meatballs made as appetizers,  giant-sized Italian meatballs balancing on top of a plate of spaghetti, and then there were the Swedish meatballs, floating in a gravy rich with sour cream.  So with a foot in both the Swedish and Italian heritage  communities, I think I know something about meatballs.

As I grew older and had a family of my own I developed my own meatball-making style.  They’re still a comfort food to me, but I’ve tried to make them healthier by using leaner meats, less fats in the sauce or gravy, and more spices to increase flavor.  Meatballs make a satisfying meal and can almost always be made ahead and frozen.  I like to make twice the amount I need for a meal and freeze the extras.  It’s reassuring to know you have the basis for a meal that can be prepared quickly when you don’t have time to cook.

These are the six principles I keep in mind when making meatballs:

1.  Keep it lean.  Opt for meat that is 90% lean.  If you want to use a fattier meat, such as pork for flavor, combine it with something leaner like turkey breast which is 99%lean.

2.  Use whole grain binders.  Typically meatballs use bread or breadcrumbs as a binder.  Use wholegrain versions or brown rice to add fiber and nutrients.

3.  Use plenty of herbs and spices.  The saying “fat equals flavor” is true, but if you cut back on fat you must make up for its flavor by adding dried or fresh herbs and spices to bump up the flavor.

4.  Change how you serve them.  A healthier meatball is great but not very  appetizing if served over a pile of white rice.  So think of other sides to pair them with like polenta, whole wheat noodles, or brown rice.  If you’re making a meatball sub use a whole grain roll.

5.  Don’t overmix.   Be careful to mix the ingredients just till they’re combined and handle gently when forming the meatballs, otherwise they will be tough.

6.  Cook smarter.  There is no need to cook meatballs in tons of oil… If cooked in a skillet , just a tablespoon of olive oil will provide enough lubrication to get them started.  The advent of non-stick pans has been a great help in this regard.  Meatballs can also be baked on a baking sheet lined with foil for easy cleanup.

In the weeks ahead I would like to share with you a few of my recipes for meatballs, so today we will start with Swedish meatballs.

IMG_2732

SWEDISH MEATBALLS

SERVINGS:   about 5

INGREDIENTS

  • 1/2 cup finely chopped onion
  • 1/4 cup dry breadcrumbs, whole wheat if possible
  • 1/4 teaspoon ground nutmeg
  • 1/4 teaspoon allspice
  • 1 egg
  • 1/4 cup milk or beef broth
  • 1 lb. lean ground beef
  • 1 can condensed cream of mushroom soup
  • 1 12 oz. can evaporated milk
  • 1 Tablespoon chopped parsley for garnish

1.  Preheat oven to 350* and spray a 2-quart baking dish with non-stick spray.

2.  In a large mixing bowl whisk together the egg and the milk ( or beef broth).  Add the dry breadcrumbs and spices, and mix with the egg mixture.  Allow to stand a few minutes to allow the breadcrumbs to absorb the liquid.  Add the chopped onion and crumbled  beef.

Gently mix together all the ingredients.

Gently mix together all the ingredients.

3.  Mix all together lightly, and shape into 1 inch balls.  Place on a lightly greased baking sheet.

Meatballs are about the size of golf balls.

Meatballs are about the size of golf balls.

4.  Bake at 350* for about 20 minutes.  Remove from the oven and drain the meatballs if needed.  Place in the greased baking dish.  In a separate bowl, whisk the soup with the evaporated milk until smooth.  Pour over the meatballs.

5.  Return to the oven and bake for another 15 – 20 minutes to heat through.  Sprinkle with parsley before serving.

Meatballs served over whole wheat egg noodles.

Meatballs served over whole wheat egg noodles.

SOURCE:   This is a major modification of my mother’s recipe.