Sausage, fennel and ricotta pizza.
Friday evenings feel like pizza night to me. Not always, but quite frequently I make it for dinner. When you make it often you need a variety of toppings to fall back on- at least I do. As I have said previously, variety is the spice of my life. I get bored easily with the repetition of the same foods, and pizza is one of those foods that lends itself to whatever you may have on hand to put on it.
Last week’s version ended up with a crazy combination of things, that somehow worked together, and became an instant favorite. I’m writing this down so that I don’t forget it. It started with a roll of refrigerated pizza dough from the supermarket. This was my first time using this particular product. I usually use a ball of dough from the bakery department. The pizza dough was very easy to use. Just unroll it onto your pan and with your fingers press it out to fit. Make it thick or thin; however you like it.

The toppings consisted of half pound of sausage meat, half a fennel bulb, thinly sliced, some sliced red onion, and ricotta cheese to which I added some Italian herbs and minced garlic. A pizza like this could be vegetarian by omitting the sausage and adding in some other vegetables like broccoli, and/or peppers. In place of the fennel, you might use baby spinach.
SAUSAGE, FENNEL AND RICOTTA PIZZA
YIELD: 8 slices
INGREDIENTS
- 1 12 oz. roll refrigerated pizza dough
- 1 -2 links Italian turkey or pork sausage
- 1 cup thinly sliced fennel bulb
- 1 Tablespoon cornmeal
- 2 Tablespoons pesto
- 1/3 cup part-skim ricotta cheese
- 1 teaspoon minced garlic
- 1/2 teaspoon dry Italian seasoning
- 1/3 cup thinly sliced red onion
- 2 teaspoons fennel seeds (optional)
- 1/2 teaspoon crushed red pepper
- 1/2 teaspoon black pepper
- 1/8 teaspoon kosher salt
1. Remove pizza dough from refrigerator and bring to room temperature while oven preheats. Preheat oven to 450*F. Lightly grease a pizza pan, baking sheet, or pizza stone. Sprinkle cornmeal evenly on baking pan or stone.
2. Heat a large nonstick skillet over medium-high heat. Remove casings form sausage. Crumble and add to pan, cook 4 minutes or until lightly browned. Add fennel bulb; cook 4 minutes or until tender.
3. Roll pizza dough into a 16 – inch oval and place on baking sheet, or press into the pan with your fingers.
4. Brush the dough evenly with the pesto. Sprinkle the sausage mixture evenly over the dough. Combine ricotta with the minced garlic and Italian seasoning in a small bowl; top pizza with teaspoonfuls of ricotta mixture. Sprinkle red onion and remaining ingredients evenly over pizza.
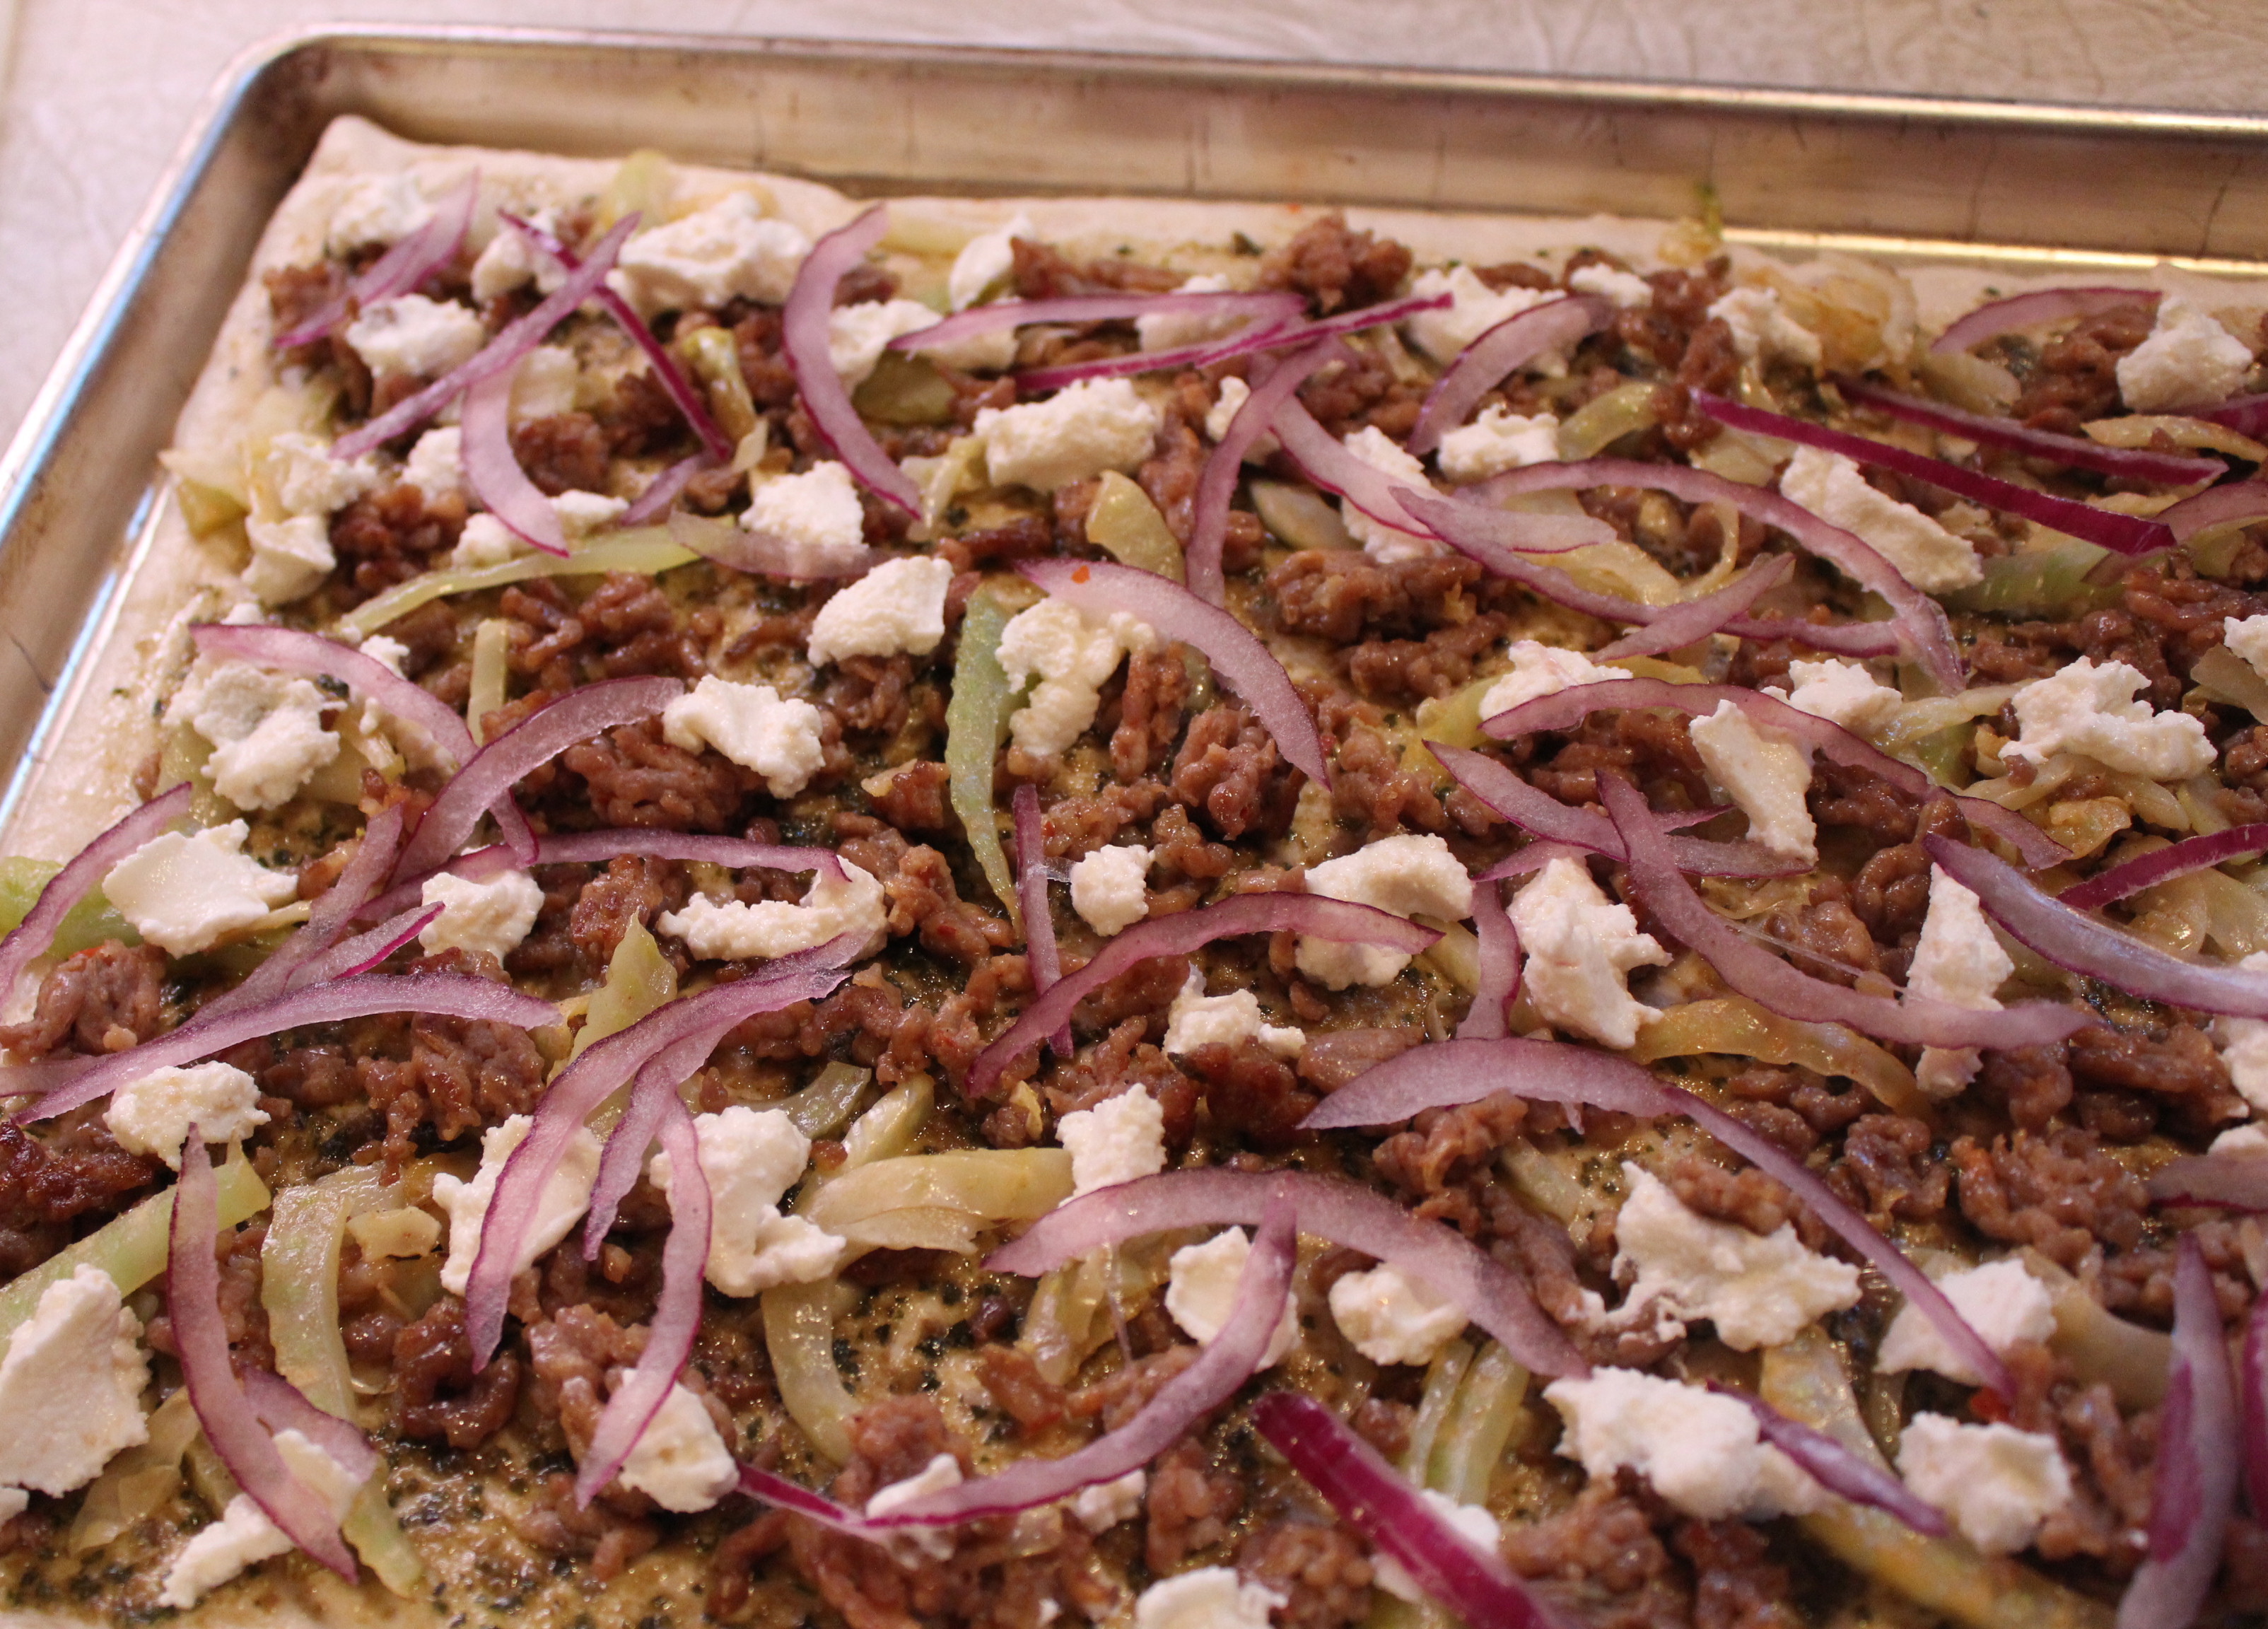
Layer on all the ingredients.
5. Bake at 450*F for 10 – 11 minutes or until golden. Cut into 8 slices.

In my version, the crust was thin and crispy.
Served with a hearty salad this made a very filling meal.

We never get tired of pizza.
SOURCE: My own creation