Orange-Apricot Scones

Apricot-Orange Scones

Apricot-Orange Scones

This post might also be called “How to be a Better Scone Baker”.  Have you always wanted to make scones, but thought they were too difficult or there was something tricky about making a perfect scone?  It’s time to get over all that and take the plunge.  With just a few simple tips, you too can be enjoying flaky tender scones.  The very first thing you must do, is stop expecting perfection.  A scone is not competing in a beauty contest 🙂   But it will be so lovely to bite into! IMG_9468 So today, let’s talk about 3 ways to be a better baker.  A few small nuggets of advice to help you build confidence in the kitchen whether you are baking scones or something else.

1.  Have a good understanding of your oven.  Not ovens in general, but YOUR oven.  Some ovens have hot spots, or areas that get hotter than the rest.  You may have noticed that a cake rises unevenly or becomes more browned on one side.  If this is happening, you need to rotate your items during baking.    The very best thing you can do is invest in an oven thermometer.  This tells you the actual temperature inside the oven, and you may find that it does not match up with what  you have set the dial to. If that is the case, you will need to adjust the length of baking time accordingly.

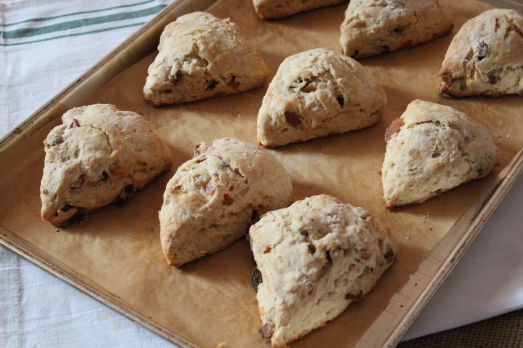
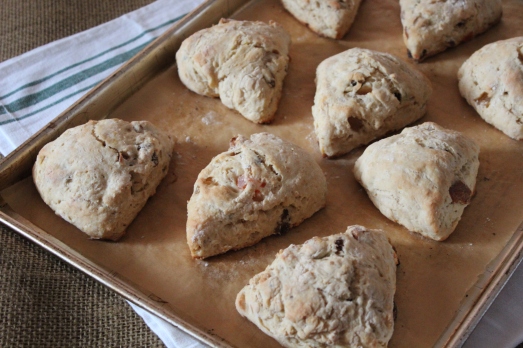
Perfectly baked:  firm to touch, lightly browned at the edges.

Perfectly baked: firm to touch, lightly browned at the edges.

2.  You need to follow directions. Yes, really!  It’s a must if you want good results.  Baking is a delicate balance between flour, moisture, leavening and heat.  Chemical reactions are involved that produce the finished baked item.  A recipe holds your hand as you go step by step through the process, so trust in the recipe.  Not all recipes are good ones, but most of them are,  so trust the process.

3.  Measure accurately.  To repeat my statement from above:  baking is a delicate balance between the ingredients.  If one of more is out of proportion, the whole thing ends up wrong, and there will be no way to fix it.  Flour and sugar should be spooned lightly into a measuring cup, then leveled with the flat side of a knife for an even measure.  Brown sugar is the exception.  It should be measured packed into the measuring cup, level across the top.  Liquids, likewise should be poured  exactly to the measurement line on a liquid measuring cup.  Measuring spoons should be filled, then leveled off with a knife for the same kind of precise measure as flour.  Cut sticks of butter according to the tablespoon markings on the wrapper, these are usually pretty accurate.

There are other tips for successful baking that I could share with you, but that’s enough for  today.  I’ll return to this subject another time.  Let’s make some delicious scones.  This recipe can be a master recipe for making just about any kind of scones, whether savory or sweet.  The ones I made are considered a sweet scone, but have just a touch of sweetness, relying on the dried apricots and hint of orange to add flavor.  At the end of the recipe, I list some other suggestions for add-ins that I think would made fantastic scones.  I’ll be trying them all out as time goes on…… IMG_9477

CLASSIC SCONES, MASTER RECIPE

Yield:   Makes 12 scones

Ingredients:

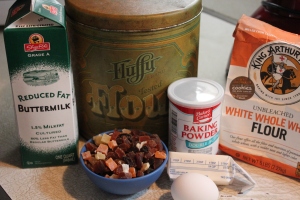
  • 1  1/2 cups all-purpose flourIMG_9449
  • 1  1/4 cups whole-wheat flour
  • 1 Tbsp. baking powder
  • 1/4 cup sugar (sweet), or 1 Tbsp. sugar (savory)
  • 1/2 tsp. salt
  • 5 Tbsp. cold, unsalted butter, cut into 1/2-inch cubes
  • ADD-INS  (see below)
  • 1 cup milk, reduced fat, or buttermilk
  • 1 large egg

Directions: 1.  Preheat the oven to 400*F.  Coat a large baking sheet with cooking spray.

2.  Whisk the flours, baking powder, sugar and salt in a large bowl.  Using a pastry blender, cut in the butter; or rub the butter into the dry ingredients with your fingertips.  Stir in the ADD-INS. IMG_9450 3.  Whisk together the milk (or buttermilk) and egg in a medium bowl, stir into the dry ingredients until just combined. Do not over mix.  Note:  if using a flavor extract, add it to the milk-egg mixture.
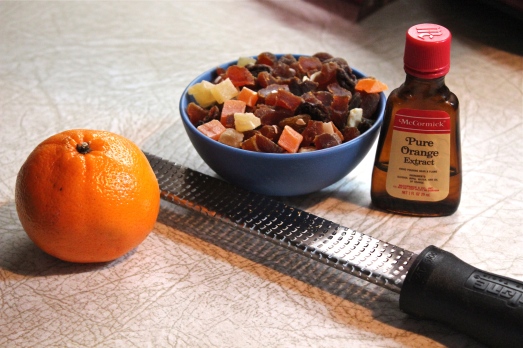
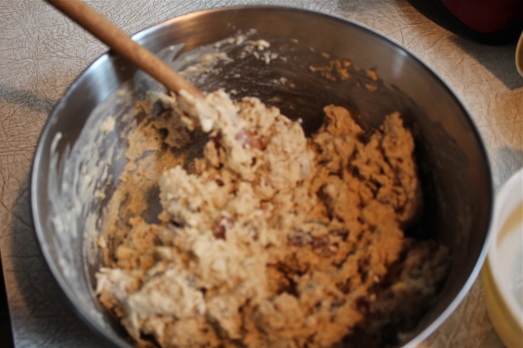
Liquids meet dry.

Liquids meet dry.

4.  Sprinkle a work surface with 1 Tbsp. flour.  Turn the dough out and sprinkle with a little more flour.  Knead three to five times, or until dough just comes together.  Divide in half and pat each piece into a 5-inch circle.  Cut each circle into 6 wedges and transfer to the prepared baking sheet.
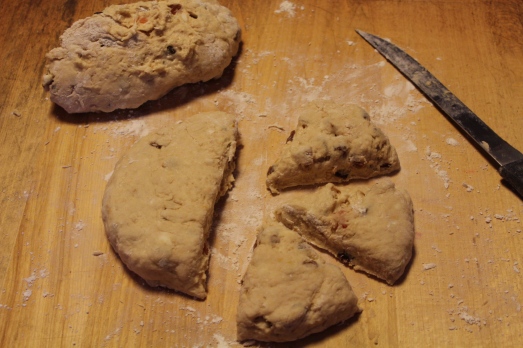
From each circle of dough, make 6 wedges.

From each circle of dough, make 6 wedges.

5.  Bake the scones until firm to the touch and lightly browned, 18 – 24 minutes. IMG_9454

IMG_9456

Glaze 'Em!

Glaze ‘Em!

ADD-INS Sweet:

  • Orange-Apricot:   1 cup chopped dried apricots,  2 Tbsp. grated orange or lemon rind,  1/2 tsp. orange or lemon extract.
  • Lemon-Poppy Seed:  2 Tbsp. lemon zest,  2 Tbsp. poppy seeds
  • Lemon-Ginger:  2 Tbsp. lemon zest,  1/4 cup finely chopped candied ginger
  • Chocolate-Cherry:   1/3 cup dried cherries, coarsely chopped; 1/3 cup dark chocolate mini chips
  • To Glaze any of the above:  whisk 3/4 cup confectioners’ sugar and 2 Tbsp. lemon juice or milk in a small bowl until smooth.  Adjust consistency with a little more sugar or liquid as desired.  Drizzle over scones.

Savory:

  • Ham and Cheese:  1/2 cup shredded cheddar cheese, 1/4 cup chopped ham, 1/4 cup thinly sliced fresh chives
  • Smoked Salmon and Dill:  1/3 cup chopped smoked salmon,  1/3 cup finely chopped red onion,  1/4 cup minced fresh dill.
  • Sun-Dried Tomato, Thyme and Asiago:   1/3 cup chopped soft sun-dried tomatoes,  1/3 cup shredded Asiago cheese,  1/4 cup chopped fresh thyme

SOURCE:  Eating Well

Crockpot Pot Roast

Fabulous Crockpot Pot Roast

Fabulous Crockpot Pot Roast

Super easy, super flavorful they said.  It was all over Pinterest, and everyone was raving about it.  I just couldn’t let something that sounded so good go by without giving it a try.

So I made it…..as a test.   Think of me as a scientific investigator.   I do all the work of testing out a recipe by making it, eating it, then telling all of you how wonderful it was (or not).   See, I do that, just for YOU.

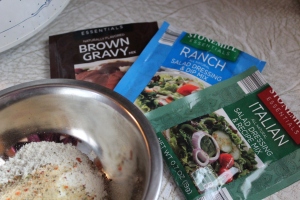
Today,  I’m here to tell you it was Fabulous!!!!  But there is reason to be cautious.  This recipe uses only four ingredients, plus 1/2 cup water.  Three of those ingredients are pre-packaged mixes for Brown Gravy, Ranch Dressing, and Italian Salad Dressing.   I’m sure you know as well as I, that these mixes can contain a whole lot of Sodium, and sometimes, MSG. (Mine were labeled as having no MSG.)   There may be some slight variation among the many brands available, but here’s what mine contained:   Ranch Dressing mix==110mg,  Brown Gravy mix==240mg, and the biggest culprit of all, Italian Salad Dressing mix==320mg.
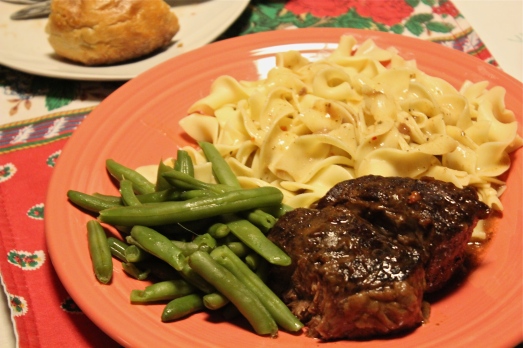
There’s no way I would ever put that much salt on a piece of meat I am cooking, so let’s get real, and try to fix the problem.  Reasoning that flavorful gravy is what we’re after, not salad dressing, I used the whole package of Brown Gravy mix, but I used only half of each of the dressing mixes.   The resulting gravy was full of flavor, and about right in terms of saltiness.  I think it is the best gravy I ever made.
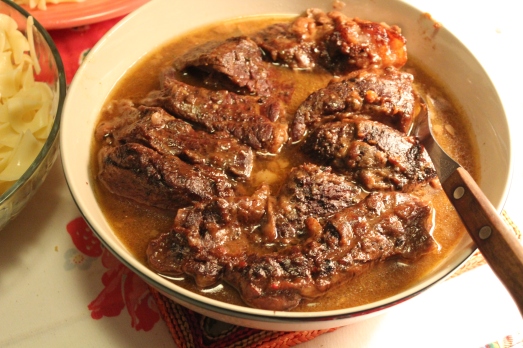
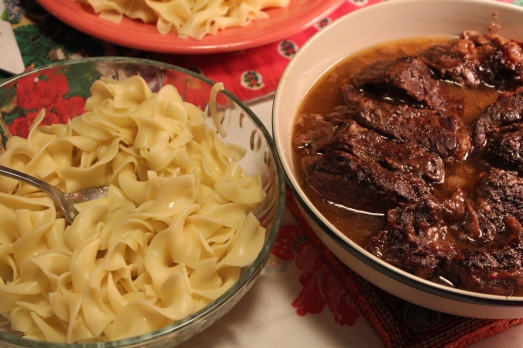
IMG_9234

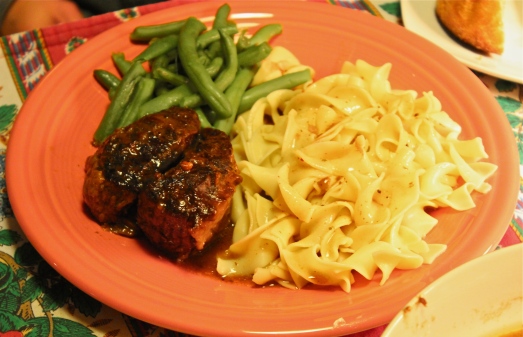
I served egg noodles with the pot roast and we spooned the gravy over the noodles.  Therefore I used only a tad of salt in the cooking water for the noodles.  Likewise, if served over mashed potatoes, use very minimal salt in the water to cook the potatoes.

IMG_9235

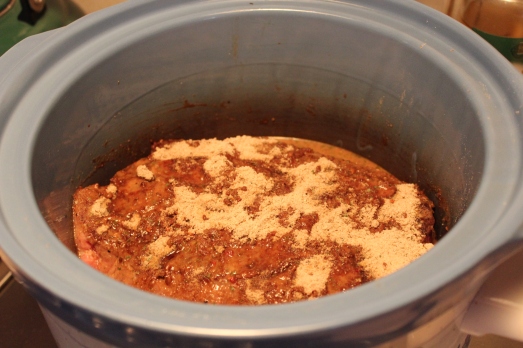
It is great to find a recipe this easy to make.  All it requires is a 2-3 pound pot roast that can be with or without the bone, like a chuck, or round roast;  the three packages of mixes and water.  I simply mixed the three mixes together in a small bowl, seared the roast in a large skillet to brown it on both sides, then put it in the crockpot.  Next I sprinkled the seasoning mixture over the beef, then poured on the 1/2 cup water.  Set it and forget it, as the saying goes. It couldn’t be easier.  You really don’t need a recipe to make this, but in case you need to see it written as a step-by-step procedure, here it is….

CROCKPOT  POT ROAST

Three packaged mixes plus the beef roast.

Three packaged mixes plus the beef roast.

Yield:   depends on size of roast,  probably 6 to 8 servings

Ingredients:

  • beef pot roast, such as chuck, top or bottom round ( 2.5 – 3 pounds)
  • 1 packet  Brown Gravy Mix
  • 1 packet Ranch Dressing Mix
  • 1 packet Italian Salad Dressing Mix
  • 1/2 cup warm water

Directions:

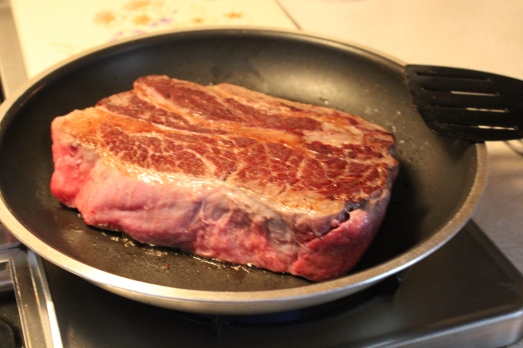
1`.  In a hot skillet, place the beef and sear well on both sides.  Transfer to crock pot.

Sear well on both sides.

Sear well on both sides.

2.  In a small bowl, combine the three mixes, using only half the Ranch and Italian mixes.  (save them for next time, and you’ll only need to buy the gravy mix.)

3.  Sprinkle over the pot roast in the crock pot.   Pour the water over all.

Sprinkle on seasonings, pour water over all.

Sprinkle on seasonings, pour water over all.

4.  Set on LOW, and cook for 8-9 hours.

You can thicken the gravy, if you prefer it that way.

Serve the beef with gravy and mashed potatoes or noodles for a real treat.

IMG_9236

SOURCE:   Pinterest


Lemon Icebox Cookies

Lemon Icebox Cookies

Lemon Icebox Cookies

Total tart throbs….that’s what I call these buttery, lemony confections.  Cookie nirvana!  Cookie heaven!  Cookie num-yums!   I think you get how much I love these cookies.

IMG_9544

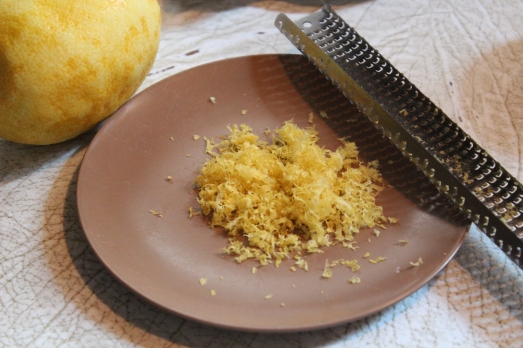
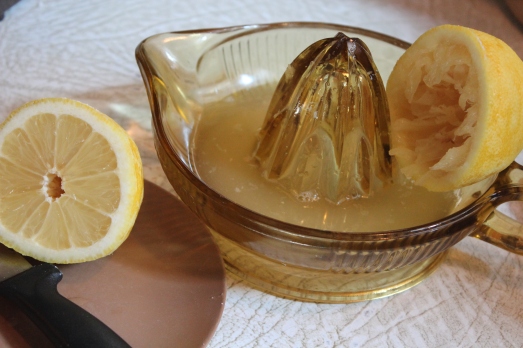
Lemon desserts seem so perfect at this time of year, more than any other, I think.  So I took my recipe for luscious butter cookies, added some (lots) lemon zest, plus a few drops of lemon juice, and zing went the strings of my heart.  Just lemony enough, just buttery enough, and just satisfying enough.  In other words…..perfection 🙂

IMG_9548

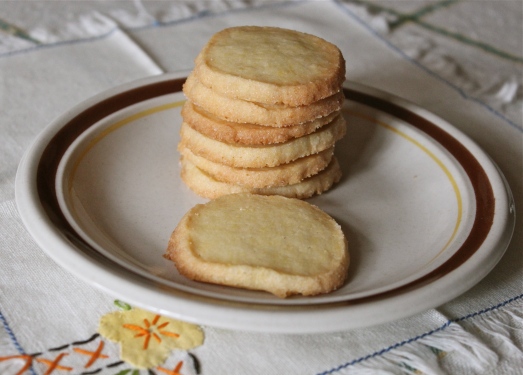
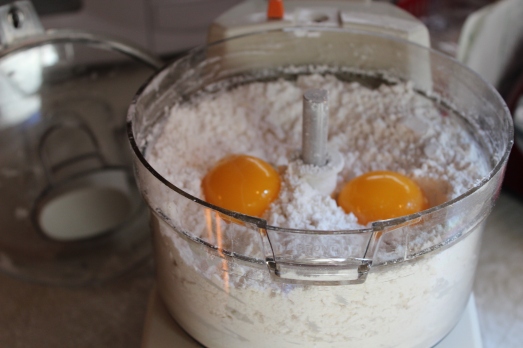
As you look over the recipe you will notice that confectioners’ sugar is used instead of granulated.   Powdered sugar gives these cookies their crumbly, sandy texture without too much sweetness, thus the lemon and butter flavors shine through.  The dough is made entirely in the food processor, divided in half and chilled before slicing and baking.  The dough cuts beautifully, not like some others I’ve made that like to crumble when you go to slice them.  Before cutting the cookies each log of dough is rolled in granulated sugar, so the edges of the cookies are glistening and crunchy once baked.

LEMON ICEBOX COOKIES

Yield:  Makes about 5 dozen cookies

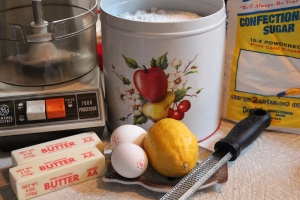
Ingredients:IMG_9519

  • 2 cups all-purpose flour
  • 1 cup confectioners’ sugar
  • 1 tsp. coarse salt
  • 1 Tbsp. + 1 tsp. lemon zest
  • 1 tsp. fresh lemon juice
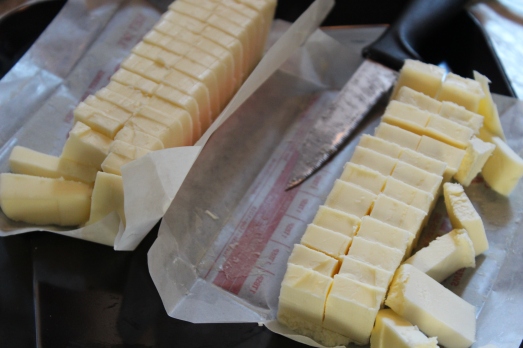
  • 1 cup (2 sticks) unsalted butter, cut into pieces
  • 2 large egg yolks
  • 1/4 cup granulated sugar, for rolling

IMG_9520

Directions:

1.  In a food processor, pulse together the flour, confectioners’ sugar, salt and lemon zest until combined.

IMG_9522

This is how I cut butter into small pieces.


Add butter and process until sandy.  Add egg yolks and lemon juice; pulse until dough comes together.

IMG_9524

IMG_9523


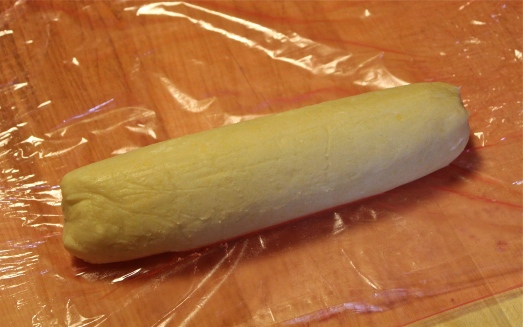
2.  Divide dough in half and form each into a 1  1/2-inch-wide log.

IMG_9525

Wrap in plastic wrap and chill until firm, at least 2 hours, or overnight.  Or after wrapping, dough may be frozen up to a month.

IMG_9526

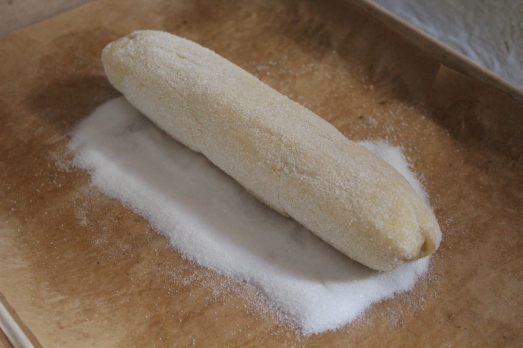
3.  Preheat oven to 350*F. , with racks in upper and lower thirds.  Spread granulated sugar on a piece of wax paper or parchment; roll logs over sugar to coat.

IMG_9535

Roll dough logs in sugar to coat well.


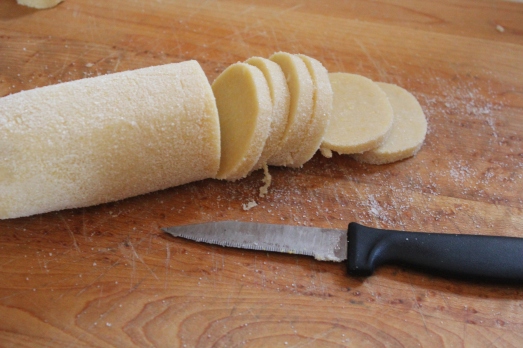
4.  Slice logs into 1/4-inch-thick slices.

This dough slices so nicely.

This dough slices so nicely.

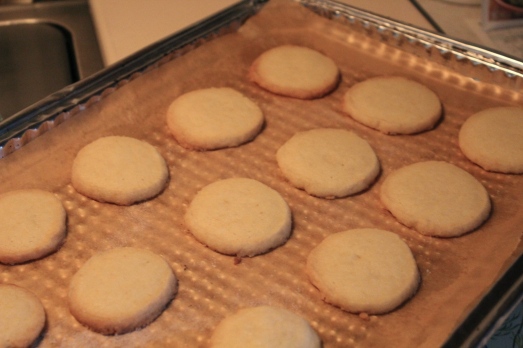
Arrange 1 inch apart, on two (or more) parchment-lined baking sheets.  Bake until cookies are golden brown around edges, about 15 minutes, rotating sheets halfway through.

Lightly browned around the edges.

Lightly browned around the edges.

Transfer cookies to wire racks to cool.   To store, cover and keep at room temperature, up to 5 days.

IMG_9550

These are the perfect little sweet to serve with a cup of tea, or alongside a scoop of vanilla ice-cream.


SOURCE:   Carolyn’s Originals

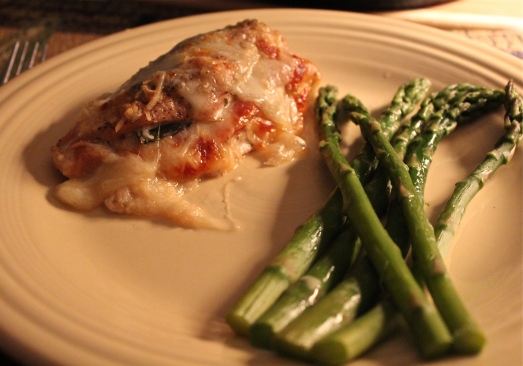
Stuffed Chicken with Roast Peppers, Mozzarella and Basil

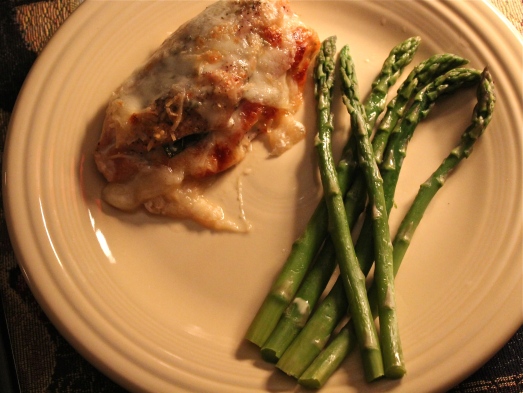
Chicken Breasts Stuffed with Roasted Peppers and Mozzarella

Chicken Breasts Stuffed with Roasted Peppers and Mozzarella

I’ve been away from my kitchen too long.   Recovery from knee replacement surgery is a slow process, one that must be taken seriously, if you expect to regain full use of the knee.  All that stretching, bending, walking, etc is hard work and very tiring.  I’m glad to report that I’m moving ahead at a steady pace, but in tiny steps.  During the past weeks, we’ve had some wonderful friends who stopped by with meals for us (they took pity on Mr. D.)  so we have enjoyed some great home cooking while I’m recuperating  but today I felt like getting my hands dirty in the kitchen.  So this is what I came up with.

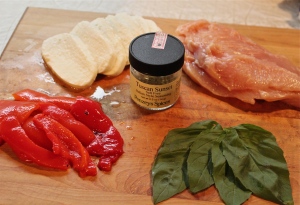
Exploring my freezer, I found a package of boneless chicken breasts, and in my cupboard, a jar of roasted peppers.  What naturally came to mind to accompany these ingredients were mozzarella cheese and basil.  This meal is quick and easy-to-prep, just right for when you want to get out of the kitchen fast, but also elegant enough for a special meal. Keep the side dishes simple with a vegetable and a salad.

IMG_9285

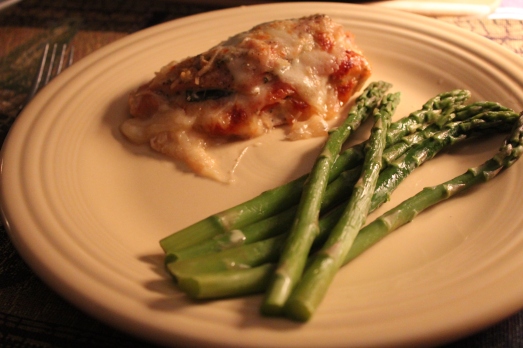
Mr. D. loved it, commenting that it looks like pizza.   It really does because of the colors of peppers and cheese, plus the Italian seasoning.  It smells wonderful as it’s cooking also.  He said it’s become his new favorite way to have chicken.

This is my basic recipe, but it can certainly be changed or added to with some sautéed spinach, sliced fresh tomatoes, artichokes, mushrooms, etc.

STUFFED CHICKEN WITH ROAST PEPPERS, MOZZARELLA AND BASIL

Yield:  Serves 4

Ingredients:IMG_9274

  • 4 boneless, skinless, chicken breasts
  • 8 oz. fresh mozzarella, sliced into 8 slices
  • 1 12 oz. jar roasted red peppers, sliced into 1-inch pieces
  • 1 bunch fresh basil, whole leaves
  • 1/4 cup grated parmesan
  • 1 Tbsp. Italian seasoning
  • salt and pepper for seasoning

Directions:

1.  Preheat the oven to 400*F.  Grease a broiler-proof baking dish.

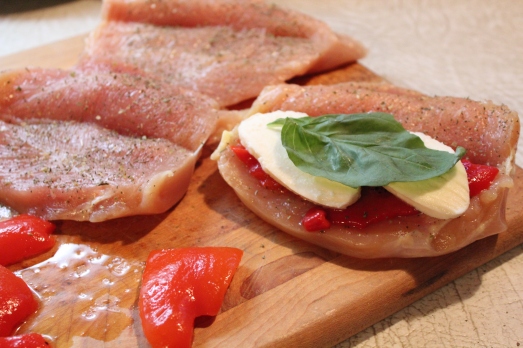
2.  Butterfly chicken breasts by cutting into the long side of the breast, stopping about 1/4-inch from the opposite side.  On your work surface, lay the chicken breasts opened up.  Sprinkle the exposed insides with 1/2 of the Italian seasoning, salt and pepper.

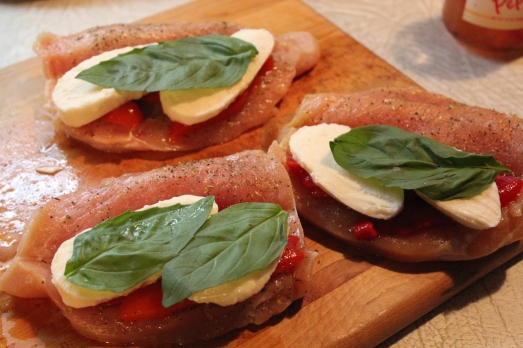
IMG_9275

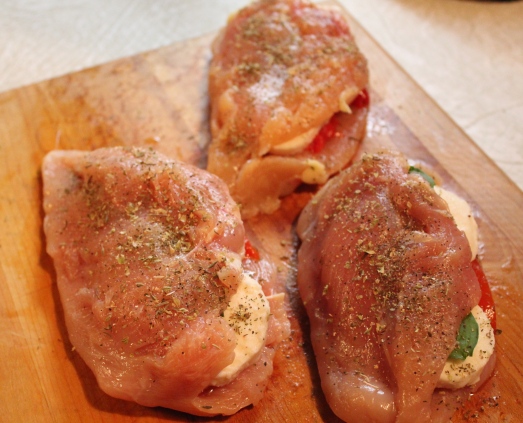
3.  Stack the pepper, 1 slice mozzarella and basil on the bottom side of the chicken.  Fold the top flap of the chicken over, tucking in the contents as necessary.  Sprinkle with the remaining Italian seasoning.

IMG_9276

IMG_9277

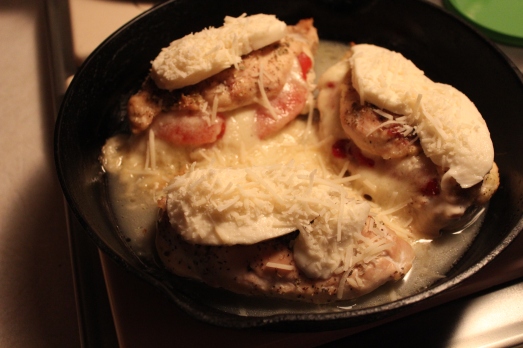
4.  Bake for 30 – 40 minutes (until chicken is no longer pink).  Take chicken out of the oven and turn on broiler.  Top each chicken piece with remaining slices mozzarella and sprinkle with Parmesan cheese.


IMG_9279

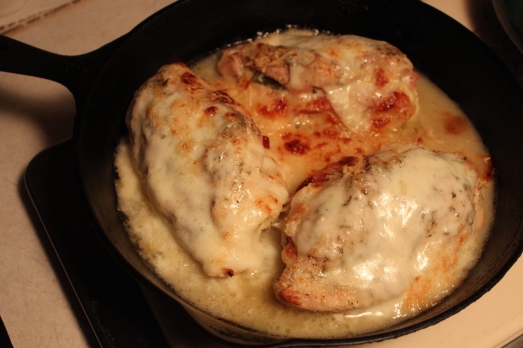
Broil until cheese is browned and bubbly, about 5 minutes.

IMG_9283

Serve with vegetable and a salad.

IMG_9286

SOURCE:  Food Network

Bacon and Leek Quiche

Bacon and Leek Quiche

Bacon and Leek Quiche

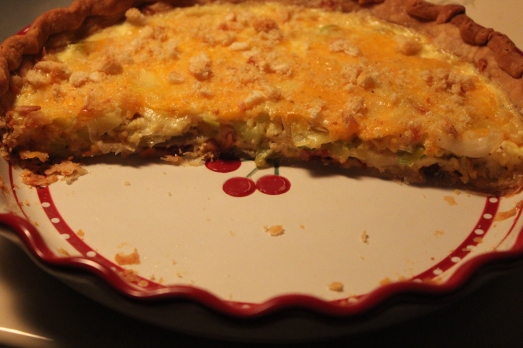
What food comes to mind most often when planning a menu for brunch?  Is it quiche?  I’m not surprised.  Quiche may well be the most versatile brunch dish.  A rich eggy custard encased in a flaky crust, it can be made with an almost endless variety of herbs, meats, cheeses and vegetables.  It can also be served hot or at room temperature, making it an ideal choice it you have other dishes on the menu.

We know that bacon can never go wrong, it seems, in any dish; so that’s beyond question in this quiche.  But leeks?  Probably not high on the list of favored ingredients.   If you are not familiar with leeks, they are a member of the onion family and have a mild oniony taste.  In most dishes where they are used they sort of blend in and their flavor is hard to identify, but not in this dish.  Their mild distinct flavor is noticeable and goes especially well with Gruyère cheese.

IMG_9513

My best description for the filling in this quiche is that it is “silky”.  The leeks are sautéed in a little butter until tender before adding to the crust with the bacon.  Once the egg, milk, cheese mixture is added everything melds together and bakes into a fabulous, silky, smooth custard, with bits of salty bacon throughout.

I made this dish one evening for our dinner and served it with a large mixed vegetable salad.  It seemed like the perfect meal.  The portion that was left over I rewarmed for lunch, and once again we enjoyed it immensely.

If you are someone who really like leeks, bacon and Gruyère cheese, (or even if you don’t) I encourage you to try this quiche.  I think you will be really glad you did.

BACON AND LEEK QUICHE

Yield:   makes 6 servings

Ingredients:

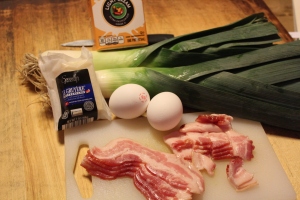
  • single-crust flaky pastry doughIMG_9505
  • Smoked bacon, 4 slices, coarsely chopped
  • unsalted butter, 1 Tbsp.
  • leeks, 2 small, white and pale green parts, chopped
  • half and half, 1 cup
  • large eggs, 2
  • kosher salt, 1/2 tsp.
  • ground black pepper, 1/4 tsp.
  • freshly grated nutmeg, 1/8 tsp.
  • Gruyère cheese, 1 cup shredded

Directions:

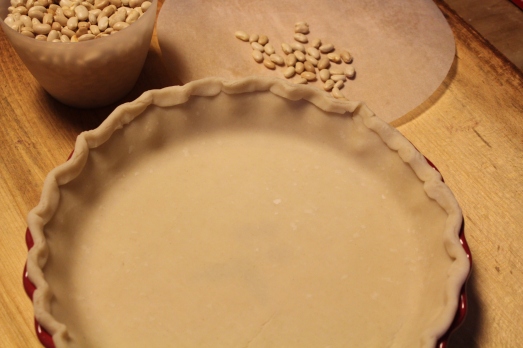
1.  Use your favorite recipe for pie dough, or use refrigerated store-bought pie dough.  Roll the dough out into a round about 12 inches in diameter.  Transfer to a 9-inch pie dish or tart pan.  Trim the dough, leaving a 1/2-inch overhang.  Fold the overhanging dough over and into the pan, pressing it firmly against the dough on the sides of the pan; the dough should be doubly thick at the sides and rise about 1/8 inch above the pan rim.  Line the dough with a piece of parchment paper, and chill for 30 minutes.

Make the pie shell and chill for 30 minutes.

Make the pie shell and chill for 30 minutes.

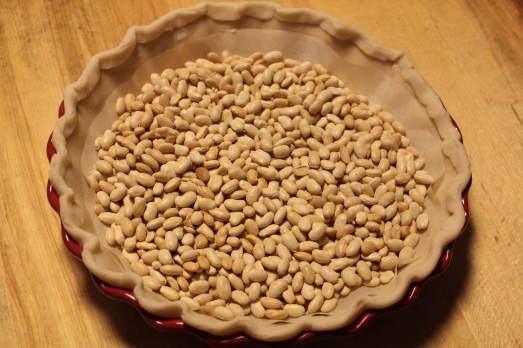
2.  Meanwhile, position a rack in the lower third of the oven and preheat to 375*F.  Place the dough-lined pan on a baking sheet and fill the parchment paper with pie weights or dried beans.  Bake until the dough is set and beginning to brown, about 20 minutes.

Fill pie shell with pie weights and bake till set.

Fill pie shell with pie weights and bake till set, about 20 minutes.

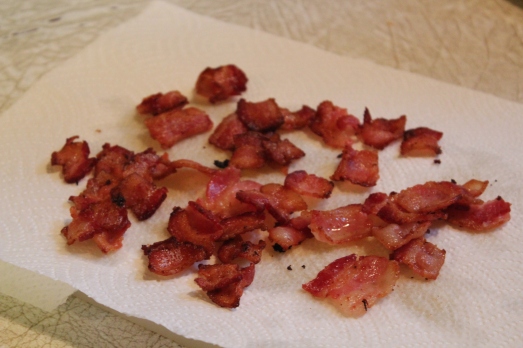
3.  While the crust is baking, make the filling.  In a fry pan, fry the bacon over medium heat, stirring until crisp and golden, about 6 minutes.  Use a slotted spoon to transfer the bacon to paper towels to drain.

Fry bacon till crisp, remove and drain on toweling.

Fry bacon till crisp, remove and drain on toweling.

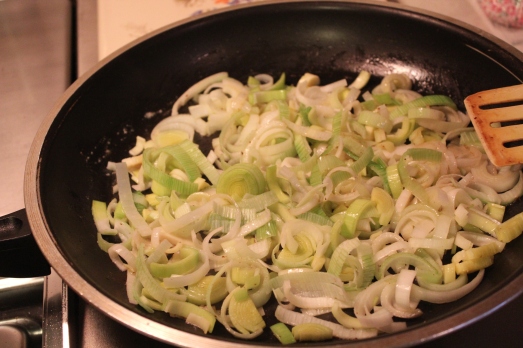
Pour out the fat, wipe out the pan with clean paper towels, and add the butter.  Melt over low heat.  Add the leeks and cook, stirring occasionally, until tender, about 10 minutes.

Saute leeks in butter till tender.

Saute leeks in butter till tender.

Transfer to a plate and let cool slightly.

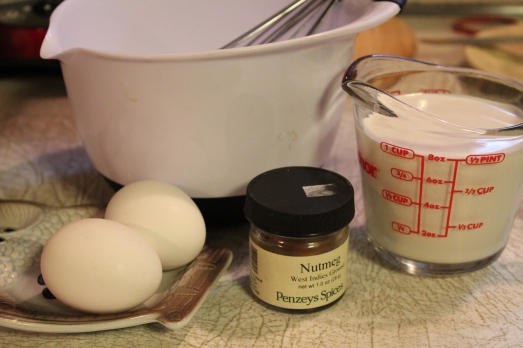
4.  Remove the baking sheet with the tart pan from the oven.  Remove the parchment and the weights/beans.  In a bowl, whisk together the half-and-half, eggs, salt, pepper, and nutmeg until combined.

Whisk together eggs, half-and-half and seasonings.

Whisk together eggs, half-and-half and seasonings.

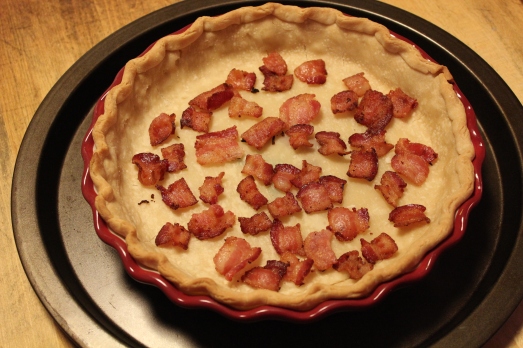
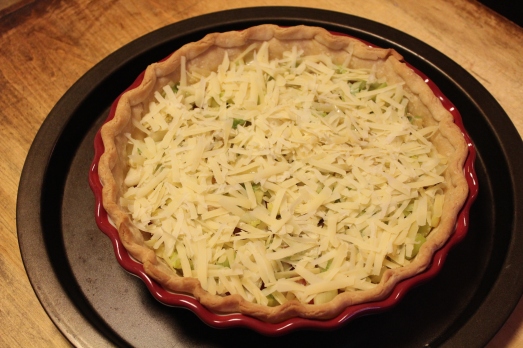
Scatter the bacon, leeks, and cheese evenly in the pastry shell.

Layer in bacon.

Layer in bacon.

Cover bacon with leeks, then cheese.

Cover bacon with leeks, then cheese.

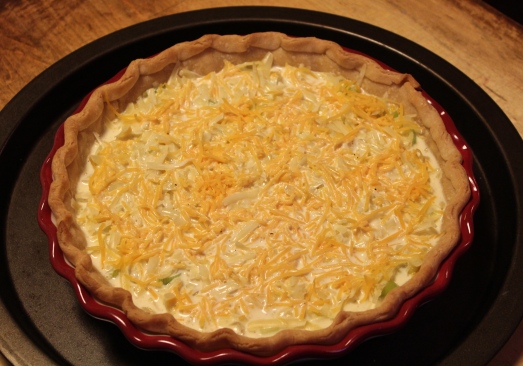
Carefully pour the egg mixture into the shell.

Pour in egg mixture.

Pour in egg mixture.

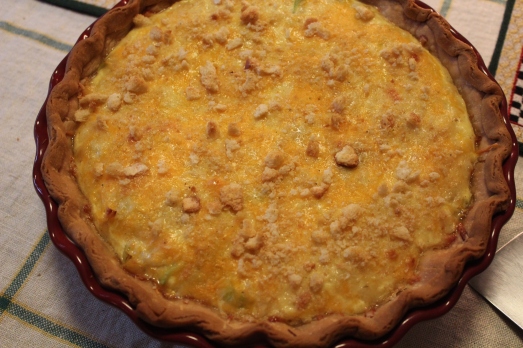
Return to the oven and bake until the filling is puffed and golden brown, about 30 minutes.  Let cool slightly, then serve.

IMG_9513

IMG_9516


SOURCE:  Comfort Food, warm and homey, rich and hearty,  by Rick Rodgers

Cranberry Pecan Biscotti

Cranberry-Pecan Biscotti

Cranberry-Pecan Biscotti

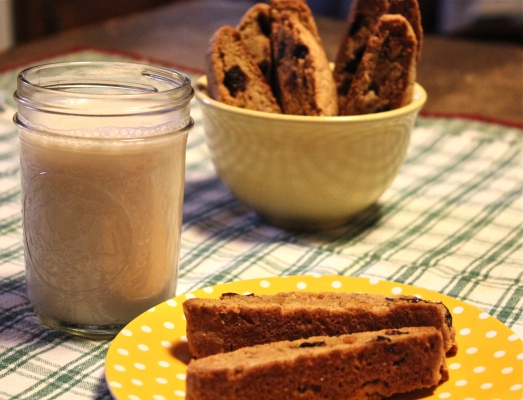
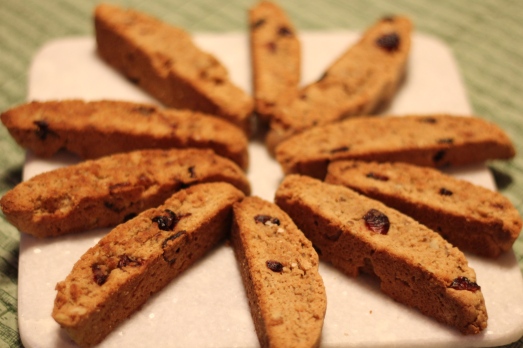
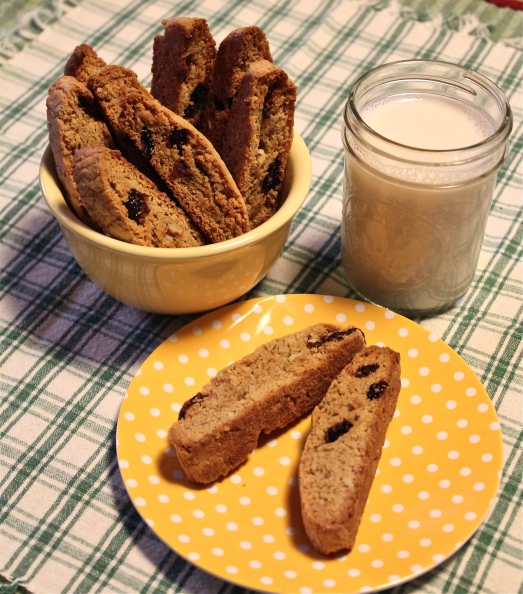
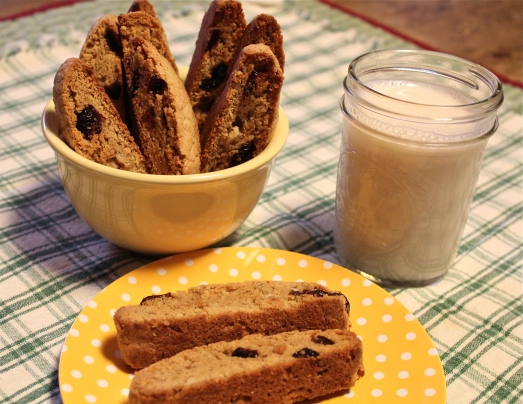
Listen up folks!   It is a scientific fact that a beverage, whether it be coffee, tea, hot chocolate or milk, needs the perfect dunking cooking to go with it.

I took a poll among my friends with the question “would you rather have a graham cracker, a snickerdoodle, or cranberry pecan biscotti with your favorite beverage”?  Don’t ever let it be said that I’m afraid to ask the hard questions!   Biscotti was the overwhelming winner.  Although I have a sneaky suspicion that a frosted cinnamon roll would not be unwelcome either.

The winners….biscotti!

The winner….biscotti!

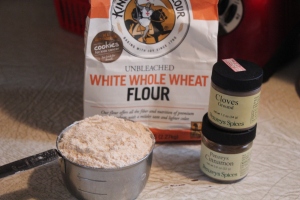
These are very gentle biscotti;  they are not going to fall apart and leave crumbs in the bottom of your cup or glass.  They are gently spiced with cinnamon and cloves, and they are made with whole wheat flour, so they are good for you.  In addition there’s the cranberries adding their vitamin C. and chopped pecans for some added crunch.  These are as much a cookie as they are a tiny package of warmth and comfort in the middle of what was this winter’s coldest temperatures.

Ahem, excuse me, but I wrote this over a month ago when it was still winter around here.  Don’t be misled, these are great any ole time you feel like having a cookie to munch on.

IMG_8934

CRANBERRY PECAN BISCOTTI

Yield:  Makes about 2 1/2 dozen biscottiIMG_8929

Ingredients:

  • 1 cup sugar
  • 1/2 cup butter, softened
  • 2 eggs
  • 1 tsp. vanilla extract
  • 2 cup whole wheat flour
  • 1 1/2 tsp. baking powder
  • 1/4 tsp. salt
  • 2 tsp. ground cinnamonIMG_8931
  • 1/4 tsp. ground cloves
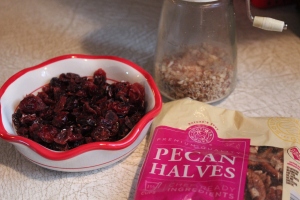
  • 2/3 cup chopped pecans
  • 3/4 cup dried cranberries

Directions:

1.  Preheat oven to 325*F.   Line a baking sheet with parchment paper, or Silpat liner.

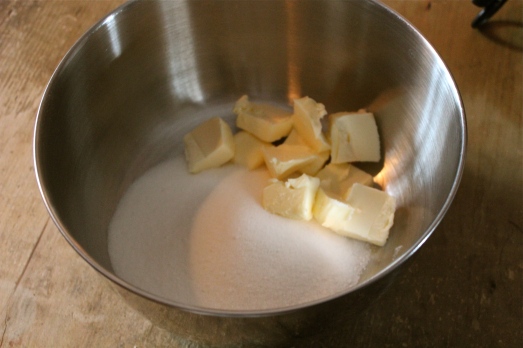
2.  In the large bowl of an electric mixer, cream together the butter and sugar until light and fluffy.  Add the eggs, one at a time, then the vanilla.

Start by creaming the butter and sugar.

Start by creaming the butter and sugar.

3.  In a separate bowl, whisk together the flour, baking powder, salt, cinnamon and cloves.  Add to creamed mixture in several additions.  If mixture becomes too thick, stir in the remainder of the flour mixture.

4.  Stir in the nuts and cranberries.

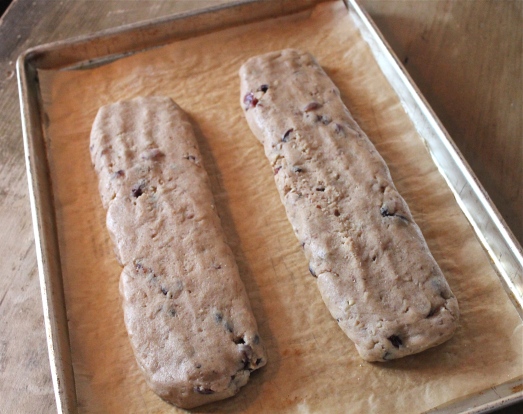
5.  Divide the dough in half and form 2 logs on the baking sheet. (approximately 1/2″ x 2″ wide).

Form dough into 2 "logs" on baking sheet.

Form dough into 2 “logs” on baking sheet.

6.  Bake at 325*F. for 25 minutes, until light golden brown.

7.  Remove from oven and cool for 5 minutes.  Slice into 1/2″-thick slices.   Lay on their sides.  Bake about 10 minutes longer, turning over after 5 minutes.

These biscotti may not seem crisp enough, but as they cool they become crisper, so do not over bake them.

IMG_8937

Enjoy these delightful biscotti and be comforted!

SOURCE:    Big Oven

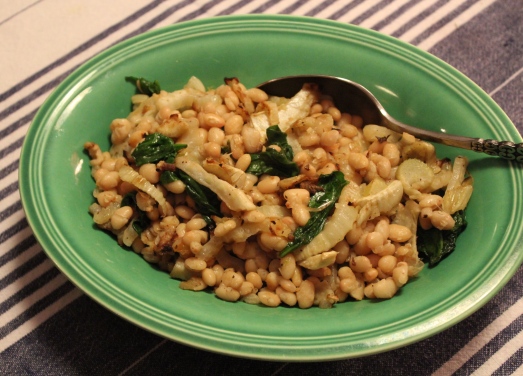
White Beans with Fennel

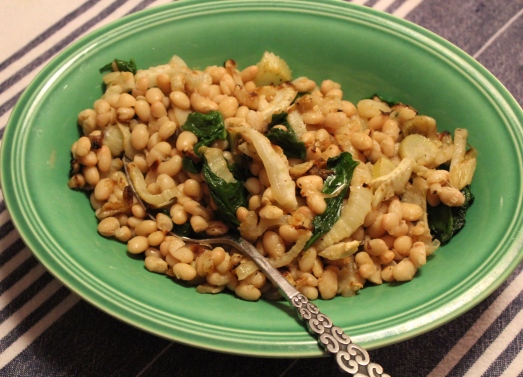
White Beans with Fennel.

White Beans with Fennel.

Since I’ve cut back sharply on the amount of carbohydrates we are eating, I’ve been leaning pretty heavily on vegetables.  We have 2 – 3 veggies at each main meal.  In this dish you get three vegetables all getting cozy together.  So if you are trying to make healthy choices, this dish might be a good thing to incorporate into your menu plan.  It has white beans to provide some protein and complex carbohydrates, fennel for flavor and fiber, and spinach for color, and vitamins.

IMG_9298

Lunch is often the most difficult meal for me to get right.  I wait until I’m starving, then head for the kitchen to grab what ever is quickest to fill that empty hole, and often that’s peanut butter on toast.  ( Oh no, I just revealed my secret vice.)  Oh well, it was bound to come out sometime, so now you know I’m not perfect.  But I could be if I had a bowl of white beans and fennel in my refrigerator to munch on when I get hungry.  Actually a bowl of anything that’s healthy is a very good thing to have on hand when lunch-time hungries strike.   Good, hearty, real food that isn’t scrambled eggs, that you can eat right from the fridge….if you’re into that sort of thing, and aren’t we all?  This tastes as good cold as it does hot!

All I’m saying is,  if you decide to make this dish, make enough so you’ll have some left over for that bowl of real healthy food to munch on whenever hunger strikes.

WHITE BEANS WITH FENNEL

Yield:  Makes about 6 servings

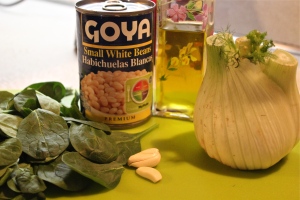
Ingredients:

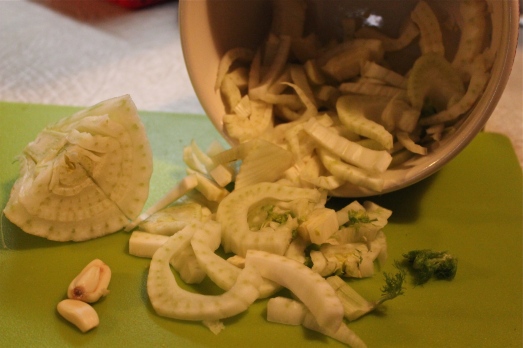
  • 1 large fennel bulb, cut in half vertically, core removedIMG_9290
  • 2 Tbsp. olive oil, divided
  • 1/2 tsp. salt, divided
  • 1/2 tsp. pepper, divided
  • 1 clove garlic, minced
  • 3 Tbsp. grated Parmesan cheese
  • 1 can Great Northern beans, rinsed and drained (any white bean will do)
  • 2 cups fresh baby spinach
  • 1 tsp. fresh lemon juice

Directions:

1.  Preheat oven to 450*F.  Spray baking sheet with non-stick spray.

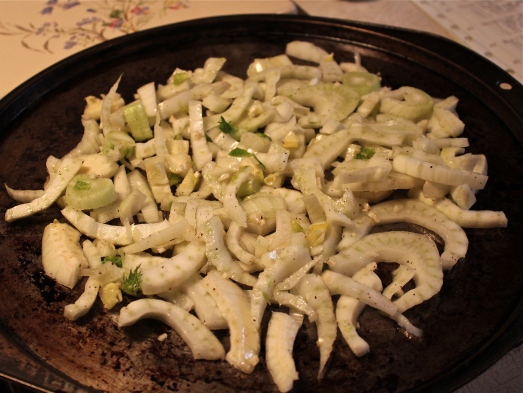
2.  Slice fennel into 1/4-inch thick slices.  In a medium bowl, toss with 1 Tbsp. olive oil, 1/4 tsp. salt, 1/4 tsp. pepper, and minced garlic.


IMG_9291

Arrange on baking sheet and bake at 450*F. for 15 minutes or until it is beginning to brown.  Stir.  Sprinkle with the Parmesan cheese and bake for 5 minutes more.

IMG_9293

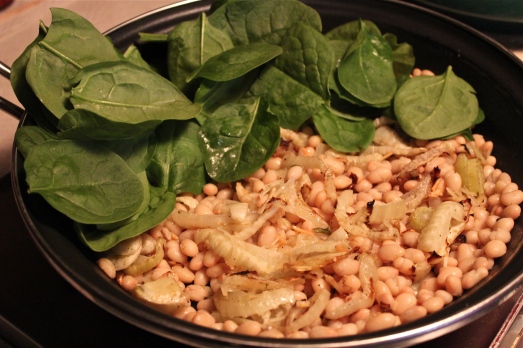
3.  In a large skillet heat 1 Tbsp. olive oil over medium heat.  Add the beans and cook for 2 minutes.  Add the fennel and baby spinach, plus 1/4 tsp. salt and 1/4 tsp. pepper.

Sauté beans then add fennel and spinach.

Sauté beans then add fennel and spinach.

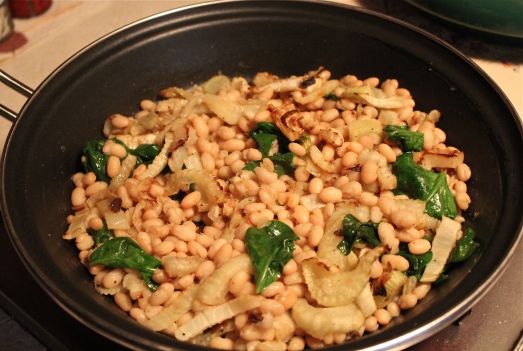
Cook 2 minutes to heat through.  Add the splash of lemon juice and stir in.

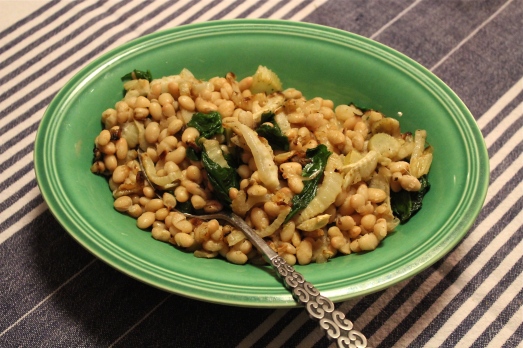
Ready to serve.

Ready to serve.


Serve with salmon or other fillet of fish.  Add a salad and you will have a wonderful meal.

IMG_9296

SOURCE:    Unknown


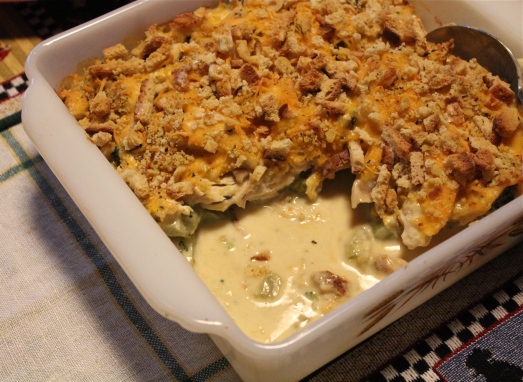
Church Supper Chicken Casserole

Church Supper Chicken Casserole

Church Supper Chicken Casserole

Happy Spring, friends.  I do believe that Spring is finally starting to show signs of it’s arrival, and for me that means getting organized.  So this week has been a closet organizing, cob-web dusting, house cleaning kind of week.  This time of year always has me rearranging things for a fresh perspective, but this year I have an additional reason for doing so.

In just a few days I will be having surgery to replace the worn-out joint in my right knee.  Since I don’t know exactly what I’ll be capable of doing while healing and therapy take place, I’m doing some extra cooking (freezing meals),  clothes preparation (getting out the warm weather clothes), and trying to plan ahead for any events that may arise.    It will  be some time before I get back to my cooking adventures and writing to tell you about them.  In the mean time I have some posts ready to self-publish in my absence, but they will not be as frequent as you have been accustomed to.

The recipe that I’m sharing with you today is one that goes back quite a few years and was introduced to members of our church by our pastor, the first woman to be ordained in our church.  She always made this chicken and broccoli dish for our church suppers, and it became known as “Rosemary’s Chicken Casserole”.   Over the years I’ve taken a few liberties with the recipe and adapted it to use leftovers whenever I have some cooked chicken or rotisserie chicken on hand.

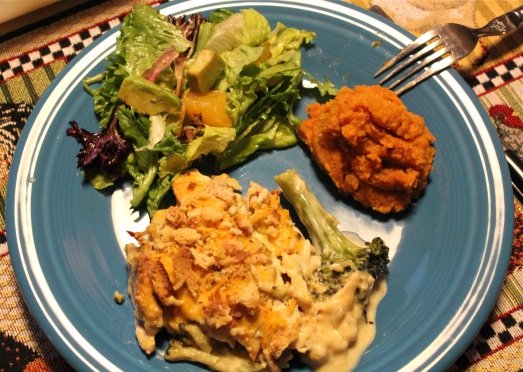
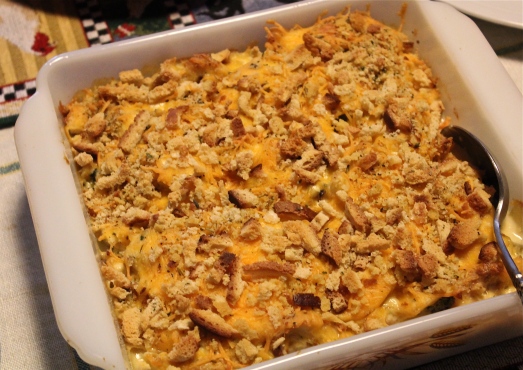
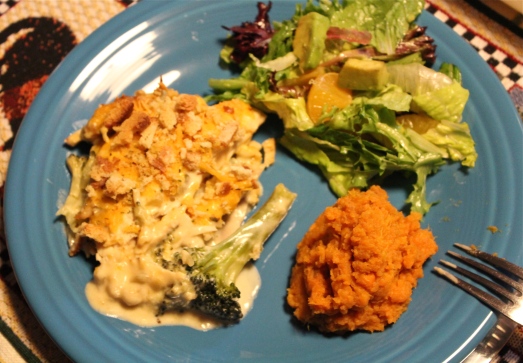
Chicken and Broccoli casserole with mashed sweet potatoes and salad.

Chicken and Broccoli casserole with mashed sweet potatoes and salad.

I include here the original recipe if you would like to make it the way it was intended, plus some notes on how I modify it to use leftovers.

Rosemary’s Church Supper Chicken Casserole

Yield:   Makes 8 servings

Ingredients:

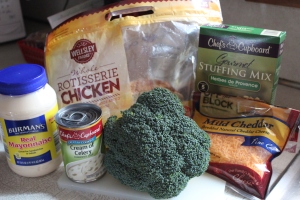
  • 2 large chicken breasts ( or 3-4 cups cooked chicken or rotisserie chicken)IMG_9482
  • 2 packages frozen broccoli (or 1 large head fresh broccoli)
  • 1 can cream of mushroom soup
  • 1 can cream of chicken soup
  • 1 cup milk
  • 1/2 – 3/4 cup mayonnaise
  • 2 cups shredded cheddar cheese
  • 1 cup stuffing mix ( Pepperidge Farm or other)

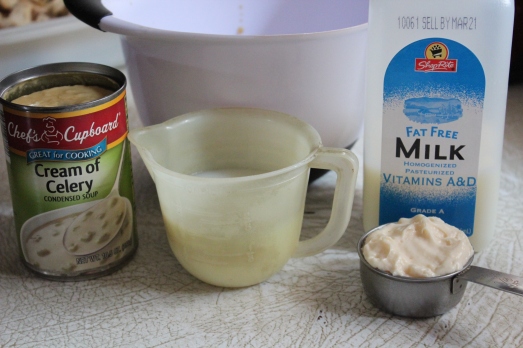
Note:  the recipe can be easily halved for a smaller quantity.  If you do this, use only one can of soup, (Here, I’ve used cream of celery).   1/2 cup milk, and 1/4 cup mayonnaise.

Directions:

1.  Simmer chicken breasts in a small amount of water until cooked.  Cool and debone.

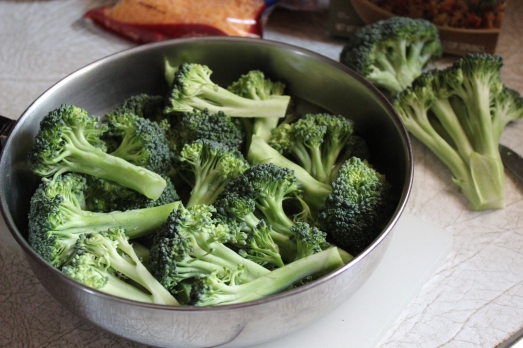
2.  Cook frozen broccoli, or fresh broccoli, if using.

IMG_9483

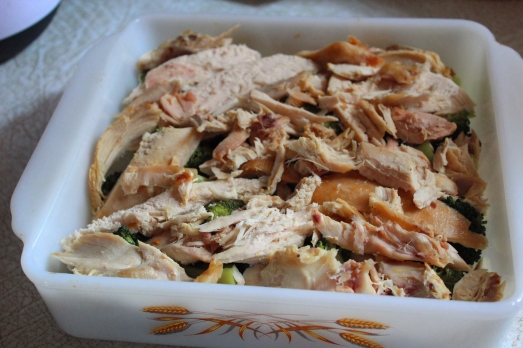
Place broccoli in a large casserole that has been prepared with cooking spray.  For half the recipe use an 8″ or 9″ square baking dish.  Cover with pieces of cooked chicken.

Cover broccoli with pieces of cooked chicken.

Cover broccoli with pieces of cooked chicken.

Preheat oven to 350*F.

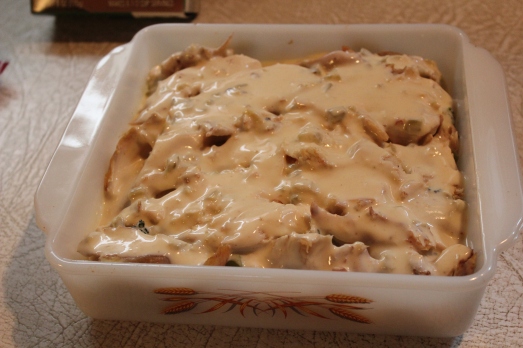
3.  Make the sauce by whisking together the soups, milk and mayonnaise.

IMG_9485

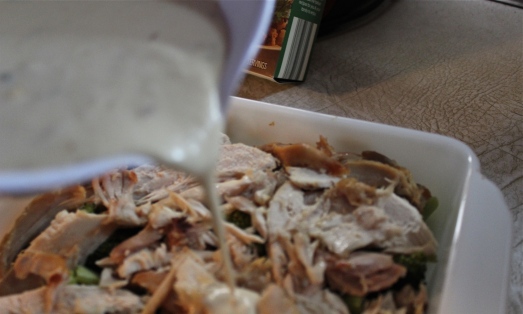
Pour over the chicken and broccoli.

IMG_9488

IMG_9489

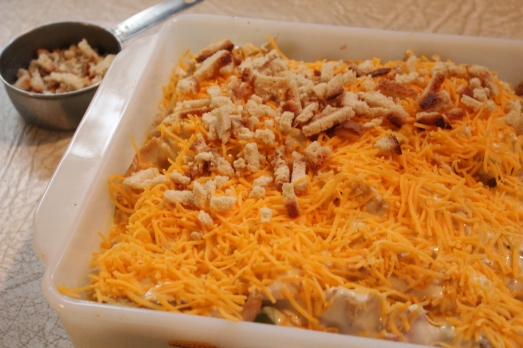
4.  Sprinkle the cheese over the sauce,

Add grated cheese over sauce.

Add grated cheese over sauce.

then place the stuffing mix on top.

Top with stuffing mix.

Top with stuffing mix.

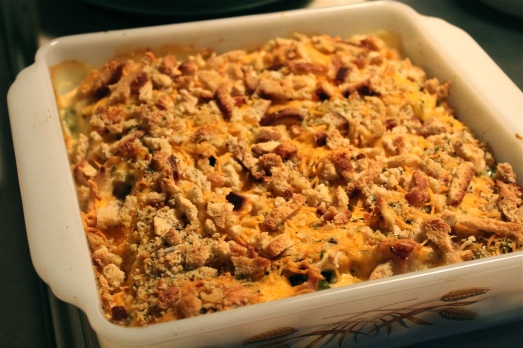
5.  Bake at 350*F. for 25 – 30 minutes until top is browned and bubbly.

Hot and bubbly.  Yum, so good!

Hot and bubbly. Yum, so good!

IMG_9497


SOURCE:  Recipes From the Heart

Buttermilk Waffles with Cheese

Cheesy Buttermilk Waffles

Cheesy Buttermilk Waffles

Here’s the thing about buttermilk:  You probably don’t keep it on hand all the time, but it’s so handy to have available for a great many purposes.  It keeps for a long time.   What?  Did you think it was going to go sour?  Here’s a news flash….it IS sour!  Not spoiled, just sour tasting.  Did you know you can make a substitute for buttermilk by adding a little vinegar to regular milk to sour it.  So, no need to worry about the sour thing.   Once you have some, it’s easy to find ways to use it up.  Like, you will get some buttermilk because you want to make waffles (or pancakes)…and then you will make more waffles (or pancakes) because you have buttermilk.   If waffle-ing gets boring, just switch to scones.  There’s another use for buttermilk.   See,  easy!!

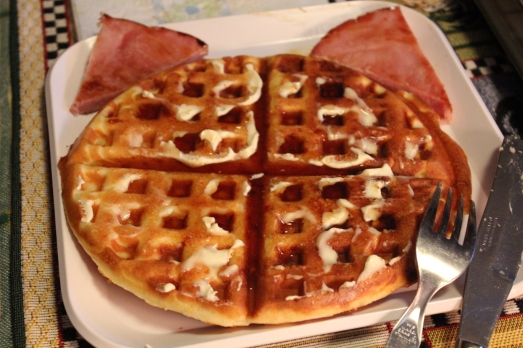
Cute!  A waffle cat appeared on my plate.

Cute! A waffle kitty appeared on my plate.

If you worry that you won’t use the buttermilk often enough to justify buying a quart, consider keeping a canister of powdered buttermilk in your pantry.  It is available in the baking aisle of the grocery store.  With this you can make up exactly the amount you need for a recipe by adding the buttermilk powder to water and mixing well.  I always have this on hand as well as a quart of buttermilk in the refrigerator.

Buttermilk is the liquid of choice in this recipe because it lends a slight tanginess to the waffle, and it is so complimentary to the cheese.  Chances are you will put something sweet on your waffle, so that tang brings everything into balance.

These waffles raise up nice and high and are very light.  Any leftover waffles can be used to make a ham sandwich, or try sliced banana and crispy bacon sandwiched between two waffles.  Yum!!

BUTTERMILK WAFFLES WITH CHEESE

Yield: makes about 8  6-inch waffles

Ingredients:

  • 2 eggs
  • 1  1/2 cups milk ( regular or low-fat)
  • 2 Tbsp. vegetable oil
  • 2 cups all-purpose flour
  • 1 Tbsp baking powder
  • 1/2 tsp. salt
  • 2 cups grated cheddar cheese (or more, to taste)

Directions:

1.  In a large batter bowl, whisk together the flour, baking powder, and salt.

2.  In a separate, smaller bowl,  blend together the eggs, milk, and oil.  Add to dry ingredients and stir to blend.  Batter may be lumpy.  Stir in the cheese.

3.  Heat waffle iron to hot and spray with non-stick cooking spray.  Pour batter into center of waffle iron (about 1/2 cup per waffle).  Bake 2 1/2 – 4 minutes,  following cooking times as per your waffle iron.  Generally 2-3 minutes will give you a soft waffle, while 4 minutes will make a crispy waffle.

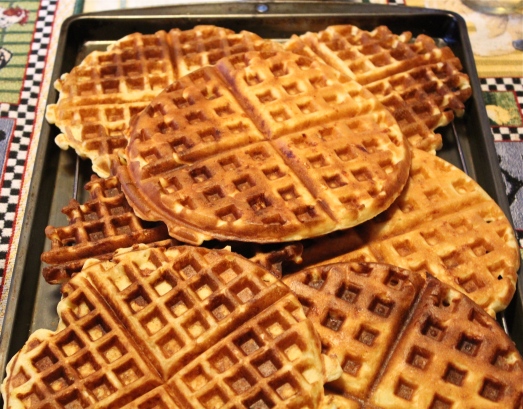
IMG_9479


We love these waffles for dinner with a meat such as ham or sausages.  I also think they would be very good as the basis for chicken and waffles.  Use your imagination to think up other ways to enjoy them.

SOURCE:  Will It Waffle?


Mini Cheesecakes, (or what I brought to Easter dinner)

Mini Cheesecakes

Mini Cheesecakes

Good morning, folks,  Happy Spring,  Welcome to Monday, and here I am back….did you miss me?  I certainly missed you!

Last week was a whirlwind of busy-ness, and I didn’t spend a lot of time in the kitchen, so our meals devolved into left overs and quick and easy ones that are already on these pages somewhere.  Can you believe one evening we even had Chinese Takeout?   Well, what can I say?  We like it every so often (in a pinch).   The point to all this being …I didn’t have anything new to share with you,  until Easter weekend rolled around, that is.

IMG_9541

The family gathered at my niece’s house–she wanted to try being the hostess for the first time.  I like to encourage our younger family members to try hostessing and entertaining,  and so I said,  “what can I do to help with dinner?”   The answer:  “Oh, Aunt Carolyn, will you please make dessert?”   YES!

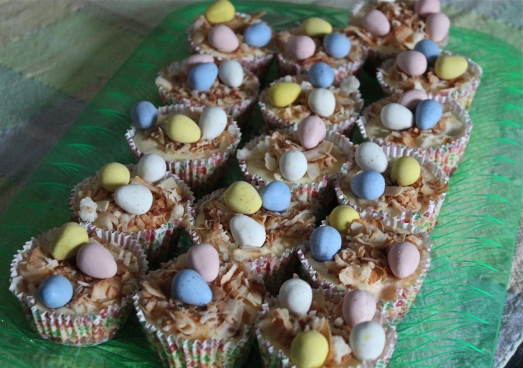
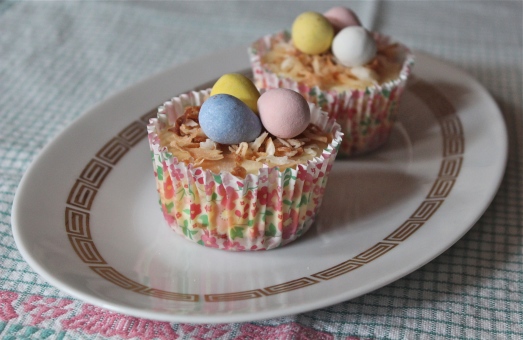
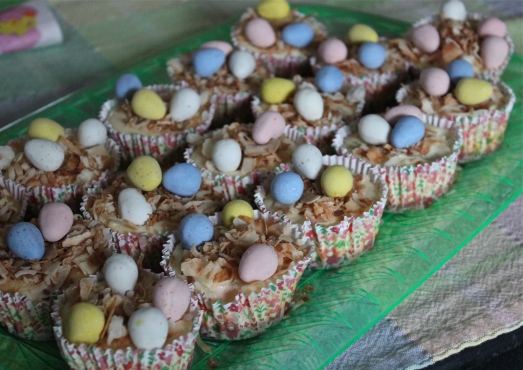
I had seen a picture of miniature cheesecakes in a magazine that were so cute, I really wanted to try them.  They were individual ones, made in muffin tins, with the tops decorated with toasted coconut and mini chocolate eggs to look like little nests.  I knew the children would really like them…and the adults too!  They were super easy to make and came out just right.  I was so pleased.  Those pictured below were decorated with help from a 3-year-old, so they may not look perfect.  A few extra “eggs” may have been eaten along the way, but it was fun doing it with a little girl to help me!

IMG_9556

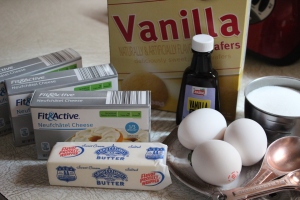
The crust under the cheese filling is meant to be made with graham cracker crumbs, but in our family we have an allergy to graham crackers, so I always use a shortbread cookie instead.  In this case I used Nilla Wafers, crushed to replace the graham crumbs.  I also used a low-fat cream cheese in place of the regular, for a reduction of some fat and calories.  It all worked out beautifully.

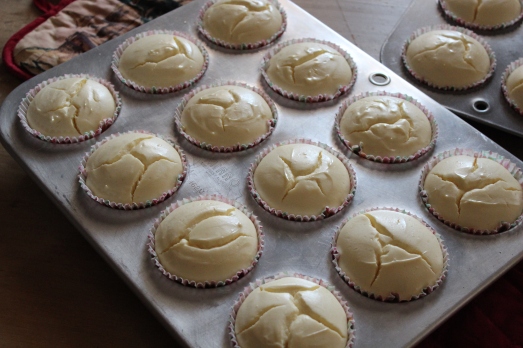
As the cheesecakes bake, the tops of them get cracked, but as they cool, and the tops sink a bit, the cracks close up, and they are covered by the toasted coconut “grass”, so don’t worry about that small detail.

IMG_9533

It has occurred to me that these little cakes would be a perfect dessert for a buffet.  With Mother’s Day coming up soon, bridal showers and graduations too, just change out the type of little candies in the “nest” to fit the occasion.  So cute!!

MINI CHEESECAKES

Yield:  Makes 18 servings

Ingredients:

  • 1 cup graham cracker crumbs (or other type of cookie crumb)IMG_9528
  • 3/4 cup + 2 Tbsp. sugar, divided
  • 3 Tbsp. butter, melted
  • 3 pkg. cream cheese, softened (8-oz. each)
  • 1 tsp. vanilla extract
  • 3 eggs
  • 1 cup + 2 Tbsp. coconut
  • 54 tiny speckled chocolate eggs

Directions:

1.  Preheat oven to 325*F.  Line 18 muffin cups with paper liners.

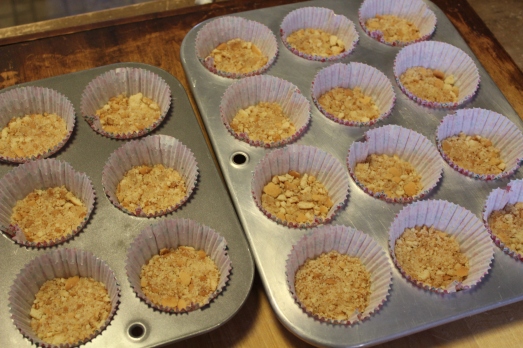
2.  Mix graham crumbs, 2 Tbsp. sugar and melted butter in a small bowl until uniformly moistened and crumbly.  Press 1 Tbsp. crumbs into the bottoms of muffin cups.

Crumbs in the bottom of the cups.

Crumbs in the bottom of the cups.

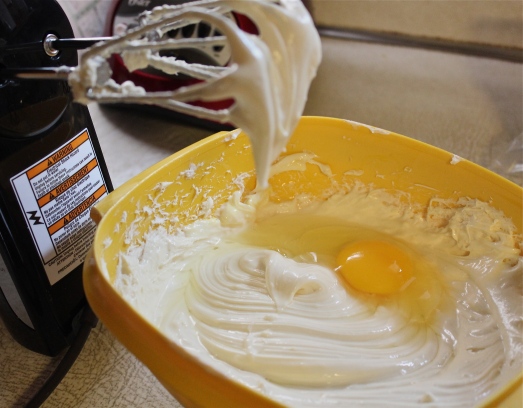
3.  Beat cream cheese, vanilla and remaining sugar with mixer until smooth.  Add eggs, 1 at a time, mixing on low speed after each just until blended.

IMG_9530

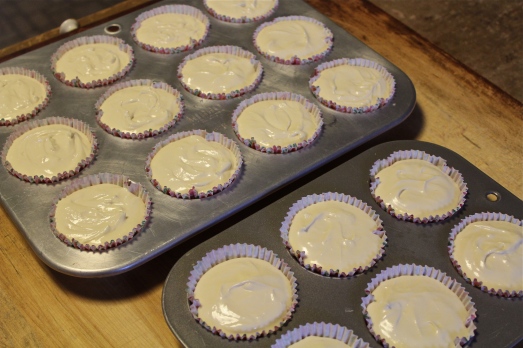
Spoon over crusts.  (Each cup takes about 2 Tbsp. filling)

IMG_9531

4.  Bake at 325*F. for 25 to 30 minutes or until centers are almost set.  Cool completely.  Refrigerate for at least 2 hours.

IMG_9533

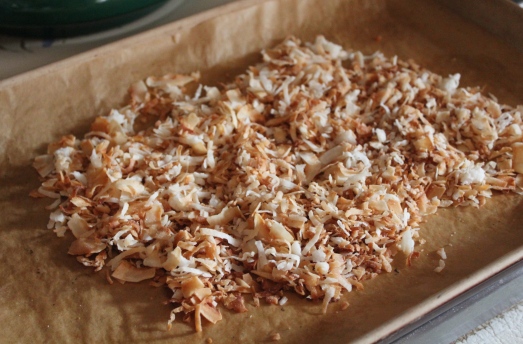
To toast coconut:  pour the 1/2 cup + 2 Tbsp. coconut onto a baking sheet and bake at 325*. for 5 minutes.  Watch carefully to prevent over browning.

Toasted Coconut.

Toasted Coconut.

5.  Top each cheesecake with 1 Tbsp. toasted coconut shaped into a nest.

Fill each one with 3 tiny speckled chocolate eggs.

IMG_9543

IMG_9557

SOURCE:   Food Network Magazine