Pumpkin Spice Pancakes.
Those of you who know me by now, know that I adore anything with pumpkin spice, in fact I have a whole board on Pinterest, devoted to it. That board gets visited a lot so I figure there are lots of other folks who love pumpkin spice anything as much as me. Usually those foods revolve around dessert of some sort like cupcakes, pies, cookies, bars or even ice cream….but with pancakes I can bring my addiction to the breakfast table.
These are a perfect fall breakfast and a great way to use up small amounts of pumpkin leftover from your other baking endeavors. Sprinkling the tops with cinnamon sugar and adding just a drizzle of syrup is all these need in the way of topping. I made these on a rainy Sunday morning when we could enjoy a leisurely breakfast. They were wonderful !
PUMPKIN SPICE PANCAKES

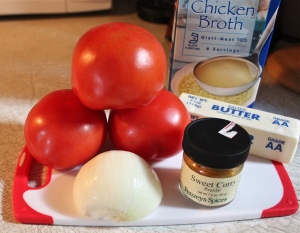
All the ingredients ready.
Yield: 8 – 12 pancakes
Ingredients:
- 1 1/4 cups all-purpose flour
- 2 Tbsp. brown sugar, packed
- 2 tsp. baking powder
- 1/4 tsp. salt
- 3/4 tsp. ground cinnamon
- 1/4 tsp. ground nutmeg
- Dash ground ginger
- Dash ground cloves
- 1 cup milk (I used 1/3 cup skim milk and 2/3 cup pumpkin spice coffee lightener for extra flavor.)
- 1/2 cup pumpkin puree
- 1 large egg
- 2 Tbsp. vegetable oil or melted butter
Directions:
1. In a medium mixing bowl, combine the flour, brown sugar, baking powder, salt and spices and stir with a whisk to combine.
2. In another bowl, mix together the milk, pumpkin, egg, and oil or butter. Add the wet ingredients to the flour mixture and whisk together just until combined.

Add egg-pumpkin mixture to the dry ingredients.
The batter may still have a few lumps–that’s okay.
3. Preheat the oven to 200*F. Have an oven safe platter or serving dish ready. Heat a greased griddle or skillet over medium heat. Once the griddle is hot, spoon on the pancake batter. Let cook until bubbles begin to form on the top surface. Carefully flip with a spatula and cook the second side until golden brown, a couple minutes more.

Look how they puffed up!
Transfer the cooked pancakes to the oven safe dish, and place in the oven to keep warm. Repeat with rest of the batter until it has all been cooked.
4. Serve warm with cinnamon sugar, maple syrup, and butter as desired.

Nice robust flavor!!

Served with breakfast sausages.
SOURCE: adapted from Martha Stewart