Lemony Ricotta Galette with Summer Squash

Lemony Ricotta Galette with Summer Squash

Lemony Ricotta Galette with Summer Squash

I know that being swamped with zucchini is a continuing problem for some of you with gardens, so I’m here to help with that.  Even if you don’t have a garden (like me), you may be looking for some different ways to use zucchini or yellow summer squash.

Summer squashes are about as versatile a vegetable as they come.  Delicious in so many ways–grilled, sautéed, baked or paired with other vegetables, you name it, they’re great.  They can become the main entree in a meatless meal, a savory side dish, or baked into a dessert.  Today I am making a galette that can be the centerpiece of your meal, or served as a side dish, or appetizer.

A side salad is all that's needed for this meal.

A side salad is all that’s needed for this meal.

Galettes are known for their flaky flat crust and irresistible fillings, and this zucchini/summer squash-stuffed pastry is no exception.  The tender veggies are paired with three kinds of cheeses, lemon, and a drizzle of olive oil, then baked until brown and crisp.

Here’s a tip that will make the squash less moist and save your crust from becoming soggy:  Salt the squash well and allow to drain in a colander for about 15 minutes.  Pat dry with a paper towel before putting them into the pastry.

LEMONY RICOTTA SUMMER SQUASH GALETTE

Yield:   Makes 6 servings

Ingredients:IMG_7875

  • 2 medium zucchini and/or yellow squash, thinly sliced (2  1/2 cups)
  • salt
  • 1/2  (15-oz.) package rolled refrigerated piecrust (A time saver,  but make your own if you must.)
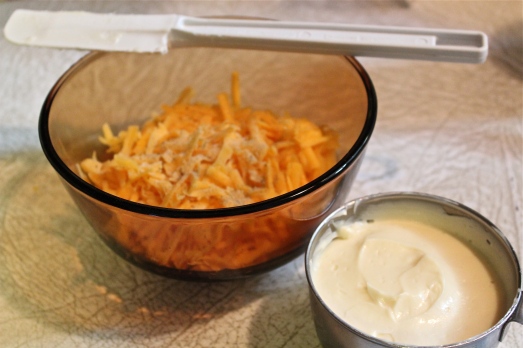
  • 3/4 cup ricotta cheese
  • 1/2 cup grated Parmesan cheese
  • 1/4 cup shredded mozzarella cheese
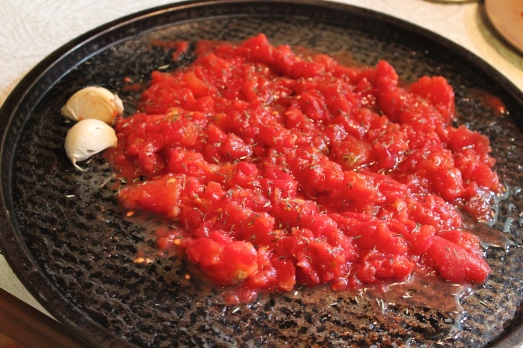
  • 1 clove garlic, minced
  • 1 tbsp. olive oil
  • 2 tsp. finely shredded lemon peel
  • 1 tbsp. lemon juice
  • 1/4 tsp. salt
  • 1.4 tsp. ground black pepper
  • 1 egg yolk  ( or small amount egg beater/egg substitute)
  • Italian seasoning blend or dill weed for garnish

Directions:

1.  Sprinkle sliced zucchini lightly with salt.  Transfer to a colander; drain for 15 minutes.  Pat dry with paper towels.  Preheat oven to 400*F.

Pat squash dry before using.

Pat squash dry before using.

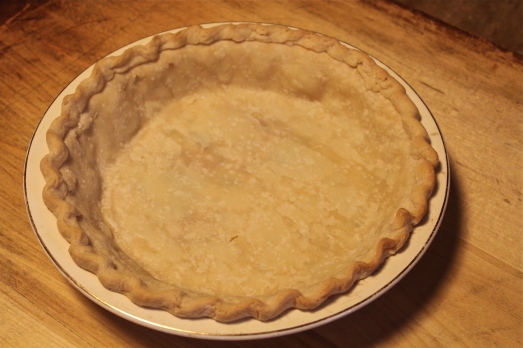
2.  Meanwhile, on a large piece of lightly floured parchment paper, roll pie dough to a 12-inch circle.  Transfer parchment and dough to a large baking sheet and set aside.

IMG_7878

3.  Make ricotta filling:  In a medium bowl whisk together ricotta, Parmesan, mozzarella, garlic, 1 tsp. olive oil, lemon peel, lemon juice, salt, and pepper.  Using a spatula, spread over dough, leaving a 1  1/2-inch border at edge.

Spread ricotta filling on dough leaving a border.

Spread ricotta filling on dough leaving a border.

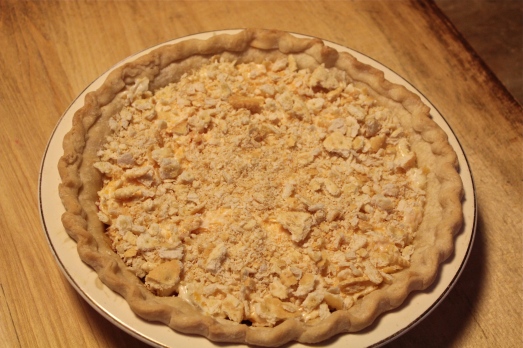
Top with squash slices.  Drizzle with remaining olive oil.  Sprinkle seasoning blend over squash.

Top with squash slices and seasonings.

Top with squash slices and seasonings.

Gently fold up pastry edges over filling, pleating as necessary.

Fold up edges, and brush with egg mixture.

Fold up edges, and brush with egg mixture.

4.  In a small bowl, whisk egg yolk and 1 tsp. water.  (Or use egg substitute)  Lightly brush pastry edges with egg mixture.  Transfer galette to oven.  Bake 35 – 40 minutes or until edges are golden brown.  If using dill weed as a seasoning, some dill fronds make a colorful garnish.  Serve warm or at room temperature.

IMG_7882

So delicious!

So delicious!


SOURCE:   Better Homes and Gardens


Tomato Pie

Tomato Pie

Tomato Pie

Sometimes a recipe will contain ingredients that make  you wonder how such diverse items could possibly go together and taste good.  Such is the case with this recipe.  This is a dish that I find unusual and out of the ordinary, not because of what the ingredients are, but the way in which they are put together.

Let’s take the tomatoes— not at all unusual in a sandwich with mayonnaise, or even with a slice of cheese.  But how about if the tomatoes get combined with mayonnaise and cheese in a piecrust?    Add some roast garlic to this combination and top the whole thing off with crumbled Ritz crackers.   This is not a dessert pie, but a side dish.  And let me tell you it is wow-worthy!

Sorry I couldn't cut a piece for a photo.

Sorry I couldn’t cut a piece for a photo.

I believe this dish may be southern in origin, one that is popular at pot-luck get-togethers.  So I made it recently to bring to an end-of-the-year pot-luck picnic.  First came the questions:  “what is this?”   Then sounds of delight, ” wow, this is so good,  who made it?”,  “may I have the recipe?”   I’ll admit, I was doubtful that I would like it, but after one taste I was hooked.  I encourage you to give it a try, with a small suggestion.  When fresh tomatoes become plentiful, you may want to use them, and roast them as the recipe directs, to decrease their juiciness.  But when fresh tomatoes are not available, good quality canned ones are great also, as that is what I used in making it for the first time, and what the recipe actually calls for.

We are going to a pot-luck picnic supper.

We are going to a pot-luck picnic supper.

TOMATO PIE

Yield:   Makes 8 servingsIMG_7581

Ingredients:

  • 1 ( 9-inch) piecrust – store-bought or make your own favorite recipe for single crust pie
  • 1 (28-ounce) can peeled whole tomatoes, preferable San Marzano, drained, seeded, and cut into 1-inch pieces
  • 2 large garlic cloves, unpeeled (use 3-4 if you really like garlic)
  • 1/4 cup olive oil  ( I thought this was a more than needed)
  • 2 tablespoons fresh thyme, plus more for garnish ( or use 1 teaspoon dried)
  • 1 cup grated sharp Cheddar ( about 4 ounces)
  • 3/4 cup mayonnaise
  • 1 teaspoon ground pepper
  • 1/4 teaspoon salt
  • 1/3 cup crumbled Ritz crackers

Directions:

1.  Preheat oven to 375*F.  On a lightly floured surface, roll piecrust dough into a 1/4-inch-thick, 11-inch round.  Fit into a 9-inch pie plate; trim any excess dough and crimp edge.  Note: use a standard pie dish, not a deep-dish one.

Prepare pie shell for single crust pie.

Prepare pie shell for single crust pie.

Line pastry bottom with a round of parchment paper and fill with dried beans or pie weights.

Fill with dried beans or pie weights prior to blind baking.

Fill with dried beans or pie weights prior to blind baking.

Bake until edge is golden brown but bottom is still pale, 15 – 20 minutes.  Set aside to cool on a wire rack.

Baked pie shell.

Baked pie shell.

2.  Reduce heat to 350*F.  Arrange tomatoes and garlic in a single layer on a rimmed baking sheet; drizzle evenly with olive oil and  sprinkle with thyme.  Roast tomatoes until slightly shriveled and starting to brown around the edges, about 15 minutes.  Remove from oven and let cool in pan.

Roast tomatoes and garlic cloves on a baking sheet.

Roast tomatoes and garlic cloves on a baking sheet.

3.  Meanwhile in a medium bowl, combine Cheddar, mayonnaise, pepper, and salt.  Set aside.

Mix together mayonnaise and shredded cheese.

Mix together mayonnaise and shredded cheese.

4.  Squeeze roasted garlic from its skin onto piecrust.  Using an offset spatula or your fingers, spread the garlic paste evenly to cover bottom of piecrust.  Layer tomatoes on top of the garlic paste.  Spread the cheese-mayonnaise mixture over the tomatoes.

Spread cheese mixture over tomatoes in pie shell.

Spread cheese mixture over tomatoes in pie shell.

Sprinkle top with crushed Ritz crackers.

Top with crushed Ritz crackers.

Top with crushed Ritz crackers.

Bake until cheese is bubbly and pie top is golden brown, about 20 minutes.  Garnish with a sprig of thyme, if desired.

Sorry I couldn't cut a piece for a photo.

Sorry I couldn’t cut a piece for a photo.


SOURCE:   Country Living Magazine

Texas Corn Casserole

Texas Corn Casserole

Texas Corn Casserole

Things in Texas are big!  That’s what we always hear isn’t it?   The state is big, people live big, and they eat big!

This corn casserole is well named for Texas.  It’s big in every way.  The recipe makes a 9″ x 13″ casserole, but the flavor is fantastic.

Sweet with corn, savory with peppers and scallions and spicy with seasoning.  Oh, Yeah!

Sweet with corn, savory with peppers and scallions and spicy with seasoning. Oh, Yeah!

I made this recently to take to a large gathering that included people of all ages from 2 year olds to folks in their eighties.  Not one person had anything but compliments to say about it.  A young boy came up to me and said, ” I really liked your cornbread.  Could you give the recipe to my dad?”   Wow, that made me feel so good!   I know something about children who are picky eaters, so when a youngster likes a particular food that is somewhat out of their “comfort zone”, I know it’s a keeper.

There’s just a little bit of sweetness to this that the corn and corn bread contribute, but enough variety in flavors to make it really interesting.  The recipe calls for Creole seasoning which I didn’t have, so I used Cajun seasoning instead, putting in only 1 teaspoon.  The resulting spiciness was apparent, but not too much, for my taste and the children’s.  You can adjust the spice/heat level to your liking, but do try this unique cornbread casserole.  It’s great to bring to a pot-luck picnic, or as a side dish to a summer meal.

IMG_7628

TEXAS CORN CASSEROLE

Yield:     Make about 10 to 12 servings, or more if cut smaller

Uses convenience foods for fast preparation.

Uses convenience foods for fast preparation.

Ingredients:

  • 6 tablespoons butter, melted, plus more for greasing the pan
  • 1  ( 14 1/2-ounce) can whole-kernel corn, drained
  • 1  (14 1/2-ounce) can cream-style corn
  • 1 (7-ounce) box corn bread mix
  • 6 scallions, white and green parts, finely chopped
  • 2 large eggs
  • 1/2 green pepper, seeded and diced
  • 1  1/2 teaspoons Creole seasoning, plus more to sprinkle on top

Directions:

1.  Preheat the oven to 400*F.  Butter a 9 by 13-inch baking dish and set aside.

2.  In a large bowl, combine all ingredients.

Combine all ingredients in a large bowl.

Combine all ingredients in a large bowl.

Transfer batter to prepared pan.  Sprinkle top with Creole seasoning.  Bake casserole until golden brown, about 40 minutes.

Golden brown on top, moist inside.

Golden brown on top, moist inside.

So Good!

So Good!


SOURCE:  Country Living Magazine


Zucchini and Onion Gratin

Zucchini and Onion Gratin

Zucchini and Onion Gratin

I know that later in the summer we will be so overwhelmed by the amount of zucchini that is available, we won’t know what to do with it all, but right now the thought of making a zucchini baked dish with some tender young zucchini, seemed like a good idea to go with my grilled chicken menu.  And later on when all those zucchini show up on my doorstep, I’ll be returning to this recipe again, and again.

IMG_7579

The use of the term gratin in food preparation means that an ingredient is topped with a browned crust that can be made from breadcrumbs, grated cheese, eggs or butter.  A gratin is usually prepared in a shallow dish, then baked or cooked under an overhead grill or broiler to form a golden crust on top and is traditionally served in its baking dish, a gratin dish.

This recipe pretty much meets that description.  Using just a few key additives to enhance the rather bland flavor of zucchini, it turns out to be wonderfully flavorful.  Pre-broiling the zucchini helps to get them browned, and sprinkling a small amount of Parmesan cheese on top further forms a browned crisp crust.  You can serve this dish hot, but it’s also great at room temperature.

ZUCCHINI AND ONION GRATIN

Yield:  serves 6    ( Note:  1 serving is about 1 cup and equals 92 calories and 7 gm carbs.)

Ingredients:IMG_7565

  • 2 tablespoons olive oil, divided
  • 1 large onion, quartered lengthwise and thinly sliced
  • 1 tablespoon tomato paste
  • 2 teaspoons grated lemon rind
  • 1 teaspoon fresh thyme leaves, or 1/2 teaspoon dried
  • 3/8 teaspoon kosher salt, divided
  • 1/4 teaspoon ground black pepper
  • 1  1/2 pounds zucchini, diagonally sliced into 1/4-inch thick pieces
  • 1 oz. Parmesan cheese, grated (about 1/4 cup)

Directions:

1.  Heat a large skillet over medium heat.  Add 1 tablespoon oil to pan, swirl to coat.  Add onion; cook 6 minutes, stirring occasionally.  Stir in tomato paste, cook 2 minutes.   Stir in lemon rind, thyme, 1/8 teaspoon salt and  pepper; cook 2 minutes, stirring occasionally.

Sauté onions and thyme, then add tomato paste and lemon rind.

Sauté onions, then add tomato paste, thyme and lemon rind.

2.  Preheat broiler to high.

3.  Arrange zucchini on a jelly-roll pan.  Drizzle with remaining 1 tablespoon oil; toss.  Broil 7 minutes or until lightly charred.  Sprinkle with remaining salt.

Lay zucchini slices out on a baking sheet for broiling.

Lay zucchini slices out on a baking sheet for broiling.

4.  Preheat oven to 375*F.

5.  Spread onion mixture in a 2-quart gratin dish.  Arrange zucchini mixture over onion mixture.  Sprinkle with cheese.  Cover and bake at 375*F. for 25 minutes.  Remove from oven.

Arrange in a baking dish and top with grated cheese.

Arrange in a baking dish and top with grated cheese.

6.  Uncover zucchini mixture; broil 1  1/2 minutes to lightly brown the top if needed.   Note:  I thought mine was adequately browned after baking, so I omitted this step–use your judgement if it’s needed.

IMG_7578


SOURCE:   Quick Vegetarian Pleasures

Mashed Potato Salad

Mashed Potato Salad

Mashed Potato Salad


Unlike most potato salads that have chunks or cubes of potato in them, this one is a mashed potato salad.  A friend of mine made this for a pot-luck dinner, and we thought it was so different and tasty that I had to have the recipe.  This style potato salad has now become our favorite.  It is absolutely awesome.  It is super popular whenever I bring it anywhere, and I get asked for the recipe all the time.

The recipe is easy to prepare and very flexible allowing you to include additional ingredients that you love, but this is the way we like it best.  It can be served warm or chilled, its just great either way. You can include or omit the chopped egg, and sometimes I add some cooked, crumbled bacon.  Mr. D. asks for it whenever we have a picnic meal.  Try it the next time you’re making a potato salad, and you’ll see why we like it so much.

The best darn potato salad!!

The best darn potato salad!!

When I mash the potatoes, I leave them a little rough for more texture, but some people like their potatoes mashed well so the salad is more creamy.  It’s really just a matter of personal preference.  Also, some people have told me they use dill pickle relish and dill pickle juice, and some folks don’t peel their potatoes.  Leaving the skins on the potatoes makes the salad more “rustic”, but good never-the-less.

MASHED POTATO SALAD

Yield:   Serves 8

Ingredients:

  • 2 pounds potatoes,  white or Yukon GoldIMG_7393
  • 1 small sweet onion, or scallions, chopped
  • 2 hard-cooked eggs, chopped
  • 1/2 cup diced celery
  • 1/4 cup sweet pickle relish
  • salt and black pepper to taste
  • 1 cup mayonnaise
  • 2 teaspoons prepared yellow mustard
  • 2-3 tablespoons sweet pickle juice

Directions:

1.  Peel potatoes, cut into chunks, and place into a large saucepan.  Cover with cold water and salt lightly.  Bring to a boil.  Reduce heat to medium-low and simmer until tender, about 20 minutes.  Drain and transfer potatoes to a large bowl.

2.  Mash potatoes with a potato masher.  Stir in onion or scallion, eggs, celery, pickles, salt and black pepper.

Add eggs, celery, onion or scallion and salt and pepper to mashed potatoes.

Add eggs, celery, onion or scallion and salt and pepper to mashed potatoes.

Mix mayonnaise, pickle juice, and mustard in a separate small bowl;  pour over potatoes and mix well.  Salad may be served at this point while it is still warm, or cover and refrigerate at least 1 hour to chill before serving.


IMG_7396


SOURCE:  adapted from a friend’s recipe


Garlicy Baked Potato Slices

Garlicy Baked Potato Slices

Garlicy Baked Potato Slices

Of all the ways that I have fixed potatoes, I think one of my favorites is baked, crispy, well-seasoned slices.  Sliced potatoes are easier to prepare than, say, cutting french fries.  I just slice them up, drizzle with a little olive oil and seasonings, bake, and they turn out great.  The thinner you slice them, the crispier they get.  Sort of like hot potato chips.

I made the batch you see here to go with oven baked fish, but they are the prefect side dish with so many things from burgers to steak, and anything in between.

IMG_7161

You really don’t need a recipe for these, but I wrote down some basic guidelines if you care to make them…..

GARLICY BAKED POTATO SLICES

Yield:   Makes 2 – 4 servings   I plan on 1 potato/person

Ingredients:

  • 2 – 4 whole potatoes, peeled (Russets are preferred)
  • olive oil,  about 1 Tablespoon/potato
  • salt and pepper
  • 1 – 2 cloves finely chopped garlic
  • mixed herbs such as Italian Blend or Fine Herbs

Directions:

1.  Preheat oven to 400*F.  Lightly spray a shallow baking sheet with sides.

2.  Slice potatoes into desired thickness.  Remember, thinner is crispier.  Cut them with a knife or use a mandoline for uniform slices.

3.  Rinse potatoes with water to remove starch.  Pat dry with paper towels.

4.  In a large bowl, mix together the olive oil, salt and pepper, garlic, and seasonings of choice.   Add potato slices and stir or toss until all are evenly coated.

5.  Spread potato slices on prepared baking sheet.  Place in oven to bake, turning every 15 minutes until golden brown.  The total time will depend on how many potatoes you are cooking.  I made 2 potatoes and it took about 30 minutes for them to be done.

Serve while hot with a dipping sauce of your choice.  We like ranch dressing or Thousand Island dressing.

It’s unlikely that when you serve these, there will be any left over, but IF there are,  we like them rewarmed in a skillet with an egg broken over them.  Serve with bacon for breakfast.

Garlicy Baked Potato Slices

Garlicy Baked Potato Slices


SOURCE:   Carolyn’s Originals


Cauliflower Fritters

Cauliflower Fritters

Cauliflower Fritters

If it looks like a potato pancake and it tastes like a potato pancake, it must be a potato pancake, right?   Wrong!!  These are cauliflower fritters, and they are delicious.  Similar to the taste of a potato pancake, they make a fabulous side dish–we loved them!

IMG_6939

As a continuation of my posts about cauliflower, I have this one for you.   Another way to use this versatile vegetable and reap it’s health benefits in a fun way.

You can use either a bag of frozen cauliflower, or cook up some fresh cauliflower, mash, then mix with hash brown potatoes, cheese, onions, whole wheat flour and eggs.  Use just enough oil to sauté them in a fry pan, and you will have crispy fritters.  I made a dipping sauce to go with them that enhanced their presentation and flavor.  I find it amazing how versatile cauliflower is and how it can mimic potatoes or rice.  It makes a great stand-in for either of them with far fewer calories and carbohydrates.

CAULIFLOWER FRITTERS

Yield:  Makes 8 – 10 fritters

Ingredients:

  • 1 medium head cauliflower, or 1 (10-oz.) package frozen cauliflower
  • 1/2 cup onion, chopped in small diceIMG_6933
  • 2 tablespoons whole wheat flour
  • 2 teaspoons minced garlic
  • 1/4 teaspoon kosher salt
  • 1/4 teaspoon black pepper
  • 1/4 teaspoon lemon zest
  • 3/4 cup shredded hash brown potatoes, thawed if frozen
  • 1/2 cup shredded white cheddar cheese
  • 2 large eggs, lightly beaten
  • 2 teaspoons olive oil

For the dipping sauce:

  • 1/4 cup plain Greek yogurt (0%, or 2% fat is okay)
  • 2 tablespoons minced green onions
  • 2 tablespoons canola mayonnaise
  • 2 teaspoons fresh lemon juice
  • 1 – 2 dashes hot sauce, optional

Directions:

1.  Prepare cauliflower as package directs if frozen, or bring to a boil and cook until tender if using fresh.

2.  Place cauliflower in a large bowl and mash with a potato masher.  Stir in onion, flour, garlic, salt, pepper, lemon zest, potatoes, cheese and eggs.  Mix to combine well.

IMG_6934

IMG_6935

3.  Form into 8 – 10 patties.  I used a large spoon, and dropped lumps of batter into the skillet, then flattened them slightly with a spatula. Using this method, I got 10 fritters.

IMG_6936

4.  Heat a large nonstick skillet over medium-high heat.  Add oil and swirl to coat.  Cook patties 4 minutes on each side or until nicely browned.  Repeat with remaining batter.

5.  Make dipping sauce:  Combine yogurt, 1/8 tsp. salt, and remaining ingredients.  Serve sauce with fritters.

IMG_6940


IMG_6942

SOURCE:  adapted from Skinny Taste

Flower Power

Roasted Cauliflower with Cranberries and Crispy Onions

Roasted Cauliflower with Cranberries and Crispy Onions

Cauliflower is a beautiful thing!!  With its bunches of tightly clustered florets snuggled into green leaves, cauliflower looks somewhat like a flower.  Cauliflower comes in colors other than white–and with added nutrients.  Orange and green cauliflower provide us with beta carotene.  Green cauliflower also has a little more protein.  Purple cauliflower  gets its color from anthocyanins, said to improve memory.  Since its color fades with cooking, you will get the most benefits by eating it raw.

Cauliflower has been called the “skinny starch”.  It has 16 % less carbs and 79 % fewer calories per 1/2 cup than potatoes.  It also has lots of pectin– the same stuff that thickens jams and jellies–so pureed cooked cauliflower has a velvety texture that adds body to soups, and mimics potatoes when mashed.  Cauliflower may also be shredded or finely chopped, then lightly sautéed to make a low-carb “rice” or “couscous”.

If you prepare cauliflower with a sense of adventure, its mild flavor and unique texture allow it to take the place of other higher calorie, higher-starch foods in  winter dishes.  Forget basic steamed florets.  In this recipe you will see that roasty-browned cauliflower mixes well with dried cranberries and crispy French fried onions to make a side dish that goes well with just about any main entree.

IMG_6635

ROASTED CAULIFLOWER WITH CRANBERRIES AND CRISPY ONIONS

Yield:   Makes 6 – 8 servingsIMG_6629

Ingredients:

  • 1 large head of cauliflower
  • 3 tablespoons extra virgin olive oil, divided
  • 1 teaspoon salt
  • 1/2 teaspoon black pepper
  • 3/4 cup French Fried onions, divided
  • 1/2 cup dried cranberries, divided
  • 1/2 cup coarsely chopped pistachios, divided
  • 1/2 cup ricotta cheese

Directions:

1.  Preheat oven to 375*F.

2.  Cut cauliflower into small bite-size florets.  Place on a large baking sheet and toss with 2 tablespoons olive oil, salt and pepper.   Roast for 10 minutes.  Remove cauliflower from oven.  Add 1/2 cup of the French fried onions to the cauliflower on the baking sheet and toss to mix.  Place the remaining 1/4 cup onions off to one side of the baking sheet (these will be used as garnish.)   Roast mixture an additional 10 minutes or until cauliflower reaches desired tenderness and onions are brown and crispy.

3.  In a small bowl, combine ricotta cheese with 1 tablespoon olive oil, salt and pepper to taste.

4.  Set aside 2 tablespoons each of dried cranberries and pistachios ( these will be used as garnish).

5.  In a medium bowl, toss warm cauliflower mixture with dried cranberries and pistachios.  Spoon ricotta mixture on top and fold gently, leaving large bits of ricotta.  Garnish with reserved cranberries, pistachios and crispy onions.  Serve immediately.

IMG_6637

SOURCE:   Eating Well

Broccoli and Rice Casserole

Broccoli Rice Casserole

Broccoli and Rice Casserole

Broccoli, rice and cheese seem to have a natural affinity for each other and this recipe has been around in one form or another for years.  But you know what?   We never had it at our house when I was growing up.  I remember having it at church potluck suppers, and I know my friends had it at their house, but this was not one of my mother’s  side dishes. Other popular meals that my friends had were Shake and Bake Chicken and Hamburger Helper, but nope, not us.  I felt so deprived!   And even to this day, as a grown-up,  when I hear or read about broccoli and rice casserole I still get that “left out” feeling.  So I decided to take the bull by the horns and just make it.  With all the people who have made this dish over the years, how hard could it be?

Success!!

Success!!

I know that some people used “Cheez-Whiz” to make this dish real cheesy, but that, too, had been denied to me.  So I followed the path I know and used a cheddar cheese.  You can make this with fresh broccoli if you precook it sightly,  or as a time saver use frozen broccoli florets.  The type of rice you use can vary according to your taste.  I used long grain white rice, but you could use a wild and white rice combination, brown rice, or any other variety of rice.

The finished casserole was indeed cheesy, and had a good proportion of broccoli to rice, so I didn’t feel that it was too heavy with carbohydrates.  It’s filling and satisfying, and goes well with most any meat or fish, or serve with another vegetable and a salad for a meatless meal.

IMG_6527

BROCCOLI AND RICE CASSEROLE

Yield:   Makes 6 servings

Ingredients:

  • 1/2 medium onion, dicedIMG_6520
  • 2 tablespoons extra virgin olive oil
  • 1 cup rice ( long grain, brown, or other)
  • 2 cups chicken broth (or vegetable broth)
  • 1 medium head broccoli, stems trimmed, and cut into florets; or use 1 (14 0z.) bag frozen broccoli florets
  • 1 can ( 11 oz.) cream soup, i.e., cream of chicken, mushroom, or celery
  • 3/4 cup shredded cheddar
  • 1/4 teaspoon cayenne pepper
  • pepper to taste

Directions:

Preheat oven to 350*F.

1.  Saute onion in 2 T olive oil;  when onion is translucent stir in rice.  Cook and stir for 2 – 3 minutes more.  Add 2 cups broth, bring to a boil, decrease heat and simmer about 40 minutes with the lid on.  Stir a few times to prevent sticking.

2.  Meanwhile cook (or thaw) broccoli, but not completely.  You want it to be on the crisp side.  Drain off any liquid.  Mix in the soup and pepper.

3.  Add the cooked rice and 1/2 cup cheese.

Mix rice into broccoli mixture.

Mix rice into broccoli mixture.

Add the cheese and mix in.

Add the cheese and mix in.

Transfer to a baking dish that has been prepared with non-stick spray.  Top with remaining 1/4 cup cheese.  Bake for 30 minutes at 350*F.

So good!

It may be April 1st, but this dish is no joke!  😀

SOURCE:    Adapted from The Casserole Connection

Spicy Roasted Root Vegetables

Spicy Roasted Root Vegetables

Spicy Roasted Root Vegetables

With yesterday being the first day of Spring, I have high hopes for this cold dreary weather to turn itself into something resembling spring pretty darn quick.  I’m ready for “peep-toe” shoes, cut-offs, short sleeves and blazer jackets.  I’m also longing for some springtime foods, like strawberries, something lemon, rhubarb, grilled chicken and some different vegetables.  I’m dreaming of sunny days, flowers poking up thru debris in the garden, buds on the trees and getting my hands dirty in the dirt–not!!

So I jotted down some things on my foods “to-make” list. Things like lemon meringue pie, baked ham with scalloped potatoes, fresh peas, cupcakes with coconut on them……etc.   Then I made this instead.  I’m sure you understand.  Before you take that dive into forbidden territory, you must fortify yourself, get your system ready for what lies ahead.  So I put all my notes into a “Spring is not here yet, but it’s coming” file, and turned to what is available at hand now.

IMG_6847

What I had on hand was golden beets and sweet potatoes.  Similar colors, different textures and taste, but both are root vegetables.  So I decided to treat them both the same way.   Anyone who knows anything knows that roasting is the way to go when you want to bring out the natural sweetness in vegetables because their natural sugars get caramelized.  Beets and sweet potatoes are  both loaded with natural sugars, and Gwyneth Paltrow suggested that a light drizzle with good olive oil and some spicy seasonings would turn these vegetables into a dinnertime sensation.   You know what?   She was right!

SPICY ROASTED ROOT VEGETABLES

Yield:    Serves 4IMG_6837

Ingredients:

  • 1 bunch golden beets, (about 3 med-large size), peeled and cut into wedges.
  • 1 large, or 2 medium sweet potatoes (yams), peeled and cut into wedges or sliced about 1/4-inch thick
  • 2 tablespoons olive oil
  • 1/2 teaspoon cumin
  • 1/2 teaspoon paprika, either sweet or smoky
  • 1/4 teaspoon chili powder
  • 1/4 teaspoon sea salt

Directions:

1.  Preheat oven to 400*F.  Line a baking sheet with foil, and spray with non-stick spray.

2.  In a large bowl, mix together the spices (cumin, paprika, chili powder, salt).

IMG_6840

IMG_6841

Isn't this an interesting pattern in the beet?

Isn’t this an interesting pattern in the beet?

Add cut up beets and sweet potatoes.  Drizzle with the olive oil.  Toss lightly to coat evenly with the spices and oil.  Spread into an even layer on the baking sheet.

IMG_6843

I kept the two kinds of veggies separate on the baking sheet and also on my serving platter, just for appearance sake.

IMG_6845

3.  Roast for 30 minutes, or until they pierce easily with a knife.   Sprinkle with additional salt and pepper if desired.  Serve warm.

IMG_6847

More thoughts on the subject:   this is a good spice mixture to have in a little jar ready for use whenever you have root vegetables to cook.  Mix up the combination of veggies.  Think of turnip, parsnips, carrots—I think any of them would be good cooked this way.

SOURCE:    my own imagination