Spaghetti Squash with Meatballs and Sauce

Roast spaghetti squash with meatballs and marinara sauce.

Roast spaghetti squash with meatballs and marinara sauce.

Roasted spaghetti squash topped with a simple fresh-tasting tomato sauce and Italian-style meatballs.  I’m getting hungry all over again just thinking and writing about it.  This dish is so darn good you won’t even miss the pasta, and think of all the calories you’ll be saving.

This recipe can be reinvented in different ways.  For instance, instead of meatballs,  brown up ground beef ( or turkey) and add it directly to the sauce for a meat sauce.  Cook up some pasta for anyone who won’t eat meatballs and sauce without it, while you enjoy the squash.  This is a meal that will make the whole family happy.  It is low-carb, gluten-free, and paleo friendly.

A large spaghetti squash provides enough “Noodle-strands” for four generous servings.  It can be cooked in the microwave as a time saver instead of roasting it.  The sauce can be frozen and reheated for a busy night.

Serve strands of squash with sauce and meatballs.

Serve strands of squash with sauce and meatballs.

SPAGHETTI SQUASH WITH MEATBALLS AND SAUCE

Yield:  4 servings

Ingredients:

  • 1 large spaghetti squash, about 3 pounds
  • salt and pepper, to taste

For the Sauce:

  • 1 Tbsp. butter
  • 1 Tbsp. olive oil
  • 1/2 an onion, finely chopped
  • 1 carrot, peeled and chopped
  • 1 stalk celery, finely chopped
  • 28 oz. can crushed tomatoes
  • 1/4 cup white wine, or chicken broth
  • 1 bay leaf
  • salt and pepper to taste
  • 1  lb. lean ground beef
  • 2 Tbsp. flavored fine bread crumbs
  • 1 Tbsp. grated Parmesan cheese
  • 1 egg
  • salt and pepper
  • olive oil for browning meatballs

Directions:

1.  Preheat oven to 400 *F.  Cut spaghetti squash in half lengthwise and scoop out seeds and membrane.  Season with salt and bake about 1 hour, or longer if needed in a shallow baking dish.  It should pierce easily with a sharp knife when done.

Roast the spaghetti squash.

Roast the spaghetti squash.

If you prefer the microwave, prepare squash as directed above, place in a microwave-safe  dish and cover.  Microwave for 8 – 9   minutes or until soft and pierces easily.

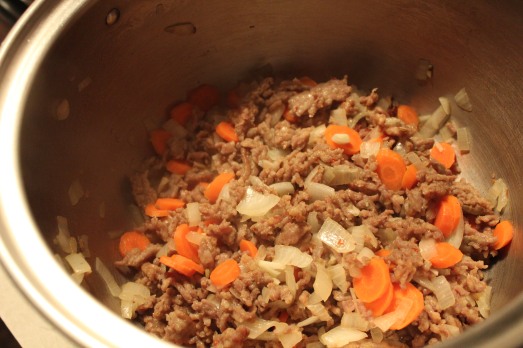
2.  In a large deep sauté pan, melt butter and add oil.  Add onions, celery and carrots and sauté on medium-low heat for about 3 – 4 minutes, until soft.

Sauté celery, onions, and carrot till soft.

Sauté celery, onions, and carrot till soft.

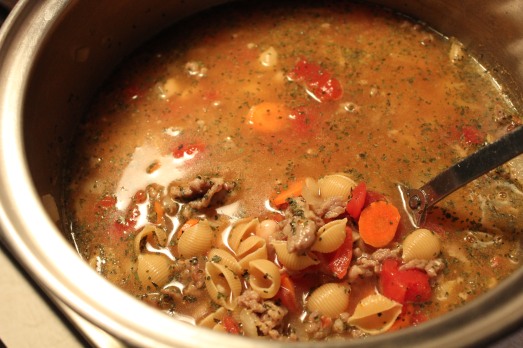
Add the wine, tomatoes and bay leaf, and season with salt and pepper.  Let mixture come to a simmer while you make the meatballs.

Add in crushed tomatoes, wine, and seasonings.

Add in crushed tomatoes, wine, and seasonings.

3.  In a large bowl, mix together the ground beef, bread crumbs, Parmesan cheese, and egg.  Add salt and pepper to taste.  Blend well.  Form into meatballs (I like mine medium sized).

4.  In a large skillet, heat the olive oil, and in batches, brown the meatballs on all sides.  Add them to the tomato sauce and let them finish cooking in the sauce.  Simmer the sauce with meatballs for about an hour.

5.  When squash is cooked, let it cool for about 10 minutes.  When cool, use a fork to remove the spaghetti-like strands.  Keep covered and set aside to keep warm until sauce is ready.  Serve topped with sauce and meatballs, and grated Parmesan cheese if desired.

Top each serving with grated cheese if desired.

Top each serving with grated cheese if desired.

SOURCE:    Martha Stewart

Swedish Apple Pie

Swedish Apple Pie

Swedish Apple Pie

This past weekend I made some time for a fall activity I particularly enjoy–apple picking.  Many of the nearby orchards offer “pick-your-own” and it’s become somewhat of a tradition.  There’s something so satisfying about going into the orchard, and plucking those rosy, beautiful apples right off the tree and into your basket.  My problem is that I don’t seem to know when to stop.  I plan to pick a few, primarily for eating, ( lunches, ect.), and to bake a pie, or other dessert,  but somehow when I get home I have way more than I planned on.  Fortunately my unheated sunroom turns into “cold storage” room during cold weather, so apples keep quite well out there.

IMG_5539

Apple Pie is always on the agenda of what to make with the apples.  But this recipe, though called Apple Pie,  is out of the ordinary in that there is no bottom crust, and what looks like a crust on top is more like a big sugar cookie.  This recipe is one that I tend to forget about until something reminds me of it.  It originally came to my attention when it was included in a cookbook put together by the ladies of my church several years ago.  I really don’t know its history, or why its called “Swedish Apple Pie”, but being half Swedish myself I decided to claim it, make it and share it with you. If anyone out there knows its history please let me know.IMG_5547

Any firm, tart apple can be used, so that the acidity stands up to the rich batter.  The orchard I visited had Macouns and Cortlands available for picking, and I got some of each.  I used three Cortlands for this pie, but I really don’t think it matters what kind of apple you use.  You really can’t go wrong with apple pie.IMG_5548

Swedish Apple Pie is very easy to make.  Basically you slice the apples into a pie dish, sprinkle them with a sugar-cinnamon mixture, mix up the batter and spread it over the apples.  Bake till nice and brown.  The crust is very much like a sweet, chewy cookie,  somewhat like an apple crisp, but not quite.  Start to finish it takes about an hour to make, and soon after that you’ll be spooning up a warm apple dessert that is particularly good served with a wedge of sharp cheddar cheese, another New England tradition not to miss.  It is also very nice with a scoop of vanilla ice cream.

IMG_5554

SWEDISH APPLE PIE

Servings:   6 – 8

Ingredients:

  • 3 large, or 4 medium firm-tart apples, peeled, cored and cut into 1/4-inch thick slices
  • 1 tsp. ground cinnamon
  • 1 Tablespoon plus 1 cup flour
  • 2 Tablespoons plus  2/3 cup sugar
  • 1 teaspoon baking powder
  • 1/4 teaspoon salt
  • 10 Tablespoons butter, melted
  • 1 large egg, slightly beaten

Directions:

1.  Preheat the oven to 350*F.  Grease a 9 – inch pie plate.

2.  Place the sliced apples into the pie plate, arranging them to fit.  The pie plate will be nearly full.

3.  In a small bowl, mix together the 1 Tbsp. flour, 2 Tbsp. sugar, and 1 tsp. cinnamon.  Sprinkle over the apples.

Sprinkle cinnamon-sugar over the apples in a pie dish.

Sprinkle cinnamon-sugar over the apples in a pie dish.

4.  In a large bowl,  whisk together the 1 cup flour, 2/3 cup sugar, baking powder, and salt.  Add the beaten egg, and melted butter. Stir just to mix well.  Spoon over the apples and spread to cover as well as possible.  I just “plop” it all over the top, and then with a spatula spread it out as much as possible.  It may not cover completely.

"Plop" spoonfuls of dough over the apples.

“Plop” spoonfuls of dough over the apples.

Spread dough out to cover apples as much as you can.

Spread dough out to cover apples as much as you can.

5.  Bake until the crust is golden brown, about 40 to 45 minutes.  Let cool on a wire rack for 30 minutes.  Serve warm.

Bake till brown on top.

Bake till golden brown on top.

Serve with a wedge of cheddar cheese or a scoop of ice cream.

Serve with a wedge of cheddar cheese or a scoop of ice cream.

SOURCE:   First Church cookbook:  “Home Cooking”

Broccoli Salad

Broccoli Salad

Broccoli Salad

This is one of my favorite salads to bring to a pot-luck meal.  I always come home with an empty bowl, and get lots of requests for the recipe.  I have been making this salad for a long time and don’t remember where I learned to make it. These days I pretty much make it from memory.  It’s that easy.

Basically it consists of raw broccoli and sliced celery combined with green grapes, and golden raisins.  I also like to add some salted sunflower seeds for additional texture.  The dressing is made up of mayonnaise and yogurt, or sour cream, with some sugar added and white vinegar.  As you can imagine there’s lots of “crunch” to it provided by the broccoli and celery, and that is off-set by the sweetness and juiciness of grapes and raisins.

IMG_5535

Everyone seems to love it, even children.  Probably because of the sweetness.  So for anyone needing a way to introduce more vegetables into their diet, this salad, I believe, is a good place to start.

In my experience I find that the flavors blend better if you make the salad and refrigerate it at least an hour before you want to serve it.  It keeps well for a few days in the refrigerator if you should happen to have any left over. The amount of the individual ingredients is flexible, so  you can put in as much  of any ingredient as suits your taste.

BROCCOLI SALAD

Yield:   Servings:  8

All the ingredients you need.

All the ingredients you need.

Ingredients:

  • 4 cups small broccoli florets
  • 1  1/2 cups seedless green grapes, halved
  • 1 cup sliced celery
  • 1 cup raisins
  • 1/4 cup salted sunflower seeds
  • 1/4 cup light mayonnaise
  • 1/4 cup plain low-fat yogurt (or sour cream)
  • 3 Tablespoons sugar
  • 1 Tablespoon white vinegar

Directions:

1.  Combine the first 5 ingredients  in a large bowl.

2.  Combine mayonnaise, and remaining ingredients, stirring with a whisk.  Pour dressing over broccoli mixture, and toss well.  Chill for at least an hour before serving.

Mixing up the dressing.

Mixing up the dressing.

Toss salad and dressing and chill for at least an hour.

Toss salad and dressing and chill for at least an hour.

IMG_5536

P.S.  If I’m really feeling “devil-ish”,  I cook up 3 – 4 slices of bacon, and crumble it into the salad as well.    Oh, Yeah!!

Anytime Frosted Sugar Cookies

Anytime frosted sugar cookies.

Anytime frosted sugar cookies.

Psssst—-Gather ’round everyone, I have a secret to tell you.   You know those soft, frosted sugar cookies that you see in those plastic containers at the grocery store?  The ones that have changing color schemes depending on the season and upcoming holiday?    Well, you can make them at home,  only BETTER!     I don’t buy them myself, but if someone offered me one, I guess I’d have a hard time saying,  ” no, thanks.”   They’re nicely decorated, make you feel festive, and it’s so easy to buy a package and put them out on a plate,  what’s the harm?    Artificial ingredients, that’s what.

I’ve found a recipe for a homemade version that blows the competition right out of the water.    These taste buttery and delicious because, well, they’re made with real butter, with real vanilla, and real eggs.  Real beats artificial every time.  These are easy to make and they can be customized to the season or holiday just by tinting either the cookie dough or the frosting with food coloring and sprinkling on some decorative sugars or jimmies.  The only problem once you make these is that they taste so much better than the store-bought, you won’t want to stop at having just one.  So having a batch of these around is kind of a problem, but at least it’s a good problem to have. 😀

ANYTIME FROSTED SUGAR COOKIES

Yield:  2 – 3 dozen large cookies

Change colors to suit the occasion or holiday.

Change colors to suit the occasion or holiday.

Ingredients:

  • 4  1/2 cups all-purpose flour
  • 4  1/2 tsp. baking powder
  • 3/4 tsp. salt
  • 1  1/2 cups ( 3 sticks) unsalted butter, at room temperature
  • 1 1/2 cups sugar
  • 3 large eggs
  • 5 tsp. vanilla extract

1.  Preheat oven to 350*F.  Line baking sheets with parchment paper or grease lightly.

2.  In a medium bowl combine the flour, baking powder and salt, and whisk together to blend.

3.  In the bowl of an electric mixer, combine the butter and sugar and beat together on medium-high speed until soft and fluffy, about 2 – 3 minutes.  Beat in the eggs one at a time, mixing well after each addition and scraping down the bowl as needed.  Blend in the vanilla.

4.  With the mixer on low speed, add the dry ingredients mixing just until incorporated and evenly mixed.  Cover and chill the dough for 1 hour.

5.  When you are ready to bake the cookies, scoop a scant quarter cup of cough and roll into a ball.  Flatten the ball slightly and place on the prepared baking sheet.  Repeat with the remaining dough, spacing the cookies at least 2 – 3 inches apart.  Bake about 10 – 12 minutes or just until set.  (Do not over bake.)  The edges should be only very lightly browned if at all.  Let cool on the baking sheet for several minutes.  Transfer to a wire rack to cool completely.

Frosting:IMG_5546

  • 4 – 5 cups confectioners’ sugar, sifted
  • 1/3 cup  ( 5  1/3 Tbsp.) unsalted butter, melted
  • 1 Tbsp. vanilla extract
  • 7 – 8 Tbsp. milk, plus more as needed
  • food coloring, optional
  • sprinkles and colored sugars, optional

To frost the cookies:

1.  Place the confectioners’ sugar in a medium bowl.  Add the melted butter, vanilla, and milk to the bowl and whisk until smooth.  Whisk in additional milk as necessary, 1 teaspoon at a time, until you reach your desired consistency.  Tint with food coloring if desired.  Use an offset spatula or knife to frost the cooled cookies.  Top with sprinkles as desired.   Store in an air-tight container.

Let frosting dry before storing in air tight container.

Let frosting dry before storing in air tight container.

SOURCE:    Martha Stewart

Turkey Sage Burgers with Sautéed Apples and Brie

Turkey sage burgers with sautéed apples and cheese.

Turkey sage burgers with sautéed apples and cheese.

Apples are a wonderfully versatile fruit used in both sweet and savory dishes.  In this quick entreé they lend their sweetness to turkey burgers, making them the perfect quick meal for a fall lunch or dinner.

These pan seared turkey burgers are flavored with sage and shallots and topped with apple slices sautéed in butter and a slice of creamy brie or other cheese of your choice.  In my burgers  I used sliced sharp cheddar cheese, but whatever cheese you have that pairs well with apples would be a good match-up.

IMG_5512

Whenever I make these burgers Mr. D. does not know we are eating turkey;  he thinks it is a beef burger.  So I’m sure that you could serve them with traditional burger toppings in place of the apples and cheese, and unless you tell, no-one would suspect, and would “gobble” them up.  😀

TURKEY SAGE BURGERS WITH APPLES AND CHEESE

Yield:   Serves 4

Ingredients:

  • 1 – 1.3 lb. ground turkey
  • 1/2 tsp. salt
  • dash pepper
  • 1 Tbsp. mayonnaise
  • 1 Tbsp. bread crumbs
  • 1/2 medium shallot, finely chopped ( about 2 tsp.)
  • 1 Tbsp. fresh sage, finely chopped or 1 tsp. dried sage
  • 1 Tbsp. vegetable oil for cooking
  • 4 slices cheese  (Brie, cheddar, Jack)
  • 4 seeded rolls, split

Apples:

  • 1 medium apple, cored, peeled and cut into thin slices
  • 1 Tbsp. butter
  • pinch salt

Directions:

1.   Sauté apples first by melting butter in a large skillet over medium heat.  Add apple slices in a single layer and sprinkle with salt.  Cook till tender, about 2 minutes each side.  Transfer to bowl and set aside.

Set aside sautéed apples while burgers cook.

Set aside sautéed apples while burgers cook.

2.   Mix ground turkey and seasonings (through sage) in a large bowl.  Form into 4 equal-size patties.

3.  Add vegetable oil to the skillet used by the apples.  Bring heat to medium-high.   Get the pan hot before adding the burgers to get a nice sear, then lower the heat to medium-low.  Cook burgers, turning several times so they don’t burn,  until firm and no longer pink in the middle,  7 – 8 minutes total.

A hot pan will give a nice sear to the burgers.

A hot pan will give a nice sear to the burgers.

4.  Remove from heat, top each burger with a quarter of the apples and a slice of cheese.  Cover pan and set aside about 5 minutes to allow cheese to melt.  Place burgers on buns and serve immediately.

Serve with chips and a pickle or a side of coleslaw.

Serve with chips and a pickle or a side of coleslaw.

SOURCE:    My Gourmet Connection

Croissant French Toast

Baked Croissant French Toast

Baked Croissant French Toast

I love using croissants to make fresh-tasting sandwiches, especially with egg salad.  But after a day or two if they have not been used up croissants start to dry out and lose their appeal.  Finding myself in that situation, I thought, why not make French Toast with them?IMG_5518

The one thing I was uncertain about was what form  should the croissant be in,  i.e.. left whole, broken up into pieces?  So I went where everyone goes for answers, the internet!  Into the Google search window I typed ” French Toast made with croissants”. and up came a whole load of sites, as you would expect.  Selecting one that seemed to have some promise, I ended up on a site called “Yummly”, and a recipe from Rachael Ray.  This gave me all the information I needed to proceed, and a fantastic new slant on baked french toast.   So here it is,  a  french toast that is very light and airy, nicely flavored with maple syrup, and baked till brown and crispy on top.

I wanted this for Sunday morning breakfast, and so I prepared the recipe the evening before and refrigerated it overnight.  Pop it in the oven to bake while having a first cup of coffee, and in about 35 – 45 minutes you can be sitting down to this extremely enjoyable breakfast, with a serving of fruit on the side.   Dee-lish!

CROISSANT FRENCH TOAST

Yield:   makes 6 servingsIMG_5515

Ingredients:

  • 1 cup sugar
  • 1/4 cup plus 2 Tbsp. pure maple syrup
  • 1/2 cup water
  • 2 cups milk  ( any kind  is okay.)
  • 2 large eggs
  • 5 croissants, cut in half horizontally

Directions:

1.  Preheat oven to 350* F. Butter a  cake pan appropriately sized.  ( 9″ round,  8″ x 12″ rectangle)

2.  In a small heavy saucepan, bring the sugar, 2 Tablespoons maple syrup, and 1/2 cup water to a boil over medium-high heat, without stirring, and cook for about 5 minutes.  Boil until the caramel is a light golden color or a candy thermometer registers 240 degrees, 5 – 8 minutes longer  Working quickly and carefully, remove the thermometer and pour the maple caramel into the prepared cake pan.    Set aside.

3.  In a large bowl, whisk the milk, eggs and the remaining 1/4 cup maple syrup.  Arrange the croissants over the maple caramel in the baking dish.  Slowly pour the egg mixture over the top making sure to moisten all of the bread.  Press down gently to flatten.  Wait about 10 minutes, then go back and flatten again.  The dish may be baked at this time, or cover with plastic wrap and refrigerate until you are ready to bake it.  Before baking press down on the croissants again .

4.  Prior to baking sprinkle a cinnamon sugar mixture all over the top to create a sugary, crisp topping.  (This is my addition to the recipe,)  Bake at 350* for 35 – 45 minutes until custard is set and a toothpick inserted in the center comes out clean.

Browned and crispy on top.

Browned and crispy on top.

Remove from the oven , cut into wedges or squares, and serve with butter and additional maple syrup if desired.

Serve with butter, maple syrup and a side of fruit.

Serve with butter, maple syrup and a side of fruit.

TIP:   Swap out the croissants and use raisin bread or cake doughnuts instead.

SOURCE:   Everyday with Rachael Ray via Yummly.com

Chocolate Chip Pumpkin Cookies

Chocolate Chip Pumpkin Cookies

Chocolate Chip Pumpkin Cookies

Happy Halloween, everyone.  There are no tricks today, just treats!!

Every fall–it never fails, when the leaves start to fall and the weather gets crisp, I start thinking about these cookies–it’s crazy.  Usually I like my cookies to be crisp or chewy, but these are the exception.  They have a cake-like consistency which seems perfect and they taste like a combination of pumpkin pie and chocolate.  After they have cooled I like to drizzle some vanilla glaze over the tops to dress them up a little.   Honestly, they are the best pumpkin cookies I’ve ever tried!

IMG_5502

CHOCOLATE CHIP PUMPKIN COOKIES

Yield:  about 2 dozen cookies, depending on size

Ingredients:

Pumpkin,  spices and chocolate chips = Yummy

Pumpkin + spices + chocolate chips = Yummy

  • 1 cup pumpkin puree ( canned or homemade)
  • 1/2 cup granulated sugar
  • 1/2 cup brown sugar
  • 1/2 cup vegetable oil ( can use applesauce instead)
  • 1 egg
  • 3 drops red or orange food coloring (optional)**
  • 2 cups flour ( white, whole wheat, or a combination)
  • 2 tsp. baking powder
  • 2 tsp. ground cinnamon
  • 1/2 tsp. nutmeg
  • 1/4 tsp. cloves
  • 1/4 tsp. ground ginger
  • 1/4 tsp. salt
  • 2 tsp. vanilla extract
  • 1 tsp. baking soda
  • 1 tsp. milk
  • 1 cup chocolate chips (we love dark chocolate chips)
  • 1/2 cup chopped walnuts (optional)

Directions

1.  Preheat the oven to 350 *F.  Grease cookie sheets or line with parchment paper.

2.  In a large bowl, whisk together the pumpkin, sugars, oil and egg.  Add food coloring, if using.

3.  In another bowl, Whisk together the flour, baking powder, spices and salt.

4.  Dissolve the baking soda in the milk and set aside.

5.  Add flour mixture to the pumpkin mixture and stir together.  Stir in the baking soda/milk mixture and mix well.  Stir in vanilla, chocolate chips and nuts.

6.  Drop by tablespoon onto prepared cookie sheet (s) and bake at 350* for approximately 10 minutes or until lightly brown and firm.    I like to roll the dough into a ball and then flatten a little with a fork for a uniform look.  It makes the tops smoother if you plan to drizzle with icing.  An orange butter cream icing on top is wonderful also.

A little frosting drizzled on top fancies them up.

A little frosting drizzled on top fancies them up.

** These cookies will not be orange, therefore by adding the red or orange food coloring, you bring out the orange color of pumpkin.  Somehow when they look like pumpkin, the flavor of pumpkin seems to be more pronounced.  No kidding!

IMG_5505

IMG_5503

SOURCE:   ALL RECIPES.COM

Tuscan Sausage Soup with Shell Pasta and White Beans

Tuscan Sausage Soup  with Shell Pasta and White Beans.

Tuscan Sausage Soup with Shell Pasta and White Beans.

I’ve shared my views previously on the many shapes of pasta and how some shapes are better suited for one kind of dish while other shapes have their own perfect niche in your repertoire of recipes.  One of my absolute favorites to use in soups is shell pasta.  The reason seems obvious–they hold the broth!  Just like a spoon they carry some of the yummy flavor-laden broth to your mouth.

IMG_5393

Anyway, when I first saw this recipe for Tuscan Sausage Soup, packed with “conchiglie”, I was drawn to it.  Conchiglie is the Italian word for shell, so I felt as though it was talking to me.  It also includes white cannellini beans and spinach and is seasoned with garlic, onion and basil.  All the flavors you would expect in a rustic Italian soup such as this one.

The recipe makes a large amount of soup, and can be easily doubled  to feed a hungry crowd, or freeze some for a later date.  I made the recipe as I found it except for using frozen spinach instead of fresh. You could also use kale if you wish.   This is a recipe you need to have in your back pocket for when colder weather arrives and you want something warm and hearty to feed your family.

IMG_5387

TUSCAN SAUSAGE SOUP WITH SHELL PASTA AND WHITE BEANS

YIELD:   6 servings

Ingredients:

  • 1 pound Italian sausage, bulk or links.  If using links, remove casings.

    Gather together all the ingredients.

    Gather together all the ingredients.

  • 2 carrots, peeled and sliced
  • 1 large onion, chopped
  • 2 cloves garlic, minced
  • 6 cups chicken broth, low sodium preferred
  • 1  14.5 oz. can tomatoes, diced with juice
  • 1  15 oz. can cannellini beans, drained and rinsed
  • 1  1/2 tsp. dried basil
  • 8  oz. shell pasta, whole wheat, preferred
  • 6 oz. fresh spinach, or 1 pkg. frozen chopped spinach, well drained
  • salt and pepper to taste
  • grated Parmesan cheese for topping

Directions:

1.  Remove casings from sausage if using links.   Brown over medium-high heat in a large stock pot.  Crumble as you brown it.

Brown and crumble the sausage

Brown and crumble the sausage

2.  Add carrots, onion and garlic;  sauté until tender and starting to get a bit golden, about 7 minutes.

Add in the carrots, onion, and garlic.

Add in the carrots, onion, and garlic.

3.  Add chicken broth, tomatoes, beans, pasta and basil.

Add chicken broth, tomatoes, pasta, beans, and basil.

Add chicken broth, tomatoes, pasta, beans, and basil.

Bring to a boil, then reduce heat to a simmer.  Cover and continue cooking until pasta becomes a bit tender, about 7 minutes.

4.  Stir in spinach and cook until it is just wilted.  Taste and season with salt and pepper.

5.  Serve hot garnished with grated Parmesan cheese, if desired.

Here it is.  Looking delicious and tasting just as good as it looks.

Here it is. Looking delicious and tasting just as good as it looks.

SOURCE:   A Couple in the Kitchen

Chickpea and Chorizo Fideos

Chickpeas and chorizo fideos.

Chickpea and chorizo fideos.

In my opinion you can never have too many recipes for one-pot meals.  This one is easy to make and is a quick version of a Spanish pasta dish.  The chorizo provides a smoky flavor, but if you can’t find chorizo, pepperoni works well in its place, and that is what I used since I was not able to find the chorizo at my supermarket.  It is more likely to be found in a market that has a large department of Spanish foods.

In Spanish Fideo means noodle.  Fideo is a type of pasta commonly used in soups.  It can be long or short.  In this recipe the angel hair pasta is broken into 2-inch lengths to mimic the short fideos.

In addition to the chorizo or pepperoni, chickpeas, also known as garbanzo beans, provide an excellent source of protein.  So this dish, although consisting of only a few ingredients, is highly nutritious as well as very tasty.  We loved it and I’m sure I’ll be making it again.  If you have leftovers they can be easily reheated by adding a small amount of chicken broth to loosen it, and heat briefly in the microwave.

CHICKPEA AND CHORIZO FIDEOS

Yield:   Makes about 4 servingsIMG_5312

Ingredients:

  • 3 Tbsp. extra-virgin olive oil, divided
  • 1/2 package whole-wheat angel hair pasta ( 7-8 oz.), broken into 2-inch pieces
  • 2 large cloves garlic, minced
  • 1/2 cup chopped Spanish chorizo or pepperoni ( about 2 oz.)
  • 1 ( 14.5 oz.) can petite diced tomatoes
  • 1  1/2 cups water
  • 1/2 cup dry white wine
  • 1 15-oz. can chick peas, rinsed and drained
  • 3 scallions, sliced
Have all ingredients chopped and ready to go.

Have all ingredients chopped and ready to go.

Directions:

1.  Heat 2 Tbsp. olive oil in a Dutch oven over medium heat.  Add pasta pieces and cook, stirring, until toasted and browned in spots, 2 to 3 minutes.  Transfer to a bowl.

Toasting the pasta.

Toasting the pasta.

2.  Add the remaining 1 Tbsp. oil to the pan and heat over medium heat.  Add garlic and chorizo ( or pepperoni) and cook, stirring, until fragrant, about 1 minute.

3.  Add tomatoes, water, wine and the toasted pasta;  bring to a boil.  Reduce heat to a simmer and cook, stirring occasionally, until the pasta is tender and most of the liquid is absorbed, about 8 minutes.

Adding in the water, wine, pasta and tomatoes.

Adding in the water, wine, pasta and tomatoes.

4.  Stir in chickpeas and scallions and cook 1 minute more.

Add chickpeas and scallions.

Add chickpeas and scallions.

IMG_5318

Serve with a big green salad drizzled with a vinaigrette dressing.

SOURCE:    Eating Well.com

Beet and Orange Salad with Goat Cheese

Beets are one vegetable that I’ve had a complete turn-around on.  That is to say,  I didn’t used to like them and now I love them.  Roasting is what brought about my change of heart.  Once beets have been roasted they taste like a completely different vegetable.  I’ve described my method for roasting them in an earlier blog post that you can find here.  I frequently use them in salads as they combine well with other vegetables and some fruits.

Beet and Orange salad with Goat Cheese

Beet and Orange salad with Goat Cheese

Oranges are one of the fruits that play well with beets.  Their citrusy sweetness goes well with the sweetness that roasting brings out in beets.  Then I add some greens for color and texture contrast and nuts for crunch, in this case, pistachios.   Over the top is drizzled a Dijon vinaigrette dressing and some crumbled goat cheese.  Mr. D. loves this salad and asks for it on many occasions.  I kind of like it too!

IMG_5272

Please note, in the recipe below, directions are given for quickly cooking beets in the microwave if you are short on time for oven roasting them.  This works well in a pinch.

BEET AND ORANGE SALAD WITH GOAT CHEESE

Yield:   Makes 4 servings

Ingredients:

  • 1  1/2 pounds halved, peeled beets  (wear gloves for peeling or you will have stained fingers)
  • 1 navel orange, peeled and sectionedIMG_5271
  • 2 cups mixed salad greens
  • 1/3 cup salted pistachios
  • 2 Tablespoons goat cheese

Dressing:

  • 2 Tablespoons olive oil
  • 2 teaspoons white vinegar
  • 2 Tablespoons minced shallots
  • 1/2 teaspoon Dijon mustard
  • 1/4  tsp. salt and 1/4 tsp. pepper

Directions:

1.  Wrap beets in parchment paper.  Microwave on HIGH until tender, about 7 minutes.  Let stand 5 minutes.  Cut into 1-inch pieces and place in a salad bowl.

2.  Section the orange and place the pieces in the salad bowl with the beets.**

3.  Add the salad greens to the salad bowl with the beets and orange sections.

4.  Whisk together all the dressing ingredients till well blended.   Add to salad bowl.  Toss  to coat.

5.  Top with the  pistachio nuts and crumbled goat cheese.

IMG_5364

** When I make this salad for two of us, I construct it on salad plates, as you see pictured.

SOURCE:   Cooking Light