No More Burned Marshmallows

I don’t know anyone who doesn’t like S’mores, do you?  I was first introduced to them when I was a young girl at Girl Scout Camp where we roasted the marshmallows on a stick over a camp fire.  It seemed like mine always caught fire, and I ended up with a charred, blackened marshmallow while everyone else’s marshmallow was golden and perfectly toasted.  I usually insisted that I made it that way on purpose because I loved them burned.  😦

roasting a marshmallow

roasting a marshmallow (Photo credit: Wikipedia)

Now-a- days, I’ll gladly eat a S’more if someone else will toast my marshmallow, because I still can’t seem to get it right!   That’s probably why I think these bars are so fabulous.  There is no toasting of marshmallows involved—what’s used here is marshmallow fluff out of a jar.  While it’s a little sticky to spread, I’m better with that than I am with an open fire.

S'mores Bars

S’mores Bars

I found this recipe hidden away at the bottom of an ad from my Mazda dealer.  Sneaky little devil, thought I wouldn’t see it!      Well, I did see it, and I made it for us all to enjoy.  People,  you will be so happy that I’m sharing it with you.  No longer will you need to go camping, or build a fire to toast marshmallows,  just make these ooey, gooey, chocolatey, bars and you will have the best without the mess.  🙂

Decadent!

Decadent!

SWEET AND SPICY S’MORES BARS

Yield:   Makes 16 bars

Graham crackers, chocolate and marshmallow fluff.

Graham crackers, chocolate and marshmallow fluff.

Ingredients:

  • 1 stick unsalted butter, at room temperature
  • 1/3 cup sugar
  • 1/4 cup dark brown sugar
  • 1 tsp. vanilla extract
  • 1/2 cup whole wheat flour
  • 1/2 cup graham cracker crumbs
  • 1 tsp. baking powder
  • 1/2 tsp. ground cinnamon
  • 1/4 tsp. salt
  • 2   (3.5 oz.) bars dark chocolate
  • 1/2 cup marshmallow fluff

1.  Preheat the oven to 350*F.  Line an 8 x 8 inch baking pan with parchment  paper, leaving an overhang at the sides.

2.  In a mixer bowl, beat the butter, sugars, and vanilla together until light and fluffy.

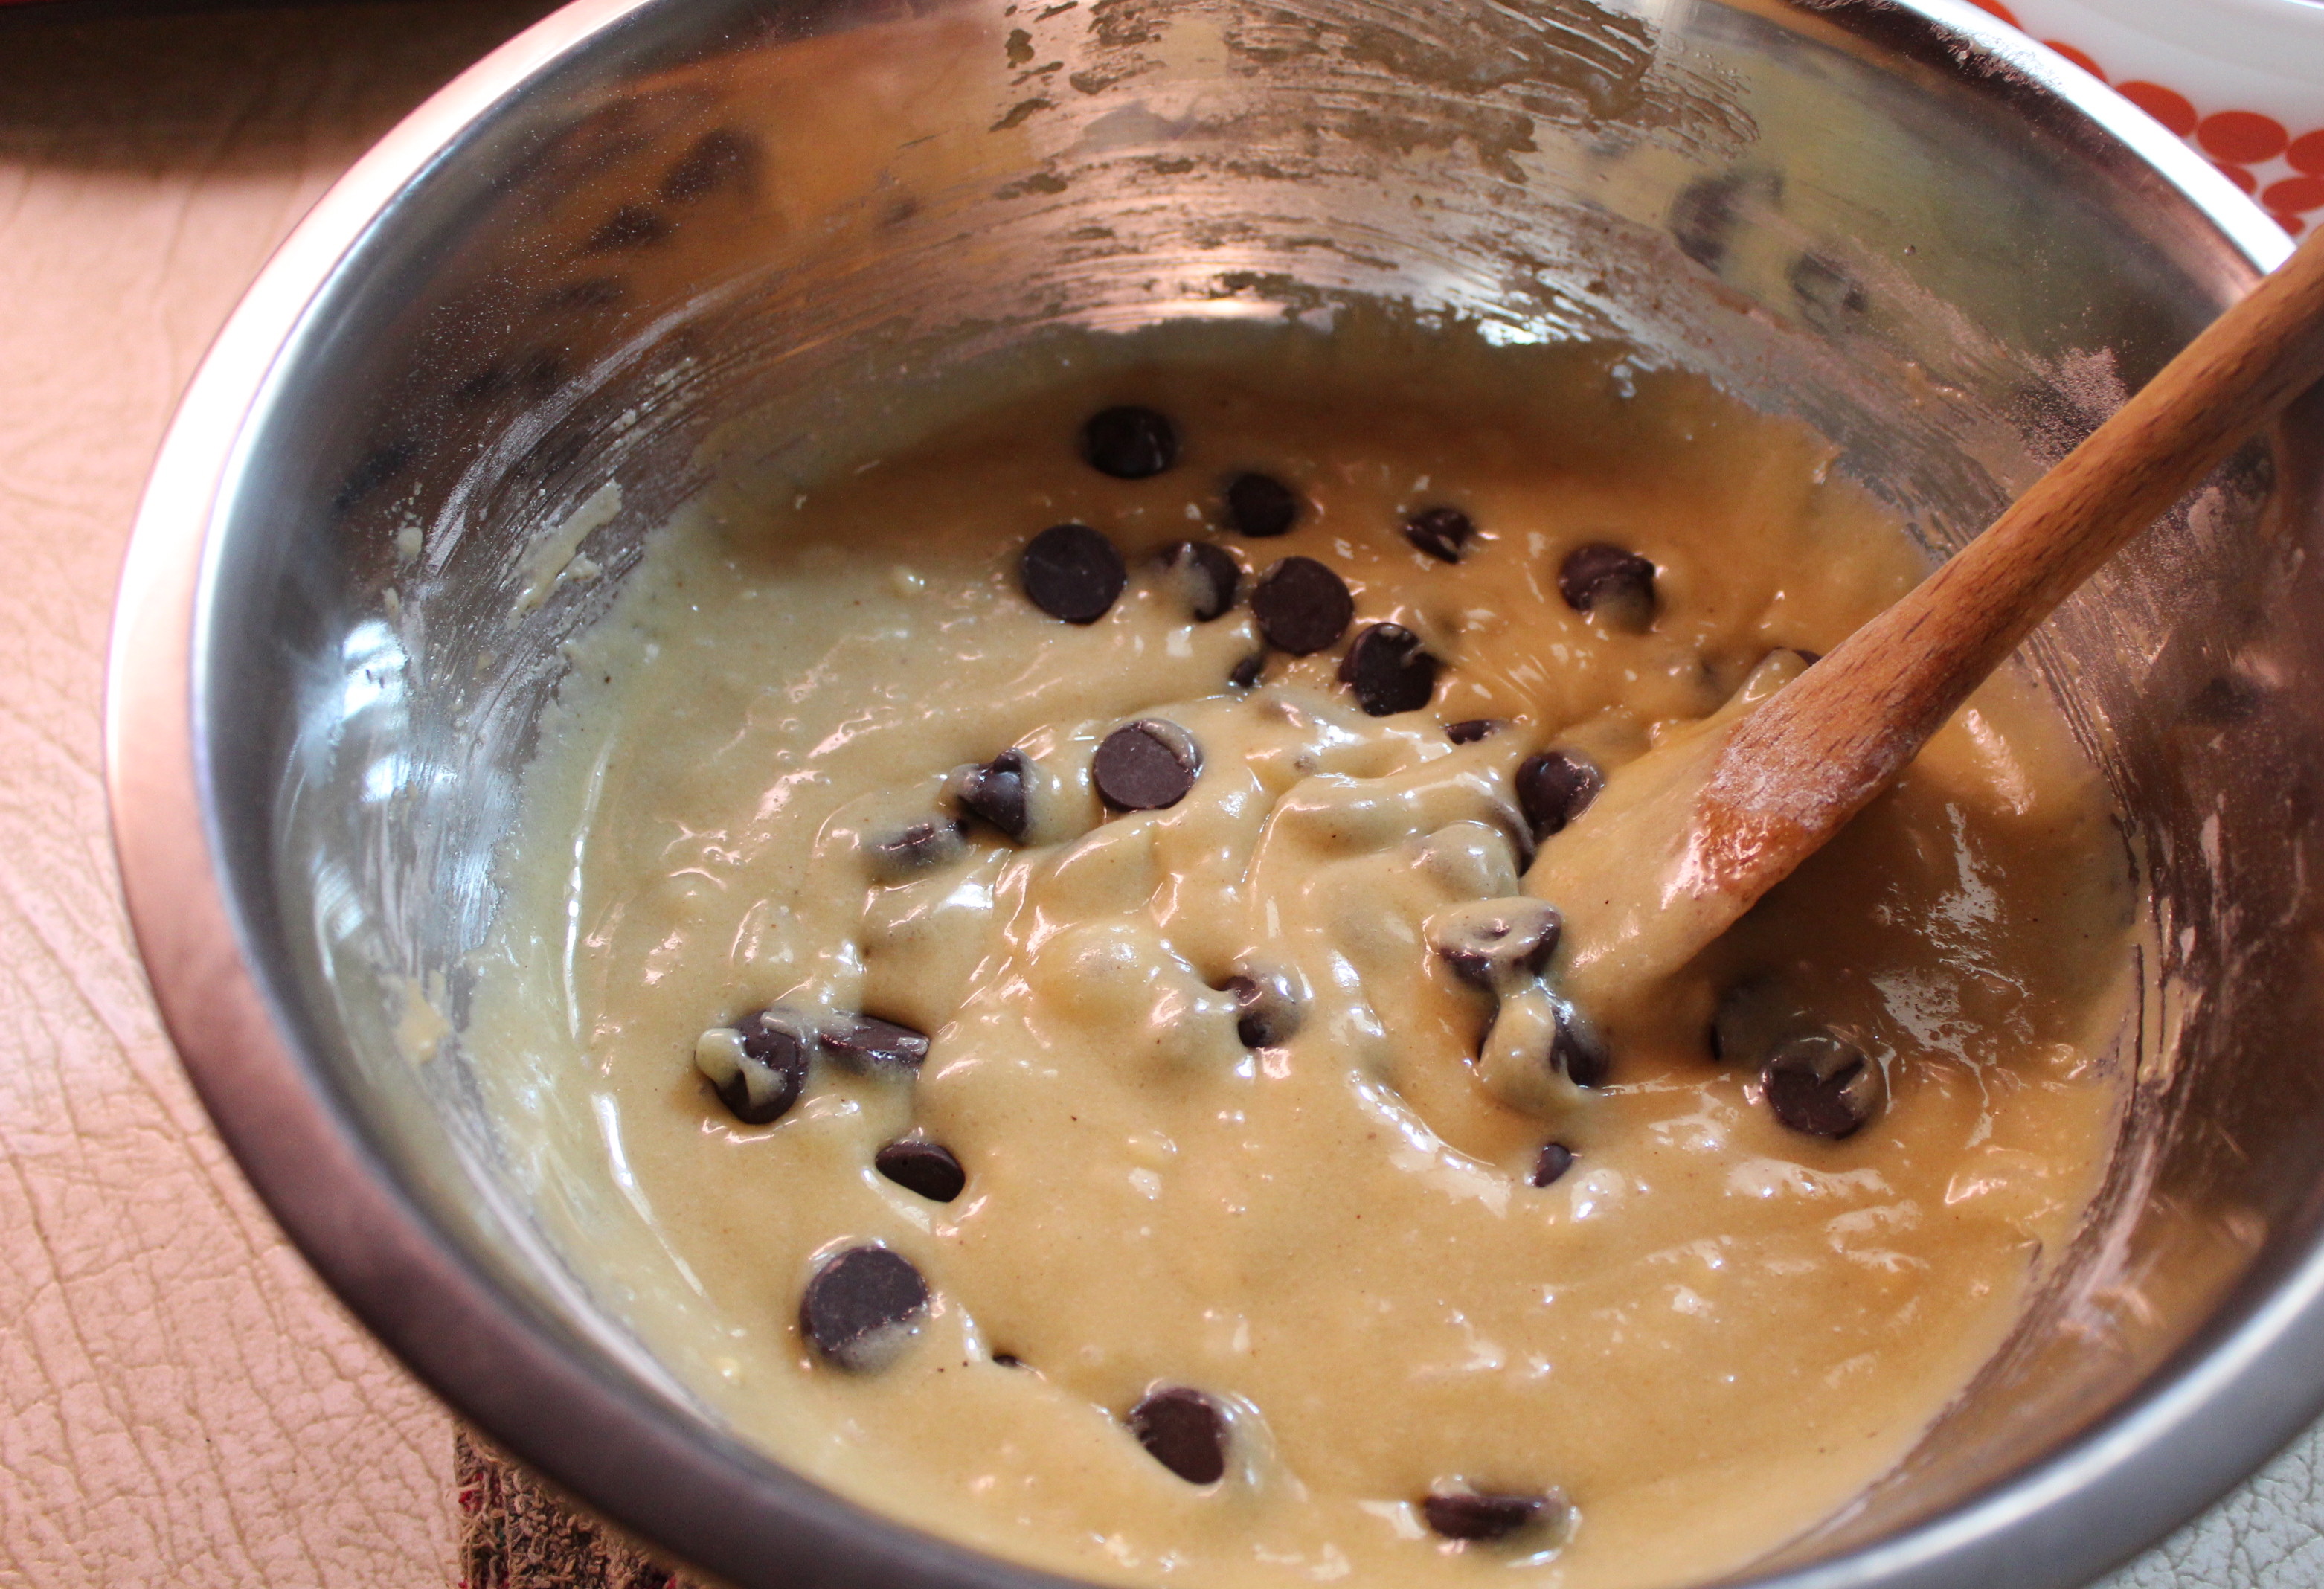
3.  In a small bowl, whisk together the flour, graham crumbs, baking powder, cinnamon and salt.  Stir into the creamed mixture until well combined.  Batter will be crumbly.

Batter will be crumbly.

Batter will be crumbly.

4.  Spread 2/3 of the batter onto the prepared pan and press into an even layer.  Lay the two chocolate bars in an even layer across the dough.

5.  Spread the marshmallow fluff over the chocolate, and crumble the remaining dough evenly over the top.

All layered up and ready for the oven.

All layered up and ready for the oven.

6.  Bake until puffed and set, about 25 to 30 minutes.  Cool completely.  Remove the square from the pan using the paper overhang and place on a cutting board.  Cut into 16 squares.

So good.  After one you will want s'more!

So good. After one you will want s’more!

Salted Pretzel Marshmallow Bars

Salted Pretzel Marshmallow Bars

Salted Pretzel Marshmallow Bars

There are so many words to describe these bars I hardly know where to start.  Chewy?  most definitely.  Crispy?  yup, when you bite into a pretzel piece.  Sweet?  well, of course, they are dessert bars after all.  Salty?  yes, a little.  You can thank the pretzels for that too.  And where do I fit in the experience of biting into a gooey melted marshmallow with drizzles of  peanut butter and dark chocolate?      Do you get the picture, here?  There’s so much going on with these bars words can’t do them justice.  You’ll just have to make them for yourself to see what I mean.

IMG_4353

I’m thankful the recipe only makes a 9-inch square pan of these goodies. One square is just enough to satisfy without feeling guilty and makes portion control so much easier.  Even better, bars are so easy to share!  I’ll be willing to bet that if you do decide to share these, you’ll get requests for the recipe.

SALTED PRETZEL MARSHMALLOW BARSIMG_4349

Yield:  16 squares

For the bars:

  • 1  1/2 cups broken pretzel pieces
  • 1 1/4 cups all-purpose flour
  • 1  1/2 tsp. baking powder
  • 1 tsp. kosher salt
  • 1 stick unsalted butter
  • 1  1/2 cups brown sugar, packed
  • 2 large eggs, lightly beaten
  •  2 tsp. vanilla extract

For the topping:

  • 8 marshmallows, halved horizontally
  • 1/4  cup peanut butter chips
  • 1 tsp. vegetable oil
  • 1/4 cup semisweet chocolate chips

1.  Position a rack in the middle of the oven and preheat to 350*F.   Line a 9 – inch square baking pan with foil, leaving a 2 – inch overhang on all sides.  Lightly spray the foil with cooking spray.

2.  Pulse 1 cup pretzel pieces in a food processor until finely ground ( you should have about 1/2 cup crumbs).  Transfer to a bowl.  Whisk in the flour, baking powder and salt.

3.  Melt the butter in a saucepan over medium heat.  (or in the microwave)  Stir in the brown sugar.  Let cool slightly, then stir in the eggs and vanilla.  Stir the pretzel crumb mixture into the butter mixture in two additions.

Mixing in the dry ingredients.

Mixing in the dry ingredients.

4.  Spread the batter in the prepared pan.  Scatter the remaining 1/2 cup pretzel pieces on top.  Bake until golden and a toothpick inserted into the center comes out clean with a few crumbs, 25 – 30 minutes.  Let cool completely in the pan on a rack, then ligt the foil to remove the bars from the pan and transfer to a baking sheet.

After baking, just out of the oven.

After baking, just out of the oven.

5.  Preheat the broiler.  Press the marshmallow halves, cut-side down, in even rows on top of the bars.  Broil, rotating the baking sheet as needed, until the marshmallows are golden brown, 1 to 2 minutes;  let cool.

6.  Put the peanut butter chips and 1/2 teaspoon vegetable oil in a microwave-safe cup or small bowl and microwave in 30 – second intervals, stirring, until melted and smooth.  Repeat with the chocolate chips and the remaining 1/2 teaspoon vegetable oil in another bowl.  Drizzle the melted peanut butter and chocolate mixtures over the bars.  Let harden at room temperature or chill to set before cutting.

IMG_4352

SOURCE:  Food Network Magazine

Camelitas

Carmelita Bars

Carmelita Bars

I charge 500 kisses for these bars!    That’s a lot of kisses, but boy, they’re worth it.

I have a very good friend who loves these bar cookies, and whenever he says he wants some cookies, I always say “it’s gonna cost ya”.  When he says, “how much?”,  I say, ” 500 kisses”.    He loves the cookies and I love the pay-off!  (This is all in jest, of course.)     Try baking these for someone special in your life and see what the reward will be.

Buttery crust and crumb topping.  In the middle, chocolate, caramel and nuts.

Buttery crust and crumb topping. In the middle, chocolate, caramel and nuts.

No one I know can resist a caramelita bar.  The base and top layer is made of flour, butter, oats and brown sugar, and the middle layer consists of chocolate, nuts and caramel, but you can customize this layer with whatever you may have in your pantry.  I’ve used different kinds of nuts, coconut, toffee chips and butterscotch chips.  They’re a hit however you make them.

If you need to bribe someone, do it with these!

If you need to bribe someone, do it with these!

Baked in a 13 x 9-inch pan you get about 32 bars.  You will need to let them cool about 30 minutes and then run a knife around the edge of the pan to prevent the caramel from sticking.  Once cool, they cut neatly into the desired number of squares or bars.

CARMELITAS

Yield:   about 32 barsIMG_4247

Ingredients:

  • 2 1/4 cups flour
  • 2 cups old-fashioned oats
  • 1 1/2 cups light brown sugar, packed
  • 1/2 tsp. baking soda
  • 3/4 tsp. salt
  • 1 cup unsalted butter, softened
  • 1 large egg
  • 1 package caramels ( 14 – 16 oz.) unwrapped**
  • 1/2 cup milk or cream**
  • 1 1/2 cups semisweet chocolate chips
  • 1 cup chopped nuts, walnuts, or other kinds

Directions:

1.  In a medium saucepan, combine the caramels and milk or cream.  Heat gently, and stir until melted and smooth.  Remove from heat and set aside.

**My tip:  a quick and easy step-saver is to use a jar of caramel ice-cream topping instead.  It works just as well and I think is less costly. You will need to use 1 1/4  cups of prepared caramel topping if you go this route.

2.  Preheat oven to 350*F.  Grease, or line with parchment, a 13 x 9-inch baking pan.

3.  In the large bowl of a stand mixer, combine the flour oats, brown sugar, baking soda, and salt.  Mix at low speed just to combine.  Add the butter, a chunk at a time, with the mixer running.   Once all the butter is in, add the egg.

4.  Reserve 1 1/2 cups of this mixture for the topping.  Pour the remainder into the prepared pan, and spread evenly.  You can lay a piece of plastic wrap on the surface and then use a loaf pan to press it down evenly.  Remove the plastic wrap, and bake for 10 minutes.

5.  After removing the base from the oven, sprinkle with chocolate chips and nuts.  Drizzle the caramel sauce over the them, and then sprinkle the reserved base mixture over the top.  Press down lightly to help it adhere.   Bake for 25 to 28 minutes, until the top is golden brown.  Remove from the oven and cool at least 30 minutes before cutting.

IMG_4250

SOURCE:  Cooks.com

Blackberry Pie Bars

Blackberry Pie Bars.

Blackberry Pie Bars.

Once again I’ve been called upon to provide the dessert for a pot-luck affair.  As we approach the end of the school year, many other activities also take a break for the summer and the last meeting of many organizations often involve food in the form of a picnic or pot-luck dinner.  So here we go again —-not that I mind,  it gives me the chance to bake, maybe try out something new, and then tell you all about it.  How cool is that?

Buttery crumb crust, creamy blackberry filling, more buttery crumbs on top.

Buttery crumb crust, creamy blackberry filling, more buttery crumbs on top.

While today’s recipe is called “pie’ bars, they’re not really like pie at all.  There is a bottom crust made of buttery crumbs, with a sprinkle of more crumbs to top, and in the middle a “berry” filling.  The recipe calls for black berries and that is what I used here, but I’ve made these before using raspberries, and they were super yummy too.  These bars are quick to put together, and are a great way to use up frozen berries you might have in your freezer;  you know, to make room for more berries over the summer.

Oh yeah, these are simply the best!.

Oh yeah, these are simply the best!.

I added a little lemon zest to the crust, and lemon juice to the filling and I think it brightens up the flavor, and makes an irresistible combination.  They bake up quite thick, so I cut them into small-ish squares to be eaten with fingers, but if serving them on a plate, these would be set off nicely by a dab of vanilla ice cream.  I like them while still a little warm from the oven, but they are also excellent served chilled straight from the fridge.  Once you give these a try they will undoubtedly become a staple for bringing to summertime parties and get-togethers.  Be adventurous and try other fruits as well.

BLACKBERRY PIE BARSIMG_4227

Yield:  16 – 20 bars

Ingredients:

For the crust and topping:

  • 1  1/2 cups all-purpose flour
  • 3/4 cup sugar
  • pinch salt
  • zest of half a lemon
  • 3/4 cup (12 Tbsp.) unsalted butter, cold

    Blackberries----the stars of  the show!.

    Blackberries—-the stars of
    the show!.

For the filling:

  • 2 large eggs
  • 1 cup sugar
  • 1/2 cup sour cream or greek yogurt
  • 6 Tbsp. all-purpose flour
  • pinch of salt
  • juice of half a lemon
  • 1 tsp. vanilla extract
  • 15 – 16 oz. blackberries, fresh or frozen (thawed and drained of excess juices)

Directions:

Preheat the oven to 350*F.  Line a 9 x 9 inch baking pan with foil and grease lightly.  In the bowl of a food processor or electric mixer, combine the flour, sugar, salt and lemon zest.  Pulse briefly to blend.  Cut the butter into small pieces, then add to the bowl with the dry ingredients.  Process in short pulses to cut the butter into the dry ingredients until only small pieces of butter remain and the mixture is crumbly.

Reserve 3/4 cup of the mixture for topping the bars.  Add the rest of the mixture to the  prepared pan and press to form an even layer of crust on the bottom of the pan.  Bake 12 – 15 minutes, until light golden.  Let cool 10 -15 minutes before proceeding.

In a medium bowl, make the filling mixture.  Combine the eggs, sugar, sour cream, flour, salt, lemon juice an vanilla.  Whisk until smooth.  Gently stir in the blackberries with a spatula.  Spread the filling mixture over the pre-baked crust in the baking pan.  Crumble the reserved topping mixture evenly over the filling.

Bake until the top is beginning to brown and the bars are just set, about 45 minutes.  Let cool completely on a wire rack.  Chill to firm up before slicing and serving.

IMG_4220

SOURCE:   The Pastry Queen by Rebecca Rather

Chocolate Chip Cheesecake Squares

Chocolate chip cheesecake squares.

Chocolate chip cheesecake squares.

Did I hear someone say “cheesecake”?.   Oh, that was me!  Yes, well,  I fell off the wagon, and I mean big time!  But you will remember it was my birthday and Mother’s Day all in the same weekend.  So that was my excuse for treating myself and, of course, anyone else who was around to some sinfully rich and oh-so-good chocolate chip cheesecake squares WITH toffee cookie crumb crust.  Try saying that three times fast.  I could eat one faster than I can say it, and I bet you could, too.

An elegant, creamy, smooth dessert.

An elegant, creamy, smooth dessert.

There are so many recipes for cheesecake bars and squares out there, that you could pick any one that you like, but I particularly like this one because it not only includes cream cheese, but also mascarpone.  And when you combine those two you can’t expect anything but perfection.

The most commonly used ingredient for making a crust is graham cracker crumbs,  but Mr. D. has an allergy to graham crackers, so in their place I usually use shortbread cookies crushed into crumbs.  In making these bars I would have done the same except when I was shopping for groceries I spied  these cookies called Toffee Sandies by Keebler.  Since I’ve always loved pecan sandies, I thought these would make an interesting crust instead.

The cookies I used.

The cookies I used.

Cheesecake is a dessert that is very forgiving in that you can add many different flavorings, use all kinds of toppings, change the crust, and bake in a variety of pans.  It still comes out creamy and delicious.  So you really can’t go wrong.  If you need a dessert that everyone will love, give this stellar creation a try.

The hint of orange is such a good companion flavor to chocolate.

The hint of orange is such a good companion flavor to chocolate.

CHOCOLATE CHIP CHEESECAKE BARS WITH TOFFEE COOKIE CRUST

Servings:   9

Ingredients:

For the crust

  • 1  1/2 cups toffee sandies—fine crumbs
  • 5 Tablespoons butter, melted

    Cream cheese, mascarpone, chocolate chips and orange zest provide the flavor

    Cream cheese, mascarpone, chocolate chips and orange zest provide the flavor

For the filling:

  • 8 oz. cream cheese, softened  ( 1/3 less fat variety, OK )
  • 8 oz. mascarpone cheese
  • 1/2 cup sugar
  • 3/4 cup semisweet (or your choice) chocolate chips
  • 1 teaspoon orange zest
  • 1 Tablespoon vanilla extract
  • 3 large eggs

1.  Place the toffee sandies in a food processor bowl and pulse to fine crumbs;  place in a mixing bowl.

2.  Add melted butter and mix well.

3.  Press crumb mixture into the bottom and sides of a 9 x 9 inch pan.  I made one and a half times the recipe, thus you see a larger pan.

Cookie crumb crust in the pan.

Cookie crumb crust in the pan.

4.  Bake crust for 10 – 12 minutes at 325*F.

5.  Allow to cool while you make the filling.

Filling:

1.  In the bowl of a stand mixer, beat the cheeses, sugar, zest and vanilla until smooth.

2.  Add eggs one at a time, beat on low speed just until combined.

3.  Fold in chocolate chips

4.  Pour over crust and smooth with an offset spatula

Going into the oven.

Going into the oven.

5.  Bake at 325 *F for 35 – 40 minutes or until center is just set and top begins to brown.

Out of the oven--only the edges are browned, but the filling is "set".

Out of the oven–only the edges are browned, but the filling is “set”.

6.  Remove pan from the oven, and cool on a wire rack for 10 minutes

7.  Carefully run a knife around the edge of pan to loosen;  cool 1 hour longer then refrigerate at least 6 hours or overnight before serving.

You will want more than one of these!

You will want more than one of these!

IMG_4066

SOURCE:   adapted from   A Culinary Journey with Chef Dennis

Very Berry Strawberry Cookies

Very Berry Strawberry  Cookies

Very Berry Strawberry Cookies

This is the time of year when strawberries are reappearing at the market and they look so beautiful; red, ripe and juicy.  They never fail to get my creative juices flowing.  The native berries that grow here where I live have not ripened yet  (usually not till the end of May), so until those are available I will use the California-grown berries available at the market.

However, I have found from past experience  that baking with strawberries does not produce a true, vivid strawberry flavor.  They are so much more enjoyable in their natural state, luscious and juicy with just a little sugar on them.  So for baking I have been exploring ways to get a true strawberry flavor.  I think I have found the answer, and it happened quite by accident.  One morning I was eating Special K cereal with Red Berries and was struck by how strong the berry flavor was.  These freeze-dried strawberries had the color and flavor I have been looking for.  So I searched the dried fruits section of the supermarket and there I found bags of freeze-dried strawberries.

Freeze dried strawberries can be pulverized into powder.

Freeze dried strawberries can be pulverized into powder.

Bingo!  I was on to something.  Reasoning that if I could crush or pulverize those freeze dried berries and mix the powder into the dough,  I could get the strong flavor I wanted.    I love to experiment,  so I was excited to give this a try.  The results, I’m happy to tell you, were quite good.   Using a recipe I had for a basic sugar cookie that also uses some cream cheese, and adding the strawberry powder to the dough,  I got a tender cookie with a pretty pink color and real strawberry flavor.  They are just great on their own, but you know what?   You can also mix this strawberry powder into cream cheese frosting and make sandwich cookies for a double-whammy of strawberry goodness.  (Notice that I’m not mentioning calories here!)    Ok, Ok, let’s be reasonable.  Let’s enjoy these cookies with a dish of strawberry ice cream instead!!!

The perfect accompaniment to Very Strawberry ice cream.

The perfect accompaniment to Very Strawberry ice cream.

VERY BERRY STRAWBERRY  COOKIES

Yield:   Makes about 4 1/2 dozen 2″ cookies, or 27 sandwich cookies

For the Cookies:

  •  1 cup  ( 2 sticks) butter
  • 1/2 cup  ( 4 ounces) cream cheese at room temperature.  Reduced fat version is OK.
  • 1/4 tsp. salt
  • 1/2 tsp. baking powder
  • 1/4 cup strawberry powder
  • 3/4 cup granulated sugar
  • 1 cup confectioners’ sugar
  • 1 large egg
  • 3 cups flour,  I used half white whole wheat flour;

For the Filling:

  • 1/2 cup cream cheese  (4-ounces)
  • 3 cups confectioners’ sugar
  • 2 Tablespoons strawberry powder
  • 1 Tablespoon strawberry jam
  • milk or cream as needed for spreading consistency

To make the cookies:

1.  Preheat oven to 375*F.  Lightly grease two baking sheets or line with parchment paper.

2.  Begin by crushing the dry strawberries.  I used a mortar and pestle and was able to get a fine powder with little or no lumps.  If you have difficulty getting it smooth, you can always sift the powder to remove any lumps.   Measure 1/4 cup plus 2 tablespoons if making the filling.

3.  In a large bowl, cream together the butter, cream cheese, salt and baking powder, strawberry powder and sugars.

Mixing up the cream cheese, butter, sugars and strawberry powder.

Mixing up the cream cheese, butter, sugars and strawberry powder.

4.  Once the mixture is nice and light and fluffy, beat in the egg and then mix in the flour.

5.  Scoop by the tablespoon onto the prepared baking sheets.  Flatten each cookie into a 2″ circle with the bottom of a glass dipped into sugar.

Drop by tablespoon onto baking sheet and flatten into  2-inch circles.

Drop by tablespoon onto baking sheet and flatten into 2-inch circles.

Bake for 14 – 16 minutes, until barely golden around the edges.  Remove from the oven and cool on the baking sheet for 5 minutes before transferring to a rack to cool completely.  Makes about 54 cookies.

To make the filling:

1.  Beat the cream cheese until soft and fluffy.  Add the strawberry jam, and blend into the cream cheese.  Add the sugar and strawberry powder gradually  along with small amounts of milk or cream to achieve a spreading consistency.

2.  Generously frost the bottom side of one cookie and top with another to make a tasty sandwich.  Makes about 27 sandwich cookies.

These are not going to last long.

These are not going to last long.

You can never have too much of a very good thing!

You can never have too much of a very good thing!

SOURCE;  a Carolyn Original based on a modified recipe for sugar cookies from Taste of Home

Lemon Tassies

Lemon Tassies

Lemon Tassies

A “tassie” is a small cup-shaped cookie or tart, and comes from the Scottish word tass + ie. which means small cup.  Taking this idea to its simplest form I made the lemon tassies from supplies that I had on hand.  They were extremely easy to make and insanely good to eat.

I started with a package of refrigerated sugar cookie dough,  the kind that comes in a block and can be separated into 24 “squares”,  one for each cookie.  Using two mini-muffin pans,  I placed a block of cookie dough into each well, and with my fingers pressed it to cover the bottom, and up the sides of the muffin cups.  Then I baked them.  After baking, there was a depression in the center of each one where I spooned about 1 teaspoon of lemon curd.

IMG_3663

The heat from the still warm cookies, softened the curd so that it spread and filled the depression.  After they were completely cool, I put a dab of white frosting on each one.  (Frosting was left over from a previous baking project.)  If I didn’t already have the frosting, I would have dusted them with confectioners’ sugar, because I thought they needed something white on them for garnish.  For a special occasion a candied flower, like a violet, would be a lovely garnish.

IMG_3665

When first made the cookie part was crisp, but I kept them in a covered container, and the next day the cookie had softened and become chewy.  That seemed to fit the smooth, lemony filling better and we liked them better that way.

For some reason I always seem to want something lemon in spring time, and I already had a small amount of lemon curd that I had made, so that’s how I came up with this idea.  I think these little finger cookies ( or tarts) would be great served at a tea, a Mother’s Day Brunch,  a shower, or any other springtime occasion.

A few simple supplies are all you need:

  • mini-muffin pans, for a total of 24 cookies
  • 1 package of preformed , refrigerated sugar cookie dough, 24/pkg.
  • 1 jar lemon curd, or your own homemade.**
  • a small amount of vanilla frosting, or other garnish

Spray the muffin cups with non-stick spray.  Preheat the oven as the cookie package suggests.

Place one block of cookie dough in each of the muffin cups; with your fingers press to cover the bottom and up the sides to form a shell.

Press dough into the wells of a mini-muffin pan.

Press dough into the wells of a mini-muffin pan.

Bake for the recommended time on the cookie package, starting to check on them early, so they don’t get too brown.  Remove from the oven, and while still warm, spoon about 1 teaspoon of the lemon curd into the depression of each cookie.

After baking the shells, fill depressions with lemon curd.

After baking the shells, fill depressions with lemon curd.

Allow to cool completely on a wire rack,  loosening the cookies so they don’t stick.

Garnish the top of each cookie with your choice of frosting or other decorative garnish.

IMG_3667

**If lemon curd is not available, any flavor of jam would be a nice substitute.

SOURCE:  A Carolyn Original

Black and White Bars

Black and White Bars

Black and White Bars

Black and white, the classic color combination;  found in so many places.  In the fashion world with black and white you can’t go wrong.  I always feel as though I am well put-together when I wear it.  Any season, any reason it’s always right.  Think of a piano keyboard, another perfect example of this combination, and nothing can improve upon it.   Well, in this recipe for black and white bars, the same is true.  White chocolate with bittersweet dark chocolate make beautiful music together.  I can’t think of one thing to make them better.

So good!

So good!

They are pretty simple to make requiring one large bowl, a smaller one, and a hand mixer.  The recipe calls for baking them in a 9 – inch square pan, but I made a mistake and used an 8 – inch pan.  They came out quite thick, but for me, thicker is better, and more chewy.  So use what you have, remembering that if you use a smaller pan you need to bake them at least 5 minutes longer.  (test with a toothpick). You will not be disappointed in these bars, except maybe at how fast they disappear.  Be sure to get yours before they’re all gone!

BLACK AND WHITE BARS

YIELD:  16 squares

INGREDIENTS

  • 1 cup chopped white chocolate, or white chipsIMG_3617
  • 1/4 cup ( 1/2 stick ) butter
  • 3/4 cup granulated sugar
  • 2 teaspoons vanilla extract
  • 1/4 teaspoon nutmeg
  • 1/4 teaspoon salt
  • 2 large eggs
  • 1  1/4 cup all-purpose flour
  • 1/2 teaspoon baking powder
  • 1 cup bittersweet chunks or large chips

1.  Preheat the oven to 350*F.  Lightly grease a 9 – inch square pan

2.  Place the white chocolate, butter, and sugar in a heatproof bowl.  Heat at low power in the microwave for 1 minute intervals, or over simmering water, until the chocolate softens.  White chocolate is sensitive to to scorching, so watch carefully.

Melting the white chocolate, sugar and butter over simmering water.

Melting the white chocolate, sugar and butter over simmering water.

3.  When the butter is melted and the white chocolate looks soft, stir in the vanilla, nutmeg and salt.  Let the mixture cool to lukewarm,  then beat in the eggs.

Beating in the eggs.

Beating in the eggs.

4.  In a separate medium bowl whisk together the flour and baking powder; stir into the egg mixture.

Stir in the flour and baking powder.

Stir in the flour and baking powder.

Stir in 3/4 cup of the dark chocolate chunks.

Stir in the dark chocolate chunks or chips.

Stir in the dark chocolate chunks or chips.

Spoon the batter into a greased 9″ square pan, and sprinkle the remaining chocolate chunks over the top.

In the pan, ready for the oven.

In the pan, ready for the oven.

5.  Bake the squares for 25 minutes,  ( 30 minutes for a smaller pan), until light golden brown and the edges pull just slightly away from the pan.  Remove from the oven and cool before cutting.

It was hard to wait for them to cool.

It was hard to wait for them to cool.

I cheated a little and cut them before they were completely cool, so the chocolate is still warm and melty-like—nothing wrong with that–except you don’t get a nice clean cut.  Who cares when they taste this good!

SOURCE:  King Arthur Flour.com/recipes/bars

Salted Chocolate Chunk Cookies

Salted Chocolate Chunk Cookies

Salted Chocolate Chunk Cookies

Who doesn’t like chocolate chip cookies?   If a vote were taken for favorite cookie they would probably win by a landslide, and it seems as though every cook has their favorite recipe for making them.   Mine would have to be the traditional Toll-House cookie, so I don’t usually look at other recipes for chocolate chippers.   But you know how popular the addition of salt has become in the dessert world, so when I happened on this recipe for Salted Chocolate Chip cookies, I was curious what they would be like and had to try them.

IMG_3430

A sprinkle of salt on the cookies before baking is the finishing touch that brings out the chocolate flavor and tones down the sweetness, creating the ultimate sweet and salty snack.  We found these cookies to have a very nice taste, but they do flatten out quite a bit as they bake.  I normally like a thick, chunky cookie with lots of depth to bite into, and these were not that, but I did enjoy that hit of salt against the sweetness of the chocolate.  These cookies are crisp on the outside but chewy on the inside; a nice contrast in textures.  We both liked them enough for me to make them again, so I would recommend you try them especially if you would like to experience that sweet and salty combination.

IMG_3429

After baking the first sheet of cookies and seeing how they turned out, I put the remaining two sheets in the refrigerator to chill the dough and firm up the butter, before they hit the heat of the oven.  It’s important also be keep your oven at 375*F  throughout the baking time. For best results  bake only one sheet of cookies at a time, instead of two and rotating them, as the recipe suggests.

When using salt on your desserts, a sprinkle of one of the following will get the job done—just don’t use table salt.   Kosher salt, large crystals, dissolve quickly;   flaky sea salt,  light, crunchy texture, provides ideal finishing touch on cookies, etc.;  coarse sea salt,  grains are crunchy, but don’t dissolve as quickly, good with assertive flavors and textures.

SALTED CHOCOLATE CHUNK COOKIES

YIELD:   makes about 30 cookies

INGREDIENTSIMG_3423

  • 1  1/2  cups flour
  • 1 tsp. baking powder
  • 1/2 tsp. kosher salt
  • 1/4 tsp. baking soda
  • 1/2 cup  ( 1 stick ) unsalted butter, room temperature
  • 3/4 cup ( packed ) light brown sugar
  • 1/2 granulated sugar
  • 1/4 cup powdered sugar
  • 2 eggs
  • 1 tsp. vanilla extract
  • 8 oz. semisweet or bittersweet chocolate chips or chunks
  • flaky sea salt

1.  Preheat oven to 375*F.  Prepare baking sheets with non-stick spray or line with parchment paper.

2.  Whisk together flour, baking powder, salt and baking soda in a medium bowl; set aside.

3.  Using an electric mixer on medium speed, beat butter, brown sugar, sugar, and powdered sugar until light and fluffy, 3-4 minutes.  Add eggs and vanilla.  Beat, occasionally scraping down the sides of the bowl, until mixture is pale and fluffy,  4-5 minutes.  Reduce mixer speed to low; slowly add dry ingredients, mixing just to blend.  Using a spatula, fold in chocolate.

4.  Spoon rounded tablespoons full of cookie dough onto prepared baking sheets, spacing 1″ apart.  Sprinkle cookies with sea salt.

5.  Bake cookies, rotating sheets halfway through, until just golden brown around the edges, 10 – 12 minutes.  Cookies will firm up as they cool.  Let cool slightly on baking sheets, then transfer to wire racks;  let cool completely.   Store airtight at room temperature.

IMG_3426

SOURCE:   adapted from Bon Appetit,  January, 2013

A Breath of Sunshine

IMG_3142

We are growing tired of winter winds whipping, snow piled up in hugh mountains, and very little green(ery) to be seen.  So along comes a breath of sunshine in the form of citrus fruits to remind us of warm weather and sunnier times.  The bright colors of oranges, lemons, limes, and grapefruits, are so cheerful, and they show up in the produce isles just when we need them most.  I don’t know about you, but I am ready for a little warm weather fling.

IMG_3149

Citrus fruits are an equal opportunity ingredient, happy in either savory dishes or sweet.  For example, I use orange segments in green salad to brighten it up and give the salad a little interest and of course I bake with citrus, especially lemons. This post is not going to be using words like zippy, zingy, tangy and tart to describe the flavors of citrus.   You don’t need me to tell you what a lemon tastes like, or how frequently a recipe calls for lemon juice.  In fact I don’t know of a cuisine that does not use citrus in one way or another.  It’s the citric acid that brightens food and makes it come alive.  Often its there,  you don’t know it, but it provides balance.

IMG_3173

One of my favorite uses for lemons is to make lemon squares.  With the abundance of  all this citrus, I decided to indulge myself and make a batch.   This recipe uses oatmeal as one of the ingredients in the cookie base and the topping, so you get a nice little crunch in every bite.  Paired with the smooth creaminess of the lemon filling, this makes a very satisfying dessert or snack.

LEMON CREME SQUARES

YIELD:   12 squaresIMG_3154

INGREDIENTS

  • 1 1/3 cups flour
  • 1/2 teaspoon salt
  • 1 teaspoon baking powder
  • 1/2 cup butter, slightly softened
  • 1 cup brown sugar, lightly packed
  • 1 cup oats
  • 1 can sweetened condensed milk
  • 1/2 cup lemon juice
  •  zest of 1 lemon

1.  Preheat oven to 350*F,  and lightly grease a 9″ x 9″ pan

2.  In a large bowl cut butter into brown sugar until they are well combined.

3.  In a separate bowl, whisk together the flour, salt and baking powder.  Add this mixture and the oats to the butter mixture and mix to combine.  This will be quite dry and crumbly.

4.  Press half the crumb mixture into the bottom of the prepared pan, and press down lightly.

5.   In a small bowl mix together the condensed milk, lemon juice and zest.

IMG_3157

Spread evenly on top of the oat mixture in the pan.  Top with the remaining oat mixture.

IMG_3161

6.  Bake for 20 – 25 minutes or until the top is golden brown.  Let cool and refrigerate for 30 minutes or until set.  Cut into bars and store in the refrigerator.

IMG_3169

IMG_3172

SOURCE:   TASTE OF HOME BAKING