Shrimp and Broccoli Scampi
Shrimp Scampi is one of my all-time favorite seafood dishes, one that I routinely order in a good seafood restaurant. However, I frequently make it at home as well. There is already one such recipe already here on the blog, but I made this variation of it recently and felt that you might be interested in it too. I cooked the shrimp in a different way, and included broccoli for a more fully rounded dish.

The idea for cooking the shrimp this way came by way of Pinterest, and I must say they are very tasty. Using melted butter, sliced lemons, and Good Seasons Salad Dressing Mix for seasoning, these shrimp would be just great dipped in cocktail sauce for a party. When I saw all that nicely seasoned butter available after cooking the shrimp, that’s when I decided to turn them into Scampi. The whole deal is really very simple. You can have this dinner on the table in about 30 minutes.
SHRIMP AND BROCCOLI SCAMPI
Yield: Serves 4
Ingredients:
- 1 pound large shrimp, peeled and deveined

Shrimp, lemons, salad dressing mix.
- 5 Tbsp. butter, divided
- 1 lemon, sliced
- 1 package Good Seasons Italian Salad Dressing Mix
- 1 medium head of broccoli, cut into florets
- 8 0z. uncooked thin spaghetti
- 2 tsp. olive oil
- 3 cloves garlic, minced
- 3/4 cup low-sodium chicken broth
- 1 Tbsp. water
- 2 tsp. cornstarch
- 1/4 cup chopped parsley
- 1/4 tsp. salt
- Parmesan cheese, shaved or grated (about 1/4 cup)
Directions:
1. Preheat oven to 350*F. On a baking sheet with sides, melt 4 Tablespoons of butter in the preheating oven. Remove baking sheet from oven and lay the lemon slices in the butter. Place all the shrimp on top of the lemon, then sprinkle with dry salad dressing mix.

Lay shrimp on top of lemons and melted butter.
Note: I used about half an envelop for 1 pound of shrimp, and we thought it was adequately seasoned. Bake for 10 – 15 minutes, till shrimp turn pink and are almost fully cooked. Remove and set aside.

Shrimp after baking.
2. Meanwhile, bring a large pot of water to boil and cook the pasta as package directs, omitting salt and oil. Add the broccoli in the last 2 minutes of cooking. Drain.

3. Heat a large skillet over medium-high heat. Add the 1 Tbsp butter and olive oil; swirl to coat. Add garlic; sauté 1 minute. Add the chicken broth; bring to a boil, scraping pan to loosen any browned bits. Combine 1 Tbsp. water and cornstarch in a small bowl. Stir cornstarch mixture into stock mixture; cook 1 minute. (Note: Don’t skip the cornstarch here– it helps the garlicky sauce cling to the pasta.)

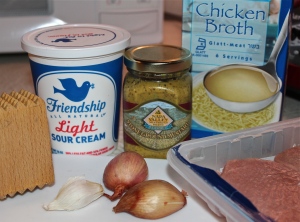
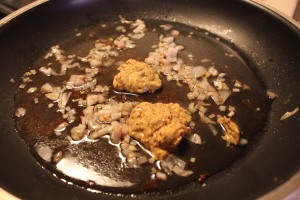
Chicken broth, cornstarch mixture and garlic, ready for the pan.
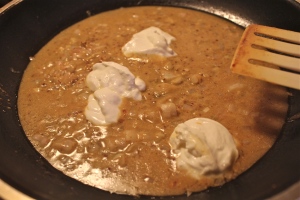
4. Stir in the shrimp and all its juices.

Shrimp and its juices added to the skillet.
Add pasta, broccoli, parsley and salt. Cook 1-2 minutes, to heat through, tossing to coat well. Transfer to serving dish, and sprinkle with Parmesan cheese. Serve immediately.

This rendition of shrimp scampi is about the best I have ever made. Not a drop of buttery juice goes to waste and the broccoli benefits from the lemon and seasonings. So good, I hope you try this one!!
SOURCE: Carolyn’s Originals