Blueberry Crumb Bars

Blueberry Crumb Bars

Blueberry Crumb Bars

Summertime desserts seem to fall into three major categories:  cool, frozen concoctions,  no-bake pies and such, and fresh fruit delights.  Today’s recipe falls into the latter group.

Right about now I’m seeing blueberries appearing at the supermarket that are coming to us from California.  It’s still too early for  East Coast berries to make their appearance, but blueberries hold up fairly well and those arriving here from the West coast are looking good.  Although I missed making these bars for Memorial Day, they are good anytime at all, and perhaps for July 4th.  The reason I say that is because with their blue color from the berries and light crumb topping, they have a patriotic color theme, and they certainly speak of summer.

IMG_7446

These bars are ridiculously good. They are the sort that will make you want to eat the whole pan, and then moan at how good they were.  Having tried the recipe as written using blueberries, I would feel confident in changing up the fruit and using a different berry,  or in the fall, using sliced apples with brown sugar instead of granulated.  This is just what I love, a really good recipe that lets you try it different ways and never lets you down.  Whooo-Hoo!

IMG_7445

From my experience with making these bars, I have two suggestions:  use a little more than half the dough mixture for the bottom layer, the bars will cut better and the berries won’t leak through to the bottom.  Also, if your berries are a little tart, you may want to add an additional tablespoon of sugar to the berries.

IMG_7448

BLUEBERRY CRUMB BARS

Yield:  15 servings

Ingredients:

  • 3 cups all-purpose flour, or half white flour, and half whole wheat
  • 1  1/2 cups sugar
  • 1 teaspoon baking powder
  • 1/4 teaspoon salt
  • a pinch of cinnamon
  • 1 cup shortening or butter
  • 1 egg
  • 3 teaspoons cornstarch
  • 4 cups fresh blueberries

Directions:

1.  Preheat oven to 375*F.  Grease a 13 x 9-inch pan.

2.  In a large bowl, whisk together the flour, 1 cup sugar, baking powder, salt and cinnamon.  Use a fork or pastry cutter to cut in the shortening (or butter).   Mix in the egg–dough will be crumbly.

Stir egg into dry ingredients.

Stir egg into dry ingredients.

Pat half of it into the bottom of the prepared pan.

3.  In another bowl, stir together the cornstarch and remaining 1/2 cup sugar.  Gently stir in the blueberries.  Sprinkle the berry mixture evenly over the crust.

Layer berries over bottom crust.

Layer berries over bottom crust.

Crumble the remaining dough over the berries.

Top with remaining crumbs.

Top with remaining crumbs.

4.  Bake for 40 – 45 minutes, till the top is lightly browned.  Cool completely before cutting into squares.

IMG_7449


SOURCE:   All recipes.com


Grapefruit Buttermilk Doughnuts with Candied Zest

Graperfuit Buttermilk Doughnuts

Graperfuit Buttermilk Doughnuts

It was only after the fact that I learned that National Doughnut day had come and gone.  But that’s alright, I probably wouldn’t have paid any attention to it anyway.  I honestly never pay much attention to any of these so-called special days because there are so many of them, every single day it’s something, and often more than one something per day.

Who designates these special days anyhow?  No one has ever asked me what I think, or if I have a favorite food that I would like to honor with it’s own special day.  If anyone can get in on the act offering random suggestions for dedicated days, then I can do it too. Mine would be much more specific like— mulch the flower beds day, or skip work and go for a drive day, or lets’s get our nails done and then go out for lunch day, or put on some good music and dance day.  As you can see my days have a lot more to do in them than just eating one type of food… they’re more about movement and action and getting things done.  That’s the kind of gal I am.

IMG_7543

Anyway, having gotten that off my chest,  here’s a recipe for making doughnuts that are just the tiniest bit healthy because they are baked instead of fried.  I don’t know anyone who makes their own fried doughnuts, do you?  I think everybody and their mother hates deep frying foods, and that definitely includes me.   If the thought even crosses your mind, think of your thighs and reconsider!!   One impulsive act like frying doughnuts can undo weeks of careful eating, and hopefully weight loss, so get a grip on yourself.

Tiniest bit healthy baked doughnuts!!

Tiniest bit healthy baked doughnuts!!

Thank heavens these doughnuts require NO fryer.  They’re easy to make and they turn out light and cake-like. They require only one specialized pan; a doughnut pan that is generally inexpensive.  When I bought mine I thought I would never use it, but I’m finding myself using it more and more.  One little trick that I do with mine, is pour muffin batter in it and bake them.  You will get a shallow muffin, like muffin tops with a hole in the middle.  Think of it as a weight loss tactic; smaller muffin with a hole in the middle=less calories!   What you see in the above photo that looks like muffins is actually the remainder of the doughnut batter that I baked in a muffin pan.  I call them Douffins 🙂

Mr D. called these doughnuts “fabulous” and I have to agree with him.  I love the bits of tartness that the grapefruit zest adds to the flavor, and the grapefruit juice in the glaze keeps it all from becoming too sweet.  Making the candied zest is very easy to do, and now that I’ve done it, I would try it with other citrus fruits and use the candied zest as a garnish or topping on other baked goods.  Try this, it adds just the perfect touch.

IMG_7542

GRAPEFRUIT BUTTERMILK DOUGHNUTS WITH CANDIED ZEST

Yield:   1 dozen doughnuts  (I got 12 doughnuts plus 4 douffins)

Ingredients:

  • non-stick cooking sprayIMG_7533
  • 2 cups all-purpose flour
  • 2 cups granulated sugar
  • 2 teaspoons baking powder
  • 1 teaspoon ground ginger
  • 1/2 teaspoon salt
  • 1 1/4 cups buttermilk
  • 1 large egg, lightly beaten
  • 2 tablespoons canola oil
  • 1 teaspoon vanilla extract
  • zest of 1 large grapefruit, plus 4 two-inch long strips grapefruit zest thinly sliced
  • 1 cup confectioners’ sugar
  • 3 tablespoons grapefruit juice

Directions:

1.  Coat 2  six-cavity doughnut pans with nonstick spray.  Preheat oven to 350*F.  Meanwhile in a large bowl, combine flour, 1 1/2 cups granulated sugar, baking powder, ginger, and salt, and mix well.

2.  In a small bowl, whisk buttermilk, egg, canola oil, vanilla, and zest of 1 grapefruit to combine.

Mix wet ingredients together.

Mix wet ingredients together.

Add wet ingredients to dry ingredients and stir.  Spoon batter into the prepared pans, filling each cavity a little more than three-quarters.

IMG_7536


IMG_7537

3.  Bake for 25 – 30 minutes.  Let cool in pan for 5 minutes, then turn doughnuts out onto a wire rack to cool completely.

IMG_7540

4.  In a small bowl, whisk confectioners’ sugar and juice until smooth.  Set glaze aside.  In a small saucepan, combine zest strips, 3 tablespoons granulated sugar, and 3 tablespoons water, and bring to a boil.  Reduce heat to low and simmer mixture until sugar dissolves, about 5 minutes.   Drain, and discard the liquid.  Immediately toss the zest strips in the remaining sugar until coated.  Transfer to a cutting board and chop.

After cooking, coat zest strips in sugar.

After cooking, coat zest strips in sugar.


Chopped sugared zest into small pieces.

Chop sugared zest into small pieces.

5.  For each doughnut, carefully dip the top in the glaze, then set on a wire rack, glaze side up, so excess drips off.  Sprinkle immediately with chopped zest.


Dip tops into glaze, sprinkle with zest.

Dip tops into glaze, sprinkle with zest.


These are unbelievably good.

These are unbelievably good.


SOURCE:   Country Living Magazine


Layered Strawberry-Coconut Panna Cotta

Strawberry-Coconut Panna Cotta

Strawberry-Coconut Panna Cotta

After this year’s seemingly never ending winter, it’s a joy to see the arrival of spring and the arrival of fresh vegetables like asparagus, baby artichokes, and new beets.  Early fruits include rhubarb and strawberries, and I can’t wait to start to use them in my meals.

One of the first things I made was this sweet, creamy strawberry-coconut panna cotta.   The strawberries are served up in two ways–sliced and sweetened as a topping, and cooked into the ruby-red gelatin. I showcased it’s pretty layers by serving it in wine glasses.

IMG_7096

This dessert gets it’s coconut flavor thru coconut milk, and the recipe calls for both regular coconut milk and light coconut milk.  If you prefer to use all light coconut milk you certainly can, but it’s amazing how much flavor and creamy consistency you get from mixing in a little full-fat coconut milk.  I already had some cream of coconut open in my refrigerator, so I used that, and thinned it with skim milk.  This allowed me to keep the fat content low, but still get the coconut flavor.  The cream of coconut is sweet, so I used only 1 Tablespoon of sugar in the panna cotta.

LAYERED STRAWBERRY-COCONUT PANNA COTTAIMG_7095

Yield:   Serves 4

Ingredients:

Strawberry Gelatin:

  • 1 teaspoon unflavored gelatin
  • 1 tablespoon water
  • 3/4 cup sliced strawberries
  • 3 tablespoons granulated sugar
  •  1 teaspoon fresh lemon juice
  • 3/4 cup water

Panna Cotta:

  • 3/4 teaspoon unflavored gelatin
  • 1 tablespoon water
  • 1/2 cup coconut milk**
  • 1/4 cup light coconut milk **
  • 2  1/2 tablespoons granulated sugar  ( I used only 1 Tablespoon sugar, here.)IMG_7099
  • 1 teaspoon fresh lemon juice
  •  ** If using cream of coconut, make a 50-50 mixture of cream of coconut and fat-free milk for a total of 3/4 cup of liquid.

Strawberries:

  • 2 cups sliced strawberries
  • 2 tablespoons powdered sugar
  • 1 teaspoon chopped fresh thyme, or 1/4 teaspoon dried
  • 1  teaspoon fresh lemon juice

Directions:

1.  To make the strawberry gelatin:  Sprinkle 1 teaspoon gelatin over 1 tablespoon water in a small bowl.  Combine the strawberries, the sugar and lemon juice in a small saucepan;  let stand for 5 minutes.  Mash mixture with a fork or a potato masher.  Place pan over medium-high heat.  Bring to a simmer;  cook 2 minutes or until sugar dissolves.  Add the water; return to a simmer.  Remove from the heat.  Add gelatin mixture, stirring until gelatin dissolves.  Strain mixture through a fine sieve into a measuring cup, pressing on solids to extract as much liquid as possible.  Discard solids.  Divide strawberry mixture evenly among 4 wineglasses.  Chill 1 hour or until set.

2.  To make the panna cotta:  Sprinkle 3/4 tsp. gelatin over the 1 tbsp. water in a small bowl.  Combine coconut milks, sugar, and 1 tsp. lemon juice in a saucepan; bring to a simmer.  Remove from heat.  Add gelatin mixture, stirring until gelatin dissolves.  Cool to room temperature.  Carefully pour one-fourth of this mixture on top of each strawberry gelatin.  Chill 1 hour or until set.

3.  To prepare strawberries:  Combine remaining ingredients in a bowl;  toss gently.  Let stand  5  minutes.  Divide strawberry mixture evenly among the glasses.

IMG_7102


IMG_7097


SOURCE:   Cooking Light Magazine

Nutella Cream Puffs

Nutella Cream Puffs

Nutella Cream Puffs

Today I thought I would dazzle you with these decadent cream puffs.  Really, who can be good all the time?  I just couldn’t help myself when I found this recipe.  They are so delicious!   It just wouldn’t be fair to make them and not share them with all of you.   I think these would make the perfect dessert for Easter dinner.

Creamy Nutella filling with a rich chocolate glaze.

Creamy Nutella filling with a rich chocolate glaze.

Cream puffs are not a dessert that I make on a regular basis; more likely for special occasions. I’d almost forgotten how much I love baking choux–the way it magically puffs in the oven, creating a secret hiding place for a rich filling. The pastry itself is very simple and the Nutella whipped cream couldn’t be easier.  You can substitute any cream filling or pudding if you would like. This is one of those desserts that looks like you spent hours making it and is super complicated, but instead is incredibly easy.  This is a dessert that can be made over two days, though it doesn’t need to take that long.  The first day I like to leisurely make the paté choux, and the next day I’ll make the filling and frosting.

The puffs, though easy to make, do need ample time in the oven to puff up.  Give them the full time allotted and don’t open the oven door until they are fragrantly eggy and golden.


NUTELLA CREAM PUFFS

Yield:  12 to 14 puffs

Ingredients:

For the pastry:IMG_7005

  • 1 cup water
  • 1/2 cup butter
  • 1/4 tsp. salt (only if using unsalted butter)
  • 1 cup flour
  • 4 eggs

For the whipped cream:

  • 1 cup heavy whipping cream
  • 2 tablespoons powdered sugar
  • 1/2 cup Nutella

For the chocolate drizzle:

  • 3/4 cup chocolate chips
  • 1/2 teaspoon coconut oil or shortening

Directions:

1.  Preheat oven to 400*F.    Bring the water, salt and butter to boil over medium high heat, and stir occasionally.  At the boil,  remove from heat and sift in flour, stirring until the mixture pulls away from the sides of the pan and forms a ball.  Stir with a wooden spoon 1 minute to cool a little.  Add eggs one at a time, stirring well after each one, until the mixture is smooth and satiny.

2.  Drop scoops of dough ( or pipe rounds for smooth even puffs) onto a baking sheet lined with parchment paper or a silicone liner.  Bake for 20 – 25 minutes, or until the puffs are golden and puffed up.  Puffs are done when they are hollow inside.  Remove from oven and transfer to a cooling rack to cool.

Baked puffs, nicely browned.

Baked puffs, nicely browned.

3.  While puffs are cooling, whip the cream using a stand mixer or hand mixer.  When the cream forms soft peaks beat in the powdered sugar until combined.  Add the Nutella and beat until light and fluffy.  Cut cooled puffs in half horizontally and fill with whipped cream.

4.  To make the drizzle, add the chocolate chips and coconut oil (or shortening) to a microwave safe bowl.  Heat at 50% power for one minute and stir.  Continue heating for thirty second intervals at 50% power until melted and smooth.  Pour the chocolate into a ziploc bag or piping bag and cut a small piece off the corner of the bag.  Drizzle over the filled cream puffs.  Store cream puffs in the refrigerator.

IMG_7024

IMG_7032


SOURCE:   Chocolatier Magazine

Chocolate Cherry Mousse Pie

Chocolate Cherry Mousse Pie

Chocolate Cherry Mousse Pie

This is a very special and “showy” pie that is great for special occasions or holidays.     Today is a special occasion and I made it to celebrate.  This post is my 500th since starting this blog just about 2 years ago.  In that time I have published five posts/week and gained a following of over 300 readers worldwide.  My goal from the beginning, (and still is) is to share with you recipes that are nutritious, mindful of dietary restrictions and special diets, reasonably economical to make with readily available ingredients, and taste fabulous. Whether you are a new-comer in the kitchen, or an experienced cook, there’s always something to learn.  I pass along my trials and errors, my successes and failures, and encourage you to be adventurous with your cooking.   These are recipes that I am proud to serve and hopefully you will be proud to serve also.  By your responses to me, I think I must be succeeding.  So I am very happy to have all of you as my “community” of readers.  Thanks so much for finding this little blog and sticking with me.  Love Ya!!

With Easter just ahead, this pie would make a nice addition to the dessert table.  Besides being so pretty, its also a very luscious pie with two kinds of chocolate and cherries in a creamy white chocolate mousse.  It’s sweet, yet very light.  This is one dessert that will definitely disappear into the crowd…in a good way.

IMG_6899


The surprise, once the pie has been cut, is the layer of dark chocolate that lies between the crust and the light airy filling.   This really makes the pie interesting and the dark chocolate is a nice foil for the white, light filling.  I liked putting some grated dark chocolate on top with the cherry garnish to give a hint of what’s waiting inside.

IMG_6917


Ways to reduce the caloric impact of this pie would be to use low-fat condensed milk, low-fat cream cheese, and sugar-free instant pudding.  I’m not sure if white chocolate pudding mix is available sugar-free, but vanilla flavor certainly is, and makes a good substitute.  In place of whipped cream you could also use “light” whipped topping. Be sure to include the almond flavoring… it somehow adds to the whole taste experience.

WHITE CHOCOLATE CHERRY MOUSSE PIE

Yield:    8 – 10 servings

Ingredients:

  • 1 (9-inch) pie shell, blind baked.  You may use a frozen pie shell or your own favorite pie dough recipe.  Bake the shell until lightly browned and cooked through.  It will not be cooked again.IMG_6892
  • 1 can (14-ounce) sweetened condensed milk, divided
  • 1 square (1 ounce) or 1 packet pre melted unsweetened chocolate
  • 1/2 teaspoon almond extract, divided
  • 1 jar (10-ounces) maraschino cherries, drained
  • 1 package (8-ounces) cream cheese, softened.   Low-fat is OK, but not fat-free.
  • 1 cup cold water
  • 1 package ( 3.4 ounces) instant white chocolate pudding mix (I used Hershey’s brand).  If unable to find, substitute vanilla instant pudding mix.
  • 1 cup whipping cream, whipped
  • chopped chocolate or chocolate curls, optional

Directions:

1.  In a medium saucepan, over low heat, cook and stir 1/2 cup condensed milk and chocolate until the chocolate is melted and mixture is thickened, about 4-5 minutes.

Mix chocolate and condensed milk and cook till thick.

Mix chocolate and condensed milk and cook till thick.

Mixture gets quite thick, like fudge.  Stir in 1/4 teaspoon almond extract.  Pour into pie shell and set aside.

IMG_6895

2.  Reserve 8 whole cherries for garnish.  Chop the remaining cherries and set aside.

IMG_6896

3.  In a mixing bowl, beat the cream cheese until light.  Gradually beat in water and remaining milk.  Add pudding mix and remaining extract; mix well.

IMG_6897

4.  Fold in the whipped cream.  Stir in chopped cherries.

Fold in whipped cream and chopped cherries.

Fold in whipped cream and chopped cherries.

Pour over chocolate layer in the pie crust.  Chill 4 hours or until set.  Garnish with whole cherries and chocolate curls before serving.

IMG_6900


It's like eating a cloud!!

It’s like eating a cloud!!

IMG_0281


SOURCE:    Adapted from a Taste of Home recipe

Chocolate Chip Cookie Dough Pie

Chocolate Chip Cookie Dough Pie

Chocolate Chip Cookie Dough Pie

I’m taking a break from bacon and eggs because the date today is 3-14, people, and you know what that means—-it’s Pi day!  A food holiday that it’s a pleasure to celebrate.  Of course, it’s not the only day that most of us make pie,  think of Thanksgiving.  But those pies tend to be the traditional classics like pumpkin, apple, pecan, etc.   I like Pi day because it gives me the chance to bake a new pie I haven’t tried yet.  What could be more fun?  The date on the calendar gives me the prefect excuse to play around and make a pie.

Oh, you are going to love this pie!

Oh, you are going to love this pie!

I mulled over the wide choice of possibilities, considering both sweet and savory options.  Sweet won out this time so here is Chocolate Chip Cookie Dough Pie, and believe it or not, it’s fabulous.

Never having made it before I had no point of comparison, but we loved this pie.  Basically I made a chocolate chip cookie dough, scooped it into a pie shell and baked the whole thing.  At serving time, a dollop of cream on top will take it the extra mile.  I just love the way this came out.  Are you celebrating Pi day with pie?  I’d love to know what flavors you all are making!

This is a fabulous pie!

This is a fabulous pie!

CHOCOLATE CHIP COOKIE DOUGH PIE

Yield:    serves 8

Ingredients:

I preferred using mini chocolate chips in this pie.

I preferred using mini chocolate chips in this pie.

  • 1   9-inch regular or deep-dish pie shell, unbaked.  Use your favorite recipe or a frozen pie shell.
  • 1/2  cup flour
  • 1 cup  sugar
  • 2 eggs, slightly beaten
  • 1/2 cup butter (1-stick), melted and cooled to warm
  • 1 cup regular or quick oats ( or 1/2 cup oats and 1/2 cup chopped nuts)
  • 1 cup mini chocolate chips
  • 1 teaspoon vanilla extract

IMG_6703

Directions:

1.   Preheat oven to 350*F  In a mixing bowl, combine the flour and sugar.  Add the eggs and mix.

Add eggs to flour and sugar and mix well.

Add eggs to flour and sugar and mix well.

Add the butter and mix again.

2.  Fold in the oatmeal and nuts, if using, chocolate chips, and vanilla.

Fold in the oatmeal, and chocolate chips.

Fold in the oatmeal, and chocolate chips.

Pour into the pie crust.

Ready for the oven.

Ready for the oven.

3.  Bake at 350*F.  for about 30 – 35 minutes, until golden.

Smells like a chocolate chip cookie. I wonder why!

Smells like a chocolate chip cookie. I wonder why!

IMG_6732

Oooey, gooey, and chewy.  :D

Oooey, gooey, and chewy. 😀

SOURCE:   Carolyn’s Originals

Cherry Pie, Billy Boy

Cherry Pie, Billy Boy

Cherry Pie, Billy Boy

“Can she bake a cherry pie, Billy Boy, Billy Boy?  Can she bake a cherry pie, charming Billy? ”   The answer to the question asked by that old song is…..definitely yes, if she makes this recipe.

IMG_6516

In honor of George Washington, and all folks who love cherry pie, this one’s for you!!   So let’s get started. You won’t want to wait to dig in to this tart-sweet pie with a flaky crust that just breaks apart as you cut into it.  But who cares what it looks like when the flavor is so fabulous.  When I serve it I like to add a scoop of cherry vanilla ice cream, just because— :-).

IMG_6533

CHERRY PIE, BILLY BOY

YIELD:   SERVES 8

Ingredients:

  • 2 cans sour pitted cherries (16 0z. each)  Even better are fresh pitted sour cherries, if you have access to them.
  • 1  1/2 cups cherry juice, drained from the cherries
  • 1  1/2 cups sugar
  • 1/4 tsp. salt
  • 3  1/2 Tbsp. cornstarch
  • 2 Tbsp. butter
  • 1/2 tsp. almond extract
  • your favorite recipe for a double crust pie, or a package of refrigerated pie crust.
  • sugar and a little cream for the top of the pie

Directions:

Preheat oven to 400*F.   Have ready a 9-inch pie dish.

1.  Drain juice from the cherries and measure out 1  1/2 cups.  Sift sugar, salt and cornstarch and mix with the juice.  Place mixture in a medium sauce pan and cook for about 5 minutes to thicken, stirring often to prevent sticking.  Add butter and almond extract.  Remove from the heat.

2.  Add the cherries to the thickened juice mixture, then pour into the pie shell.  Cut decorative slits in the top crust and place on top of filling.  Trim crusts, so top crust extends about 1/2-inch beyond the bottom crust.  Fold top crust over edge of bottom crust and press together to seal.  Flute edges with your fingers.

3.  With a small amount of milk or cream, lightly brush the top crust, then sprinkle with about 1 Tablespoon of sugar.  This will give the crust a nice glaze and make it very tender and flaky.

4.  Bake at 400 *F for 45 minutes until filling starts to bubble up through the top slits, and top is nicely browned.  You may need to cover crust edges with foil if they are browning too quickly.

IMG_6515

IMG_6537

IMG_6531

As you can see I have a hard time waiting until it’s cooled to cut into, therefore it breaks.  When the pie cooled completely, it cut cleanly and didn’t break apart.  Patience, patience, I must learn that some day.  😀

SOURCE:   A clipping for this recipe has been in my recipe box for a long time.  It came from an old magazine,  done’t know the source.

Shortbread Heart Cookies

Shortbread Heart Cookies

Shortbread Heart Cookies

I remember the first time I ever had shortbread cookies.  They were made by a woman from Scotland who was a friend of my mother’s.  I thought they were the most delicious cookies I had ever had.  Tasting strongly of butter, with a texture that was tender and flaky, they simply melted on my tongue.  I have tried on many occasions to duplicate those cookies.  Somehow the ones I turn out fall just shy of the perfection I remember.  Or is it that time has a way of altering our memories just a little?

IMG_6355

Anyway, the recipe I’m sharing with you today is my go-to recipe for shortbread cookies.  I like it because the dough can be made in the processor, thereby eliminating all that stirring and blending of butter with the flour /sugar mixture.  An egg yolk, a little water, and almond or vanilla extract add just enough moisture to hold it all together.  Once chilled it is easy to work with and rolls out easily, so it can be cut into shapes for whatever the occasion may be.  Here, I cut heart shapes, and then to fancy them up for Valentine’s Day I added a strip of raspberry jam and a chocolate drizzle.  Since raspberry and chocolate are a favorite combination, this works very well, and makes an attractive and tasty cookie.

Shortbread  Heart Cookies

Shortbread Heart Cookies

SHORTBREAD CUTOUT COOKIES

YIELD:   Makes about 3 dozen

Ingredients:

  • 1 cup all-purpose flour
  • 1/2 cup blanched almonds**
  • 1/4 cup sugar
  • 1/4 tsp. salt
  • 1/2 cup butter
  • 1 egg yolk
  • 2 teaspoons water
  • 1/4 teaspoon vanilla or almond extract

** If you would prefer to eliminate the almonds, substitute 1/2 cup more flour.

To make cookies that look like mine you will also need:

  • 1/2 cup seedless raspberry preserves
  • 2 teaspoons cornstarch
  • 1/2 cup semi-sweet chocolate chips

Directions:

1.  In a food processor, combine the flour, almonds, sugar and salt;  cover and process until almonds are finely ground.  Cut butter into cubes; add to processor.  Pulse on and off until mixture resembles coarse crumbs.

2.  Combine the egg yolk, water and extract in a small bowl.  With processor running, gradually add yolk mixture; process until dough forms a ball.  Wrap in plastic wrap and refrigerate for at least 30 minutes.

3.  On a lightly floured surface, roll out half of the dough to 1/4-inch thickness.  Cut into desired shapes with floured cookie cutters.  Place 1 inch apart on ungreased baking sheets.  Repeat with remaining dough.

Cut into desired shapes

Cut into desired shapes

4.  With the handle of a wooden spoon, or other small cylindrical object, make a depression diagonally across each cookie.

IMG_6339

4a.      Place the raspberry preserves in a microwave safe cup or small bowl, and stir in the cornstarch.  Bring to a boil in the microwave:  about 1 minute.  Stir well and allow to cool.

Fill the indentation in each cookie with a small amount of the raspberry preserves.

IMG_6340

5.  Bake at 325*F.  for 12 – 14 minutes or until edges are lightly browned.  Cool for 1 minute before removing from pans to wire racks to cool.

6.  Melt the chocolate chips in the microwave, stirring @ 30-second intervals until melted and smooth.   Drizzle  the melted chocolate over each cookie.  Allow the chocolate to harden before storing in an air-tight container.

IMG_6343

IMG_6357

SOURCE:  Adapted from Taste of Home

Here are some more Valentine’s Day cookies that have been featured previously in this space.

Sandwiches Sweet and Pink

Pecan Sour Cream Sandies

Coconut Tapioca Pudding with Mango

Tapioca Pudding with Mango and Coconut Cream

Tapioca Pudding with Mango and Coconut Cream

Are you still sticking with your New Year’s Resolution?  You know, the one about exercising and losing weight.  You are?  Why that’s just  great!  And I’m here to help with that.  Isn’t it hard going without desserts though, denying yourself those sweets you love?  What happens most often is–you can hold out for a while, but then youabsolutelymusthavesomething for dessert.IMG_6265

For me pudding seems to be the answer.  I cannot completely cut desserts out of my life, so I think that having a limited quantity of a dessert that is not excessively decadent is exactly what’s needed.  It keeps me sane (at least I think so). In my opinion there is no better dessert for this purpose than pudding.  This week my pudding of choice is tapioca.   OK, so call me old-fashioned.  I served it in dessert cups that I found in my parent’s attic;  I love these old vintage dishes, too.

Served in vintage dessert dishes.

Served in vintage dessert dishes.

Tapioca is a pudding that doesn’t get much attention in the pudding/dessert world.   It’s a puzzle to me, as I think it’s gorgeous, has a chewy starchy texture, and comes from the plant world.  Tapioca pearls come in several sizes, but I like the tiny ones.  They get cooked in a custard to which you can add vanilla or lemon, orange, or cinnamon.  Tapioca pudding is like a blank slate.  In this case, since I am feeling the effects of this long cold winter, I included ingredients that I associate with the tropics;  mango, lime and coconut.  I used mango pureed with lime juice, and topped off the whole thing with whipped coconut cream, and toasted coconut chips for garnish.

A luxurious, but surprisingly low-fat dessert.

A luxurious, but surprisingly low-fat dessert.

If you are dreaming of warmer places, places with palm trees and tropical fruits, places where one does not need to pull on heavy snow boots with ski socks, a down-quilted jacket, knit hat, scarf and gloves just for a grocery store run, then this dessert might just be the dessert for you.

As I write this, the southern parts  of the U.S are feeling the full brunt of a winter snow-sleet-ice storm.  I feel your pain, people.  We here in the northeast know just what you’re going through.  Hang in there, Spring is on its way!

COCONUT TAPIOCA PUDDING WITH MANGO

Yield:    4  1/2-cup servings,  plus toppings

Pudding:

Tiny pearl tapioca, plus "light" coconut milk.

Small pearl tapioca, .

  • 1/3 cup small pearl tapioca, such as Bob’s Red Mill
  • 2  1/2 cups coconut milk ( light or full-fat, or use regular milk)
  • 1 egg yolk
  • 1/4 – 1/3 cup granulated sugar
  • 1/4 tsp. table salt
  • 1/2 tsp. vanilla extract

 Mango Puree:IMG_6258

  • 1 very ripe mango, peeled, pitted and roughly chopped
  • 2 tsp. granulated sugar, optional ( I used it, but would skip it next time)
  • 1 squeeze or two of fresh lime juice

Optional garnishes:

  • whipped coconut cream
  • 1/2 cup toasted coconut chips or flakes
  • few gratings of lime zest

Make Pudding:  In a medium saucepan, soak tapioca in coconut milk for 30 minutes.  Whisk in egg yolk, sugar, and salt.  Place saucepan over medium heat until mixture comes to a simmer, then reduce it to very low so it’s barely bubbling, and cook it until it thickens, about 15 minutes, stirring frequently.

Cooking the tapioca vanilla custard

Cooking the tapioca vanilla custard

Remove from heat and stir in vanilla extract.  Pour into pudding cups to chill for several hours.  Pudding may seem thin going into the cups but after chilling in the fridge, it will set on the firm side.

Pour pudding into dessert cups to chill.

Pour pudding into dessert cups to chill.

To make a softer, lighter pudding you may want to beat the egg white you separated from the yolk, separately with a spoonful of sugar you would otherwise have added to the tapioca.  Beat until glossy peaks form.  After the pudding has cooled for about 15 minutes, spoon some of the pudding mixture into the egg white and fold in, then pour all of it back into the pudding, folding in until it has all been uniformly incorporated.

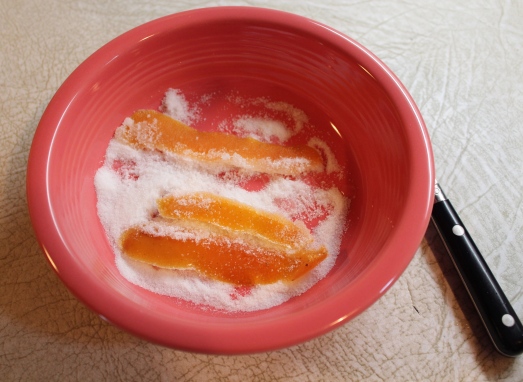
Make Mango  Place mango chunks in a small food processor or blender with lime juice and sugar and blend until very smooth.  Refrigerate puree until needed.

Make Whipped Coconut Cream:  Place 1 can of full fat coconut milk in the fridge overnight.  This will cause the coconut fats and thin milk/watery part to separate.  Also place small/medium mixing bowl (ideally metal) in the freezer.  The next day, turn the can of coconut milk upside down before opening it, so that the thickened coconut fat will be at the bottom.  Pour off the thin coconut milk;  you should have about 1 cup and this can be used towards the amount needed for the tapioca.  About 2/3 thickened coconut fat will remain at the bottom of the can.  Scrape this into the chilled bowl, and beat it with an electric mixer until thick and whipped, like cream.  Dollop it over desserts such as this, though you will have more than you need for 4 puddings.  It will keep, covered, in the refrigerator for several days.

Thick coconut milk whips up like cream.

Thick coconut milk whips up like cream.

To Toast Coconut Chips:  Heat an oven to 350*F.  Spread coconut flakes on a rimmed baking sheet and toast until golden brown and fragrant, about 5 minutes, tossing once if needed to help them brown evenly.  Let cool before using.

To Serve:  Dollop a spoonful of mango puree on the tapioca, then top it with a some coconut cream.  Sprinkle with toasted coconut before serving.

IMG_6267

SOURCE:  Smitten Kitchen

Chocolate Pudding Cake

Chocolate Pudding Cake

Chocolate Pudding Cake

When you are in the mood for a dessert that is gooey and chocolatey, but don’t want a whole lot left over ( to further tempt you), this recipe is the perfect answer.  It makes only four individual servings, so portion control is built right in.  This is cake that makes its own sauce.  The topping magically makes a fudge-y pudding on the bottom of the cake, and served with a scoop of  ice cream, whipped cream, or a toasted marshmallow, you just can’t go wrong!

Serve warm with ice cream.

Serve warm with ice cream.

Quick and easy to make, and deliciously fabulous to eat, these chocolate pudding-like cakes are a warm decadent finish to a winter menu.  This is comfort food at its best, an awesome dessert, whether served to family or guests, everyone will love it.

CHOCOLATE PUDDING CAKES

Yield:  4 servings

Ingredients:

Batter:IMG_6111

  • 1/2 cup all-purpose flour
  • 1/4 cup sugar
  • 1/4 cup baking cocoa
  • 1/4 cup almond flour ( or 1/4 cup almonds, finely chopped in a processor)
  • 1/4 tsp. salt
  • 1 tsp. baking powder
  • 1 tsp. vanilla extract
  • 3 Tbsp. butter, melted
  • 1 large egg
  • 1/2 cup milk

Topping:IMG_6132

  • 1/2 cup sugar
  • 2 Tbsp. baking cocoa
  • pinch salt
  • 1 cup hot milk or hot water

Directions:

1.  Preheat the oven to 350*F.   Grease 4 ( 8 – 10 0z,) oven-safe mugs or ramekins.

2.  For the cake:  Mix together the flour, sugar, cocoa, almond flour, salt, and baking powder.

Mix together dry ingredients.

Mix together dry ingredients.

In a separate bowl, whisk together the vanilla, melted butter, egg, and milk.  Add to dry ingredients, and mix until all is moistened without over mixing.  Divide this batter among the 4 mugs or ramekins, using about 1/3 cup batter in each.

3.  For the topping:  Whisk together the sugar, cocoa, and salt.  Divide this mixture among the mugs or ramekins, using two heaping tablespoons for each.

Divide batter into ramekins and sprinkle on topping.

Divide batter into ramekins and sprinkle on topping.

4.  Top each dish with a 1/4 cup of the hot milk or water.  Place all on a baking sheet.

Pour warm milk over top.

Pour hot milk over top.

5.  Bake the cakes for 18 to 22 minutes.  The cake should be puffy, with some liquid bubbling up around the edges.

Serve warm with ice cream or whipped cream if desired.

IMG_6130

Warm, gooey, fudge-y.  What's not to love?

Warm, gooey, fudge-y. What’s not to love?

SOURCE:   King Arthur Flour